
Related Manuals for Cornelius HELIX


Summary of Contents for Cornelius HELIX
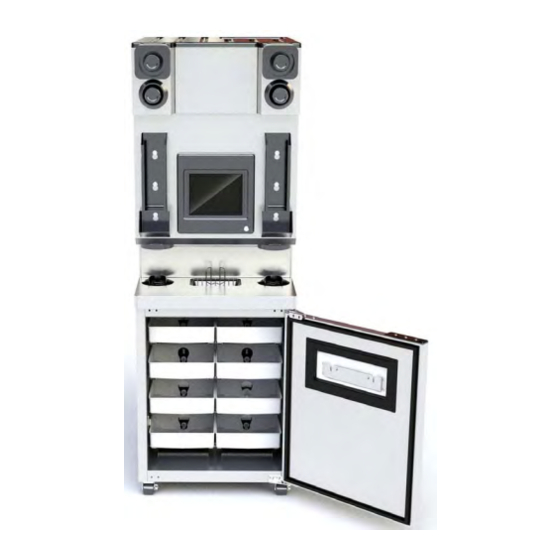
- Page 1 HELIX Installation Manual Release Date: June 13, 2012 Publication Number: 621058497INS Revision Date: April 7, 2014 Revision: A23 Visit the Cornelius web site at www.cornelius-usa.com for all your Literature needs.
- Page 2 Commercial Warranty. Cornelius will not be responsible for any repair, replacement or other service required by or loss or damage resulting from any of the following occurrences, including but not limited to, (1) other than normal and proper use and normal...
-
Page 3: Table Of Contents
Helix Machine Usage ........ - Page 4 CO2/Compressed Air Connections ......... . . 12 Syrup Requirements .
-
Page 5: Safety Instructions
Learn how to operate the unit and how to use the controls properly. • Do not let anyone operate the unit without proper training. This appliance is not intended for use by very young children or infirm persons without © 2012-2014, Cornelius Inc. All Rights Reserved - 1 - Publication Number: 621058497INS... -
Page 6: Qualified Service Personnel
A freezing ambient environment will cause residual sanitizing solution or water remaining inside the unit to freeze resulting in damage to internal components. Publication Number: 621058497INS - 2 - © 2012-2014, Cornelius Inc. All Rights Reserved... -
Page 7: Co2 (Carbon Dioxide) Warning
Failure to avoid rotating blades could result in injury or equip- ment damage. ENTILATION ARNING WARNING: WARNING: Keep ventilation openings, in the appliance enclosure or in the built-in structure, clear of obstruction. © 2012-2014, Cornelius Inc. All Rights Reserved - 3 - Publication Number: 621058497INS... -
Page 8: Defrost Warning
When transporting the unit, make sure that the product trays, drizzle holders, lid holders and cup trays are removed from the unit and stored in a safe place for ship- Publication Number: 621058497INS - 4 - © 2012-2014, Cornelius Inc. All Rights Reserved... -
Page 9: Storage Within The Machine
TORAGE WITHIN THE ACHINE CAUTION: Do not store explosive substances such as aerosol cans with a flammable propel- lant in this appliance. © 2012-2014, Cornelius Inc. All Rights Reserved - 5 - Publication Number: 621058497INS... -
Page 10: Introduction
F (12.8 to 35°C) A-Weighted Sound Pressure Level (during blender operation)... <70dB The Helix unit is capable of using syrups with particulate matter up to 1/8” in size. Publication Number: 621058497INS - 6 - ©... -
Page 11: 60 Hz
A-Weighted Sound Pressure Level (during blender operation) ..<70dB The Helix unit is capable of using syrups with particulate matter up to 1/8” in size. © 2012-2014, Cornelius Inc. All Rights Reserved... - Page 12 Helix Installation Manual Publication Number: 621058497INS - 8 - © 2012-2014, Cornelius Inc. All Rights Reserved...
-
Page 13: Installation
Failure to comply could result in serious injury, death or equipment damage. OCATION The Helix unit must be located in an area with a level floor surface. The unit must be installed within 2° of level for the unit to operate properly. -
Page 14: Supply Connections
3/8 in. (0.95 cm) flare fitting. The CO /compressed air supply is a 1/4 in. (0.635 cm) flare fitting. Drain Connection Figure 1. Power compressed air Water Connection Connection Connection Figure 2. Publication Number: 621058497INS - 10 - © 2012-2014, Cornelius Inc. All Rights Reserved... -
Page 15: Syrup Connections
The unit requires a 230 V, 50/60 Hz, 1 phase power supply. Measure the voltage at the wall outlet to verify proper wiring of the outlet before plugging the Helix unit in. Do not plug the Helix unit in at this time. -
Page 16: Water Supply Requirements
Helix Installation Manual The Helix unit requires a minimum of a 20 Amp circuit breaker for proper operation. Water Supply Requirements Water Connections WARNING: WARNING: This equipment must be installed to comply with the International Plumbing Code of the International Code Council and the Food Code Manual 01 the Food and Drug Administration (FDA). -
Page 17: Syrup Requirements
Always keep a minimum air gap of 50 mm (2 in.) between the drain exit and the floor/wall drain. To avoid reverse contamination, never connect the Helix drain straight to the floor, or wall drain. © 2012-2014, Cornelius Inc. All Rights Reserved... - Page 18 Figure 4. Fixed Plumbing Flexible Flexible Plumbing Flexible Hose 1.25” ID PVC Drain Pipe PVC Drain Pipe fixed to rear panel fixed to back wall Figure 5. Publication Number: 621058497INS - 14 - © 2012-2014, Cornelius Inc. All Rights Reserved...
-
Page 19: Commissioning The Unit
COMMISSIONING THE UNIT OCATION The Helix unit is not to be installed in an area where a water jet (power washer) is used. The unit should only be installed in a location where its use and maintenance is restricted to trained personnel and the floor area is level. -
Page 20: Unit Preparation
The system now displays the Home Screen, shown in Figure 8. Hopper Sanitation The sanitizing procedure is automated. For ice hopper sanitizing, perform the proce- dure in Table 3. Publication Number: 621058497INS - 16 - © 2012-2014, Cornelius Inc. All Rights Reserved... - Page 21 Play button. The sanitization program steps through the rest of the procedure pro- viding step-by-step instructions. Menu Button Figure 8. Sanitize Button Figure 9. © 2012-2014, Cornelius Inc. All Rights Reserved - 17 - Publication Number: 621058497INS...
-
Page 22: System Sanitation
During initial setup, all ingredient lines and blenders must be sanitized. Select the ‘Weekly Product’ tab and press the play button to run through the product line and blender sanitization process. See Figure 12 on page 19. Publication Number: 621058497INS - 18 - © 2012-2014, Cornelius Inc. All Rights Reserved... -
Page 23: Sanitation Scheduler
NOTE: Even though the option to turn off weekly product sanitation exists, it is required to sanitize the machine on a weekly basis. © 2012-2014, Cornelius Inc. All Rights Reserved - 19 - Publication Number: 621058497INS... -
Page 24: Ice Maker Sanitation
NOTE: Even though the option to turn off ice maker sanitation exists, it is required to sanitize the ice maker. Refer to local codes and regula- tions for appropriate scheduling. Publication Number: 621058497INS - 20 - © 2012-2014, Cornelius Inc. All Rights Reserved... -
Page 25: Descaler
Screen shows the location for each syrup bag in the cabinet. The level indicators show the amount of product in each bag. To prepare the system after replacing a product bag, perform the procedure in Table 4. © 2012-2014, Cornelius Inc. All Rights Reserved - 21 - Publication Number: 621058497INS... - Page 26 NOTE: The bag should engage the fitting on the back wall. If product is leaking out, the connection did not seal and the bag should be rein- serted. Ingredient Status Button Figure 16. Figure 17. Publication Number: 621058497INS - 22 - © 2012-2014, Cornelius Inc. All Rights Reserved...
-
Page 27: Calibration
View the weight of the ingredient dispensed then enter it into the Weight Entry Menu. Make sure proper units of measure are used (oz/gm) Tare the cup again and repeat Steps 2 and 3 again until calibration is completed. © 2012-2014, Cornelius Inc. All Rights Reserved - 23 - Publication Number: 621058497INS... -
Page 28: Ice Calibration
This process is longer than a normal ingredient cal- ibration. Do not cancel the procedure in the middle, or all 20 dis- penses must be redone. Publication Number: 621058497INS - 24 - © 2012-2014, Cornelius Inc. All Rights Reserved... -
Page 29: Blender Operation
CAUTION: Do not run blenders dry. Use a cup of plain water for testing. © 2012-2014, Cornelius Inc. All Rights Reserved - 25 - Publication Number: 621058497INS... -
Page 30: Troubleshooting
A. Ingredient menu is used to replace Ingredient Expired the interval date is matched. Expired expired ingredients. Notification is Alarm ingredients are not allowed to be used. accomplished using a red triangle. Publication Number: 621058497INS - 26 - © 2012-2014, Cornelius Inc. All Rights Reserved... - Page 31 If the files can- Unable to read/write Settings Files not be loaded, main status window dis- plays critical error pop up with reset option. © 2012-2014, Cornelius Inc. All Rights Reserved - 27 - Publication Number: 621058497INS...
- Page 32 Helix Installation Manual Publication Number: 621058497INS - 28 - © 2012-2014, Cornelius Inc. All Rights Reserved...
- Page 34 Cornelius Inc. www.cornelius-usa.com...
Need help?
Do you have a question about the HELIX and is the answer not in the manual?
Questions and answers