
Related Manuals for Clearaudio Verify


Summary of Contents for Clearaudio Verify
- Page 1 Verify User manual Bedienungsanleitung © clearaudio electronic GmbH, 2018/11 Made in Germany...
- Page 2 Please read this instruction manual carefully, to avoid any damages or loss of warranty. This manual will help you for an easy setup and guarantees the highest pleasure for a long time. Verify We wish you a lot of listening pleasure with your new Clearaudio tonearm. Clearaudio electronic GmbH Warning Do not expose the equipment to rain or moisture.
-
Page 3: Table Of Contents
User manual / Bedienungsanleitung Contents 1. List of components ..........4 2. Verify tonearm mounting ........5 - 10 3. Special notes ............11 4. Technical data ............12 Warranty ..............24 - 25 Made in Germany... -
Page 4: List Of Components
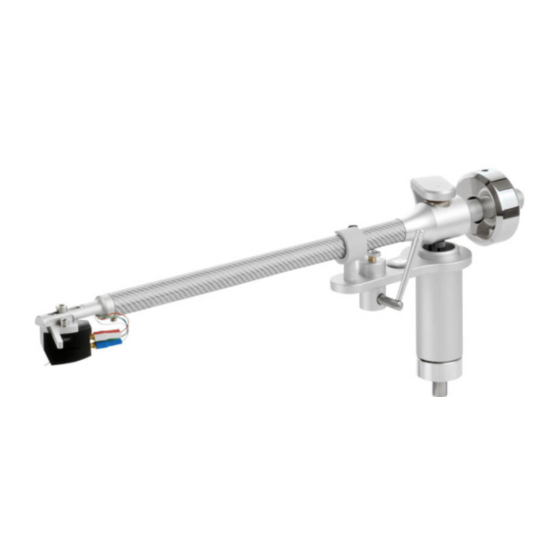
User manual / Bedienungsanleitung 1. List of components Verify Clearaudio has developed special and secure packing for your tonearm that ensures safe transportation. Please keep this original packing, you will need it if you need to ship the tonearm. Please check the contents as shown in picture below and in the list at the bottom of this page: Pic. -
Page 5: Verify Tonearm Mounting
Pic. 2: Mounting the tonearm base Pic. 3: Mounting the tonearm base Mounting the aluminum clamping ring on a non-Clearaudio turntable: To install the aluminum clamping ring on the turntable chassis, you will need to drill the required holes. Please refer to the drilling template shown below (Picture 4) for the measurements to mark the exact drilling holes. - Page 6 User manual / Bedienungsanleitung Pic. 4: Mounting the aluminum clamping ring on a non-Clearaudio turntable Please carefully put the tonearm through the tonearm base (Pic. 5). Now fix the tonearm with the 2 screws and the hex wrench (Pic. 6), not to much, so that you can fine adjust it in the next steps! Pic.
- Page 7 After you have reached the correct position, tighten the tonearm base again. Please use the delivered alignment gauge or for more accurate adjustment the professional cartridge alignment gauge from Clearaudio (Art. No.: AC005 www.analogshop.de ). Pic. 8: Distance from pivot to stylus...
- Page 8 Please ensure that the height of the measuring platform on your tracking force gauge is the same height as a record to get an accurate measurement. The Clearaudio Smart Stylus Gauge or Clearaudio Weight Watcher are recommended. 2.5.2 Adjustment of the tonearm height (Vertical-Tracking-...
- Page 9 User manual / Bedienungsanleitung 2.5.4. Adjustment of the Azimuth The azimuth indicates the angle of the stylus relative to the record, viewed from the front. It should be exactly 90°. The Azimuth is already preset at factory. If you need to change the azimuth, please loosen the screw on the under side of the tonearm near the headshell using Pic.
- Page 10 You will find the Anti – skating adjustment wheel on the bottom of the tonearm (Pic. 13). The factory installation is preset for a clearaudio MM cartridge at tracking force 2.4 grams and marked with a black stripe on the bolt (view bottom up).
-
Page 11: Special Notes
Otherwise serious damage could occur. 3.3 Service If any servicing or repair of a Clearaudio product is necessary, please first contact your dealer or distributor. Alternatively contact Clearaudio directly and we will advise you of your nearest service location. -
Page 12: Technical Data
430 gram (incl. counter weight) Manufacturers guarantee*: 2 years* * Provided that the warranty card is correctly completed and returned to Clearaudio within 14 days of purchase. Clearaudio electronic is not responsible for typographical errors in descriptions. Technical specifications subject to change or improvement without prior notice. - Page 13 Tonarms nutzen zu können, lesen Sie bitte diese Bedienungsanleitung aufmerksam durch. Alle Hinweise dienen dem Ausschöpfen der vollen Klangeigenschaften und bewahren Sie vor Fehlbedienungen. Verify Wir wünschen Ihnen viel Freude mit Ihrem neuen clearaudio Tonarm. clearaudio electronic GmbH Warnung Das Gerät nicht Regen oder Feuchtigkeit aussetzen.
- Page 14 User manual / Bedienungsanleitung Inhaltsverzeichnis 1. Verpackungsübersicht..........15 Verify 2. Montage des Tonarms .........16 - 21 3. Besondere Hinweise ..........22 4. Technische Daten ...........23 Garantie ..............24 - 25 © clearaudio electronic GmbH, 2018/11...
-
Page 15: Verpackungsübersicht
Transport gewährleistet. Bitte prüfen Sie den Inhalt der Verpackung anhand des unten abgebildeten Bildes und der Inhaltsangabe auf Vollständigkeit. Bewahren Sie die Verpackung für Transportzwecke unbedingt auf. Abb. 1: Verpackungsübersicht Verify Carbon Tonarm mit clearaudio Schrauben: Directwire Plus Kabel - 3x Zylinderkopfschraube (mit Innen- sechskant) M4 x 10... -
Page 16: Montage Des Verify Tonarms
Sie bitte einen 4,5 mm HSS-Spiralbohrer, um die Bohrungen durch das Material zu bohren. In diesem Fall können Sie den Klemmring mit handelsüblichen Schrauben in der entsprechenden Länge und den dazu passenden Muttern befestigen (V2A-Inbus). © clearaudio electronic GmbH, 2018/11... - Page 17 User manual / Bedienungsanleitung Abb. 4: Montage der Klemmbasis auf einem Laufwerk anderer Hersteller Bitte führen Sie vorsichtig den Tonarm durch die aufgeschraubte Basis (Abb.3). Befestigen Sie den Tonarm durch vorsichtiges Anziehen der Schrauben seitlich in der Montierbasis. Ziehen Sie nur so fest an, dass Sie die Schrauben zu weiteren Einstellungen wieder leicht lösen können.
- Page 18 Achten Sie darauf, dass Sie Ihren Nadelschutz auf den Tonabnehmer aufsetzen, um diesen vor Beschädigungen zu schützen. Abb. 7: Montage des Tonabnehmers Zur exakten Einstellung des Drehpunktes des Tonarms empfehlen wir die clearaudio Drehtonarm Einstellschablone (Art. AC005 unter www.analogshop.de ). Sie können allerdings hierzu auch ein Lineal benutzen! Hierbei müssen Sie darauf achten,...
- Page 19 User manual / Bedienungsanleitung 2.5.3 Ausrichtung des Tonarms / Tonabnehmers Zu den nachfolgenden Einstellungen legen Einstellschablone auf den Plattenteller auf. Entfernen Sie den Nadelschutz des Tonabnehmers. Wenn Sie den Tonabnehmer etwa auf Plattenmitte absenken, sollte seitlich betrachtet, Oberkante Tonabnehmerkörpers parallel Schallplattenoberfläche verlaufen.
- Page 20 Referenzpunkt liegt und die Vorderkante des Tonabnehmers parallel zu den Linien auf der Einstellschablone verläuft. Fixieren Sie anschließend alle von den Einstellungen betroffenen Schrauben etwas kräftiger. Abb. 13: Korrekte Position des Abtastdiamanten © clearaudio electronic GmbH, 2018/11...
- Page 21 2.5.6 Einstellung des Anti - Skating Zum Einstellen des Antiskating befindet auf der Unterseite des Tonarms eine Einstellschraube. Der Tonarm wird vom Hause clearaudio aus mit einer Auflagekraft von 2,4 Gramm gemäß einem clearaudio MM Tonabnehmer eingestellt. Diese Einstellung ist auf Ihrem Tonarm (von unten betrachtet) mit einem schwarzen Strich markiert.
-
Page 22: Besondere Hinweise
Originalverpackung. Andernfalls könnte Ihr Tonarm ernsthafte Schäden davon tragen. 3.3 Pflege Wenn eine Wartung oder Reparatur an einem clearaudio Produkt erforderlich ist, wenden Sie sich bitte zuerst immer an Ihren Händler oder Vertriebspartner. Alternativ können Sie clearaudio direkt kontaktieren und wir werden Sie von Ihrer nächstgelegenen Servicestelle beraten. -
Page 23: Technische Daten
Garantie: 2 Jahre*. * Nur bei korrekt ausgefüllter und eingesandter Garantiekarte an clearaudio innerhalb von 14 Tagen. Änderungen bleiben vorbehalten. Lieferbar solange Vorrat reicht. Für Druckfehler keine Haftung. Irrtümer vorbehalten- Kopien und Abdrucke – auch nur auszugsweise – bedürfen der schriftlichen Genehmigung durch die clearaudio electronic GmbH. -
Page 24: Warranty
User manual / Bedienungsanleitung To achieve the full Clearaudio warranty, it is necessary that you fill out and send the corresponding part of the warranty registration certificate /card back to Clearaudio, within two weeks after purchase. Only if the product is returned in its original packing Clearaudio can provide the warranty of 2 years. - Page 25 ESPAÑOL GARANTIA Para obtener información acerca de la garantia póngase en contacto con su distribuidor Clearaudio. GUARDE SU RECIBO DE COMPRA Su recibo de compra es su prueba permanente de haber adquirido un aparato de valor, Este recibo deberá guardarlo en un lugar seguro y utilizarlo como referencia cuando tenga que hacer uso del seguro o se ponga en contacto con Clearaudio.
- Page 26 User manual / Bedienungsanleitung © clearaudio electronic GmbH, 2018/11...
- Page 27 User manual / Bedienungsanleitung Made in Germany...
- Page 28 91054 Erlangen Germany Phone/Tel.: +49 9131 40300 100 Fax: +49 9131 40300 119 www.clearaudio.de www.analogshop.de info@clearaudio.de Handmade in Germany (Technische Änderungen vorbehalten - Technical specification are subject to change without prior notification) 2018 © clearaudio electronic GmbH, 2018/11 Made in Germany...
Need help?
Do you have a question about the Verify and is the answer not in the manual?
Questions and answers