Table of Contents
Advertisement
Advertisement
Table of Contents

Subscribe to Our Youtube Channel
Related Manuals for Tornado BDSO 27/28


Summary of Contents for Tornado BDSO 27/28
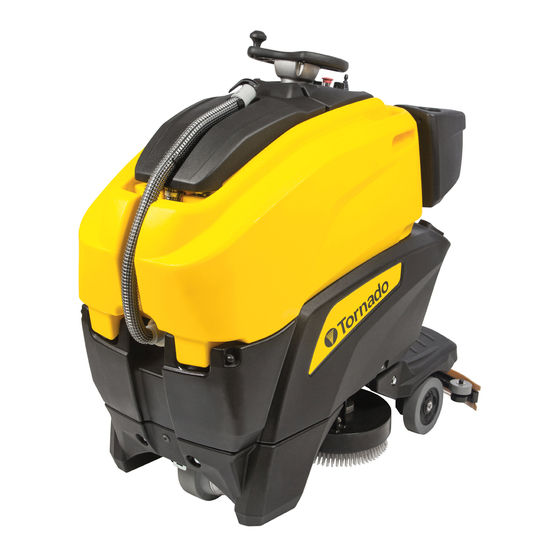
- Page 1 TORNADO INDUSTRIES, LLC 3101 WICHITA COURT FORT WORTH, TX 76140 PHONE 800-VACUUMS FAX 817-551-0719 WWW.TORNADOVAC.COM Operations & Maintenance Manual For Commercial Use Only BDSO 27/28 STAND-ON AUTOMATIC SCRUBBER MODEL NO: 99786 Form No. L9786AA 09/17 ©Tornado Industries, LLC. All rights reserved...
- Page 2 2. All non-wear item parts purchased after warranty expiration are warranted for 90 days. 3. Warranty starts from the date of sale to the consumer or, at Tornado’s discretion, 6 months after the dealer purchased the unit from Tornado, whichever comes first.
- Page 3 NOTES...
- Page 4 Your new Tornado unit is a high quality, precision-made product. All parts used in the manufacturing of this unit have passed rigid quality control standards prior to assembly. Please safeguard the original receipt / invoice. If you experience any problems with your unit during the warranty period, the original receipt / invoice will act as proof of purchase.
-
Page 5: Table Of Contents
SUMMARY SPEED ADJUSTMENT, FORWARD TECHNICAL DESCRIPTION AND BACKWARD GENERAL RULES OF SAFETY DETERGENT SOLUTION FLOW RATE TRANSFER AND ADJUSTMENT STORAGE AND DISPOSAL AUTOMATIC MODE WORK CORRECT USE SUCTION MOTOR SILENT MODE MAINTENANCE STANDBY MODE STEERING WHEEL PANEL HORN CONTROLS BOARD LEGEND EMERGENCY BUTTON MACHINE LEGEND PARKING BRAKE... -
Page 6: Technical Description
TECHNICAL DESCRIPTION BDSO 27/28 Cleaning Width in/mm 26.5/685 Squeegee Width in/mm 34/860 Working Capacity sqft/h/sqm/h 44,239/4,110 Brushes Diameter in/mm 2 x 14/2 x 355 Brushes Speed Brush Pressure lbs/kg 126/57 max Brushes Motor 2 x 350/2 x 15 Traction Motor... -
Page 7: General Rules Of Safety
GENERAL RULES OF SAFETY − When your machine has to stop activity, provide The rules below have to be followed carefully in order for the appropriate waste disposal of its materials, to avoid injury to the operator and damage to the especially oils, batteries and electronic components, machine. -
Page 8: Steering Wheel Panel
STEERING WHEEL PANEL 1. DISPLAY 2. UP/DOWN BRUSHES BUTTON 3. ON/OFF VACUUM MOTOR BUTTON 4. UP/DOWN SQUEEGEE BUTTON 5. AUTOMATIC/MANUAL MODE BUTTON 6. OPEN/CLOSE SOLENOID VALVE 7. SOLUTION LEVEL BUTTON (ONLY FOR 3S/3SD) 8. MAXIMUM SPEED INCREASE BUTTON 9. MAXIMUM SPEED DECREASE BUTTON CONTROLS BOARD LEGEND 1. -
Page 9: Display Reading
DISPLAY READING DISPLAY WHILE SWITCHING ON When the machine is switched on, the display shows the following screen BDSO 27/28 Next screen will be displayed as follows:... -
Page 10: And 3Sd Display
After selectiong the 3S or the 3SD mode (see the 3S/3SD mode paragraph), the display will show the following controls: MANUAL SYMBOLOGY Symbol denoting the open book. Obligation symbol requiring the wear of Indicates that the operator has to read the protection glasses. -
Page 11: Navigation Controls
GENERAL SETTINGS To enter the general settings menu use the controls panel as follows: 1. Keep the buttons (1) and (4) pressed simultaneously. A wrong setting may result in an irreversible damage of 2. Turn the key on. the battery. 3. -
Page 12: Before Use
BEFORE USE HANDLING OF THE PACKED MACHINE The machine is supplied with suitable packing foreseen for fork lift truck handling. The total weight is 590 lbs. (268kg). Packing dimensions: Base: 70” x 37” (178 cm x 93 cm) Height: 54” (138 cm) Weight (packed machine): 492 lbs. -
Page 13: Installing The Batteries
BATTERY CHARGER Make sure that the battery recharger is suitable for the installed batteries, both for their capacities and type (lead/acid or GEL and equivalent). In the plastic bag containing the use and maintenance you will find the coupling connector for the recharger. INSTALLING THE BATTERIES It must be assembled onto the cables of your recharg- The standard machine is provided with the batteries... -
Page 14: Battery Charging
BATTERY CHARGING Never charge any battery with a non suitable re- charger. Strictly follow the instructions supplied by the batteries and recharger manufacturer NOTE: Never leave the batteries completely dis- charged for long periods, even if the machine is not BATTERIES RECHARGING used. -
Page 15: Adjusting The Squeegee
The two splash guards have to be assembled onto the brushes base group as indicated in the following figures. Insert the metal strips inside the suitable slots present on the rubber. Attach the ends of the strip to the screw (1). Lock the lever (2) to the ring placed at the free end of the meal strip. -
Page 16: Floor Cleaning
For a longer life of the brushes we suggest to daily invert their position. Whenever brushes result to be deformed we suggest to reassemble them in the same position, in order to avoid that the different inclina- tion of the bristles causes excessive motor overload or troublesome vibrations. -
Page 17: Solution Saving System (Optional)
WORK A safety device prevents the machine’s movement if the operator is not properly placed on the footboard. To turn on the machine: 1. Step on the footboard. 2. Turn the key (1) clockwise to turn on the machine. 3. Check the battery level on the display. The machine will go automatically in manual mode Always use low foam detergent. -
Page 18: Brushes Pressure Adjustment
5. To lower the squeegee press the button (6). If backward movement is selected the brush base will stay down, the squeegee will lift up and the suction motor will shut itself off. When the forward movement is selected again the squeegee will go down and the suction motor will turn back on. -
Page 19: Suction Motor Silent Mode
SUCTION MOTOR SILENT MODE It is possible to start the silent mode of the suction mo- tor by pressing the switch-on button (1) of the suction motor for a few seconds. When the silent mode is on the symbol on the display When the parking brake is released manually, for ex- changes. -
Page 20: Cleaning Operation
CLEANING THE SUCTION FILTER STOPPING THE MACHINE AFTER CLEANING 1. Open the cover (1) and unscrew the knob (2) to OPERATION release the filter protection (3). At the end of the work proceed as follows: 2. Rotate the filter protection clockwise to release it. 1. -
Page 21: The Brushes
CLEANING THE SQUEEGEE Keeping the squeegee clean guarantees the best drying result. For its cleaning it is necessary to: 1. Take off the squeegee hose (4) from the coupling. 2. Disassemble the squeegee from its support (1) by loosening the knobs (2) counterclockwise and sliding the squeegee assembly off of the bracket. -
Page 22: Cleaning The Squeegee Hose
To replace the rubber it is necessary to: CLEANING THE SOLUTION TANK 1. Lift up the squeegee 2. Unlock the hooks (1). 3. Unscrew the wing nuts (2) to take off the outer rub- ber blades (3) and then the central one (4). 4. -
Page 23: Six-Monthly Maintenance
Check the wear of the squeegee rubber and eventually replace it. For the replacement it is necessary to: 1. Take off the squeegee (see under paragraph If, with the key switch positioned clockwise to switch “SQUEEGEE CLEANING”). on the machine, the display and other functions are 2. -
Page 24: Traction Motor Does Not Work
3. Check the battery charge 1. Check on the display on the display. that the solenoid valve is activated. 4. Check on the display that the starting signal of the brushes motor is on. 2. Check that the valve 5. Press the pedal on the lever is open (1). -
Page 25: Excessive Foam Prosuction
6. Check on the display that the starting signal of the suction motor is on. 7. Put the motor in stan- dard mode if silenced. 8. Check that the suction motor cap is closed properly. If the problem persists, please contact the authorized technical assistance. - Page 26 3101 Wichita Court may or may not apply based on your specific machine. If any defect occurs, the warranty is voided if service is Fort Worth, TX 76140 attempted by non-Authorized Tornado Service Centers. Fax: 817-551-0719 or online at ©2017 Tornado Industries. All rights reserved.
Need help?
Do you have a question about the BDSO 27/28 and is the answer not in the manual?
Questions and answers