Table of Contents
Advertisement
Advertisement
Table of Contents

Related Manuals for Tornado 99728


Summary of Contents for Tornado 99728
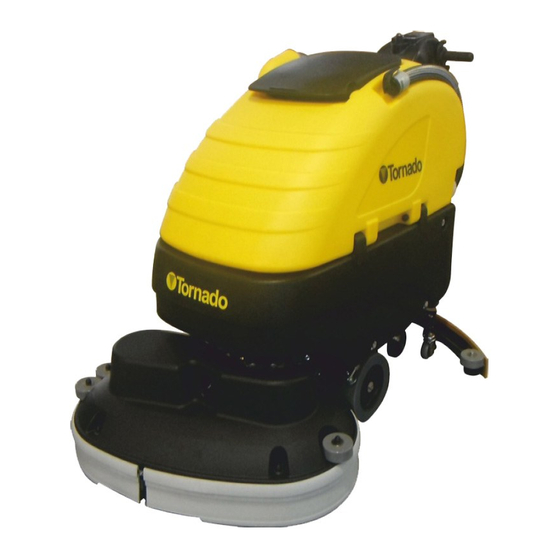
- Page 1 TORNADO INDUSTRIES, LLC 333 CHARLES COURT WEST CHICAGO, IL 60185 (630)-818-1300 FAX (630)-818-1301 WWW.TORNADOVAC.COM Operations & Maintenance Manual For Commercial Use Only BD 28/20 AUTOMATIC SCRUBBER MODEL NO: 99728 Form No. L0028AA 02/15 ©Tornado Industries, LLC. All rights reserved...
-
Page 2: Table Of Contents
INTRODUCTORY COMMENT Thank you for choosing our machine. This floor cleaning machine is used for the industrial and commercial cleaning and is able to clean any type of floor. During its operation, the combined action of the brushes and the detergent solution removes the dirt which is recovered through the rear suction assembly, giving a perfectly dry surface. -
Page 3: General Rules Of Safety
MAINTENANCE The rules below have to be followed carefully in order to avoid injury to the operator and damage to the machine. − If the machine does not work properly, check by conduct- − Read the labels carefully on the machine. Do not cover ing simple maintenance procedures. -
Page 4: Technical Description
BD 28/20 TECHNICAL DESCRIPTION Cleaning Width in/mm 28/685 Squeegee Width in/mm 34/860 Working Capacity /h/ft 29494/2740 Brush Diameter in/mm 14/355 Brush Speed Brush Pressure lbs./kg 110/50 Brush Motors (2) 2 x 350/2 x 14.5 Traction Motor 300/12 Vacuum Motor 570/23 Vacuum in water lift/mbar 64/160... -
Page 5: Legend Control Panel
LEGEND CONTROL PANEL 1. DISPLAY 2. PUSH BUTTON MAXIMUM SPEED REDUCTION 3. PUSH BUTTON SUCTION MOTOR PUSH BUTTON SUCTION MOTOR SILENT MODE 4. PUSH BUTTON UP/DOWN BRUSHES 5. PUSH BUTTON MAXIMUM SPEED INCREASE 6. PUSH BUTTON ACTIVATION OZONE SYSTEM 7. PUSH BUTTON OPENING/CLOSING SOLENOID VALVE PUSH BUTTON ACTIVATION 3S SYSTEM LEGEND MACHINE 1. -
Page 6: Display Reading
DISPLAY READING VISUALIZATION WHILE SWITCHING ON When the machine is switched on, the display shows the following screen which indicates the software release and the battery setting. -
Page 7: Navigation Controls
GENERAL SETTING To enter the menu for the setting, use the keyboard of the instrument board and proceed as follows: 1. Keep the buttons (1) and (5) pressed simultaneously. An incorrect setting may damage irreparably the battery. 2. Turn the key to switch on the machine. ALWAYS verify to have set the correct parameter. -
Page 9: Before Use
BEFORE USE HANDLING OF THE PACKED MACHINE The machine is supplied with suitable packing foreseen for fork lift truck handling. BD 28/20: the total weight is 363 kg (800 lbs.). Packing dimensions: Base: 161 cm x 87 cm (63"x 34") Height: 123 cm (48") Thanks to a blocking system of 2 levels, the machine allows the Do not place more than 2 packages on top of each other. -
Page 10: Batteries Charge Level Indicator
The battery charge level is observed on the display with its respec- tive symbol (see "VISUALIZATION CONTROLS"). Never leave the batteries completely discharged even if the ma- chine is not used. In case of traditional lead/acid batteries, please check the electrolyte level every 20 recharging cycles and as needed, top up with distilled water at the end of the recharge. -
Page 11: Adjustment Of The Squeegee
ADJUSTMENT OF THE SQUEEGEE BRUSHES ASSEMBLY In order to have a perfect drying result through the squeegee, the To assemble the brushes, pro- rear rubber must have the lower bending uniformly adjusted in all ceed as follows: its length. For the adjustment, it is necessary to put the unit in work- 1. -
Page 12: Floor Cleaning
FLOOR CLEANING CONNECTION OF THE BATTERIES TO THE MACHINE Plug in the batteries connector (1) to the machine connector (2), placed in the rear part of the machine. On the side of the machine there is a level hose that permits the operator to easily see the solution level inside the tank both during the filling of the tank and during operations. -
Page 13: Starting Of The Machine
STARTING THE MACHINE MOVEMENT AND SPEED AD- Every control is observed on the display (1). JUSTMENT The traction of the machine is provided through an electronically controlled motor. To move the machine, turn the key (1) and then rotate the levers drive control (2) placed on the handle bar, in forward for the forward drive, in reverse for the... -
Page 14: Emergency Brake
EMERGENCY BRAKE In case of an emergency, an immediate stop can be obtained acting upon the lever of the emergency and parking brake (1) by lowering ALARM 1 OVERFLOW DEVICE On the display will be shown the emergency brake activation to- gether with its symbol. -
Page 15: Suction Filter Cleaning
AUTOMATIC DISASSEMBLY OF THE BRUSHES 1. Turn the key (1) clockwise to switch on the machine. 2. Open the cover of the recovery tank. 2. Press the push button (2) of up/down brushes base to lift the 3. Rinse the tank with a water jet. brushes. -
Page 16: Weekly Maintenance
CLEANING OF THE SOLUTION TANK 5. Reassemble all parts, paying attention to put the washers (3) into position, there are two for each knob, they are assembled one un- der and the other on top of the two slots on the squeegee support. 1. -
Page 17: Troubleshooting Guide
If the problem persists, please contact the authorized technical as- sistance. THE BRUSH MOTOR DOES NOT WORK 1. Verify that the key switch (1) is in the correct position. Switch the machine off and on again. 2. Check the charge level of the batteries on the display. TROUBLESHOOTING GUIDE The checking of all the other foreseen machine operations is left to 3. -
Page 18: The Detergent Solution On The Brushes Is Not Sufficient
THE MACHINE DOES NOT CLEAN PROPERLY 1. The brushes do not have the correct bristles: contact the autho- rized technical assistance. 2. The brushes bristles have gotten worn. Check the brushes wear condition and eventually replace them (the brushes have to be replaced when the bristles have reached a height of about 1/2”... -
Page 19: Warranty Statement
2. All non-wear item parts purchased after warranty expiration are warranted for 90 days. 3. Warranty starts from the date of sale to the consumer or, at Tornado’s discretion, 6 months after the dealer purchased the unit from Tornado, whichever comes first. -
Page 20: Notes
NOTES... -
Page 21: Warranty Registration
Return to: may or may not apply based on your specific machine. If any defect occurs, the warranty is voided if Tornado Industries service is attempted by non-Authorized Tornado Service Centers. 333 Charles Ct. Unit 109 West Chicago, IL 60185 ©2015 Tornado Industries.
Need help?
Do you have a question about the 99728 and is the answer not in the manual?
Questions and answers