Table of Contents
Advertisement
Quick Links
Advertisement
Table of Contents

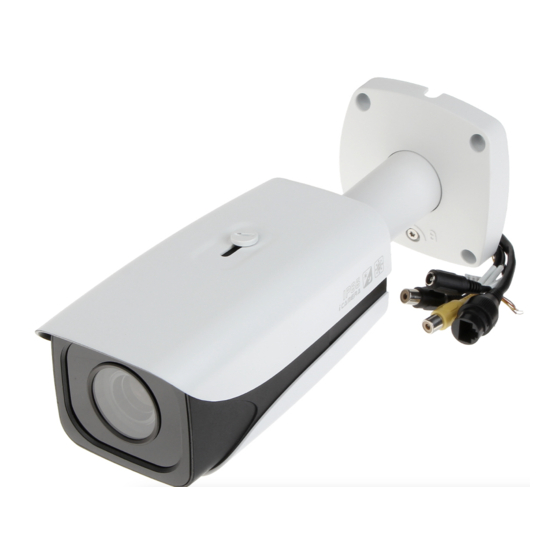
Related Manuals for Dahua ITC237-PW1A-IRZ


Summary of Contents for Dahua ITC237-PW1A-IRZ
- Page 1 ITC237-PW1A-IRZ Web Operation Manual Version 1.0.0...
- Page 2 Important Safeguards and Warnings 1.Electrical safety All installation and operation here should conform to your local electrical safety codes. The power shall conform to the requirement in the SELV (Safety Extra Low Voltage) and the Limited power source is rated 90-240V. We assume no liability or responsibility for all the fires or electrical shock caused by improper handling or installation.
- Page 3 The GND port of the product shall be grounded to further enhance the reliability of the device. 6. Accessories Be sure to use all the accessories recommended by manufacturer. Before installation, please open the package and check all the components are included. Contact your local retailer ASAP if something is broken in your package.
-
Page 4: Table Of Contents
Table of Contents Live ..........................1 Log in ........................ 1 Video Bit Stream Bar ..................4 Preview Window Switch ..................4 System Menu ....................5 Common Function Bar ..................6 Monitor Window Switch ..................6 Query..........................8 Picture Query ....................8 Record Query.................... - Page 5 Information ...................... 40 3.7.1 Version ..................... 40 3.7.2 Log ......................41 3.7.3 Online User ....................42 Logout ......................... 43...
-
Page 6: Live
1 Live 1.1 Log in Open IE and input HD intelligent traffic camera IP address in the address column. For example, if your IP is 192.168.1.108, then please input http:// 192.168.1.108 in IE address column. See Figure 1-1 Input your IP address here. - Page 7 Figure 1-2 Security Settings After installation, the interface is shown as below. See Figure 1-3. Please input your user name and password. Default factory name is admin and password is admin. Note: For security reasons, please modify your password after you first login.
- Page 8 Figure 1-3 Login Interface After you logged in, HD intelligent traffic camera web main interface is shown as in Figure 1-4. Figure 1-4 Web Main Interface...
-
Page 9: Video Bit Stream Bar
There are five sections: Section 1: Video bit stream bar Section 2: Preview window switch Section 3: System menu Section 4: Common function bar Section 5: Monitor window switch 1.2 Video Bit Stream Bar T he video bit stream bar interface is shown as in Figure 1-5. Figure 1-5 Video Bit Stream Bar Please refer to the following sheet for detailed information. -
Page 10: System Menu
Figure 1-7 Adjusting Window Note: All the operations here apply to WEB end only. Please go to “Setup->Camera->Attributes” to set. Please refer to the following sheet for detailed information. Parameter Function It is to adjust monitor video brightness. Video setup It is to adjust monitor video contrast. -
Page 11: Common Function Bar
1.5 Common Function Bar The common function bar interface is shown as in Figure 1-9. Figure 1-9 Common Function Bar Please refer to the following sheet for detailed information. Parameter Function Select record type, default is dav. Record Type Check it to automatically receive pictures via snapshot, coil detect and video Receive detect. - Page 12 ---- Display in full screen.
-
Page 13: Query
2 Query 2.1 Picture Query Click query button, you can see an interface is shown as in Figure 2-1. Click Open Local, select picture you want to verify and click Water Verify, then you can view the result. Select the picture, click Open to preview. Figure 2-1 Picture Query 2.2 Record Query 2.2.1 Record... -
Page 14: Water Mark
Figure 2-2 Record Query 2.2.2 Water Mark Note: Before user can use this function, he/she must enable water mark in Setup>Camera>Video, and set watermark content. Default watermark is :DigitalCCTV. Select record file, click Water Mark, system shows progress of verifying and normal watermark. See Figure 2-3. -
Page 15: Configure
3 Configure 3.1 ITC 3.1.1 Lane Property User shall set related parameter according to their need. The lane property interface is shown as in Figure 3-1. Figure 3-1 Lane Property Please refer to the following sheet for detailed information. Parameter Function Snap enable Select lane to enable. -
Page 16: Snapshot
Parameter Function ANPR Set whether to snapshot vehicle at ANPR or not. Click on button in Illegeal Type Config, you will see advance config interface in Figure 3-2. Figure 3-2 Advance Config Parameter Function Snap Set number of snapshot. Amount Snap Check Observe to snapshot vehicle driving in correct direction only. -
Page 17: Intelligence Default
Figure 3-3 Snapshot Please refer to the following sheet for detailed information. Parameter Function General setup Select auto or manual mode. Manual mode includes video trigger and coil trigger. Work mode Select frame interval or custom interval. Max speed Set max speed supported by device. OSD select Set OSD menu. - Page 18 Figure 3-4 RS485/IO Please refer to the following sheet for detailed information. Parameter Note Start Coil IO Select Start Coil IO enable option, to enable coil IO, may config trigger mode and IO. Select coil IO. Set each coil’s trigger mode. Coil X Operation Mode Support ANPR mode.
- Page 19 Figure 3-5 Video Analysis Please refer to the following sheet for log parameter information. Parameter Function Virtual lane Select virtual lane no. Physical lane Set physical lane no. according to actual condition. Region Set detect region. Select and click on redraw to drawn region. Lane line Draw lane according to actual condition.
- Page 20 Figure 3-6 Video Analysis Please refer to the following sheet for log parameter information. Parameter Function This is camera height from the ground. Note: This value must match actual value; otherwise speed measure will be inaccurate. This is distance from camera to scene bottom. Note: This value must match actual value;...
- Page 21 Figure 3-7 Video Analysis Please refer to the following sheet for log parameter information. Parameter Function Vehicle Sign Select this parameter, it can recognize vehicle LOGO. Plate Size Set plate Min Height, Max Height, Min Width, Max Width, while only Min Width and Max Width are available for use.
-
Page 22: Intelligence Default
Figure 3-8 Advance Config See Figure 3-8. Advance Options means you can input customized arithmetic expression. 3.1.4 Intelligence Default The intelligence default interface is shown as in Figure 3-9. Click on default to restore default settings. Note: You cannot restore IP address and other network info. Figure 3-9 Intelligence Default 3.1.5 Snap Cutout Check SnapCutoutEnable, click Save. -
Page 23: White List
Figure 3-10 Snap Cutout 3.1.6 White List White list is used to set open gate policy for in/out vehicle. Open Gate Note Operation Policy White list By importing white list plate 1.In White List Setup page, enable white list open no. - Page 24 Figure 3-11 White List Setup Please refer to the following sheet for log parameter information. Parameter Note Enable Check, enable white list function. Start After check, enable control fuzzy matching function. If the snapshot plate does Match not match white list, you can set white list accordingly. Plate matching fuzzy search has the same property of plate on white list.
-
Page 25: Camera
Figure 3-12 White List Search Parameter Function Enter Plate No. Can search s certain plate see it is on list. Note: You can click Search, and click in search result to modify existing plate property, including start time and end time of white list right, owner and white list right. -
Page 26: Attribute
3.2.1 Attribute 3.2.1.1 General The general interface is shown as in Figure 3-14. Here you can set camera parameters. For different models, you shall refer to its parameter. Setup in this interface comes effective immediately. Figure 3-14 General Please refer to the following sheet for log parameter information. Parameter Function The value adjusts brightness of full image. - Page 27 Parameter Function Prevalue Set prevalue of day/night switch. Apply to sensor IR camera, filter red light during daytime, and switch to normal light ICR Switch filter at night. Guarantee output of high sensitivity, clear image both at day/night time. Normal video rotation of +90, -90 degree. Retate Note: This model does not support this function.
-
Page 28: Video
Select device scene mode to adjust video to best effect. Scene mode May set auto, sunny, cloudy and etc. Auto gain, if you set it to 20, auto gain will be <=20. Gain mode Fixed gain, if you set it to 20, gain will be 20. 3.2.1.3 Metering Zone The metering zone interface is shown as in Figure 3-16. - Page 29 Figure 3-17 Video Please refer to the following sheet for log parameter information. Parameter Function Code-stream Support general type. type It supports H.264 only. Encode mode H.264 : High Profile encode. Resolution Display resolution, support 1080P(1920*1080). Frame rate Max support 50 fps.
- Page 30 3.2.2.2 Snapshot The snapshot interface is shown as in Figure 3-18. Figure 3-18 Snapshot Please refer to the following sheet for log parameter information. Parameter Function Snapshot It includes general snap and trigger snap. General snap works within type predetermined time period. Trigger snap works at time of motion detect, privacy masking and relay activation.
- Page 31 Figure 3-19 Overlay Please refer to the following sheet for log parameter information. Parameter Function Enable this function to display time title. Time title Enable and click on setup to set. You may drag time title in window to choose its ...
- Page 32 Figure 3-20 Interest Area Please refer to the following sheet for log parameter information. Parameter Function Image You may drag left mouse to set interest area. quality Select snap quality from 6 levels. 3.2.2.5 Path The path interface is shown as in Figure 3-21.
-
Page 33: Network
Figure 3-21 Path You can set snapshot path and record path. Snap default path is: C:\PictureDownload. Record default path is: C:\ RecordDownload. 3.3 Network 3.3.1 TCP/IP The TCP/IP interface is shown as in Figure 3-22. Figure 3-22 TCP/IP Please refer to the following sheet for log parameter information. Parameter Function Host name... -
Page 34: Ip Filter
Parameter Function Ethernet card Set Ethernet card to config. Default is wired. You can select from static and DHCP mode. In DHCP mode, it automatically search IP while you cannot set IP/subnet mask/gateway. Plus IP/subnet Mode mask/gateway display values from DHCP. In static mode, you shall manually set IP/subnet mask/gateway. -
Page 35: Abnormity
Figure 3-24 Relay-out Please refer to the following sheet for log parameter information. Parameter Function 1-ch relay out setup. “1” means alarm output channel. Select “1” and trigger, then directly output alarm output signal. Refresh View the latest relay out status. 3.4.2 Abnormity The abnormity interface is shown as in Figure 3-25. -
Page 36: Storage
Parameter Function Relay-out delay Alarm will continue for X seconds after motion detect ends. You can set X within 10 s~300 s. 3.5 Storage Select FTP as storage, then FTP is enabled. You can set picture name and path. Click Help to view rule of naming. - Page 37 Figure 3-27 General Please refer to the following sheet for log parameter information. Parameter Function Device name Set device name. Language Select language and then close IE. When you log in again, system language will change. Video standard Display device video standard, such as PAL. Machine Group Input device group.
-
Page 38: Account
Figure 3-28 Date&Time Please refer to the following sheet for log parameter information. Parameter Function Date format Select date format. Time format Select time format. Current time Set current system time. Setup becomes effective immediately. Sync PC Sync system time with PC time. Click on save to refresh system time. DST enable Set DST, may by date or week. - Page 39 Account has two levels as group and username. Group supports max of 8 and username supports max of 18. Default group includes admin and user. Group name cannot be repeated. Each user belongs to one group only. You may add and delete group and set group.
- Page 40 Figure 3-30 Add User Modify user: Modify existing user’s group, password, right and note. See Figure 3-31.
- Page 41 Figure 3-31 Modify User Modify password: Modify password of existing user. Check box in front of modify password. Input current password and then input new password. Click on save. Password supports 0~15 characters, including letter and number only. Note: You cannot modify right of the logged in account.
- Page 42 Figure 3-32 Group Add group: Add user within group and set group right. Enter add group interface, and input group name, select right among given list. The add group interface is shown as in Figure 3-33. Figure 3-33 Add Group Modify group: Click on modify, you may edit group in prompt box.
-
Page 43: Default
Figure 3-34 Modify Group Note: You cannot delete admin and user groups. You cannot delete group which contains currently logged in user. 3.6.3 Default The default interface is shown as in Figure 3-35. Figure 3-35 Default Note: Network IP address cannot be restored to default. 3.6.4 Import/Export... -
Page 44: Auto Maintain
The import/export interface is shown as in Figure 3-36. Figure 3-36 Import/Export Please refer to the following sheet for log parameter information. Parameter Function Export Export system config to local. Import Import local config to system. 3.6.5 Auto Maintain The auto maintains interface is shown as in Figure 3-37. Figure 3-37 Auto Maintain... -
Page 45: Upgrade
User can automatically reboot system and delete old files. You shall set auto reboot schedule and set file time period for auto delete old file to delete file within certain time periods. Click on save to make setup effective. 3.6.6 Upgrade When system upgrades, you shall select firmware file. -
Page 46: Log
Figure 3-39 Version Here displays device type, software version and soft build time. All info here subject to actual condition. 3.7.2 Log The log interface is shown as in Figure 3-40. Figure 3-40 Log Please refer to the following sheet for log parameter information. Parameter Function Start time... -
Page 47: Online User
Parameter Function Type Log type includes: system, config, data, event, record, account and clear all log. Search In dropdown list, select log type, and set start/end time. Click on search button and then you will see logs searched out. ... -
Page 48: Logout
4 Logout Single click on logout to exit WEB interface. You will see Figure 4-1. To return web interface, you have to log in again. Figure 4- 1 Logout Note: This manual is for reference only. Slight difference may be found in the user interface. ...
Need help?
Do you have a question about the ITC237-PW1A-IRZ and is the answer not in the manual?
Questions and answers