Table of Contents
Advertisement
Quick Links
Advertisement
Table of Contents

Subscribe to Our Youtube Channel
Related Manuals for elsner elektronik KNX RF-MSG-DST


Summary of Contents for elsner elektronik KNX RF-MSG-DST
- Page 1 KNX RF-MSG-DST Rad io actuator Item number 70712 Installation and Ad justment...
-
Page 3: Table Of Contents
4.3.2. Automation – external ................21 4.3.3. Scenes ......................21 Elsner Elektronik GmbH • Sohlengrund 16 • 75395 Ostelsheim • Germany Radio actuator KNX RF-MSG-DST • from software version 0.1.0 ETS programme version 1.0 Status: 27.06.2018 • Subject to technical changes. Errors excepted. - Page 4 Clarification of signs Installation, inspection, commissioning and troubleshooting of the device must only be carried out by a competent electrician. This manual is amended periodically and will be brought into line with new software releases. The change status (software version and date) can be found in the contents footer. If you have a device with a later software version, please check www.elsner-elektronik.de in the menu area "Service"...
-
Page 5: Description
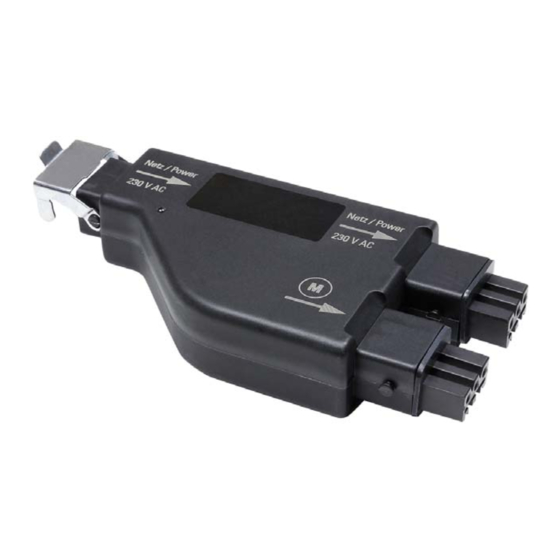
Description Description The KNX RF-MSG-DST is a radio actuator for KNX radio (KNX RF). The actuator con- trols one drive (blind, shutter, awning or window). Via an additional connector, another motor control unit is supplied with power (loop-through function). The KNX RF-MSG-DST uses the KNX RF S standard. -
Page 6: Installation And Start-Up
1024 Radio frequency 868,3 MHz *The Radio actuator KNX RF-MSG-DST should be installed in a protected area despite a high protection category because water can enter in via the connectors. Please observe the instructions in Chapter Connection. The product conforms with the provisions of EU directives. -
Page 7: Safety Advice
Installation and start-up Elsner Elektronik is not liable for any changes in norms and standards which may occur after publication of these operating instructions. 2.1.1. Safety advice WARNING! Risk of injury caused by components moved automatically! If the wireless connection between the control unit and the wireless actuator is interrupted, connected devices can no longer be operated. - Page 8 • Lay the supply lines out and down from the device. No vibrations! • Assemble the device in a place that is free of vibrations. Radio actuator KNX RF-MSG-DST • Version:27.06.2018 • Technical changes and errors excepted.
-
Page 9: Device Design
(For further information see the corresponding manual/data sheet.) 1. Start the programming mode of the KNX RF-MSG with the enclosed magnet (teles- copic rod). The programming LED lights up. Radio actuator KNX RF-MSG-DST • Version:27.06.2018 • Technical changes and errors excepted. -
Page 10: Activate Retransmitter Function
Device must not be exposed to water (rain). This could result in the electronic being damaged. A relative air humidity of 95% must not be exceeded. Avoid bedewing. Radio actuator KNX RF-MSG-DST • Version:27.06.2018 • Technical changes and errors excepted. -
Page 11: Transfer Protocol
Transfer protocol Transfer protocol 3.1. List of all communication objects Abbreviations: Read W Write Communication Transfer Name Func- Flags Data Point Size tion Type Software version Readable R-C- [217.1] 2 Bytes DPT_Version Status automatic or manual Output R-CT [1.1] 1 Bit mode DPT_Switch Manual long-term... - Page 12 Transfer protocol Name Func- Flags Data Point Size tion Type Learn object position memory Input RWC- [1.1] 1 Bit for manual 0 DPT_Switch Learn object position memory Input RWC- [1.1] 1 Bit for manual 1 DPT_Switch Approach position memory for Input RWC- [1.1]...
- Page 13 Transfer protocol Name Func- Flags Data Point Size tion Type Block 3 - Wind blocking status Output R-CT [1.1] 1 Bit DPT_Switch Block 3 - Rain blocking object Input RWC- [1.1] 1 Bit DPT_Switch Block 4 - Blocking object Input RWC- [1.1] 1 Bit...
-
Page 14: Parameter Setting
Parameter setting Parameter setting The default settings of the parameter are labelled by an underscore. 4.1. General settings First, set the general parameters for the bus communication (transmission delay). Ad- ditionally, you can indicate if for the programming of scenes all, or only the changed settings are applied to the bus. - Page 15 Parameter setting the end positions with help from the greater current on the drive output. For this, regu- lar reference movements (see below) should be set. Use an automatic runtime measurement no • yes Use an automatic runtime measurement Runtime DOWN in sec (shutter, blinds) 1 …...
- Page 16 Parameter setting Step time in 10 ms 1 … 100; 20 Step number slats 1 … 255; 5 If the short time command for shutters (step command) is used only for slat adjustment, but not for positioning the curtain, the following parameter is set to "Yes". The parameter appears only for shutters.
-
Page 17: Control
Parameter setting that the bus is not blocked by too many data packets during a longer movement. The position can also be transmitted cyclically. Use status object no • yes Use drive position feedback no • yes Position transmit delay after change in 0.1 s 0...50;... - Page 18 Parameter setting Use block 3 • no • yes, with blocking object • yes, as wind blocking • yes, as rain blocking Use block 4 • no • yes, with blocking object • yes, as wind blocking • yes, as rain blocking Use Block 5 (low priority) •...
- Page 19 Parameter setting Automatic reset: With the manual operation the automatic of the drive is deactivated. Here it is set when the automatic is reactivated. Manual switches to automatic after • expiry of a waiting period • receiving an object • expiration of a waiting period or receipt of an object Waiting period in min 1...255;...
- Page 20 Parameter setting Designation [Block 1 ... 5] Enter a designation here! If blocking object has value =1 • no action • stop • move into position • up-command • down-command (shutter/blind) • retract-command • extend-command (awning) • close-command • open-command (window) Position in % (only if by using a block, a 0...100...
- Page 21 Parameter setting Slat position in % (only if by using a block, 0...100 a specific shutter position is achieved) Waiting period in secure position in min 1...255; 5 after blocking Behaviour after waiting period For manual operation before and after •...
-
Page 22: Manual
Parameter setting Position in % (only if by using a block, a 0...100 specific position is achieved) Slat position in % (only if by using a block, 0...100 a specific shutter position is achieved) Waiting period in secure position in min 1...255;... -
Page 23: Automation - External
Parameter setting Use different positions for object values 0 no • yes and 1 (if ‘yes’ is selected, there will be a division into positions for object value 0 and object value 1) Position in % 0...100 Allow calling via command sequence: long- no •... - Page 24 Parameter setting Set the movement position. If it is allowed to save scenes via the bus, this position only applies after the ETS download until the first manual saving. Afterwards, the new movement position saved in the actuator is used. Shutter position in % or 0...100;...
- Page 26 Elsner Elektronik GmbH Control and Automation Engineering Sohlengrund 16 75395 Ostelsheim Phone +49 (0) 70 33 / 30 945-0 info@elsner-elektronik.de Germany +49 (0) 70 33 / 30 945-20 www.elsner-elektronik.de Technical support: +49 (0) 70 33 / 30 945-250...
Need help?
Do you have a question about the KNX RF-MSG-DST and is the answer not in the manual?
Questions and answers