Sign In
Upload
Download
Table of Contents
Contents
Add to my manuals
Delete from my manuals
Share
URL of this page:
HTML Link:
Bookmark this page
Add
Manual will be automatically added to "My Manuals"
Print this page
×
Bookmark added
×
Added to my manuals
Manuals
Brands
Dell EMC Manuals
Switch
S4112F-ON
Installation manual
Dell EMC S4112F-ON Installation Manual
S4112–on series
Hide thumbs
1
2
Table Of Contents
3
4
5
6
7
8
9
10
11
12
13
14
15
16
17
18
19
20
21
22
23
24
25
26
27
28
29
30
31
32
33
34
35
36
37
38
39
40
41
42
43
44
page
of
44
Go
/
44
Contents
Table of Contents
Bookmarks
Table of Contents
Table of Contents
1 About this Guide
Regulatory
Related Documents
Information Symbols
2 S4112-ON Series Switch
Introduction
Features
Physical Dimensions
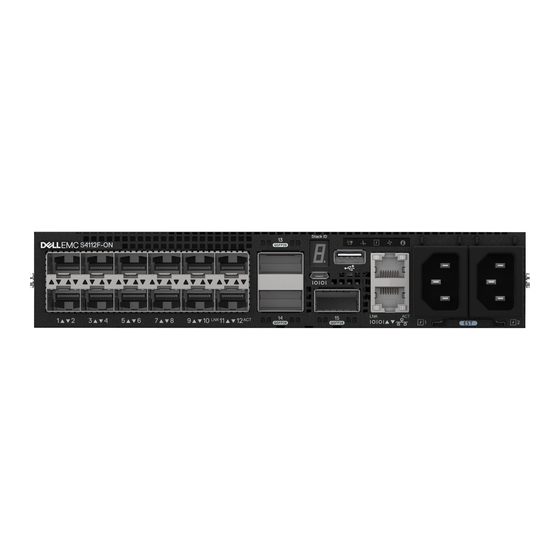
LED Display
LED Behavior
Prerequisite
S4112-ON Series Configurations
Luggage Tag
3 Site Preparations
Site Selection
Cabinet Placement
Rack Mounting
Switch Ground
Fans and Airflow
Fan Combinations
Power
Storing Components
4 S4112-ON Series Installation
Unpack
Unpack Steps
Ground Cable
Rack or Cabinet Installation
Rack Mount Safety Considerations
Half RU Front-Rack Installation
Switch Installation
Switch Removal
Optics Installation
Optics Removal
Switch Power-Up
Power up Sequence
After Switch Installation
Switch Replacement
5 Power Supplies
Components
AC Power Cable Clips
PSU Leds
DC Power Connections
6 Fans
Components
Fan Leds
7 Management Ports
RS-232 Console Port Access
USB-B Console Port Access
USB Storage
Before You Install an os
Grub Bootloader Example
ONIE Example
ONIE Service Discovery
8 Specifications
Chassis Physical Design
IEEE Standards
Agency Compliance
USA Federal Communications Commission Statement
European Union EMC Directive Conformance Statement
Japan VCCI Compliance for Class a Equipment
Korean Certification of Compliance
Safety Standards and Compliance Agency Certifications
Electromagnetic Compatibility
Emissions
Immunity
Product Recycling and Disposal
Waste Electrical and Electronic Equipment (WEEE) Directive for Recovery, Recycle, and Reuse of IT and Telecommunications Products
9 Dell EMC Support
Advertisement
Quick Links
1
Features
2
S4112-On Series Configurations
3
Switch Installation
4
Rs-232 Console Port Access
5
Management Ports
Download this manual
S4112–ON Series Installation Guide
November 2018
Table of
Contents
Previous
Page
Next
Page
1
2
3
4
5
Advertisement
Table of Contents
Need help?
Do you have a question about the S4112F-ON and is the answer not in the manual?
Ask a question
Questions and answers
Related Manuals for Dell EMC S4112F-ON
Switch DELL EMC S5048F-ON Installation Manual
(45 pages)
Switch Dell EMC S4048T-ON Installation Manual
(47 pages)
Switch Dell EMC S4112T-ON Installation Manual
S4112–on series (44 pages)
Switch Dell EMC S5232F-ON Installation Manual
(57 pages)
Switch Dell EMC S5200F-ON Series Setup Manual
(44 pages)
Switch Dell EMC S5224F-ON Setup Manual
(44 pages)
Switch Dell EMC S5212F-ON Setup Manual
(44 pages)
Switch Dell EMC PowerSwitch S4100-ON Series Installation Manual
(205 pages)
Switch Dell EMC S4128F-ON Installation Manual
(205 pages)
Switch Dell EMC S4128T-ON Installation Manual
(205 pages)
Switch Dell EMC S4148F-ON Installation Manual
(205 pages)
Switch Dell EMC S4148T-ON Installation Manual
(205 pages)
Switch Dell EMC PowerSwitch S4148U-ON Configuration And Deployment Manual
Networking fcoe deployment in npg mode (37 pages)
Switch Dell EMC S4148U-ON Installation Manual
(205 pages)
Switch Dell EMC PowerSwitch S3048-ON Configuration And Deployment Manual
Networking fcoe deployment in npg mode (37 pages)
Switch Dell EMC PowerSwitch S4810-ON Installation Manual
(35 pages)
This manual is also suitable for:
S4112t-on
Table of Contents
Save PDF
Print
Rename the bookmark
Delete bookmark?
Delete from my manuals?
Login
Sign In
OR
Sign in with Facebook
Sign in with Google
Upload manual
Upload from disk
Upload from URL


Need help?
Do you have a question about the S4112F-ON and is the answer not in the manual?
Questions and answers