Table of Contents
Advertisement
Quick Links
®
Warning: Flying material can cause eye injury or blindness and sharp edges could cause cuts or
lacerations. Wear safety glasses and gloves when installing or working on cleanout.
1. Cut pipe so that the height of the finished cleanout is at or just
below the height of the finished floor. (See Zurn Engineering
Handbook or EZ1
Submittal for dimensional heights). Ensure
TM
pipe is cut square and free of burrs or debris. See Fig. 1
2. Install cleanout body on pipe and pressure test connection per
local code requirements. See Fig. 2 (Neo-loc body shown for
reference)
Ensure that the cleanout plug is installed using an approved
thread sealant.
Note: All plastic bodies to be solvent welded to pipe.
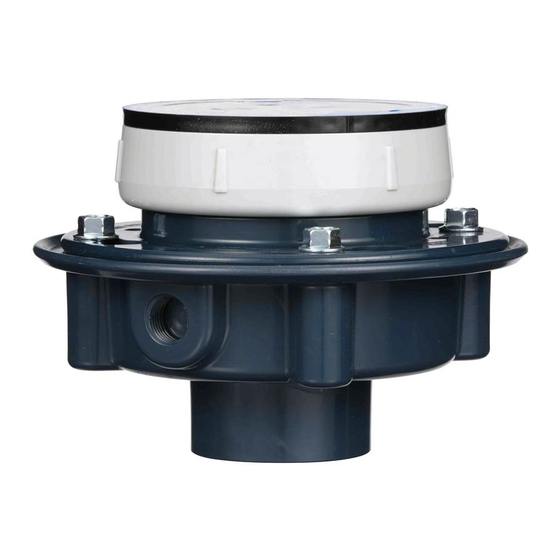
3. Adjust rough-in cover assembly so the top of the rough-in cover
is at the finish floor grade. See Fig. 3
Note: Ensure rough-in cover is tight to the concrete shield
so no concrete seeps into the assembly
WARNING: Cancer and Reproductive Harm -
ADVERTENCIA: Cáncer y daño reproductivo -
AVERTISSEMENT: Cancer et effets néfastes sur la reproduction -
Zurn Industries, LLC
|
Specification Drainage Operation
1801 Pittsburgh Avenue, Erie, PA U.S.A. 16502 · Ph. 855-663-9876, Fax 814-454-7929
In Canada
|
Zurn Industries Limited
3544 Nashua Drive, Mississauga, Ontario L4V 1L2 · Ph. 905-405-8272, Fax 905-405-1292
www.zurn.com
EZ1
CLEANOUT SERIES
TM
EZ1
FLOOR CLEANOUT INSTALLATION INSTRUCTIONS
TM
No Gap
www.P65Warnings.ca.gov
www.P65Warnings.ca.gov
Fig. 1
Fig. 2
Fig. 3
www.P65Warnings.ca.gov
Rev.
C
Date:
02/27/2018
C.N. No.
139680
Form No. CO18
Page 1 of 6
Advertisement
Table of Contents

Related Manuals for ZURN EZ1


Summary of Contents for ZURN EZ1
- Page 1 Wear safety glasses and gloves when installing or working on cleanout. 1. Cut pipe so that the height of the finished cleanout is at or just below the height of the finished floor. (See Zurn Engineering Handbook or EZ1 Submittal for dimensional heights).
- Page 2 See Fig. 6 Note: Do not remove entire label. Longer screws and adjustment shims are packaged under the label. Fig. 6 Zurn Industries, LLC Specification Drainage Operation Rev. 1801 Pittsburgh Avenue, Erie, PA U.S.A. 16502 · Ph. 855-663-9876, Fax 814-454-7929...
- Page 3 Note: Do not discard the rough-in cover. Longer screws and adjustment shims are under the label and may be needed to adjust for a tilted cleanout. Fig. 8 Zurn Industries, LLC Specification Drainage Operation Rev. 1801 Pittsburgh Avenue, Erie, PA U.S.A. 16502 · Ph. 855-663-9876, Fax 814-454-7929...
- Page 4 Remove protective label once construction is complete. See Fig. 10S Fig. 9S Fig. 10S Zurn Industries, LLC Specification Drainage Operation Rev. 1801 Pittsburgh Avenue, Erie, PA U.S.A. 16502 · Ph. 855-663-9876, Fax 814-454-7929 Date: 02/27/2018...
- Page 5 12. Install finished flooring per manufacturers instructions. Remove protective label from strainer once construction is complete. See Fig. 12S Fig. 12S Fig. 11S Zurn Industries, LLC Specification Drainage Operation Rev. 1801 Pittsburgh Avenue, Erie, PA U.S.A. 16502 · Ph. 855-663-9876, Fax 814-454-7929 Date: 02/27/2018...
- Page 6 Remove protective label from cover once construction is complete. See Fig. 15a for Slab on Grade Installation and Fig. 15b for tile installation Fig. 15b Fig. 15a Zurn Industries, LLC Specification Drainage Operation Rev. 1801 Pittsburgh Avenue, Erie, PA U.S.A. 16502 · Ph. 855-663-9876, Fax 814-454-7929 Date:...
Need help?
Do you have a question about the EZ1 and is the answer not in the manual?
Questions and answers