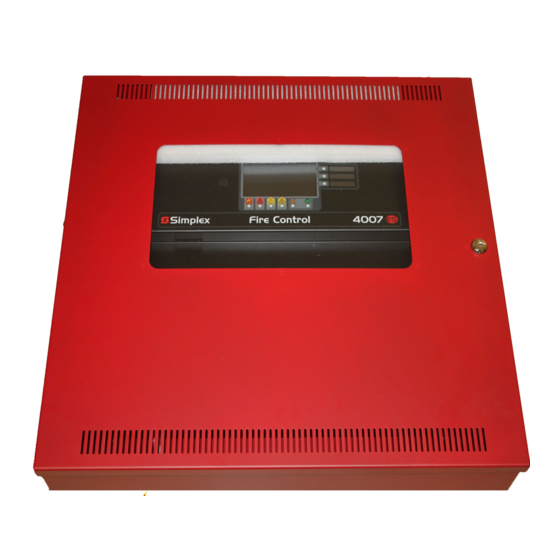
Simplex 4007ES User & Installation Manual
Fire alarm systems
Hide thumbs
Also See for 4007ES:
- User manual ,
- Programmer's manual (168 pages) ,
- Operator's manual (34 pages)
Table of Contents
Advertisement
Quick Links
Advertisement
Table of Contents
Troubleshooting

Related Manuals for Simplex 4007ES


Summary of Contents for Simplex 4007ES
- Page 1 4007ES and 4007ES Hybrid Fire Alarm Systems Installation Manual 579-1102 Rev. E...
-
Page 2: Copyrights, Trademarks, Cautions, Warnings, And Regulatory Info
ELECTRICAL HAZARD - Disconnect electrical field power when making any internal adjustments or repairs. All repairs should be performed by a representative or authorized agent of your local Simplex product supplier. STATIC HAZARD - Static electricity can damage components. Handle as follows: •... -
Page 3: Table Of Contents
4007ES Product List ..........................1-1 Glossary..............................1-2 User Interface ............................1-2 Chapter. 2 Installation....................2-1 Introduction ............................2-1 In this chapter ............................2-1 Mounting the 4007ES Panels ....................... 2-1 Trim Kit ............................2-2 Trim Kit Application ..........................2-2 Wiring ............................2-3 Wiring Guidelines..........................2-3 Safety Ground............................2-4 AC Supply Wiring.......................... - Page 4 Auxiliary Relays Section Overview ....................... 4-8 Troubleshooting .........................4-9 Troubleshooting ............................ 4-9 SLC Channel Trouble LED Codes ......................4-9 System Trouble LED Codes ....................... 4-10 Chapter. 5 4007ES Power Supplies ................5-1 Introduction ............................5-1 In this chapter ............................5-1 Power Supplies Specifications......................5-1 Wiring Guidelines..........................5-1 IDNet Section ..........................5-2...
-
Page 5: Chapter. 1 Overview
The panel can be configured by using a panel programmer. *From this point on, the 4007ES and the 4007ES hybrid will be referred to as 4007ES, unless stated otherwise. 4007ES operator instructions are described in the 4007ES Operator’s Manual, 579-1165. -
Page 6: Glossary
12 indicating LEDs. The color LCD provides system status and access to perform system functions and to change the system configuration. Figure 1-1 shows an inside view of the 4007ES panel with the optional LED module (4007-9805) installed. Figure 1-1. 4007ES Panel Inside View... -
Page 7: Chapter. 2 Installation
Chapter 2 Installation Introduction This chapter describes how to install the 4007ES panel. It can be semi-flush or surface mount. In this chapter Mounting the 4007ES Panels ....2-1 Trim Kit Application ......2-2 Safety Ground........2-4 AC Supply Wiring .........2-4 Battery Guidelines.........2-4 Final Installation ........2-5... -
Page 8: Trim Kit
Chapter 2 Installation Trim Kit Trim Kit Trim kits are used to cosmetically cover wall openings when boxes are mounted semi-flush Application into the wall. The kit includes: • Two top trim bands (shorter) • Two side trim bands (longer) •... -
Page 9: Wiring
Wiring Wiring Guidelines Follow these guidelines when connecting Power-Limited (PL) systems. For more information about these guidelines, contact your authorized Simplex Product supplier. • Non-Power Limited (NPL) field wiring (AC power, batteries, City connection, DACT) must be installed and routed in the shaded areas shown in Figure 2-5. -
Page 10: Safety Ground
25 Ah) • To minimize the power losses due to wiring from the external battery box to the 4007ES, use at least a 12 AWG wire. Mount the battery box within 20 feet of the panel in accordance with the mounting instruction label in the box. All interconnecting wiring must be enclosed in conduit. -
Page 11: Power
Chapter 2 Installation Power Final Installation To finalize the installation: 1. Reinstall the power supply and the electronics. 2. Follow the steps below to install the batteries: a. Place the first battery on the left side of the panel to avoid interference with the DACT (if installed). -
Page 13: Chapter. 3 Nac Power Supply
Chapter 3 NAC Power Supply Introduction A conventional reverse polarity NAC power supply is used in a 4007ES hybrid panel. It provides 6A and can support: • Non-addressable notification devices • Addressable initiating devices Refer to Figure 3-1 and Table 3-1for the main components of the NAC power supply. -
Page 14: Nac Power Supply Specifications
IMPORTANT: Refer to the 4007-9801 8-Point Zone/Relay Card Installation Instruction, manual 579-1103, to determine the draw of the pre-installed Zone/Relay card. Table 3-2. 4007ES Hybrid System Current Draw 2 A at 120 VAC, 50/60Hz Maximum AC Input 1 A at 240 VAC, 50/60Hz... -
Page 15: Nac Section
4007ES system are synchronized including any attached 4009 series Overview NAC extenders. Do not mix Wheelock and Simplex branded devices in the same system, they will not be synchronized. The following TrueAlert non-addressable appliances are Special Application compatible with the NAC power supply:... - Page 16 Chapter 3 NAC Power Supply NAC Section, Continued Wiring Wiring Distances Table 3-5 lists the maximum distances from the NAC terminal block to the last appliance in a Class A configuration, depending on wire gauge and current. Use Table 3-5 to calculate wire distances for your application if you are using Class A wiring.
- Page 17 Chapter 3 NAC Power Supply NAC Section, Continued Wiring Class A Wiring Note: The Class A wiring style is set up in the programmer. Refer to the 4007ES Programmer’s manual, 579-1167, for more information. To connect the power supply to reverse-polarity, non-addressable 12 AWG (3.309 mm...
-
Page 18: Troubleshooting
NAC2 NAC3 NAC4 RUI TBL LEDs RUI OC LEDs Figure 3-5. LEDs on the 4007ES Hybrid Power Supply Green. Off on AC failure LED10 LED2 RUI Trouble Yellow. On for Class A RUI trouble LED6 RUI OC Yellow. Indicates a short (overcurrent) Yellow. -
Page 19: Chapter. 4 Idnac Power Supply
Chapter 4 IDNAC Power Supply Introduction An IDNAC power supply is used in the 4007ES (non Hybrid) panel. It provides 4 A and can support: • Addressable notification devices • Addressable initiating devices Refer to Figure 4-1 and Table 4-1 for the main components of the IDNAC power supply. -
Page 20: Idnac Power Supply Specifications
Specifications CPU/Power Supply cards. The current draw taken from optional cards, IDNet Devices, Aux Power, and NACs must be subtracted from 4A. Table 4-2. 4007ES System Current Draw 2 A at 120 VAC, 50/60 Hz Maximum AC Input 1 A at 240 VAC, 50/60 Hz... -
Page 21: Idnac Section
Chapter 4 IDNAC Power Supply IDNAC Section IDNAC Section The IDNAC power supply has a single SLC for connecting addressable IDNAC devices. IDNAC Overview The power supply is compatible with TrueAlertES and TrueAlert Addressable product lines (both multi and fixed candela). The IDNAC output is Class B only. - Page 22 Chapter 4 IDNAC Power Supply IDNAC Section, Continued Wiring IDNAC Class B Wiring Tables Use the following tables to calculate the wiring distance to farthest appliance. Maximum wiring distance is the shorter of the distance limits as calculated by alarm current voltage drop or by reaching the communications distance limit.
- Page 23 Chapter 4 IDNAC Power Supply IDNAC Section, Continued Wiring IDNAC Class B Wiring To connect the power supply to IDNAC IDNAC IDNAC appliances using Class B wiring: Device Device Device 1. Route the wire from the “+” and the “-” outputs on the IDNAC terminal block (TB2) to the IDNAC IDNAC...
-
Page 24: Compatible Devices And Appliances
Compatible The devices and appliances listed in Table 4-8 are compatible with the IDNAC power supply. Devices and Notification devices are synchronized within the 4007ES system, including any attached 4009 Appliances series NAC extenders. Table 4-8. Compatible Devices and Appliances... - Page 25 Chapter 4 IDNAC Power Supply Table 4-8. Compatible Devices and Appliances LED Audible/Visible Wall 59AV-WRFH 59AV-WRFABH 59AV-APPLWRH Mount 59AV-WRFH-BA 59AV-WRFABH-BA 59AV-APPLWWH High Candela 59AV-WWFH-BA 59AV-WWFABH-BA 59AV-WRFO 59AV-WRFABO 59AV-APPLWR-O LED Audible/Visible Wall 59AV-WRFO-BA 59AV-WRFABO-BA 59AV-APPLWW-O Mount Weatherproof 59AV-WWFO-BA 59AV-WWFABO-BA LED Audible/Visible Wall 59AV-APPLWRH-O Mount High Candela 59AV-APPLWWH-O...
-
Page 26: Auxiliary Relays Section
Chapter 4 IDNAC Power Supply Auxiliary Relays Section Table 4-9. Auxiliary Relays Specifications Auxiliary Relays Electrical Specifications: Section Overview Relay circuit rated to 2 A at 30 VAC or 30 VDC, resistive load. switch: Relay contacts are Form C dry contacts. Transorbs provide Contacts: suppression to Earth. -
Page 27: Troubleshooting
The code produced by the lit yellow indicator LEDs corresponds to a trouble that is either occurring on the System or on the SLC Channels. See Table 4-10 for the 4007ES LED definitions and Table 4-11 for the LEDs and their codes. -
Page 28: System Trouble Led Codes
Chapter 4 IDNAC Power Supply Troubleshooting, Continued System Trouble System troubles are indicated by LEDs A to D. LED Codes Table 4-12. System Trouble LED Codes Description: No Trouble: There are no troubles detected on the system. AC Fail: The AC power is disconnected but the battery is working. Low Battery: The battery voltage is under 22.8 V. -
Page 29: Chapter. 5 4007Es Power Supplies
Chapter 5 4007ES Power Supplies Introduction This chapter describes the common sections of both the 4007ES Hybrid NAC power supply and the 4007ES IDNAC power supply. In this chapter Power Supplies Specifications......5-1 Wiring Guidelines ....... 5-1 IDNet Section Overview........5-2 Specifications ...... -
Page 30: Idnet Section
Chapter 5 4007ES Power Supplies IDNet Section IDNet Section The power supply provides an isolated IDNet Overview channel. This section is compatible with IDNet IDNet B+ B- A+ A- communicating initiating devices and allows the system CPU to communicate with up to 250 peripheral devices, such as smoke detectors and pull stations. -
Page 31: Wiring
Wiring Wiring Parameters Table 5-2 identifies the IDNet wiring parameters that must be considered when installing this card. For additional wiring information, refer to document 900-408, Simplex Addressable Fire Alarm Panels Field Wiring Specifications. Table 5-2. IDNet Wiring Parameters IDNet Wiring Capacitance Parameters... - Page 32 Chapter 5 4007ES Power Supplies IDNet Section, Continued Wiring Class A Wiring To wire IDNet section as a Class A circuit. 1. Make sure the jumpers on P2 are set to positions 3-5 and 4-6. 2. Route the wiring from the IDNet Circuit Primary Terminals (B+, B-) on TB1 of the IDNet to the corresponding inputs on the first device.
-
Page 33: Auxiliary Power Section
Figure 5-6. Simple NAC Wiring 4. If wiring is routed outside the building, use of a listed secondary protector is required. Use Simplex 2081-9028 (rated 5 A) or 2081- 9044 (rated 0.2 A). A protector must be installed at each building exit/entrance. Each 2081-9028 adds 0.2 ohms wiring resistance. - Page 34 AUX PWR/SNAC Output of AUX or NAC is 24V nominal. Minimum voltage is 19.5 @ minimum battery; maximum is 29.5V. Aux Loads include the compatible 4007ES Annunciators series, 4090 Overview series of IDNet ZAMs and IAMs and any listed device operating within the output limits of the AUX.
-
Page 35: Rui Section
Chapter 5 4007ES Power Supplies RUI Section RUI Overview The 4007ES RUI channel supports the following devices: B+ B- A+ A- • 4100-7401, 7402 Graphic Modules • 4602-6001, -7001, 7101, 9150 RCU/SCU Modules Wire from the power supply's RUI channel on terminal block TB1 to each RUI device. -
Page 36: Troubleshooting
Troubleshooting The code produced by the lit indicator LEDs corresponds to a trouble occurring on the system. See Table 5-7 for the IDNet LED definitions and Table 5-8 the 4007ES trouble messages. Table 5-7. 4007ES System Indicator LEDs Normally off. Turns on steady if the IDNet is Comm Trouble not communicating with the FACP CPU. -
Page 37: Chapter. 6 Optional Modules And Cards
For more information on the LED module, refer to manual 579-1105. SDACT Card The SDACT card (4007-9806) can be mounted in the 4007ES panel. It is used to notify a central station when an event occurs, to report changes to a specific point, to be connected to a transmitter for connection to a central station. -
Page 38: Alarm Relay Card
For more information on the DCAI, refer to manual 579-1029. Example of Figure 6-1, Figure 6-2, and Figure 6-3 are examples of some of the combinations that can be Combinations made in a 4007ES with the available optional cards and modules. Zone/Relay IDNet+ Loop Module... - Page 39 Chapter 6 Optional Modules and Cards Optional Modules and Cards, Continued Example of Combinations IDNet+ Loop Expansion cards Power Supply 25V Regulator Module TrueInsight Module City Circuit Module Zone/Relay Module Figure 6-2. Example 2 Zone/Relay IDNet+ Loop Module Expansion cards Dual Class A Isolator Card Power Supply...
-
Page 41: Appendix. A Ulc Programming Requirements
Appendix A ULC Programming Requirements Common Earth This application monitors a system pseudo that counts the number of ground faults or troubles Fault Ground and that occur on the system. Each time this counter increments (i.e. a ground fault or trouble Common Trouble occurs), a yellow LED on the operator interface panel illuminates. - Page 42 ULC Programming Requirements Common Earth Step 2. Open Color User Interface Card Properties Dialog Fault Ground and Common Trouble 1. Click on the Hardware Tab and expand the Unit 0, Box 1, Bay 1 icons to display the Color Indicator User Interface Card.
- Page 44 579-1102 Rev. E © 2015-2016 Tyco Fire Protection Products. Specifications and other information were current as of publication and are subject to change without notice.
Need help?
Do you have a question about the 4007ES and is the answer not in the manual?
Questions and answers
Panel screen says "Touchscreen UI unavailable! Redownload UI App!"
When the Simplex 4007ES panel displays "Touchscreen UI unavailable! Redownload UI App!", re-download the UI application to the panel. This can be done through the download options in the programming software by selecting the appropriate file and downloading it to the running panel. Ensure the option "Apply download changes after download" is selected to apply the changes immediately.
This answer is automatically generated