
Related Manuals for SHOWTEC Colorburst V1


Summary of Contents for SHOWTEC Colorburst V1
- Page 1 MANUAL ENGLISH Colorburst Ordercode: 43163 Highlite International B.V. – Vestastraat 2 – 6468 EX – Kerkrade – the Netherlands...
-
Page 2: Table Of Contents
Colorburst Table of contents Warning ....................................2 Safety Instructions ................................. 2 Operating Determinations ............................5 Laser safety for a Class 3B Laser Product ......................... 5 Rigging .................................... 7 Connection with the mains ............................8 Return Procedure ................................8 Claims ....................................8 Description of the device .............................. -
Page 3: Warning
Save the carton and all packing materials. In the event that a fixture must be returned to the factory, it is important that the fixture be returned in the original factory box and packing. Your shipment includes: ● Showtec Colorburst ● IEC Power cable (1,5 m) ●... - Page 4 Colorburst Before the initial start-up, please make sure that there is no damage caused by transportation. Should there be any, consult your dealer and do not use the device. To maintain perfect condition and to ensure a safe operation, it is absolutely necessary for the user to follow the safety instructions and warning notes contained in this manual.
- Page 5 ● If your Showtec device fails to work properly, discontinue the use immediately. Pack the unit securely (preferably in the original packing material), and return it to your Showtec dealer for service.
-
Page 6: Operating Determinations
Colorburst Operating Determinations ● This device is not designed for permanent operation. Consistent operation breaks will ensure that the device will serve you for a long time without defects. ● The minimum distance between light output and the illuminated surface must be bigger than 1 meter. - Page 7 Colorburst Compliance Statement Your Colorburst Laser has been designed to comply with FDA and IEC Standards for its classification. The Colorburst is a Class 2M laser product. Laser Safety and Compliance Information The Colorburst is manufactured to comply with the IEC 60825-1 and in accordance with U.S. Food and Drug Administration (FDA) Standards Listed under FDA Document 21 CFR 1040 and subsequent laser notices.
-
Page 8: Rigging
Colorburst According to FDA Regulations you should operate this product as stated on the left. Rigging Please follow the European and national guidelines concerning rigging, trussing and all other safety issues. Do not attempt the installation yourself ! Always let the installation be carried out by an authorized dealer ! Procedure: ●... -
Page 9: Connection With The Mains
Colorburst Connection with the mains Connect the device to the mains with the power-plug. Always check if the right color cable is connected to the right place. International EU Cable UK Cable US Cable BROWN YELLOW/COPPER PHASE BLUE BLACK SILVER NEUTRAL YELLOW/GREEN GREEN... -
Page 10: Description Of The Device
Colorburst Description of the device Features The Colorburst is a multifunctional light effect with high output and great effects. It combines laser effects, strobe effects and LED effects in one device. ● Multifunctional device ● RGBW LEDs ● Input voltage: 100-240V AC, 50/60Hz ●... -
Page 11: Frontside
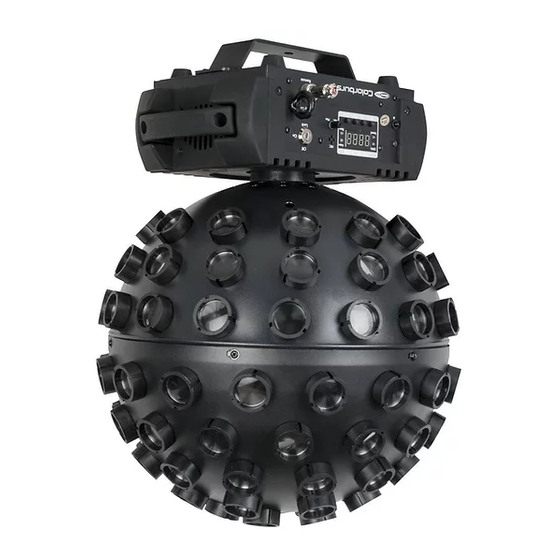
Colorburst Frontside Fig. 01 01) Laser lens 02) 5 x 8W RGBW LEDs 03) IR-remote sensor 04) LED display + menu buttons + Function LED indicators 05) Sound sensitivity control 06) Built-in microphone 07) Remote control plug 08) Safety eye 09) Interlock Backside Fig. -
Page 12: Installation
Colorburst Installation Remove all packing materials from the Colorburst. Check if all foam and plastic padding is removed. Connect all cables. Do not supply power before the whole system is set up and connected properly. Always disconnect from electric mains power supply before cleaning or servicing. Damages caused by non-observance are not subject to warranty. -
Page 13: Control Modes
Colorburst Exclusion of liability Be aware that in some countries, there are additional regulations, regarding the use of laser devices. Therefore, we strongly advise you to verify your national laws with your authorities: We do not take any responsibility for eventual discrepancies, changes or adaptions regarding lawful use of laser devices. Fig. -
Page 14: Multiple Colorbursts (Master/Slave Control)
Colorburst Multiple Colorbursts (Master/Slave control) 01) Fasten the effect light onto firm trussing. Leave at least 0,5 meter on all sides for air circulation. 02) Always use a safety cable (ordercode 70140 / 70141). 03) Use a 3-p XLR cable to connect the Colorbursts and other devices. The pins: 1. -
Page 15: Fixture Linking
Colorburst Multiple Colorbursts DMX Set Up Fig. 06 Note: Link all cables before connecting electric power Fixture Linking You will need a serial data link to run light shows of one or more fixtures using a DMX-512 controller or to run synchronized shows of two or more fixtures set to a master/slave operating mode. -
Page 16: Control Panel
Colorburst The Colorburst can be operated with a controller in control mode or without the controller in stand-alone mode. Control Panel A) DMX LED LED display C) Auto LED D) Sound LED Menu button Up button G) Down button Enter button Slave LED Fig. -
Page 17: Menu Overview
Colorburst Menu Overview The Colorburst will only show its version number at start-up ! Main Menu Options Auto Run Programs Sound-controlled Mode Static Color Mode DMX Channels / DMX Address Slave Mode System Settings Ordercode: 43163... -
Page 18: Auto Run Programs
Colorburst 1. Auto Run Programs With this menu you can start several Auto Run Programs. 01) Press the Menu button until the display shows 02) Press the Enter button to open the menu. 03) Press the Up and Down buttons to choose between 7 built-in programs 04) Choose the desired built-in program and press the Enter button to confirm. -
Page 19: Dmx Address / Dmx Channels
Colorburst 07) If you choose the laser settings, press the Up and Down buttons to choose between (no laser output), (only red output), (only green output) or (red and green output). 08) If you choose the strobe settings from the laser, press the Up and Down buttons to set the strobe. The adjustment range is between , from slow to fast and is the sound-... -
Page 20: Remote Control
Colorburst 09) Press the Up and Down buttons to choose between 10) If you choose , the text will be displayed normally. 11) If you choose , the text will be displayed reversed. 12) If you have chosen , press the Enter button to activate the IR mode. 13) If you choose , the included IR remote control will not work. -
Page 21: Dmx Channels
Colorburst DMX Channels 3 channels Channel 1 – Auto (CH2 must be set between 0-250 ) and Sound Programs (CH2 must be set between 251-255 No function 6-40 Auto program 1/ Sound program 1 41-76 Auto program 2/ Sound program 2 77-112 Auto program 3/ Sound program 3 113-148... - Page 22 Colorburst 115-125 Blue/Red Blue/Green Blue/White 126-136 White/Red White/Green White/Blue 137-147 Red/Green Red/Green Red/Green 148-158 Red/Blue Red/Blue Red/Blue 159-169 Red/White Red/White Red/White 170-180 Green/Blue Green/Blue Green/Blue 181-191 Green/White Green/White Green/White 192-202 Blue/White Blue/White Blue/White 203-213 Red/Green/Blue Red/Green/Blue Red/Green/Blue 214-224 Red/Green/White Red/Green/White Red/Green/White 225-235 Green/Blue/White...
-
Page 23: Channels
Colorburst 22 channels Channel 1 – Red Dimmer intensity LED 1 (CH17 must be set between 1-255 0-255 Gradual adjustment Red from 0-100% Channel 2 – Green Dimmer intensity LED 1 (CH17 must be set between 1-255 0-255 Gradual adjustment Green from 0-100% Channel 3 –... - Page 24 Colorburst Channel 15– Strobe LED 3 (CH11, CH12, CH13 or CH14 and CH17 must be set between 1-255 No function 6-250 Strobe flash frequency, from slow to fast 251-255 Sound-activated strobe Channel 16 – LEDs color control (CH17 must be set between 1-255 No function LED1 LED2...
-
Page 25: Maintenance
Colorburst Channel 20 – Auto and Sound Programs No function 6-40 Auto program 1/ Sound program 1 41-76 Auto program 2/ Sound program 2 77-112 Auto program 3/ Sound program 3 113-148 Auto program 4/ Sound program 4 149-184 Auto program 5/ Sound program 5 185-220 Auto program 6/ Sound program 6 221-255... -
Page 26: Troubleshooting
Suspect four potential problem areas as: the power supply, the laser, LEDs, the fuse. 01) Power supply. Check that the unit is plugged into an appropriate power supply. 02) The laser. Return the Colorburst to your Showtec dealer. 03) The LEDs. Return the Colorburst to your Showtec dealer. - Page 27 Colorburst Problem Probable cause(s) Solution No power to the fixture • Check if power is switched on and One or more cables are plugged in fixtures do not function at all Primary fuse blown. • Replace fuse. Fixtures reset The controller is not connected. •...
-
Page 28: Product Specifications
Colorburst Product Specifications Model: Showtec Colorburst Input Voltage: 100-240V AC, 50/60Hz Power consumption: 63W (full output) DMX linking: 30 pcs Power linking @110V 12 pcs Power linking @240V 21 pcs Protection rate: IP-20 Fuse: T1.6L/250V Dimensions: 320 x 320 x 400 mm (LxWxH) -
Page 29: Dimensions
Colorburst Dimensions Ordercode: 43163... -
Page 30: Notes
Colorburst Notes Ordercode: 43163... - Page 31 Colorburst Ordercode: 43163...
- Page 32 ©2018 Showtec...
Need help?
Do you have a question about the Colorburst V1 and is the answer not in the manual?
Questions and answers