AVer CAM540 User Manual
Hide thumbs
Also See for CAM540:
- Quick start manual (40 pages) ,
- Quick installation manual (8 pages) ,
- User manual (38 pages)
Table of Contents
Advertisement
Advertisement
Table of Contents

Related Manuals for AVer CAM540


Summary of Contents for AVer CAM540
- Page 1 CAM540 User Manual...
- Page 2 Federal Communications Commission Statement This device complies with Part 15 of the FCC Rules. Operation is subject to the following two conditions: (1) This device may not cause harmful interference, and (2) this device must accept any interference received, including interference that may cause undesired operation. This equipment has been tested and found to comply with the limits for a Class B digital device, pursuant to Part 15 of the FCC Rules.
- Page 3 The information contained in this documentation is subject to change without notice. In no event will AVer Information Inc. be liable for direct, indirect, special, incidental, or consequential damages arising out of the use or inability to use this product or documentation, even if advised of the possibility of such damages.
- Page 4 (carbon-zinc) or rechargeable (nickel-cadmium). Do not dispose of batteries in a fire. Do not attempt to short-circuit the battery terminals. Contact Information Global AVer Information Inc. AVer Information Inc. www.aver.com 668 Mission Ct 8F, No.157, Da-An Rd., Tucheng Fremont, CA 94539 Dist.,...
-
Page 5: Table Of Contents
Contents Package Contents ....................1 Optional Accessories ..................1 Product Introduction ....................2 Camera ......................2 Remote Control ....................3 Installation ....................... 5 Device Connection ..................5 Wall Mount Installation ..................6 Celling Mount and Switch Box Installation ............9 Secure USB Cable .................. - Page 6 AVer PTZApp ......................14 Install AVer PTZApp ..................14 Use AVer PTZApp ..................14 Set the Camera Number ................19 Hotkey Control ....................20 Home / Sleep Position ................... 21 ADDR / Protocol/Baud Rate ................21 OpenGL ......................21 Install EZLive ......................22...
-
Page 7: Package Contents
Package Contents Remote controller Power Adapter Camera USB Cable AAA Batteries Power plus* USB type-A to Screws for mount L-Mount Bracket Quick Guide type-C adapter (For US only) * The power cord will vary depending on the standard power outlet of the country where it is sold. Optional Accessories RS232 to D-sub cable... -
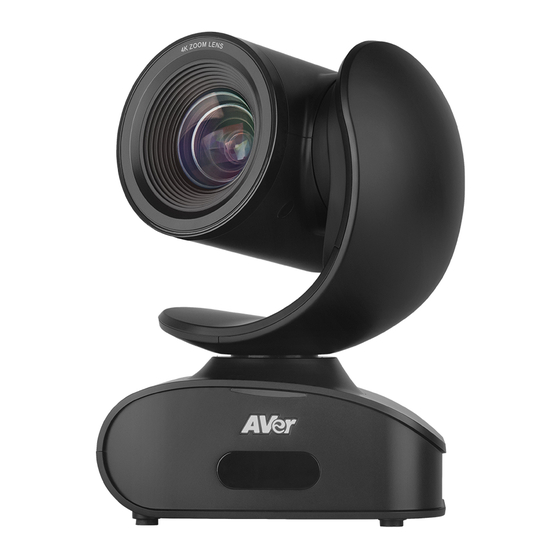
Page 8: Product Introduction
Product Introduction Camera IR sensor Reset button Power port Kensington Lock RS232 port Screw hole for mounting USB port... -
Page 9: Remote Control
Remote Controller Name Function 1. Camera select One remote can control up to 3 AVer VC/CAM. Use AVer PTZApp sets number associated with each camera, select which camera you like to control on the remote. 2. Camera direction control Use the direction button on the remote to control the direction of the camera. - Page 10 Adjust volume up or down. 12. Far site camera control** Press the Far/Near button to control the far site camera for pan, tilt, or zoom functions. 13. Hang up* End the call. * Function requires AVer PTZApp ** Not support for CAM540...
-
Page 11: Installation
Connect the power to the CAM540; power indicator will light up and camera head will rotate. Install AVer PTZApp on laptop or PC that is connected with CAM540. The app can be used to adjust and setup the parameters of the camera (refer to the section of AVer PTZApp) ®... -
Page 12: Wall Mount Installation
Wall Mount Installation 1. According to below figure to drill the hole on the wall where the user wants to mount the camera. 97.5mm(3.84”) 4 - Ø5.5mm(Ø0.22”) 58mm(2.28”) 2. Secure the wall mount bracket on the wall within screws. - Page 13 3. Secure the screw to the camera. Don’t screw tight, leave some space for later installation. 4. Install the camera to the wall mount bracket. 5. Connect the necessary cables to the camera. [Note] You may use cable ties to organizer cables.
- Page 14 6. Secure the camera with screws; please follow the order as figure shown to secure the camera.
-
Page 15: Celling Mount And Switch Box Installation
Celling Mount and Switch Box Installation The camera can be mounted on the celling, please refer the following steps. 1. Secure the screw on to the camera. Don’t screw tight, leave some space for later installation. 2. Place the camera to the wall mount bracket. 3. - Page 16 4. Secure the camera with screws; please follow the order as figure shown to secure the camera. 5. Refer to the figure shown which the holes to secure the wall mount bracket with camera to the celling. For the switch box installation, refer to the figure shown to secure the wall mount bracket to the switch box.
-
Page 17: Secure Usb Cable
Secure USB Cable Install the cable first and secure the cable. [Note] Make sure the cable is well connect to the connector on the camera before secure the cable Pan and Tilt Angle 90° ±160° 30°... -
Page 18: Rs232 Connection
RS232 Connection Through the RS232 connection, the user can control the camera unit. -
Page 19: Make A Video Call
The CAM540 is a plug-and-play conference camera. The system requires no special drivers, but we do recommend installing the AVer PTZApp for a better user experience. For information on how to install and use the AVer PTZApp, refer to the AVer PTZApp section in this user manual. -
Page 20: Aver Ptzapp
Click on it to accept the plug-in; your video application can now be control by AVer PTZApp and remote control. 2. During your video call, you can use the AVer PTZApp to pan, tilt and zoom the camera in/out and enable/disable the backlight feature. - Page 21 Currently selected device: This field displays currently selected VC or CAM device controlled by PTZApp. If you have more than one AVer VC or CAM devices connected to this PC/Mac PTZApp is running, you can click on the drop-down list to select other AVer VC or CAM device.
- Page 22 You can also update the firmware of the camera. c. Minimize: Minimize the app to system tray. To quit the application, right-click the icon on the system tray and select “Quit”. : Click icon will launch the browser and connect to the AVer PTZApp web page.
- Page 23 Normal Un-normal Connection diagnostic: Display devices connection status. If the AVer PTZApp has detected that camera and laptop/PC are not connected well, the diagram will display an “?” on the camera to indicate the connection has a problem. If the camera is in use by another application, it will...
- Page 24 To leave the page, click the Abort Diagnostic button. h. Update Now: Allows the user to update the CAM540 camera’s firmware. 1. Click” Update Now”. 2. A dialog will display the current firmware version and available new firmware version (internet connection is required).
-
Page 25: Set The Camera Number
Troubleshooting: collect more system information for troubleshooting before you contact AVer technical support. Set the Camera Number With multiple cameras connection, users can set each camera to buttons 1 to 3 on the remote control. If PTZApp detects computer connects to multiple VC/CAM, you can select which camera you like to control through the dropdown list. -
Page 26: Hotkey Control
Hotkey Control Enable hotkey control to use keyboard control camera’s movement and backlight. Select “Settings” Set Hotkey Control to “On”. A hotkey description as below figure shown:... -
Page 27: Home / Sleep Position
Home / Sleep Position Home Position: There are three options: Last operating position/Factory central position/ Preset 0 Sleep Position: There are two options -- Factory sleep position/ Preset 9 If the camera idles for more than 3 minutes, it will enter sleep mode. ADDR / Protocol/Baud Rate These settings are related to RS232 functions. -
Page 28: Install Ezlive
Install EZLive Please go to http://www.aver.com/download-center to download the AVer EZLive software. After downloading, double-click on the file and follow the on-screen instructions to complete the installation. Use AVer EZLive During a video call, EZLive can help user to do:...
Need help?
Do you have a question about the CAM540 and is the answer not in the manual?
Questions and answers