Table of Contents
Advertisement
Advertisement
Table of Contents

Subscribe to Our Youtube Channel
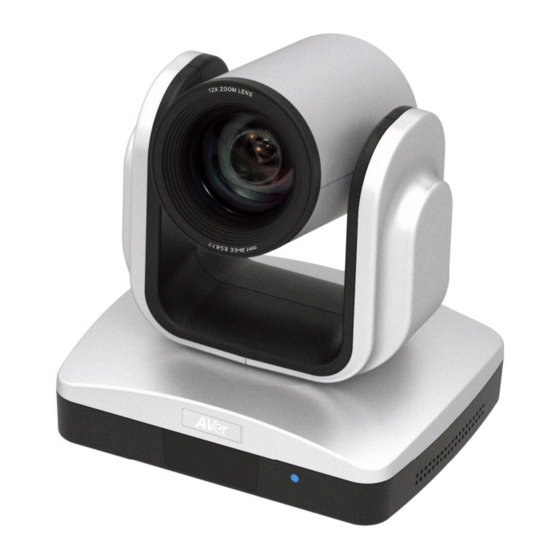
Summary of Contents for AVer CAM520
- Page 1 CAM520 User Manual...
- Page 2 The information contained in this documentation is subject to change without notice. In no event will AVer Information Inc. be liable for direct, indirect, special, incidental, or consequential damages arising out of the use or inability to use this product or documentation, even if advised of the possibility of such damages.
- Page 3 © 2016 AVer Information Inc. All rights reserved. All rights of this object belong to AVer Information Inc. Reproduced or transmitted in any form or by any means without the prior written permission of AVer Information Inc. is prohibited. All information or specifications are subject to change without prior notice.
-
Page 4: Table Of Contents
Contents Package Contents ..........................1 Product Introduction ........................... 2 Camera ............................2 Remote Control ........................... 3 Setup CAM520 ..........................5 Device Connection ........................5 Mounting Camera ........................6 Use CAM520 ............................. 7 Make a Video Call ........................7 LED Indicator ..........................7 AVer PTZApp ............................. -
Page 5: Package Contents
Package Contents 1. CAM520 5. USB cable 2. Mount (mounting screws are included) 6. User Manual 3. Power Cord & Power adapter 7. AAA Batteries (x2) 4. Remote Control * The power cord will vary depending on the standard power outlet of the country where it is sold. -
Page 6: Product Introduction
1. IR Sensor 5. Power Jack 2. Power indictor 6. Kensington lock 3. RS232 connection* 7. Screw hole for mounting 4. USB port * If you need a converter or instructions on how to use RS232, please contact AVer USA. -
Page 7: Remote Control
1. Camera select One remote can control up to 3 AVer VC/Cam. Please use the AVer PTZApp to set cameras to buttons 1 to 3. Once set, camera may be selected by a simple press of the camera select button. - Page 8 Press the Far/Near button to control the far site camera for pan, 12. Far site camera control tilt, or zoom functions. 13. Hang up* End the call. Function requires AVer PTZApp. ** Only support on CAM530. [Note] Volume control and mute buttons are not applicable to CAM520.
-
Page 9: Setup Cam520
2. Connect the power to the CAM520; power indicator will light up and camera head will rotate. 3. Install AVer PTZApp on laptop or PC that is connected with CAM520. The app can be used to adjust and setup the parameters of the camera (refer to section of AVer PTZApp) ®... -
Page 10: Mounting Camera
Mounting Camera There are 3 ways to mount the camera – on the wall, on the ceiling, and on a table with the mount and screws included in the package. [Warning] 1. When securing the camera mount on a wall or celling, only use hardware and materials certified to support 22 lb (10 kg) weight. -
Page 11: Use Cam520
GoToMeeting , WebRTC, and etc.) on your PC or l laptop. 3. Set the CAM520 camera as the primary camera for your video application (refer to your video application user guide). You can now make your call. 4. The CAM520 is a plug-and-play conference camera. The system requires no special drivers, but we do recommend installing the AVer PTZApp for a better user experience. -
Page 12: Aver Ptzapp
Skype. Click on the Skype plug-in request to accept the plug-in; this enables funcationality on the Remote Control. 2. During your video call, you can use the AVer PTZApp to pan, tilt and zoom the camera in/out and enable/disable the backlight feature. - Page 13 a. Function icon: Click it to switch to the function’s page. PTZ: To control the camera direction, zoom in and out, and to enable/disable the backlight compensation during your video call. Settings: To setup parameters of the camera – White balance, noise filter, frequency, brightness, sharpness, flip, mirror, ADDR, baud rate, H.264 stream, and numeric key control.
- Page 14 Diagnostic Utility: To display the S/W and F/W version and the devices connection status. You can also update the firmware of the camera. b. Minimize: Minimize the app to system tray. To quit the application, right-click the icon on the system tray and select “Quit”.
- Page 15 Connection diagnostic: Display devices connection status. If the AVer PTZApp has detected that camera and laptop/PC are not connected well, the diagram will display an “X” on the camera to indicate the connection has a problem. If the camera is in use by another application, it will display “Can’t start video”...
- Page 16 Currently selected device: This field displays currently selected VC or CAM device controlled by PTZApp. If you have more than one AVer VC or CAM devices connected to this PC/Mac PTZApp is running, you can click on the drop down list to select other AVer VC or CAM device.
-
Page 17: Select Remote Control
Select Remote Control CAM520 supports two different remote controls. Please select your remote. -
Page 18: Set The Camera Number
Set the Camera Number With multiple cameras connected, users can set each camera to buttons 1 to 3 on remote control. 1. If PTZApp detects computer connects to multiple VC/CAM, you can select which camera you like to control through the dropdown list. 2. -
Page 19: Hotkey Control
Hotkey Control Enable hotkey control to use keyboard control camera’s movement and backlight. 1. Selet “Settings” 2. Set Hotkey Control to “On”. 3. A hotkey description as below figure shown:...


Need help?
Do you have a question about the CAM520 and is the answer not in the manual?
Questions and answers