AVer CAM540 Quick Installation Manual
Hide thumbs
Also See for CAM540:
- User manual (28 pages) ,
- Quick start manual (40 pages) ,
- User manual (38 pages)
Table of Contents
Advertisement
Quick Links
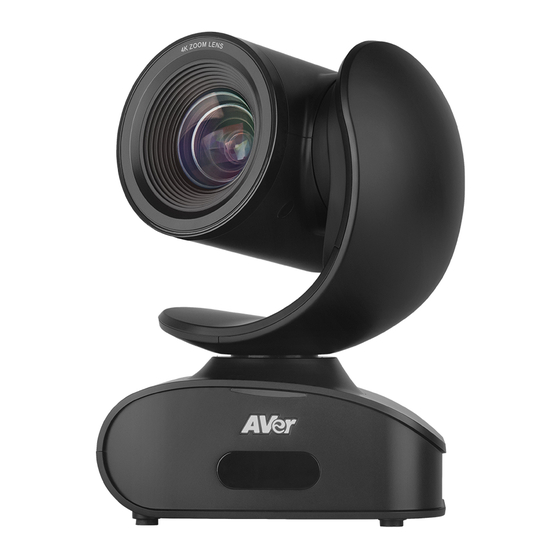
CAM540 Conference Camera
Quick Installation Guide
Package Contents
Camera
L-Mount Bracket
*The power plug will vary depending on the standard power outlet of the country where it is sold.
Overview
(1)
(1)
IR sensor
(2)
Power port
AAA Batteries
/
Screws for mount
(3)
RS232 port
(4)
USB port
Power Adapter
Power plug*
Quick Guide
(2)
(3)
(4)
(5)
(5)
Reset button
(6)
Kensington Lock
USB Cable
Warranty card
type-C adapter
(6)
(7)
(7)
Screw hole for mounting
P/N: 300AU300-???
USB type-A to
Advertisement
Table of Contents

Related Manuals for AVer CAM540


Summary of Contents for AVer CAM540
- Page 1 CAM540 Conference Camera Quick Installation Guide Package Contents Remote controller Power Adapter Camera USB Cable AAA Batteries Power plug* / USB type-A to L-Mount Bracket Screws for mount Quick Guide Warranty card type-C adapter ...
- Page 2 Installation 1. Connect the camera to power outlet. Power cord 3. Install the cable first and secure the 2. Connect the camera to the computer. [Note] If you like to use the type-C connector on cable. newer PC, connect provided adapter to type-A [Note] Make sure the cable is well connect to end of the cable, then connect type-C side of the the connector on the camera before secure the...
- Page 3 Wall Mount Installation Continue Celling Mount/ Switch Box Installation Switch Box ...
- Page 4 , Adobe Connect , WebRTC, TrueConf, V-Cube, U-meeting, Ringcentral, BlueJeans, Fuze. Step 2: Set the CAM540 as your primary camera device in your application (Please consult your application setup guide for details). Step 3: Ready to make a video call.
- Page 5 1. Run your video application. 2. During your video call, you can use the AVer PTZApp to pan, tilt and zoom the camera in/out and enable/disable the backlight feature, set up camera Home or Sleep mode preset points. For more details, please refer to the user manual.
- Page 6 5. Hotkey Control: Enable hotkey control to use keyboard control camera’s movement and backlight. The default is off. When hotkey control is enabled, a hotkey tip will display when mouse is moved to the PTZ control button in PTZ mode.
- Page 7 (2) this device must accept any interference received, including interference that may cause undesired operation. Warning: This is a class A product. In a domestic environment this product may cause radio interference in which case the user may be required to take adequate measures. ©2019 AVer Information Inc. All rights reserved. ...
Need help?
Do you have a question about the CAM540 and is the answer not in the manual?
Questions and answers