Table of Contents
Advertisement
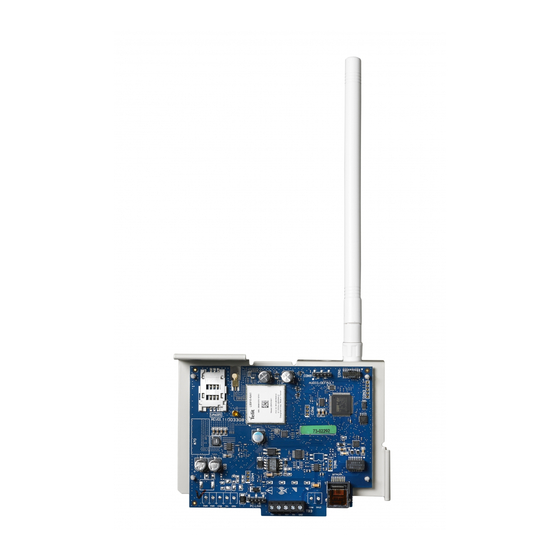
TL280LE(R)
Internet and LTE/HSPA Dual-Path Alarm
Communicator
LE2080(R)
LTE/HSPA Alarm Communicator
3G2080(R)E
HSPA Cellular Alarm Communicator
TL2803G(R)E
Internet and HSPA Dual-Path Alarm Communicator
TL280(R)E
Internet Alarm Communicator
Installation Manual 5.x
Warning: This manual contains information on limitations regarding product use and function and information on the
limitations as to the liability of the manufacturer. The entire manual should be carefully read.
Please note that not all models and features listed are available in all markets.
Advertisement
Table of Contents

Related Manuals for DSC PowerSeries Neo LE2080


Summary of Contents for DSC PowerSeries Neo LE2080
- Page 1 TL280LE(R) Internet and LTE/HSPA Dual-Path Alarm Communicator LE2080(R) LTE/HSPA Alarm Communicator 3G2080(R)E HSPA Cellular Alarm Communicator TL2803G(R)E Internet and HSPA Dual-Path Alarm Communicator TL280(R)E Internet Alarm Communicator Installation Manual 5.x Warning: This manual contains information on limitations regarding product use and function and information on the limitations as to the liability of the manufacturer.
- Page 3 ers, radiators, stoves, barbecues, fireplaces, sunlight, steam vents, lighting and so WARNING: Installer please read carefully Note to Installers Power Failure The warningson this page contain vitalinformation. Asthe only individualin contact Controlunits, intrusion detectors, smoke detectorsand manyother securitydevices with systemusers, it isthe installer’sresponsibilityto bring each itemin thiswarning to require an adequate power supply for proper operation.
-
Page 4: Table Of Contents
Table of Contents Table of Contents General Safety Information Model Information Panel Mounting Features Technical Specifications EN50131-1 Installation Requirements Ratings Compatibility Pre Installation Configuration Encryption Communicator Installation Configuration Installing the Ethernet Cable (TL Models Only) Inserting and Removing the SIM Card Running the RS-232 Cable (R models only) Installing Communicator in Panel Installing the Communicator with HS20XX Panels... - Page 5 Programming Options Communications Reporting Codes System Test Options Ethernet Receiver 1 Options Ethernet Receiver 2 Options Ethernet Options Cellular Receiver 1 Options Cellular Receiver 2 Options Cellular Options SMS Event Notification/Command and Control Options External Event Label Programming Receiver Diagnostic Testing System Information (Read Only) System Reset Defaults Ethernet Cellular Programming Worksheets...
-
Page 6: General
3rd party product solutions. Specific programming for the related programming sections is to be provided by the 3rd party. A current list of compatible 3rd party solutions can be found at www.dsc.com. 3G2080(R)E: Is a HSPA(3G) cellular alarm communicator that sends alarm communication to Sur-Gard System I-IP, II, III... -
Page 7: Panel Mounting
work. TL2803G(R)E: Is a dual-path HSPA(3G) Ethernet alarm communicator that sends alarm communication to Sur-Gard System -IPI, II, III, IV, and 5 central station receivers through Ethernet/Internet or a HSPA(3G)/GPRS digital cellular network. TL280(R)E: Is an Ethernet alarm communicator that sends alarm communication to Sur-Gard System I-IP, II, III (SG- DRL3IP), IV (SG-DRL4IP), and 5 (SG-DRL5IP) central station receivers via Ethernet/Internet. -
Page 8: En50131-1 Installation Requirements
EN50131-1 Installation Requirements For EN50131-1 compliant installations, the following programming options shall be set as described. Supervision Heart- beat (required for ATS4 and ATS5): [851][004] set to 0087h (135s heartbeat). NOTE: The compatible receiver at ARC location shall have supervision window programmed for 1800s (ATS4) or 180s (ATS5). -
Page 9: Pre Installation Configuration
Table 2: Compatible Receivers and Panels Communicator Receiver/Panel Description Sur-Gard System I-IP Receiver, version 1.13+ Sur-Gard System II Receiver, version 2.10+ Sur-Gard SG-DRL3-IP, version 2.30+ (for Sur-Gard System III Receiver) Receiver 3G2080(R)E Sur-Gard SG-DRL4-IP version 1.20+ (for Sur-Gard System IV Receiver) LE2080(R) Sur-Gard SG-DRL5-IP version 1.00+ (for Sur-Gard System 5 Receiver) TL2803G(R)E... -
Page 10: Inserting And Removing The Sim Card
Inserting and Removing the SIM Card Remove the front cover of the panel to access SIM holder. Remove power from the panel and disconnect the battery and telephone line. OPEN On the SIM card holder push gently to slide the cover downwards to . -
Page 11: Installing Communicator In Panel
Installing Communicator in Panel Installing the Communicator with HS20XX Panels NOTE: Before installing the communicator or inserting/removing SIM, ensure that system power is off and telephone line is disconnected. Figure 1 To assemble supplied mounting bracket, perform the following: (See Remove the 4 white plastic standoffs from the bag provided with the communicator kit. - Page 12 Install the Communicator into the panel: Attach one end of the PC-LINK cable to the panel PCLINK_2 header on the panel (red wire goes on the right- panel Figure 3 hand pin of the PCLINK_2 header (see b. Insert the assembled communicator into the panel. NOTE: Ensure that the threaded antenna connection is visible through the knockout hole at the top right of the panel.
- Page 13 100mA TL280(R)E Jumper pins 4 and 5 to reset 400mA alarm Network Link - Yellow DSC Panel minimum power requirements: From NID use only CAT5 supervised 16.5 VAC 40 VA transformer maximum cable length 100m (328 feet) 12 VDC 7Ah battery...
-
Page 14: Communicator Placement Test
The communicator’s red and yellow LEDs flash together while it initializes. The red and yellow LEDs will continue to flash until the communicator has successfully communicated to all programmed receivers. NOTE: During radio reset, the two green LEDs will flash alternately. NOTE: Initialization may take several minutes to complete. -
Page 15: Initial Panel Programming
Mount the supplied antenna extension bracket at the location that provides the best signal strength. If necessary, relocate the panel to improve signal strength. Initial Panel Programming When final panel/antenna location is determined, continue at the section. NOTE: If the SIM card is not activated, placement test will indicate the signal strength of the nearest cellular tower. NOTE: In between displaying signal strength, the signal strength LEDs will flash alternately if an inactive SIM card is used. -
Page 16: Sms Command And Control
SMS Command and Control Certain functions can be performed on the alarm panel by remote using SMS text messages. In addition, the system sends SMS messages to confirm commands. SMS programming options are accessed through programming section [851]. The security system only responds to SMS messages sent from designated phone numbers (programmed in section [851]> [311]-[328]). -
Page 17: Panel Supervision Trouble (2 Flashes)
Panel Supervision Trouble (2 Flashes) This trouble occurs when communication between the communicator module and the panel fails. If the module can not com- municate with the panel (e.g., loss of power to the panel) the communicator will send the ‘Panel Absent Trouble' event mes- sage to the central station receiver. -
Page 18: Communicator Reset/Update
Table 6: Radio Signal Strength Signal Yellow Green Green Signal Action Required Strength Level LED 2 LED 1 Level dBm If this status persists and the yellow LED shows 5 Radio Alternate Alternate flashes, confirm that the SIM card is active. Confirm cellular service is active in area. -
Page 19: Communicator Troubleshooting
Communicator Troubleshooting NOTE: For additional details: Refer to section [983] for troubleshooting the firmware updates Refer to section [984] to view the trouble status Refer to section [985] for troubleshooting radio initialization Table 7: Trouble Indications Trouble Trouble Possible Trouble Possible Solution indication Indicator Digit Causes... - Page 20 Trouble Trouble Possible Trouble Possible Solution indication Indicator Digit Causes Receiver This trouble is indicated when supervision is enabled and the unit Yellow LED Supervision is not able to successfully communicate with the receiver. – 8 Flashes If this trouble persists, contact the central station. Trouble The unit has exhausted all communications attempts to all Yellow LED...
-
Page 21: Ethernet/Cellular Programming Options
Ethernet/Cellular Programming Options The programming sections described in this document can be viewed at the keypad LCD. To start programming, enter: [*] [8][installer code] [851] [section number], where section number is the 3-digit section number referenced in this section. The programming worksheets at the end of this document can be used to record the new values when programming changes have been made from the default values. - Page 22 ON: Cellular Receiver 1 supervision is enabled, and heartbeats will be sent to this receiver using the supervision inter- val programmed in Section [004] (for NA installations) or section [014] (for international installations). If an acknow- ledgment signal is not received within 5 seconds, the signal will be re-transmitted. If the communicator fails to receive an acknowledgment for two consecutive heartbeat signals, the radio will be rebooted.
-
Page 23: Programming Options
NOTE: If no value is programmed and DHCP is used, the DHCP server will configure the address. If an address is pro- grammed and DHCP is used, the programmed address will be used instead of the DHCP address. [008] Backup Ethernet DNS IP Default (000.000.000.000) Enter the IP address for DNS server 2. - Page 24 [013] DLS Outgoing Port Default (0BFA/3066) The DLS outgoing port is used for outgoing sessions to DLS after an SMS request has been sent to the communicator. Use this section to set the value of the local outgoing port. The value must be changed if the communicator is located behind a firewall and must be assigned a particular port number, as determined by the network administrator.
- Page 25 [020] Time Zone Default (00) Please refer to the panel manual section ‘Real-Time Clock’ for more details. Use Column 2 (Offset Hours) to find the local Time Zone. Record the two-digit HEX value from Column 1 (HEX Value) on the same row. Program this HEX value for the Time Zone.
-
Page 26: Communications Reporting Codes
Offset Standard Location Value Hours Abbreviation 8.75 ACWST Australian Central Western Standard Time Korea Standard Time ACST Australian Central Standard Time AEST Australian Eastern Standard Time 10.5 LHST Lord Howe Standard Time Vanuatu Time 11.5 Norfolk Island Time NZST New Zealand Standard Time 12.75 CHAST Chatham Island Standard Time... -
Page 27: System Test Options
[023] Panel Absent Trouble Default (FF) Program 00 to disable this event or FF to enable. This event will occur when communications with the panel have been lost for more than 60 seconds. [024] Panel Absent Trouble Restore Default (FF) Program 00 to disable this event or FF to enable. -
Page 28: Ethernet Receiver 1 Options
[029] Cellular 2 Test Transmission Default (00) Program 00 to disable this event transmission or FF to enable. See System Test Options (previous page) for details on set- tings. NOTE: The time interval (in minutes) between periodic tests is programmed in section [125] (Ethernet) and section [225] (cellular). -
Page 29: Ethernet Receiver 2 Options
Unattended mode is used when a receiver is not available and the unit is required to perform DLS sessions. Typically used where the customer programs the control panel daily due to access control and still wants to receive alarms without buying extra hardware (receiver) or software. -
Page 30: Ethernet Options
NOTE: Do not program Ethernet receiver 1 and Ethernet receiver 2 port with the same value. [116] Ethernet Receiver 2 Domain Name Default ( ) Enter the Domain Name as 32 character ASCII. Ethernet Options [124] Ethernet Test Transmission Time Default (9999) Enter a 4-digit number (0000-2359) using the 24-hour clock format (HHMM) to set the test transmission time of day. -
Page 31: Cellular Receiver 2 Options
Enter the Domain Name as 32 ASCII characters. This information will be provided by the central station system admin- istrator. Cellular Receiver 2 Options [211] Cellular Receiver 2 Account Code Default (0000000000) The account code is used by the central station to distinguish between different transmitters. This account code is used when transmitting signals to the central station receiver. -
Page 32: Sms Event Notification/Command And Control Options
[225] Cellular Test Transmission Cycle Default (000000) This value represents the interval in between test transmissions in minutes. Valid range: 000000 - 999999 minutes. Once the unit has sent the initial periodic test transmission, all future test transmissions will be offset by the programmed number of minutes. - Page 33 [2] Serial Communication Port Enabled Default (OFF) [3] SMS Command and Control Default (ON) [4] Interactive Default (OFF) [5] SMS Character Format Default (OFF ) ON: SMS Unicode, maximum message length is 70 characters. OFF: 7 bit SMS, maximum message length is 160 characters. [6] Long SMS Message Handling Default (OFF) ON: If maximum message length is exceeded, it is split and sent as multiple SMS messages.
- Page 34 [2] Parity Type Default (OFF) ON: Odd Parity OFF: Even Parity [3] Stop Bits Default (OFF) ON: Two Stop Bits OFF: One Stop Bits [4] Flow Control Default (OFF) ON: Flow Control OFF: No Flow Control [5] - [8] Reserved [422] Integration Identification Number This section will display the unique 12-digit number assigned to this communicator for the identification when integrated with third party applications.
- Page 35 [431] Session 1 Integration Server DNS Enter the domain name (up to 32 ASCII characters) as provided by a third-party device. Refer to third party device manual for more information. [432] Session 1 Integration Outgoing Port Default (0C04/3076) This section is used to program the outgoing port for integration via UDP. [433]Session 1 Integration Incoming Port Default (0BFF/3071) This section is used to program incoming port for integration via TCP.
- Page 36 [442] Session 1 Notification Zone 65-72 [443] Session 1 Notification Zone 73-80 Toggle Zone 65 (ON) Zone 73 (ON) Zone 66 (ON) Zone 74 (ON) Zone 67 (ON) Zone 75 (ON) Zone 68 (ON) Zone 76 (ON) Zone 69 (ON) Zone 77 (ON) Zone 70 (ON) Zone 78 (ON)
- Page 37 [4]: System Maintenance Notifications [5]: Test Transmission Notifications [6]-[8]: For Future Use [700] to [703] Session 1 – 4 (Type 2) Integration Access Code Default (12345678123456781234567812345678); Valid range: (00000000000000000000000000000000 FFFFFFFFFFFFFFFF FFFFFFFFFFFFFFFF). NOTE: Do not program all 0s or Fs in this section. These sections display the programmable 32-digit number used for initialization of 3rd party integrations that use Type 2 Encryption.
- Page 38 Zone 38 (ON) Zone 46 (ON) Zone 39 (ON) Zone 47 (ON) Zone 40 (ON) Zone 48 (ON) [728] Lifestyle Zone 49-56 Toggle [729] Lifestyle Zone 57-64 Toggle Zone 49 (ON) Zone 57 (ON) Zone 50 (ON) Zone 58 (ON) Zone 51 (ON) Zone 59 (ON) Zone 52 (ON)
- Page 39 [736] Lifestyle Zone 113-120 Toggle [737] Lifestyle Zone 121-128 Toggle Zone 113 (ON) Zone 121 (ON) Zone 114 (ON) Zone 122 (ON) Zone 115 (ON) Zone 123 (ON) Zone 116 (ON) Zone 124 (ON) Zone 117 (ON) Zone 125 (ON) Zone 118 (ON) Zone 126 (ON) Zone 119 (ON)
-
Page 40: External Event Label Programming
External Event Label Programming [738]-[883] Event Labels Default (see Label Number in table); There are 143 programmable event labels. Each label is pre-programmed with the default text shown in the table. Each label is up to 32 ASCII characters (including spaces). The language is specified in section [009]. Table 13: External Event Labels Event [Section] Label Default Label... - Page 41 Event [Section] Label Default Label Event [Section] Label Default Label [784] Panel Battery Trouble (Battery Trouble) [785] Panel Battery Restore (Battery Trouble Restore) [786] Panel Bell Circuit [787] Panel Bell Circuit (Bell Circuit Trouble) (Bell Circuit Restore) Trouble Restore [788] Panel Telephone Line [789] Panel Telephone Line (Telephone Line Failure) (Telephone Line Restore)
-
Page 42: Receiver Diagnostic Testing
Event [Section] Label Default Label Event [Section] Label Default Label [838] Delinquency (Delinquency) [839] Keypad Lockout (Keypad Lockout) (Fail to communicate [840] Event Log 75% full (Event Log Near Full) [841] FTC Trouble trouble) (Panel Communications [842] FTC Restore (fail to communicate restore) [843] Panel Absent Trouble Trouble) [844] Panel Absent Trouble (Panel Communications... -
Page 43: System Information (Read Only)
(yellow LED = 9 flashes). If an FTC error occurs when testing all receivers, select only one receiver and repeat test to isolate the receiver that is not communicating. NOTE: Sending a test transmission to a receiver that is not programmed generates an FTC trouble. [961] Cellular Inactivity Timeout Default (41) Valid entries are 00 - FF. - Page 44 Resolve the low battery trouble to continue with system low battery trouble; device/module) firmware update process. System update pending - communication in Retry in a few minutes; if issue persists, contact DSC Tech progress Support. Firmware Update Sequence Change System firmware update successful None At least one module was not updated.
- Page 45 Response Description of Response Code Corresponding Action Code Reserved Enable remote firmware update in the communicator in order Remote firmware update disabled to perform remote system firmware update. Local Status Update States No action required. Communicator currently does not have any Firmware file empty firmware files.
- Page 46 Table 16: Network Indicator - Digit 3 Network Indicator Value Means No network trouble Ethernet cable disconnected Ethernet DHCP failed Incoming transmission Outgoing transmission Flashing Incoming transmission [985] Radio Initialization Status The radio initialization status provides installers with the status of radio communication. It is displayed as an 8-digit toggle option, with each digit indicating a task in the initialization process.
-
Page 47: System Reset Defaults
[993] Ethernet Gateway Address This section will display the IP address of the Ethernet gateway. This value is programmed in section [003] or assigned by DHCP. [994] Cellular IP Address This section will display the current dynamic IP address assigned by DHCP to the cellular connection. NOTE: Cellular uses DHCP (dynamic IP) only. -
Page 48: Ethernet Cellular Programming Worksheets
[009] Language Ethernet Cellular Programming Default (01); Program label language 01-29 Worksheets Language Language Language System Options English Swedish Russian Spanish Norwegian Bulgarian [001] Ethernet IP Address Portuguese Danish Latvian Default (000.000.000.000) French Hebrew Lithuanian Italian Greek Ukrainian Dutch Turkish Slovakian [002] Ethernet IP Subnet Mask Polish... -
Page 49: System Test Options
[023] Panel Absent Trouble Ethernet Receiver 1 Options Default (FF); Program 00 disable or FF enable. [101] Ethernet Receiver 1 Account Code Default (0000000000) Valid range: 0000000001 - FFFFFFFFFE. [024] Panel Absent Trouble Restore Default (FF) Program 00 disable or FF enable. [102] Ethernet Receiver 1 DNIS Default (000000) Valid range: 000000 - FFFFFF. -
Page 50: Cellular Receiver 1 Options
____________________________________ Cellular Receiver 1 Options [224] Cellular Test Transmission Time of Day [201] Cellular Receiver 1 Account Code Default (9999) Default (0000000000) Valid range: 00 - 23 hrs. (HH) 00 - 59 min. (MM). Valid range: 0000000001 - FFFFFFFFFE. [225] Cellular Test Transmission Cycle [202] Cellular Receiver 1 DNIS Default (000000) Default (000000) Valid range: 000000 - 0FFFFF. - Page 51 [343]-[374] SMS Phone Number 1-32 Toggle [4] Notification Follows Pool (OFF) Options [5] Reserved [1] SMS Notification Alarm/Restore Default (ON). [6] Reserved [2] SMS Notification Tamper/Restore Default (ON) [7] Reserved [3] SMS Notification Opening/Closing Default (ON) [8] Reserved [4] SMS Notification System Maintenance Default (ON) [427] Session 1 Interactive Polling Interval [5] SMS Notification System Test Default (ON) Default (000A) Valid range: 0000 - FFFF seconds.
- Page 52 [3] Zone 19 Default (ON) [2] Zone 58 Default (ON) [4] Zone 20 Default (ON) [3] Zone 59 Default (ON) [5] Zone 21 Default (ON) [4] Zone 60 Default (ON) [6] Zone 22 Default (ON) [5] Zone 61 Default (ON) [7] Zone 23 Default (ON) [6] Zone 62 Default (ON) [8] Zone 24 Default (ON)
- Page 53 [446] Session 1 Notification Zone 97-104 Toggle [5] Test Transmission Notifications [1] Zone 97 Default (ON) [6] Future Use [2] Zone 98 Default (ON) [7] Future Use [3] Zone 99 Default (ON) [8] Future Use [4] Zone 100 Default (ON) [692] Session 2 Notification Control [5] Zone 101 Default (ON) [1] Alarm and Alarm Restore Notifications...
- Page 54 [702] Session 3 (Type 2) Integration Access Code [6] Zone 14 Default (ON) Default (12345678123456781234567812345678) [7] Zone 15 Default (ON) Valid range: (00000000000000000000000000000000 - [8] Zone 16 Default (ON) FFFFFFFFFFFFFFFFFFFFFFFFFFFFFFFF) [724] Lifestyle Zone 17-24 Toggle [1] Zone 17 Default (ON) [2] Zone 18 Default (ON) [703] Session 4 (Type 2) Integration Access Code [3] Zone 19 Default (ON)
-
Page 55: External Event Label Programming
[5] Zone 53 Default (ON) [4] Zone 92 Default (ON) [6] Zone 54 Default (ON) [5] Zone 93 Default (ON) [7] Zone 55 Default (ON) [6] Zone 94 Default (ON) [8] Zone 56 Default (ON) [7] Zone 95 Default (ON) [8] Zone 96 Default (ON) [729] Lifestyle Zone 57-64 Toggle [734] Lifestyle Zone 97-104 Toggle... - Page 56 _______________________________________ [739] Burglary Alarm Restore Default (Burglary Alarm Restore) [757] Sprinkler Alarm Restore ______________________________________ Default (Sprinkler Alarm Restore) _______________________________________ [740] Fire Alarm [758] Water Level Alarm Default (Fire Alarm) ______________________________________ Default (Water Level Alarm) _______________________________________ [741] Fire Alarm Restore [759] Water Level Alarm Restore Default (Fire Alarm Restore) ______________________________________ Default (Water Level Alarm Restore)
- Page 57 _______________________________________ [774] Duress Alarm Default (Duress Alarm) [792] Fire Trouble _______________________________________ Default (Fire Trouble) _______________________________________ [775] Account Label [793] Fire Trouble Restore Default (Security System) _______________________________________ Default (Fire Trouble Restore) _______________________________________ [776] General System Tamper [794] Zone Tamper Default (General System Tamper) _______________________________________ Default (Zone Tamper) _______________________________________...
- Page 58 _______________________________________ [809] Automatic Arming Default (Automatic Arming) [827] Periodic Test Transmission _______________________________________ Default (Periodic Test) _______________________________________ [810] Automatic Arming Cancelled [828] Periodic Test With Trouble Default (Automatic Arming Cancelled) _______________________________________ Default (Periodic Test With Trouble) _______________________________________ [811] Late to Open [829] DLS Remote Programming Begin Default (Late to Open) _______________________________________...
- Page 59 _______________________________________ [844] Panel Absent Trouble Restore Default (Panel Communications Restore) [865] Status Request _______________________________________ Default (Status Request) _______________________________________ [845] Module Reprogramming [866] Alarm Memory Request Default (Communicator Programming Updated) _______________________________________ Default (Alarm Memory Request) _______________________________________ [846] Firmware Update [867] Help Default (Communicator Programming Updated) _______________________________________ Default (Help)
-
Page 60: Receiver Diagnostic Testing
[882] Pay As You Go Message [987] Language Version Default (*123#) [988] DNS 1 IP Address _______________________________________ [883] Response Code [989] DNS 2 IP Address Default (Response Code) _______________________________________ [990] Boot Loader Version Receiver Diagnostic Testing [901] Diagnostic Test Transmission [991] Communicator Firmware Version [1] Ethernet 1 Default (OFF). -
Page 61: Limited Warranty
Accesscardsor tagsreturned for replacement under warranty willbe credited or replaced at DSC's option. Products not covered by this warranty, or otherwise out of warranty due to age, misuse, or damage shallbe evaluated, and a repair estimate shall be provided. -
Page 62: Regulatory Information
Byinstalling, copying, downloading, storing, accessing or otherwise using the SOFTWAREPRODUCT, You agree unconditionallyto be bound bythe termsof this EULA, even if this EULA is deemed to be a modification of any previous arrangement or contract. If You do not agree to the terms of this EULA, DSC is unwilling to license the SOFTWAREPRODUCT to You, and You have no right to use it. - Page 63 (installer mode), section [851]. The TL2803G(R)E-EU/3G2080(R)E-EU/TL280(R)E connects to compatible DSC alarm control panels using the DSC proprietary serial interface and protocolPC-Link (converted also to RS- 422). The module operates in pass-through mode and it does acknowledge the alarmto the compatible control panelafter an acknowledgement hasbeen received fromthe compatible alarmreceiver.
- Page 64 TL280 (R)E (Ethernet port) and two communication paths for modelTL2803G(R)E-EU (cell/Ethernet). EN50136-1:2012 Table 4 ATSfailure reported to ARC ATS failure reported to AS (DSC compatible control panel EN50136-1:2012 Table 5 HS2128/HS2064/HS2032/HS2016) EN50136-1:2012 Table 6 There isno recording of availabilityfailure...
- Page 65 © 2018 Tyco Security Products. All Rights Reserved. Tech Support: 1-800-387-3630 (Canada & U.S.) or 905-760-3000 www.dsc.com The trademarks, logos, and service marks displayed on this document are registered in the United States [or other countries]. Any misuse of the trademarks is strictly prohibited and Tyco will aggressively enforce its intellectual property rights to the fullest extent of the law, including pursuit of criminal prosecution wherever necessary.
Need help?
Do you have a question about the PowerSeries Neo LE2080 and is the answer not in the manual?
Questions and answers