
Subscribe to Our Youtube Channel
Related Manuals for EIBENSTOCK BST 102/53


Summary of Contents for EIBENSTOCK BST 102/53
- Page 1 EIBENSTOCK Vakuum Technik Originalbetriebsanleitung……… 2 - 10 Original Instructions....11 - 19 Diamantbohrständer Diamond Drill Rigs BST 102 / 53 BST 103 / 53 BST 102 / 60 BST 103 / 60...
- Page 2 Deutsch Wichtige Sicherheitshinweise Wichtige Anweisungen und Warnhinweise sind mittels Symbolen auf der Maschine dargestellt: Warnung vor allgemeiner Gefahr Warnung vor gefährlicher elektrischer Spannung Warnung vor heißer Oberfläche Maschine, Bohrkrone und Bohrständer sind schwer – Vorsicht Quetschgefahr Reiß- bzw. Schneidgefahr Beim Arbeiten sollten Sie Augenschutz, Gehörschutz, Schutzhandschuhe und feste Arbeitskleidung tragen! Gehörschutz benutzen Augenschutz benutzen...
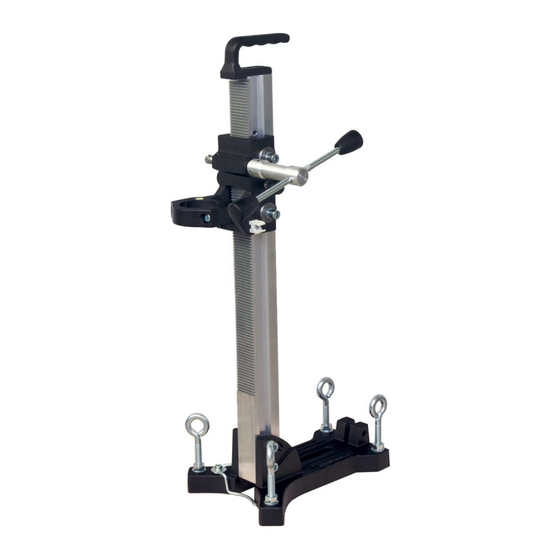
- Page 3 Der Diamantbohrständer BST 102 / 53 (60) und 103 / 53 (60) ist für Diamantkernbohrgeräte mit einem Spannhalsdurchmesser von 53 bzw. 60 mm ausgelegt. Der maximale Bohrdurchmesser darf bei BST 102/53 (60) 102 mm und bei BST 103/53 (60) 130 mm nicht überschreiten! Bei falschem oder zweckentfremdetem Gebrauch übernimmt der...
- Page 4 Einsatz Überprüfen Sie nach jeder Neueinstellung den festen Sitz der Schrauben, damit sicher mit dem Bohrständer gearbeitet werden kann. Anbringung des Drehkreuzes ■ Bringen Sie das Drehkreuz (1) in Klick Abhängigkeit von der auszuführenden Arbeit links oder rechts am Schlitten (2) an. ■...
- Page 5 Befestigung des Bohrständers mittels einer Vakuumplatte (als Zubehör erhältlich) Verwenden Sie die Vakuumbefestigung nicht an der Wand und Überkopf! Für eine Unterdruck-Anbringung darf die zu bohrende Fläche nicht porös, muss eben und rissfrei sein. Ist das nicht der Fall, kann diese Art der Anbringung nicht verwendet werden. Für die Vakuum-Anbringung benötigen Sie Vakuumpumpe, -platte und -schläuche (siehe Abbildung).
- Page 6 Befestigung durch Schnellspannsäule Um den Bohrständer mittels der Schnellspannsäule Verstreben zu können, muss der Abstand zur gegenüberliegenden Wand zwischen 1,7 m und 3 m betragen. Positionieren Sie den Bohrständer. Setzen Sie die Schnellspannsäule so dicht wie möglich hinter der Säule auf dem Ständerfuß...
- Page 7 Inbetriebnahme Um die Bohreinheit sicher zu betreiben, beachten Sie bitte folgende Hinweise: Angaben zum Einsatzort Befreien Sie den Einsatzort von allem, was den Arbeitsvorgang behindern könnte. Achten Sie auf ausreichende Beleuchtung des Einsatzortes. Halten Sie die angegebenen Bedingungen für den Anschluss an die Stromversorgung ein.
- Page 8 Bei BST 103/53 oder 60 mit Abstützungen Die Klemmschraube an der Abstützung ist zu lösen. Die Skala an der Zahnsäule erleicht Ihnen die Einstellung des Bohrwinkels. Bohren Sie am Anfang sehr langsam, da die Krone nur mit einem Bruchteil ihrer Schnittfläche ins Material greift.
-
Page 9: Fehlersuche
Schäden, die auf natürliche Abnützung, Überlastung oder unsachgemäße Behandlung zurückzuführen sind, bleiben davon ausgeschlossen. Schäden, die durch Material- oder Herstellfehler entstanden sind, werden unentgeltlich durch Reparatur oder Ersatzlieferung beseitigt. Beanstandungen können nur anerkannt werden, wenn der Diamantbohrständer unzerlegt an den Lieferer oder eine Eibenstock-Vertragswerkstatt gesandt wird. - Page 10 Die Inbetriebnahme dieser Einheit ist solange untersagt, bis festgestellt wurde, daß das Elektrowerkzeug, das mit dieser Einheit verbunden werden soll, den Bestimmungen der Richtlinie 2006/42/EG entspricht (erkennbar durch die CE- Kennzeichnung am Elektrowerkzeug). Vakuum Technik GmbH Eibenstock Lothar Lässig 21.08.2012...
-
Page 11: Important Instructions
English Important Instructions Important instructions and warning notices are allegorized on the machine by means of symbols: Warning: general precaution Warning: dangerous voltage Warning: hot surface Tool, drill bit and rig are heavy – Caution: risk of squashing Danger of tearing or cutting During work you should wear goggles, ear protectors, protective gloves, and sturdy work clothes! Wear ear protection... - Page 12 Diamond drill rig with turnstile and operating instructions in a cardboard box. Application for Indented Purpose The diamond drill rig BST 102/53 (60) and the BST 103/53 (60) is made for diamond core drills with a collar diameter from 53 (60).
- Page 13 After each readjustment always check that the screws are tightly fixed so that safe operating of the drill rig is possible. Mounting the turnstile Mount the turnstile (1) on the right or left side of the carriage Klick (2) depending on the work to be performed.
- Page 14 Fastening of the drill stand by means of a vacuum plate (as accessories available) Don’t use the vacuum mounting on the wall and overhead! For a low-pressure mounting the surface which is to be drilled must be not porous, must be flat and free of cracks. If this is not the case, this kind of mounting can’t be use.
- Page 15 Fixing the Core Drill Motor Wear protective gloves! Caution! When mounting the machine, risk of squashing. Move the machine holder (2) upwards until the locking pin (5) locks in the column. Remove both Allen screws M8 (3) and take off the clamp (4). Put the core drill (M) on the carriage and close the clamp (4) by means of the Allen screws (3).
- Page 16 Operations In order to operate the tool safely, please observe the following notes: Details of the work area Keep the work area free of everything which could obstruct operations. Provide for adequate illumination of the work area. Adhere to the regulations concerning the power connection. Lay the power cable in such a way that any damage by the drill can be avoided.
- Page 17 only for BST 103/53 or 60 with support Loosen the clamp lever on the support. The scale on the toothed column makes adjusting the drilling angle easier. At the beginning, drill very slowly, since the drill bit does only starts cutting with a fraction of the cut surface in the material.
-
Page 18: Troubleshooting
Care and Maintenance Always keep the drill rig clean, especially the column with the toothing and the 4 sliding pieces in the machine holder. In order to allow the free movement of the pinion shaft, it should be slightly lubricated. In order to achieve a good performance of the drill rig, the 4 sliding pieces in the machine holder have to move along the column without slackness. - Page 19 Complaints will be accepted only if the tool is returned in non-dismantled condition to the manufacturer or an authorized Eibenstock service centre. Declaration of Conformity It is necessary that the machine (f. e. ETN 2001 P) used in this drill rig comply with the requirements which are described in the specifications of the drill rig (f.
- Page 20 Ihr Fachhändler Your distributor Vakuum Technik GmbH Am Steinbächel 3 08309 Eibenstock...
Need help?
Do you have a question about the BST 102/53 and is the answer not in the manual?
Questions and answers