Wega EMA Use And Maintenance Manual
Espresso coffee machine
Hide thumbs
Also See for EMA:
- Use and maintenance manual (100 pages) ,
- Use and maintenance manual, instructions for the user (216 pages)

Related Manuals for Wega EMA


Summary of Contents for Wega EMA
- Page 1 ESPRESSO COFFEE MACHINE Use and maintenance manual. Instructions for the user. English User manual...
-
Page 2: Table Of Contents
Grinding and dosing ........39 Preparing the coffee ........39 Dispensing compartment light (optional) ...40 9 Preparing the coffee ..........40 ALE version ..........40 EMA version ..........40 EPU version ..........40 JUNIOR version ..........41 EVD version ..........42 10 Preparing hot beverages ........43 10.1 Manual dispensing of hot water ....43 10.2 Automatic hot water delivery ......43... -
Page 3: Instructions
General warnings Instructions After removing the packaging, check the condi- tion of the appliance. If in doubt, do not use it Read carefully but contact the retailer directly. Carefully read every part of this booklet before The packaging material must not be left within using the appliance. - Page 4 When using the electrical appliance, several nance and a check of all the safety devices done safety standards must be observed: by qualified personnel. - do not touch the appliance with wet or Do not expose your hands or other body parts to damp hands or feet;...
-
Page 5: Warranty
Warranty Presentation 15 months on all components, except for electrical This product has been manufactured in compli- and electronic components and expendable pieces. ance with the regulations for foodstuff machinery according to par. 2.1 of Directive 2006/42/EC. The espresso coffee maker is strictly for profes- Typographical conventions sional use only. -
Page 6: Warnings For The Installer
Warnings for the installer For each coffee unit, carry out a continuous de- livery, in order to release at least 0.5 liters of the coffee circuit. In the case of several dispensing Power points matched with the same exchanger/cof- fee boiler, divide the volume on the base of the The water supply of the appliance must be car- number of the dispensing points;... -
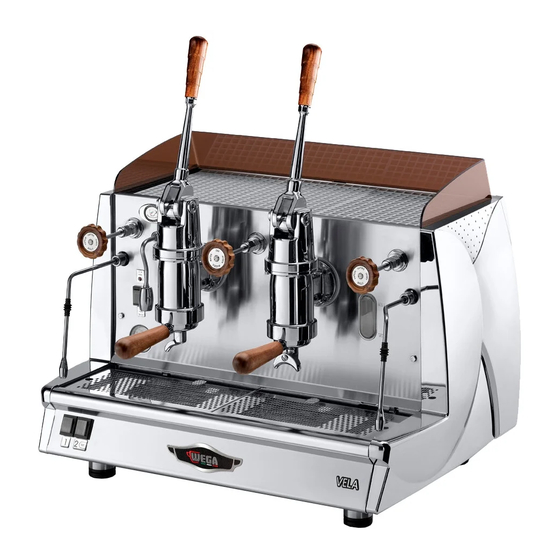
Page 7: Description Of The Machine
Adjustable foot. Hot water nozzle. Gas burner viewing window. 1-Cup filter holder. Gas safety Gas lighting button Cup-rest grid. EMA-EPU-EVD Start-up switch. Warning lights. Hot water knob. Manual delivery switches. Push-button panels. (*) Optional device. (**) In some ver sions the optical level is replaced by a green light. -
Page 8: Technical Data
Technical data The nameplate of the machine is fixed on the base of the frame under the drain pan. The data of the appliance can be seen also on Technical data plate the label located on the package of the machine. COMPATTA 120-230 120-230... -
Page 9: Starting The Machine
Power switch Starting the machine Open the water tap of the water mains and of the softener. Electric heating Turn the switch to position “1” (electrical power supplied to the pump for automatic boiler re- Before starting the machine, make sure that plenishment and machine services) and wait for the level of water in the boiler is higher than the the boiler to be automatically filled with water;... -
Page 10: Electric + Gas Heating
Electric + gas heating Preliminary operations (if gas system is present) Grinding and dosing Proceed as indicated in paragraph 7.2 “Gas heat- ing”; It is important to have a dosing-grinding device after confirming that the flame has ignited, turn next to the machine with which to grind the coffee the main switch (A) to position 2. -
Page 11: Dispensing Compartment Light (Optional)
Dispensing compartment light EMA version (optional) Put the coffee cup under the dispensing spout; raise the lever: the coffee starts pouring and can To turn on and turn off the work compartment be stopped bend the lever, when the desired lighting, press switch, which is located under the amount of coffee has been delivered. -
Page 12: Junior Version
JUNIOR version Programming Place the programming lever (1) in the ON posi- tion. It is located under the front right-hand panel of the body; place the coffee cup under the dispensing spout; press the PROG/STOP key for at least 5 seconds until all dose key LED are on;... -
Page 13: Evd Version
EVD version In some models, the programming lever has been eliminated; to access the programming, it is enough Programming to press the PROG/STOP key for at least 5 seconds with all push button panel LED coming on. To Always program the right push-button panel first, confirm the dose press the PROG/STOP key or the and, if necessary, the others subsequently. -
Page 14: Preparing Hot Beverages
Dispensing hot water Preparing hot beverages put the cup under the hot water spout (2); press the hot water key (3): wait for the delivery 10.1 Manual dispensing of hot water of water; Place the jug under the hot water nozzle (2); to stop delivery in advance, press the hot water turn the tap knob (1): counterclockwise: the delivery key (3) again or press the STOP key. -
Page 15: Cup Heater (Optional)
For optimal foaming, it is recommended to ob- Cup heater (optional) serve the following simple rules: heat only the amount of milk you intend to use; The cup heating device is for heating cups before once heated, it will have to be completely poured they are used. -
Page 16: Accessories
Accessories The build-up of lime scale deposits in the hydraulic circuit and boiler inhibits thermal exchange, thus 12.1 Softener compromising proper operation of the machine. Heavy incrustations in the boiler may cause long Mains water contains insoluble salts, which cause machine shutdowns and in any case invalidate any the build-up of lime scale deposits in the boiler and guarantee, because this symptom indicates that... -
Page 17: Cappuccino Maker
12.2 Cappuccino maker Cleaning Use special care in cleaning the cappuccino Put the suction tube inside the milk; maker, following the procedures indicated below: place the jug under the spout of the cappuccino perform a first washing by immerging the suction maker;... -
Page 18: Milk Foaming Nozzle
12.3 Milk foaming nozzle 12.4 Thermoreserve Insert the nozzle (4) in the milk so that the sprayer This is composed of a recipient where a substan- is completely covered; tial amount of coffee is produced (2.5 litres) which is stored in reserve when there is high demand for turn the steam tap (2) counter-clockwise;... -
Page 19: Suggestions On How To Obtain A Good Cup Of Coffee
Suggestions on how to obtain a good cup of coffee To obtain high-quality coffee, it is important for the hardness of the water used to not exceed 4-5 °f (French degrees). If the water hardness exceeds these values, it is advisable to use a water softener. Avoid using a water softener if the water hardness is less than 4 °f. -
Page 20: List Of Hazards
Switch off the machine and turn on all the steam List of hazards and water taps. When the pressure is zero, empty the boiler completely by unscrewing the special This chapter describes possible hazards for the pipe fitting located on the lower part of boiler. user if the specific safety standards (described in this If the above procedure is not carried out cor- manual) are not followed. -
Page 21: Checks And Maintenance
Checks and maintenance To ensure perfect safety and efficiency of the machine over time, it is necessary to carry out mainte- nance. In particular, it is advisable to ask Technical Service to carry out an overall check of the machine at least once a year. -
Page 22: Cleaning
Cleaning For perfect cleaning and efficiency of the appliance, several simple cleaning operations are necessary on the functional parts and accessories as well as the body panels. The indications given here are appli- cable for normal use of the coffee machine. If the machine is used continuously, then cleaning should be performed more frequently. - Page 23 Cleaning Daily Weekly GRINDER-DOSER Every week clean the bell jar and the dosing device with a cloth soaked in lukewarm water, both inside and out, then dry it. HEATED STORAGE Once the coffee in the heated storage container is finished, clean it as follows. 1.
-
Page 24: Malfunctions And Related Solutions
Malfunctions and related solutions Problem Cause Solution MACHINE LACKING POWER The machine is off. Turn on the machine. NO WATER IN BOILER The water supply tap is closed. Open the water supply tap. Malfunction of the electrical system or hydraulic TOO MUCH WATER IN BOILER Call for Technical Assistance. - Page 25 Problem Cause Solution THE CUP IS DIRTY WITH COFFEE Coffee is ground too coarsely Adjust the grinding of the coffee. The filter edge is damaged Replace the filter. SPURTS ALL THE LED's OF ALL THE After a few minutes, the automatic filling of the PUSH BUTTON PANELS water stops.
Need help?
Do you have a question about the EMA and is the answer not in the manual?
Questions and answers