Table of Contents
Advertisement
Advertisement
Table of Contents

Related Manuals for Nuna Pipa Lite Series


Summary of Contents for Nuna Pipa Lite Series
- Page 2 Designed around your life...
-
Page 3: Table Of Contents
Vehicle Compatibility INSTRUCTIONS FOR Infant Car Seat Parts List FUTURE REFERENCE: Base Parts List READ CAREFULLY Product Overview Product Use Installation Accessories PIPA series organic cotton insert PIPA series adapters Cleaning and Maintenance PIPA lite series instructions PIPA lite series instructions... -
Page 4: Product Information
Height: less than 32 inches (81 cm) Vehicle Safety Hotline at: 1.888.327.4236 It is recommended to keep your child rear facing as (TTY: 1.800.424.9153) or go to long as possible, until at least 2 years old. http://www.NHTSA.gov PIPA lite series instructions PIPA lite series instructions... -
Page 5: Warnings
It lies in a relatively straight line without or other soft surfaces. sagging. It does not press on the child’s ALWAYS check child restraint to base flesh or push the child’s body into an connection. unnatural position. PIPA lite series instructions PIPA lite series instructions... -
Page 6: Vehicle Compatibility
DO NOT use any products or accessories with this child restraint unless they are approved by Nuna for use with this child restraint. Doing so may be unsafe and may void the warranty. - Page 7 This belt can not be used to install this child restraint. - Lap Belts forward of Seat Bight This belt (where the seat bottom and back meet) should not be used to install this child restraint. PIPA lite series instructions PIPA lite series instructions...
-
Page 8: Infant Car Seat Parts List
Infant Car Seat Parts List Make sure all parts are available before assembly. If any part is missing, please contact Nuna (see page 4 for information). No tools are required for assembly. 12 Shoulder Harness Canopy Pads Seat Pad 13 Head Support (x2) -
Page 9: Base Parts List
Base Parts List Make sure all parts are available before assembly. If any part is missing, please contact Nuna (see page 4 for information). No tools are required for assembly. Vehicle Belt Level Indicator Lock Off Carrier Release Rigid LATCH... -
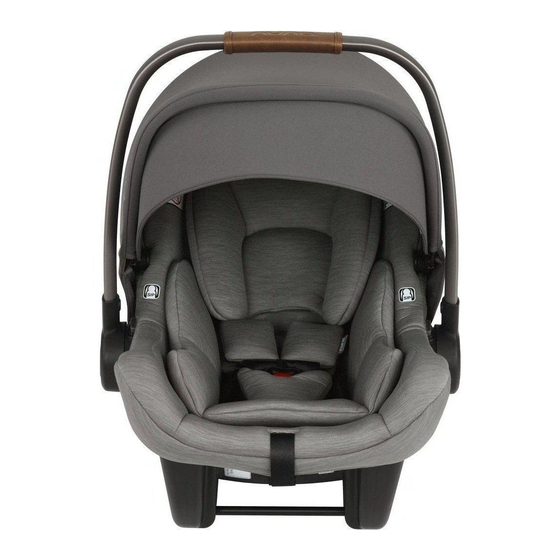
Page 10: Product Overview
™ each corner to the front of the carrier. Shoulder Harness Pads - Shoulder harness pads are removable. Unfasten the hook and loop to remove the shoulder harness pads. PIPA lite series instructions PIPA lite series instructions... - Page 11 - Pull the crotch pad off the buckle. Seat Pad - Open the snaps on both sides of the seat. - Turn child restraint over and remove the harness straps from the splitter plate. - Remove the seat pad. PIPA lite series instructions PIPA lite series instructions...
- Page 12 11 lbs. - To remove the low birth weight pillow, unfasten the hook and loop on the back of the body support and pull out the pillow. 20 PIPA lite series instructions PIPA lite series instructions...
- Page 13 - Pull loose ends of harness loop out through slots and place in correct slot. - Repeat process for second shoulder harness strap and then re-attach harness to splitter plate. 22 PIPA lite series instructions PIPA lite series instructions...
- Page 14 An unlocked handle could move unexpectedly, causing injury to child. Handle MUST NOT contact the vehicle interior (side of car or seat in front) when installed. 1 in. 25 mm 24 PIPA lite series instructions PIPA lite series instructions...
-
Page 15: Product Use
DO NOT allow child to slouch. Gently guide child’s arms through harness loops. - Insert buckle tongues into buckle and listen for clicks. Pull on buckle to verify it is latched. 26 PIPA lite series instructions PIPA lite series instructions... - Page 16 Make sure harness is snug around child and lays flat. If child is not secured properly, child could be ejected in a sudden stop or crash, resulting in serious injury or death. 28 PIPA lite series instructions PIPA lite series instructions...
-
Page 17: Installation
36. It may be necessary to shorten the lap belt by twisting it, to achieve a proper installation. Installation on a Stroller This infant carrier can attach to Nuna strollers as well as other brands of strollers using adapters. Please visit nuna.eu for more information. - Page 18 1” at belt path. Bubble must be touching line. Use recline adjustment, if needed, to position bubble. It is acceptable to install with both LATCH (lower attachments) and the vehicle belt. 32 PIPA lite series instructions PIPA lite series instructions...
- Page 19 (1) and primary rigid LATCH release buttons (2). For ease of release, push the secondary button first, then the primary button. - Then pull the base off of the bars. 34 PIPA lite series instructions PIPA lite series instructions...
- Page 20 - Open the vehicle belt lock off by lifting up. - Route the vehicle belt through the opening in the base labeled ‘belt here’ and under the vehicle belt lock off. 36 PIPA lite series instructions PIPA lite series instructions...
- Page 21 Belts and buckles must not interfere with attachment of child restraint to base. Vehicle belts must lay flat under vehicle belt lock off. It is acceptable to install with both LATCH (lower attachments) and the vehicle belt. 38 PIPA lite series instructions PIPA lite series instructions...
- Page 22 - To remove the base, lift up on the vehicle belt lock off. - Unbuckle the vehicle belt and un-route the shoulder and lap belt from the base. Then remove the base. 40 PIPA lite series instructions PIPA lite series instructions...
- Page 23 Always store stability leg when not in use. This seat is safe to use with stability leg in use or stored for both rigid LATCH or vehicle belt installation. 42 PIPA lite series instructions PIPA lite series instructions...
-
Page 24: Accessories
PIPA series adapters The PIPA lite series can attach to Nuna strollers using adapters. Instructions are included with the adapters, which are sold separately. -
Page 25: Cleaning And Maintenance
Check regularly if everything functions properly. If any parts are torn, broken, or missing, stop using this product. 46 PIPA lite series instructions PIPA lite series instructions...
Need help?
Do you have a question about the Pipa Lite Series and is the answer not in the manual?
Questions and answers