Table of Contents
Advertisement
Advertisement
Table of Contents

Subscribe to Our Youtube Channel
Related Manuals for CAS ECB Series


Summary of Contents for CAS ECB Series
-
Page 2: Table Of Contents
CONTENTS 1. Precautions Before Using The Scale ....5 2 . Overall view ............. 8 3. Installation ..............9 4. Explanation Of Display Symbols ....... 11 5. Keypad Functions ..........13 6. Operations ............14 A.Switch on / off ..............14 B.Zero the scale .............. - Page 3 8. Calibration(can be done in kg/lb) ......36 9. Power supply & battery operation ....... 37 10. RS-232 Output ............38 11. Error Codes ............45 12. Technical Data ............46...
-
Page 4: Precautions Before Using The Scale
1. Precautions Before Using The Scale... - Page 6 Environment The scale should always be used in an environment, which is free form excessive air currents, corrosives, vibration, and temperature or humidity extremes. These factors will affect displayed weight reading. DO NOT install the scale : ● Next to open windows or doors causing drafts or rapid temperature changes. ●...
-
Page 7: Overall View
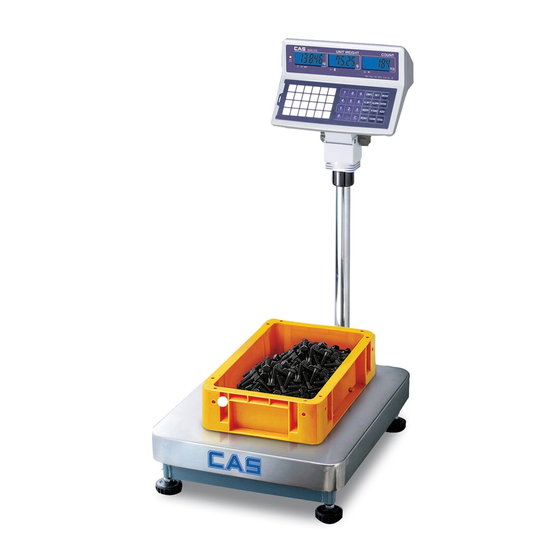
2. Overall view... -
Page 8: Installation
3. Installation 1. Open the box with care because indicator is connected to the scale with load cell wire. 2. Turn the post knob so as to fix indicator. 3. Pull down the wire out of post pipe and insert the post pipe to the post bracket. - Page 9 ※ Note: Before using the scale, unscrew the five shipping protection screws. If not, the weighing operation works wrong. 1) Location of screws 2) Adjusting procedure...
-
Page 10: Explanation Of Display Symbols
4. Explanation Of Display Symbols 1) Display Windows Weight Display: Total 6 digits for weight accumulated or being measured on the platform. Unit Weight Display: Total 6 digits for unit weight or times of weight accumulated. Count Display: Total 6 digits for number accumulated or being counted on the platform. -
Page 11: Keypad Functions
5. Keypad Functions Keys 내용 Numeric keys Decimal point key Use this key to clear out the displayed numeric readings. If there is a minor weight displayed without anything on the platform, press the zero key to clear the display. Use this key to subtract the container’s weight, indicates that the current weight reading is net weight. - Page 12 Use this key to enter into User Programming Functions. Use this key to confirm the parameter setting Use this key to move the parameter value in Set Mode. Use this key to memory a value to a location. Use these 24 blank keys to store values in memory.
-
Page 13: Operations
6. Operations A. Switch ON/OFF Push the on & off switch at the bottom of indicator to turn on or off the scale. B. Zero the scale Press ZERO key to return the display to zero in case there is any zero drifting while unloaded. C. - Page 14 The sampling operation is completed while stable display appears as below : ● ※ The larger sample size, the more accurate unit weight ※ Press SMPL key to recomputing unit weight during in counting process if the setting of “Unit Weight Recomputing” set to “on” 2) Known unit weight Input the known unit weight.
-
Page 15: D.how To Use Memory Cells
D. How to use memory cells 1) How to store into direct/indirect memory cells Give a long press of MEMORY key. Then the display as below will be shown up. ● Input the unit weight values by using numeric key(ex. 35g). After input U/W, press ENTER key to to Confirm it and move on the next step. - Page 16 The fourth step is for storing address cell. There are two memory spaces : ● Direct memory / In-Direct memory: [Into direct memory] Press one of Direct memory keys (Total 24 keys) which you want to use stored values for recalling. Then, the scale will be back to the normal counting mode directly.
-
Page 17: E.subtract Container's Weight
2) How to recall stored memory [From direct memory] Just press the direct memory key one time which you already stored in it.. [From indirect memory] Press the address number by using numeric keys which you want to recall and then press MEMORY key Twice rapidly. - Page 18 After operate Tare function well, indicators of stable( ) & Net weight( ) will appear as below. ● 2) Container’s weight known ☞ With no weight on the platform Nothing on the platform Press P.TARE key ● Input container’s weight value by using numeric keys(ex.0.96kg) ●...
- Page 19 ☞ With some weight on the platform Scale is loaded Press P.TARE key ● Input container’s weight value by using numeric keys (ex. 0.5kg) ● Press P.TARE key again. ● ※Eliminate TARE Remove all weights from the platform. If so the weight display will show a negative (-) container’s weight.
-
Page 20: Weight/Quantity Accumulation
F. Weight/Quantity accumulation Place item to be weighed / counted on the platform. ● Press ADD key. Display images will be shown as below in sequence. ● Press TOTAL key or wait approx. 2 seconds, the scale will return to counting mode. ●... -
Page 21: G.preset Counting Check Range
※ Clear accumulation Press TOTAL key to enter into accumulation status mode and press CLEAR key to clear all accumulated data. 1) The display window will show ”---OL---“when accumulated value exceed the display range. 2) The maximum accumulation time is 99. 3) The weight window should be zeroed before the next accumulation. - Page 22 Press ALARM key again to confirm HI value and move on next step to input LO value. ● Input desired LO limit by using numeric keys(ex. 5pcs) (Low limit value is effective only after high limit is preset ) High value (ex. 200pcs) LO value (ex.
-
Page 23: H.preset Weight Check Range
H. Preset weight check range Users can set a Hi – Lo range for checking weight value, when the weight value of objects on the platform meet the condition of the range, the alarm will sound beeps repeatedly. 1) Procedures Doesn’t matter what something is on the platform. - Page 24 Press U.Wt key to complete this procedure and return to normal weighing mode. ● ※ Note : 1) An error massage “E5” appears in weight window when the LO value is set higher than HI value. 2) When both HI and LO values are needed, they must be kept same decimal digits.
-
Page 25: User Programming Functions
7. User Programming Functions User programming mode is for Users. There are thirteen setting menus. To enter User programming mode, press SET key. Then the PASS WORD inputting is needed. Input “101010” and then press ENTER key to get into real user programming mode. Once the scale is in User programming mode, the first menu is Auto shut off time setting. -
Page 26: B.zero Tracking Range
B. Zero Tracking Range Keep pressing ENTER key in USER PROGRAMMING MODE until the display appears ● as below. There are 5 options, and Pressing MOVE key is possible to rotate among the options. ● (Default setting: 2) ( 0=off, 1=0.5d, 2=1d, 3=2d, 4=3d) If you want to exit, press C key to confirm and go back to normal weighing mode. -
Page 27: D.stable Class Range
D. Stable class range Keep pressing ENTER key in USER PROGRAMMING MODE until the display ● appears as below. There are 6 options, and Pressing MOVE key is possible to rotate among the options. ● (Default setting: 1) ( 0=off, 1=0.05d, 2=0.151d, 3=0.25d, 4=0.35d,5=0.45d) If you want to exit, press C key to confirm and go back to normal weighing mode. -
Page 28: Backlight Type
F. Backlight type Keep pressing ENTER key in USER PROGRAMMING MODE until the display ● appears as below. There are 2 options, and Pressing MOVE key is possible to rotate among the options. ● (Default setting: 0) 0 – Auto. Backlight ●... -
Page 29: G.change Unit Of Measure From Kg To Pound
G. Change unit of measure from kg to Pound Keep pressing ENTER key in USER PROGRAMMING MODE until the display ● appears as below. There are 2 options, and Pressing MOVE key is possible to rotate among the options. ● (Default setting: 0) 0 –... -
Page 30: H.unit Weight Recomputing
H. Unit weight recomputing Keep pressing ENTER key in USER PROGRAMMING MODE until the display ● appears as below. There are 2 options, and Pressing MOVE key is possible to rotate among the options. ● (Default setting: 1) 0 – Disable recomputing function 1–... -
Page 31: I.check Alarm Type
I. Check alarm type Keep pressing ENTER key in USER PROGRAMMING MODE until the display ● appears as below. There are 2 options, and Pressing MOVE key is possible to rotate among the options. ● (Default setting: 0) 0 – Inside type 1–... - Page 32 1.Inside type The alarm sounds beeps only when either total weight or total count is inside the set range. Ex) checking the count / weight (If the count / weight is in between LO and HI values, the value on count display window will flicker) 2.Outside type The alarm sounds beeps only when either total weight or total count is outside the set range.
-
Page 33: J.baud Rate Setting
J. Baud Rate setting Keep pressing ENTER key in USER PROGRAMMING MODE until the display ● appears as below. There are 3 options, and Pressing MOVE key is possible to rotate among the options. ● (Default setting: 2) 0 – 2400 1–... -
Page 34: L.label Format Setting(Available When A Label Printer Is Connected.)35
L. Label format setting (available when a label printer is connected.) Keep pressing ENTER key in USER PROGRAMMING MODE until the display ● appears as below. There are 10 options, and Pressing MOVE key is possible to rotate among the options. ●... -
Page 35: Calibration(Can Be Done In Kg/Lb)
8. Calibration (can be done in kg/lb) After turn on, Self-checking will be started. During Self-checking, Input “000419” by ● using numeric keys. Then the scale will be got into simple calibration mode and the display will be shown as below. * Full capacity is required for calibration Normally, the full capacity is displayed on U/W window because full capacity is required for ●... -
Page 36: Power Supply & Battery Operation
9. Power supply & battery operation POWER SUPPLY (1) AC Adaptor (2) DC 12V/800mA or 12V/1000 mA BATTERY OPERATION The scale can be operated from the battery if desired. When the backlight is off, The battery life is approximately 100hours . When the battery need to be charged, a symbol “... -
Page 37: Rs-232 Output
10. RS-232 Output The scale can be ordered with as optional RS-232 output. 1. Mode E1A-RS 232C’s UART signal 2. Format: Baud rate: 9600 BPS Data bits: 8 BITS Stop bit: Code ASCll Connector:9 Pin Socket Pin2 Input Pin3 Output Pin5 Signal Ground D a t a d i g i t 1 2 3 4 5... - Page 38 When the scale is in stable mode: NET: 15.000 kg U/W: 1000 PCS: Tare: 5.000 kg net=Unstable Net Weight NET= Stable Net Weight pcs=Unstable Quantity PCS= Stable Quantity U/W=Unit Weight Tare=Tare value 4. Transmit Format, when it is in Accumulation mode and transmit by pressing “ADD” key and “TOTAL “key.
- Page 39 When it is in stable mode: TOTAL NET: 15.000 kg U/W: 100.00 g PCS: Tare: 5.000 kg When it is in unstable mode: TOTAL net: 15.000 kg U/W: 100.00 g pcs: Tare: 5.000 kg NET=Stable Net Weight net=Unstable Net Weight PCS=Stable Quantity pcs=Unstable Quantity U/W=Unit Weight...
- Page 40 5. Label printer format. ●used “dot”, in accumulation mode: - Press ADD key ( Weight: 6.48kg / Unit weight: 20.25g / Quantity: 320pcs/ Tare: 0.035kg) - Press ADD key again (Weight: 4.55kg / Unit weight: 20.25g / Quantity: 220pcs/ Tare: 0.035kg) - Press TOTAL key (Weight: 10.935kg / Unit weight: 20.25g / Quantity: 540pcs/ Tare: 0.035kg) ●used “comma”:...
- Page 41 6. Pin Connection Connect ECB and Printer using same cable. [Female(ECB) – Male(DLP-50) 7. Key – Command ( by Transmit method setting is set “1”) Command(1 byte) Weighing Mode Char. 0x31 Same as 1 key 0x32 Same as 2 key 0x33 Same as 3 key 0x34...
- Page 42 0x53 S(s) Same as SMPL key 0x73 0x4F O(o) Same as SET key 0x6F 0x4D M(m) Same as MOVE key 0x6D 0x55 U(u) Same as U.WT key 0x75 0x41 A(a) Same as ALARM key 0x61 0x45 E(e)0 Same as ENTER key 0x65 0x52 R(r)
- Page 43 8. Variables(The prompt character) used in scale also in label ptinter Variable Name Specifications Size 2 byte Accumulated times (Weight) 7 byte Net weight (with dot “.”) 6 byte Net weight(no dot) 7 byte Net weight(with comma “,”) 7 byte Tare weight (with dot “.”) 6 byte Tare weight (no dot)
-
Page 44: Error Codes
11. Error Codes While using the scale, it might be happened to show ERROR massage unexpectedly. There is an ERROR massage description as below. Error Code Possible Causes Handling Calibration data lost Re-calibrate the scale The stored data lost Re-calibrate the scale Turn on the scale with something on the Take away all goods from the platform. -
Page 45: Technical Data
12. Technical Data Capacity 30kg 75kg 150kg 250kg Readability 0.002kg 0.005kg 0.01kg 0.02kg Version (e=d) Resolution 1/15,000 1/15,000 1/15,000 1/12,500 Capacity 60lb 150lb 300lb 500lb Readability 0.005lb 0.01lb 0.02lb 0.05lb Version (e=d) Resolution 1/12,000 1/15,000 1/15,000 1/10,000 Internal Resolution 1/600,000 0.02kg 0.05kg 0.1kg...
Need help?
Do you have a question about the ECB Series and is the answer not in the manual?
Questions and answers