Fuji Electric FRENIC-MEGA Series User Manual
High performance, multifunction inverter
Hide thumbs
Also See for FRENIC-MEGA Series:
- User manual (774 pages) ,
- Connection manual (112 pages) ,
- User manual (680 pages)
Table of Contents
Advertisement
Quick Links
Download this manual
See also:
User Manual
Advertisement
Chapters
Table of Contents
Troubleshooting

Subscribe to Our Youtube Channel
Related Manuals for Fuji Electric FRENIC-MEGA Series


Summary of Contents for Fuji Electric FRENIC-MEGA Series
- Page 1 MEH278b...
- Page 2 High Performance, Multifunction Inverter User's Manual...
- Page 3 Copyright © 2007-2009 Fuji Electric Systems Co., Ltd. All rights reserved. No part of this publication may be reproduced or copied without prior written permission from Fuji Electric Systems Co., Ltd. All products and company names mentioned in this manual are trademarks or registered trademarks of their respective holders.
- Page 4 Guideline for Suppressing Harmonics in Home Electric and General-purpose Appliances Our three-phase, 200 V class series inverters of 3.7 kW or less (FRENIC-MEGA series) were the products of which were restricted by the "Guideline for Suppressing Harmonics in Home Electric and General-purpose Appliances"...
-
Page 5: Safety Precautions
This product is not designed for use in appliances and machinery on which lives depend. Consult your Fuji Electric representative before considering the FRENIC-MEGA series of inverters for equipment and machinery related to nuclear power control, aerospace uses, medical uses or transportation. When the... - Page 6 Chapter 5 FUNCTION CODES This chapter contains overview tables of 12 groups of function codes available for the FRENIC-MEGA series of inverters, function code index by purpose, and details of function codes.
- Page 7 Icons The following icons are used throughout this manual. This icon indicates information which, if not heeded, can result in the inverter not operating to full efficiency, as well as information concerning incorrect operations and settings which can result in accidents. This icon indicates information that can prove handy when performing certain settings or operations.
-
Page 8: Table Of Contents
CONTENTS Chapter 1 INTRODUCTION TO FRENIC-MEGA Features..............................1-1 Control System ............................1-12 1.2.1 Theory of inverter ..........................1-12 1.2.2 Motor drive controls.......................... 1-13 External View and Terminal Blocks ....................... 1-14 Recommended Configuration ......................... 1-16 Chapter 2 SPECIFICATIONS Standard Model 1 (Basic Type)......................... 2-1 2.1.1 Three-phase 200 V class series (HD- and LD-mode inverters)............ - Page 9 3.3.2 Guideline for selecting inverter drive mode and capacity..............3-18 Selecting a Motor Drive Control......................3-19 3.4.1 Features of motor drive controls ....................... 3-19 3.4.2 Selecting a Motor Drive Control by Purpose ..................3-24 Chapter 4 SELECTING PERIPHERAL EQUIPMENT Configuring the FRENIC-MEGA......................4-1 Selecting Wires and Crimp Terminals.......................
- Page 10 5.3.3 Entering a run command ........................5-33 5.3.4 Starting/stopping the motor....................... 5-34 5.3.5 Specifying the acceleration/deceleration (time, mode, and pattern)..........5-34 5.3.6 Adjusting the running performance....................5-35 5.3.7 Controlling the motor........................5-36 5.3.7.1 Motor drive control to be selected..................... 5-36 5.3.7.2 Motor parameters to be set up ....................
- Page 11 7.3.6 Remote and local modes ........................7-15 7.3.7 External run/frequency command ..................... 7-16 Programming Mode ..........................7-17 7.4.1 Setting up basic function codes quickly -- Menu #0 "Quick Setup" --..........7-19 7.4.2 Setting up function codes -- Menu #1 "Data Setting" --..............7-22 7.4.3 Checking changed function codes -- Menu #2 "Data Checking"...
- Page 12 B.2 Compliance to the harmonic suppression for customers receiving high voltage or special high voltage ..........................A-13 App. C Effect on Insulation of General-purpose Motors Driven with 400 V Class Inverters......A-17 C.1 Generating mechanism of surge voltages .................... A-17 C.2 Effect of surge voltages ........................
-
Page 14: Introduction To Frenic-Mega
Chapter 1 INTRODUCTION TO FRENIC-MEGA This chapter describes the features and control system of the FRENIC-MEGA series and the recommended configuration for the inverter and peripheral equipment. Contents 1.1 Features............................... 1-1 1.2 Control System............................1-12 1.2.1 Theory of inverter ..........................1-12 1.2.2... -
Page 16: Features
1.1 Features 1.1 Features Best vector control for the general-purpose inverter in the class Ideal for highly accurate control such as positioning Vector control with speed sensor Effective for applications requiring highly precise and accurate positioning control such as offset printing Speed control range: 1:1500 Speed response: 100 Hz... - Page 17 Fuji's original dynamic torque vector control has further upgraded. Besides the dynamic torque vector control, the inverter is equipped with the motor parameter tuning for compensating even a voltage error of the main circuit devices and the magnetic flux observer of a new system.
- Page 18 1.1 Features Improved durability in overload operation Enhancement for extending the current overload durability time of the FRENIC-MEGA longer than that of the Fuji conventional inverters allows the FRENIC-MEGA to run the motor with shorter acceleration/deceleration time. This improves the operation efficiency of machinery such as cutting machines or carrier machines.
- Page 19 Accommodating various applications Convenient functions for operations at the specified speed Pulse train input speed command supported as standard The FRENIC-MEGA can issue a speed command with the pulse train input (single-phase pulse train with sign). (Maximum pulse input: 100 kHz) Ratio operation The ratio operation is convenient for synchronous control of two or more carrier machines in a multiline conveyor system.
- Page 20 1.1 Features Dancer control function optimum for winding control The PID value, calculated by comparing the feedback value with the speed command value, is added to or subtracted from the reference speed. Since the PID processor gain (in proportional band) can be set low, the inverter can be applied to automatic control systems requiring quick response such as speed control.
- Page 21 Wide model variation meeting the customer needs Wide model variation 1. Basic type Suitable for the equipment that uses a peripheral device to suppress noise or harmonics. 2. EMC filter built-in type This type has a built-in EMC filter and is compliant with European EMC Directives. Objective standard: Category C3 (2nd Env) EN61800-3:2004 compliant * Use of EMC filter will increase the leakage current.
- Page 22 1.1 Features Supports for simple maintenance The built-in USB port allows use of an inverter support loader (FRENIC loader) for easy information control! Improved working efficiency in the manufacturing site - A variety of data about the inverter body can be saved in the keypad memory, allowing you to check the information in any place.
- Page 23 Network connectivity Connectivity to the various FA networks with the following option cards - SX-bus communications card - T-Link communications card - PROFIBUS-DP communications card - DeviceNet communications card - CANopen communications card - CC-Link communications card, etc. RS-485 communication possible as standard (on the terminal block) Besides the port (RJ-45 connector) shared with the keypad, an RS-485 terminal is provided as standard.
- Page 24 1.1 Features Prolonged service life and improved life judgment function Designed life 10 years For the various consumable parts inside the inverter, their designed lives have been extended to 10 years, which also extended the equipment maintenance cycles. Consumable part Designed life Main circuit capacitor 10 years...
- Page 25 Consideration for environment Enhanced resistance to the environmental impacts Resistance to the environmental impact has been enhanced compared with the conventional inverter. (1) Enhanced durability of the cooling fan operated under the environmental impact (2) Adoption of copper bars plated with nickel or tin In FRENIC-MEGA, resistance to the environmental impact has been increased compared with the conventional model (FRENIC5000 G11S/P11S).
- Page 26 1.1 Features Compliance with RoHS Directives MEGA complies with European regulations that limit the use of specific hazardous substances (RoHS) as a standard. This inverter is environment-friendly as the use of the following six hazardous substances is restricted. <Six hazardous substances> Lead, mercury, cadmium, hexavalent chromium, polybrominated biphenyl (PBB), and polybrominated biphenyl ether (PBDE) * Except the parts of some inverter models...
-
Page 27: Control System
1.2 Control System 1.2.1 Theory of inverter As shown in Figure 1.1, the converter section converts the input commercial power to DC power by means of a full-wave rectifier, which charges the DC link bus capacitor (reservoir capacitor). The inverter section modulates the electric energy charged in the DC link bus capacitor by Pulse Width Modulation (PWM) according to the control circuit signals and feeds the output to the motor. -
Page 28: Motor Drive Controls
1.2 Control System 1.2.2 Motor drive controls The FRENIC-MEGA supports the following motor drive controls. Drive control Basic control Speed feedback Speed control V/f control Frequency control with slip compensation inactive V/f control Disable Dynamic torque vector control Frequency control with slip compensation V/f control active... -
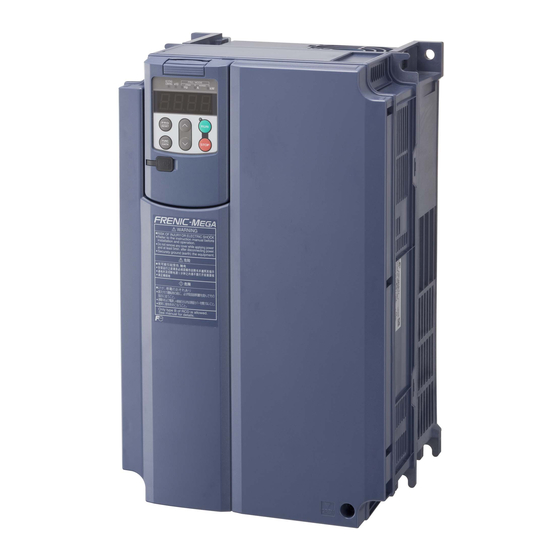
Page 29: External View And Terminal Blocks
1.3 External View and Terminal Blocks (1) External views Figure 1.3 FRN11G1S-2 Figure 1.4 FRN30G1S-4 Note: A box ( ) in the above model names replaces A, E, J, or T depending on the shipping destination. 1-14... - Page 30 1.3 External View and Terminal Blocks (2) Terminal block location (a) FRN11G1S-2 (b) FRN30G1S-2 Figure 1.5 Terminal Blocks and Keypad Enclosure Location (a) FRN0.75G1S-2 (b) FRN30G1S-2 Figure 1.6 Enlarged View of the Terminal Blocks Note: A box ( ) in the above model names replaces A, E, J, or T depending on the shipping destination. Refer to Chapter 2 "SPECIFICATIONS"...
-
Page 31: Recommended Configuration
1.4 Recommended Configuration To control a motor with an inverter correctly, you should consider the rated capacity of both the motor and the inverter and ensure that the combination matches the specifications of the machine or system to be used. Refer to Chapter 3 "SELECTING OPTIMAL MOTOR AND INVERTER CAPACITIES"... -
Page 32: Specifications
This chapter describes specifications of the output ratings, control system, and terminal functions for the FRENIC-MEGA series of inverters. It also provides descriptions of the operating and storage environment, precautions for using inverters, external dimensions, examples of basic connection diagrams, and details of the protective functions. -
Page 34: Standard Model 1 (Basic Type)
2.1 Standard Model 1 (Basic Type) 2.1 Standard Model 1 (Basic Type) 2.1.1 Three-phase 200 V class series (HD- and LD-mode inverters) Item Specifications Type (FRN_ _ _G1S-2 ) 0.75 18.5 Nominal applied motor 0.75 18.5 (kW) Rated capacity (kVA) Three-phase 200 to 230 V Rated voltage (V) Three-phase 200 to 240 V (with AVR function) - Page 35 2.1.2 Three-phase 400 V class series (HD-, LD-, and MD-mode inverters) Item Specifications Type (FRN_ _ _G1S-4 ) 0.4 0.75 1.5 2.2 18.5 160 200 220 (4.0) Nominal applied motor 0.4 0.75 1.5 2.2 18.5 160 200 220 (kW) (4.0) Rated capacity (kVA) 1.1 1.9 2.8 4.1...
-
Page 36: Standard Model 2 (Emc Filter Built-In Type)
2.2 Standard Model 2 (EMC Filter Built-in Type) 2.2 Standard Model 2 (EMC Filter Built-in Type) 2.2.1 Three-phase 200 V class series (HD- and LD-mode inverters) Item Specifications Type (FRN_ _ _G1E-2 ) 0.75 18.5 Nominal applied motor 0.75 18.5 (kW) Rated capacity (kVA) Three-phase 200 to 230 V... - Page 37 2.2.2 Three-phase 400 V class series (HD-, LD-, and MD-mode inverters) Item Specifications Type (FRN_ _ _G1E-4 ) 0.4 0.75 1.5 2.2 18.5 110 132 160 200 (4.0) Nominal applied motor 0.4 0.75 1.5 2.2 18.5 110 132 160 200 (kW) (4.0) Rated capacity (kVA)
-
Page 38: Common Specifications
2.3 Common Specifications 2.3 Common Specifications Item Explanation Remarks Maximum 25 to 500 Hz variable (Up to 120 Hz for MD- and LD-mode inverters) frequency (Up to 120 Hz under vector control without speed sensor, Up to 200 Hz under vector control with speed sensor) Base frequency 25 to 500 Hz variable (in conjunction with the maximum frequency) Starting frequency 0.1 to 60.0 Hz variable... - Page 39 Item Explanation Remarks Torque boost • Auto torque boost (For constant torque load) *1 to *4 • Manual torque boost: Torque boost value can be set between 0.0 and 20.0%. *1, *3, *4 • Select application load with the function code. (Variable torque load or constant torque load) *1, *4 •...
- Page 40 2.3 Common Specifications Item Explanation Remarks Frequency limiter • Specifies the upper and lower limits in Hz. (Upper limit and lower • It is possible to choose the operation to be performed when the reference frequency limit frequencies) drops below the lower limit specified by F16. Bias frequency •...
- Page 41 Item Explanation Remarks Automatic • If the DC link bus voltage or calculated torque exceeds the automatic deceleration level deceleration during deceleration, the inverter automatically prolongs the deceleration time to avoid overvoltage trip. (It is possible to select forcible deceleration actuated when the deceleration time becomes three times longer.) •...
- Page 42 2.3 Common Specifications Item Explanation Remarks Running/Stopping Speed monitor (reference frequency, output frequency, motor speed, load shaft speed, line speed, and speed indication with percent), output current [A], output voltage [V], calculated torque [%], input power [kW], PID command value, PID feedback value, PID output, load factor [%], motor output [kW], torque current [%] *6 *7, magnetic flux command [%]*6 *7, analog input and input watt-hour Life early warning...
- Page 43 Item Explanation Remarks Braking transistor Stop the inverter detecting the brake transistor abnormality. broken (DB transistor built-in type only Stop the inverter when the detected speed exceeds 120% of maximum output frequency. Overspeed protection *4 to *7 PG wire break *4 *5 *7 Stop the inverter detecting the PG braking. Electronic thermal The inverter is stopped with an electronic thermal function set to protect the motor.
- Page 44 2.3 Common Specifications Item Explanation Remarks Alarm relay output • The relay signal is output when the inverter stops upon an alarm. (for any fault) • key or digital input signal RST is used to reset the alarm stop state. Light-alarm (warning) The "light-alarm"...
-
Page 45: Terminal Specifications
2.4 Terminal Specifications 2.4.1 Terminal functions Main circuit and analog input terminals Symbol Name Functions L1/R, L2/S, Main circuit Connect the three-phase input power lines. L3/T power inputs U, V, W Inverter outputs Connect a three-phase motor. R0, T0 Auxiliary power For a backup of the control circuit power supply, connect AC power input for the lines same as that of the main power input. - Page 46 2.4 Terminal Specifications Symbol Name Functions [C1] Analog setting (1) The frequency is commanded according to the external analog current input current input. (C1 function) • 4 to 20 mA DC/0 to 100% (Normal operation) • 20 to 4 mA DC/0 to 100 % (Inverse operation) (2) In addition to frequency setting, PID command, PID feedback signal, auxiliary frequency command setting, ratio setting, torque limiter level setting, or analog input monitor can be...
- Page 47 Related Symbol Name Functions function codes Since low level analog signals are handled, these signals are especially susceptible to the external noise effects. Route the wiring as short as possible (within 20 m) and use shielded wires. In principle, ground the shielded sheath of wires; if effects of external inductive noises are considerable, connection to terminal [11] may be effective.
- Page 48 2.4 Terminal Specifications Digital Input Terminals Symbol Name Functions (1) Various signals such as "Coast to a stop," "Enable external [X1] Digital input 1 alarm trip," and "Select multi-frequency" can be assigned to [X2] Digital input 2 terminals [X1] to [X9], [FWD] and [REV] by setting function codes E01 to E09, E98, and E99.
- Page 49 Symbol Name Functions (1) Connects to PLC output signal power supply. [PLC] PLC signal Rated voltage: +24 VDC (Allowable range: +22 to +27 power VDC), Maximum 100 mA DC (2) This terminal also supplies a power to the load connected to the transistor output terminals [Y1] and [Y2].
- Page 50 2.4 Terminal Specifications Symbol Name Functions Programmable Programmable <Control circuit> <Control circuit> logic controller logic controller [PLC] SINK [PLC] SINK SOURCE SOURCE [X1] to [X9], [X1] to [X9], Photocoupler Photocoupler [FWD], [REV] [FWD], [REV] [CM] [CM] (a) With the switch turned to SINK (b) With the switch turned to SOURCE Figure 2.6 Circuit Configuration Using a PLC For details about the slide switch setting, refer to Section 2.4.2 "Setting up the slide...
- Page 51 Analog output, pulse output, transistor output, and relay output terminals Symbol Name Functions [FMA] Analog monitor The monitor signal for analog DC voltage (0 to +10 V) or analog (FMA function) DC current (+4 to +20 mA) is output. You can select the output form (VO/IO) by switching the slide switch SW4 on the control PCB and changing data of the function code F29.
- Page 52 2.4 Terminal Specifications Symbol Name Functions [Y1] Transistor (1) Various signals such as inverter running, speed/freq. arrival output 1 and overload early warning can be assigned to any terminals, [Y1] to [Y4] by setting function code E20 to E24. Refer to [Y2] Transistor Chapter 5 "FUNCTION CODES"...
- Page 53 Related Symbol Name Functions function codes Connecting programmable logic controller (PLC) to terminal [Y1], [Y2], [Y3] or [Y4] Figure 2.8 shows two examples of circuit connection between the transistor output of the inverter’s control circuit and a PLC. In example (a), the input circuit of the PLC serves as a SINK for the control circuit output, whereas in example (b), it serves as a SOURCE for the output.
- Page 54 2.4 Terminal Specifications RS-485 communications port Connector Name Functions DX+/DX- RS-485 A communications port transmits data through the RS-485 communications multipoint protocol between the inverter and a personal computer port 2 or other equipment such as a PLC. (Terminals (For setting of the terminating resistor, refer to Section 2.4.2 on control PCB) "Setting up the slide switches.") RJ-45...
-
Page 55: Setting Up The Slide Switches
2.4.2 Setting up the slide switches Before changing the switches or touching the control circuit terminal symbol plate, turn OFF the power and wait at least five minutes for inverters with a capacity of 22 kW or below, or at least ten minutes for inverters with a capacity of 30 kW or above. - Page 56 2.4 Terminal Specifications Figure 2.10 shows the location of slide switches on the control PCB for the input/output terminal configuration. Switching examples and factory default OFF OFF Factory default SINK SOURCE IO PTC/NTC Figure 2.10 Location of the Slide Switches on the Control PCB To move a switch slider, use a tool with a narrow tip (e.g., tweezers), taking care not to touch other electronic parts on the PCB.
-
Page 57: Terminal Arrangement Diagram And Screw Specifications
2.4.3 Terminal arrangement diagram and screw specifications 2.4.3.1 Main circuit terminals The table and figures given below show the terminal screw sizes, tightening torque and terminal arrangements. Note that the terminal arrangements differ depending on the inverter types. In each of the figures, two grounding terminals ( G) are not exclusive to the power supply wiring (primary circuit) or motor wiring (secondary circuit). - Page 58 2.4 Terminal Specifications Table 2.2 Screw Specifications and Recommended Wire Sizes (Continued) Screw specifications Recommended wire size (mm Nominal Power Tight- Ground- Tight- Braking applied Refer Main circuit power input Inverter supply Inverter type Screw ening ening Grounding resistor motor (L1/R, L2/S, L3/T) output voltage...
- Page 59 2-26...
-
Page 60: Control Circuit Terminals (Common To All Inverter Types)
2.4 Terminal Specifications 2.4.3.2 Control circuit terminals (Common to all inverter types) The control circuit terminal arrangement, screw sizes, and tightening torque are shown below. The control circuit terminals are common to all inverter types regardless of their capacities. Table 2.3 Screw Specifications and Recommended Wire Size Screw specifications Recommended wire size Terminals common to... -
Page 61: Operating Environment And Storage Environment
2.5 Operating Environment and Storage Environment 2.5.1 Operating environment Install the inverter in an environment that satisfies the requirements listed below. Table 2.4 Environmental Requirements Item Specifications Site location Indoors Surrounding -10 to +50°C (Note 1) temperature Relative humidity 5 to 95% (No condensation) Atmosphere The inverter must not be exposed to dust, direct sunlight, corrosive gases, flammable gas, oil mist, vapor or water drops. -
Page 62: Storage Environment
2.5 Operating Environment and Storage Environment 2.5.2 Storage environment 2.5.2.1 Temporary storage Store the inverter in an environment that satisfies the requirements listed below. Table 2.6 Storage and Transport Environments Item Specifications Storage -25 to +70°C temperature Places not subjected to abrupt temperature changes or condensation or freezing 5 to 95% Relative... -
Page 63: Precautions For Using Inverters
Install the inverter in an environment that satisfies the requirements listed in Table 2.4 in Section 2.5.1. Fuji Electric strongly recommends installing inverters in a panel for safety reasons, in particular, when installing the ones whose enclosure rating is IP00. -
Page 64: Wiring Precautions
400 m or less (100 m or less under the vector control). If further longer secondary wiring is required, consult your Fuji Electric representative. (5) Precautions for surge voltage in driving a motor by an inverter (especially for 400 V class,... - Page 65 (6) When an output circuit filter is inserted in the secondary circuit or the wiring between the inverter and the motor is long, a voltage loss occurs due to reactance of the filter or wiring so that the insufficient voltage may cause output current oscillation or a lack of motor output torque. To avoid it, select the constant torque load by setting the function code F37 (Load Selection/Auto Torque Boost/Auto Energy Saving Operation 1) to "1"...
- Page 66 2.6 Precautions for Using Inverters (4) PWM converter for correcting the inverter input power factor Using a PWM converter (High power-factor, regenerative PWM converter, RHC series) corrects the inverter power factor up to nearly 100%. When combining an inverter with a PWM converter, disable the main power loss detection by setting the function code H72 to "0."...
- Page 67 Noise reduction If noise generated from the inverter affects other devices, or that generated from peripheral equipment causes the inverter to malfunction, follow the basic measures outlined below. (1) If noise generated from the inverter affects the other devices through power wires or grounding wires: - Isolate the grounding terminals of the inverter from those of the other devices.
-
Page 68: Precautions In Running Inverters
2.6 Precautions for Using Inverters 2.6.2 Precautions in running inverters Precautions for running inverters to drive motors or motor-driven machinery are described below. Motor temperature When an inverter is used to run a general-purpose motor, the motor temperature becomes higher than when it is operated with a commercial power supply. - Page 69 Synchronous motors It is necessary to take special measures suitable for this motor type. Contact your Fuji Electric representative for details. Single-phase motors Single-phase motors are not suitable for inverter-driven variable speed operation. High-speed motors If the reference frequency is set to 120 Hz or higher to drive a high-speed motor, test-run the combination of the inverter and motor beforehand to check it for the safe operation.
-
Page 70: External Dimensions
2.7 External Dimensions 2.7 External Dimensions 2.7.1 Standard models The diagrams below show external dimensions of the FRENIC-MEGA series of inverters according to the inverter capacity. (Three-phase 200 V/ 400 V class series) Unit: mm FRN0.4G1S-2 /4 FRN0.75G1S-2 /4 FRN1.5G1S-2 /4 FRN2.2G1S-2 /4 , FRN3.7G1S-2 /4... - Page 71 Unit: mm FRN5.5G1S-2 /4 , FRN7.5G1S-2 /4 , FRN15G1S-2 /4 , FRN18.5G1S-2 /4 , FRN11G1S-2 /4 FRN22G1S-2 /4 FRN30G1S-2 /4 , FRN37G1S-4 Note: A box ( ) in the above model names replaces A, E, J, or T depending on the shipping destination. 2-38...
- Page 72 2.7 External Dimensions Unit: mm FRN37G1S-2 , FRN45G1S-4 FRN55G1S-4 Note: A box ( ) in the above model names replaces A, E, J, or T depending on the shipping destination. 2-39...
- Page 73 Unit: mm FRN45G1S-2 , FRN55G1S-2 , FRN75G1S-4 FRN90G1S-4 , FRN110G1S-4 Note: A box ( ) in the above model names replaces A, E, J, or T depending on the shipping destination. 2-40...
- Page 74 2.7 External Dimensions Unit: mm FRN132G1S-4 , FRN160G1S-4 Note: A box ( ) in the above model names replaces A, E, J, or T depending on the shipping destination. 2-41...
- Page 75 Unit: mm FRN200G1S-4 , FRN220G1S-4 Note: A box ( ) in the above model names replaces A, E, J, or T depending on the shipping destination. 2-42...
-
Page 76: Keypad
2.7 External Dimensions 2.7.2 Keypad Unit: mm Back view 2-43... -
Page 77: Connection Diagrams
2.8 Connection Diagrams 2.8.1 Running a standard motor 2-44... - Page 78 2.8 Connection Diagrams Install a recommended molded case circuit breaker (MCCB) or residual-current-operated protective device (RCD)/earth leakage circuit breaker (ELCB) (with overcurrent protection function) in the primary circuit of the inverter to protect wiring. Ensure that the circuit breaker capacity is equivalent to or lower than the recommended capacity.
-
Page 79: Running A Fuji Motor Exclusively Designed For Vector Control
2.8.2 Running a Fuji motor exclusively designed for vector control 2-46... - Page 80 2.8 Connection Diagrams Install a recommended molded case circuit breaker (MCCB) or residual-current-operated protective device (RCD)/earth leakage circuit breaker (ELCB) (with overcurrent protection function) in the primary circuit of the inverter to protect wiring. Ensure that the circuit breaker capacity is equivalent to or lower than the recommended capacity.
-
Page 81: Protective Functions
2.9 Protective Functions The table below lists the name of the protective functions, description, alarm codes on the LED monitor, and presence of alarm output at terminals [30A/B/C]. If an alarm code appears on the LED monitor, remove the cause of activation of the alarm function referring to Chapter 9 "TROUBLESHOOTING."... - Page 82 2.9 Protective Functions Alarm output Name Description monitor [30A/B/C] displays (Note) - Stops the inverter output upon detecting excess heat sink Overheat temperature in case of cooling fan failure or overload. protection - Detects a failure of the internal air circulation DC fan and stops the inverter (For models of 45 kW in 200 V class series and 75 kW or above in 400 V class series)
- Page 83 Alarm output Name Description monitor [30A/B/C] displays (Note) Electronic In the following cases, the inverter stops running the motor to Yes* thermal protect the motor in accordance with the electronic thermal overload overload protection setting. - Protects general-purpose motors over the entire frequency range (F10 = 1.) - Protects inverter motors over the entire frequency range (F10 = 2.)
- Page 84 2.9 Protective Functions Alarm output Name Description monitor [30A/B/C] displays (Note) Operation STOP Pressing the key on the keypad forces the inverter protection to decelerate and stop the motor even if the inverter is priority running by any run commands given via the terminals or communications (link operation).
- Page 85 Alarm output Name Description monitor [30A/B/C] displays (Note) Alarm relay The inverter outputs a relay contact signal when the inverter — output issues an alarm and stops the inverter output. (for any fault) < Alarm reset > The alarm stop state is reset by pressing the key or by the digital input signal RST.
- Page 86 Chapter 3 SELECTING OPTIMAL MOTOR AND INVERTER CAPACITIES This chapter provides you with information about the inverter output torque characteristics, selection procedure, and equations for calculating capacities to help you select optimal motor and inverter models. It also helps you select braking resistors, inverter mode (HD, MD, or LD), and motor drive control. Contents 3.1 Selecting Motors and Inverters ........................
-
Page 88: Selecting Motors And Inverters
3.1 Selecting Motors and Inverters Selecting Motors and Inverters When selecting a general-purpose inverter, first select a motor and then inverter as follows: (1) Key point for selecting a motor: Determine what kind of load machine is to be used, calculate its moment of inertia, and then select the appropriate motor capacity. - Page 89 Figure 3.2 Output Torque Characteristics (Base frequency: 60 Hz) Continuous allowable driving torque Standard motor (Curve (a1) in Figures 3.1 and 3.2) Curve (a1) shows the torque characteristic that can be obtained in the range of the inverter continuous rated current, where the standard motor's cooling characteristic is taken into consideration. When the motor runs at the base frequency of 60 Hz, 100 % output torque can be obtained;...
- Page 90 3.1 Selecting Motors and Inverters Starting torque (around the output frequency 0 Hz in Figures 3.1 and 3.2) The maximum torque in a short time applies to the starting torque as it is. Braking torque (Curves (d), (e), and (f) in Figures 3.1 and 3.2) In braking the motor, kinetic energy is converted to electrical energy and regenerated to the DC link bus capacitor (reservoir capacitor) of the inverter.
-
Page 91: Selection Procedure
3.1.2 Selection procedure Figure 3.3 shows the general selection procedure for optimal inverters. Items numbered (1) through (5) are described on the following pages. You may easily select inverter capacity if there are no restrictions on acceleration and deceleration times. If "there are any restrictions on acceleration or deceleration time" or "acceleration and deceleration are frequent,"... - Page 92 3.1 Selecting Motors and Inverters Calculating the load torque during constant speed running (For detailed calculation, refer to Section 3.1.3.1) It is essential to calculate the load torque during constant speed running for all loads. First calculate the load torque of the motor during constant speed running and then select a tentative capacity so that the continuous rated torque of the motor during constant speed running becomes higher than the load torque.
- Page 93 Deceleration time (For detailed calculation, refer to Section 3.1.3.2) To calculate the deceleration time, check the motor deceleration torque characteristics for the whole range of speed in the same way as for the acceleration time. 1) Calculate the moment of inertia for the load and motor Same as for the acceleration time.
-
Page 94: Equations For Selections
3.1 Selecting Motors and Inverters 3.1.3 Equations for selections 3.1.3.1 Load torque during constant speed running [ 1 ] General equation The frictional force acting on a horizontally moved load must be calculated. Calculation for driving a load along a straight line with the motor is shown below. Where the force to move a load linearly at constant speed υ... - Page 95 Vertical Lift Load A simplified mechanical configuration is assumed as shown in Figure 3.8. If the mass of the cage is W (kg), the load is W (kg), and the balance weight is W (kg), then the forces F (N) required for lifting the load up and down are expressed as follows: −...
-
Page 96: Acceleration And Deceleration Time Calculation
3.1 Selecting Motors and Inverters 3.1.3.2 Acceleration and deceleration time calculation When an object whose moment of inertia is J (kg·m ) rotates at the speed N (r/min), it has the following kinetic energy: π • (3.9) • To accelerate the above rotational object, the kinetic energy will be increased; to decelerate the object, the kinetic energy must be discharged. - Page 97 Table 3.1 Moment of Inertia of Various Rotating Bodies Mass: W (kg) Mass: W (kg) Shape Shape Moment of inertia: Moment of inertia: J (kg·m J (kg·m π Hollow cylinder ρ − ρ • • • • • • • •...
- Page 98 3.1 Selecting Motors and Inverters For a load running horizontally Assume a carrier table driven by a motor as shown in Figure 3.7. If the table speed is υ (m/s) when the motor speed is N (r/min), then an equivalent distance from the shaft is equal to 60·υ / (2π·N ) (m).
- Page 99 [ 3 ] Calculation of the deceleration time In a load system shown in Figure 3.11, the time needed to stop the motor rotating at a speed of N (r/min) is calculated with the following equation: η π − • •...
- Page 100 3.1 Selecting Motors and Inverters [4-1] Calculating non-linear acceleration time The expression (3.17) gives an acceleration time ∆t within a ∆N speed thread. / η 2π ∆ N • 1 2 ∆t (3.17) • τ - τ / η Before proceeding this calculation, obtain the motor shaft moment of inertia J , the load shaft moment 1...
-
Page 101: Heat Energy Calculation Of Braking Resistor
3.1.3.3 Heat energy calculation of braking resistor If the inverter brakes the motor, the kinetic energy of mechanical load is converted to electric energy to be regenerated into the inverter circuit. This regenerative energy is often consumed in so-called braking resistors as heat. The following explains the braking resistor rating. [ 1 ] Calculation of regenerative energy In the inverter operation, one of the regenerative energy sources is the kinetic energy that is generated at the time an object is moved by an inertial force. -
Page 102: Calculating The Rms Rating Of The Motor
3.1 Selecting Motors and Inverters 3.1.3.4 Calculating the RMS rating of the motor In case of the load which is repeatedly and very frequently driven by a motor, the motor current fluctuates largely and enters the short-time rating range of the motor repeatedly. Therefore, you have to review the allowable thermal rating of the motor. -
Page 103: Selecting A Braking Resistor
Selecting a Braking Resistor 3.2.1 Selection procedure Depending on the cyclic period, the following requirements must be satisfied. If the cyclic period is 100 s or less: Requirements 1) and 3) below If the cyclic period exceeds 100 s: Requirements 1) and 2) below 1) The maximum braking torque should not exceed values listed in Tables 4.6 to 4.9 in Chapter 4, Section 4.4.1.1 "Braking resistor (DBR) and braking unit."... -
Page 104: Selecting An Inverter Drive Mode
3.3 Selecting an Inverter Drive Mode Selecting an Inverter Drive Mode Precaution in selecting the inverter drive mode between HD, 3.3.1 MD, and LD modes A FRENIC-MEGA inverter is available in three different drive modes--HD (High Duty: for heavy duty load applications) , MD (Medium Duty: for medium duty load applications), and LD (Low Duty: for light duty load applications), which allows users to switch the drive modes on site. -
Page 105: Guideline For Selecting Inverter Drive Mode And Capacity
3.3.2 Guideline for selecting inverter drive mode and capacity Table 3.2 lists the differences between HD, MD, and LD modes. If the MD/LD mode specifications satisfy the requirements in your application in view of the overload capability and functionality, you can select the inverter one or two ranks lower in capacity than that of the motor rating. -
Page 106: Selecting A Motor Drive Control
3.4 Selecting a Motor Drive Control Selecting a Motor Drive Control 3.4.1 Features of motor drive controls The FRENIC-MEGA supports the following motor drive controls. This section shows their basic configurations and describes their features. Drive control Basic control Speed feedback Speed control V/f control with slip compensation inactive Frequency control... - Page 107 V/f control with slip compensation inactive <Main circuit> Converter Inverter M <Control block> |V *| pattern Three- Accelerator/ processor phase decelerator voltage processor processor Frequency command Figure 3.15 Schematic Block Diagram of V/f Control with Slip Compensation Inactive As shown in the above configuration, the inverter does not receive any speed information feedback from the target machinery being controlled and it controls the load shaft speed only with a frequency command given by the frequency setting device (open-loop control).
- Page 108 3.4 Selecting a Motor Drive Control The FRENIC-MEGA features the dynamic torque vector controller with the flux estimator, which is always correcting the magnetic flux phase while monitoring the inverter output current as the feedback. This feature allows the inverter to always apply the drive power with an optimal voltage and current and consequently respond to quick load variation or speed change.
- Page 109 It is possible to obtain the desired response by adjusting the control constants (PI constants) using the speed regulator (PI controller). The vector control without speed sensor in the FRENIC-MEGA series has adopted the magnetic flux observer system, improving the control performance in the low speed domain.
- Page 110 3.4 Selecting a Motor Drive Control Vector control with speed sensor <Main circuit> Converter Inverter Speed sensor <Control block> + Current analyzer - Speed controller Current analyzer Speed command PG interface card Figure 3.19 Schematic Block Diagram of Vector Control with Speed Sensor As shown in the above configuration, the inverter is equipped with an optional PG (Pulse Generator) interface card and receives the feedback signals from the PG to detect the motor rotational position and speed.
-
Page 111: Selecting A Motor Drive Control By Purpose
3.4.2 Selecting a Motor Drive Control by Purpose Listed below is a general guide for selecting a motor drive control by purpose. Use this guide just for reference. In individual cases, selection should be made carefully after a technical consultation regarding the detailed specifications of your system. -
Page 112: Selecting Peripheral Equipment
Chapter 4 SELECTING PERIPHERAL EQUIPMENT This chapter describes how to use a range of peripheral equipment and options, FRENIC-MEGA's configuration with them, and requirements and precautions for selecting wires and crimp terminals. Contents 4.1 Configuring the FRENIC-MEGA ....................... 4-1 4.2 Selecting Wires and Crimp Terminals......................4-2 4.2.1 Recommended wires ........................... - Page 113 4.4.2 Options for operation and communication ..................4-61 4.4.2.1 External frequency command potentiometer................4-61 4.4.2.2 Multi-function keypad (TP-G1-J1, TP-G1-C1)................. 4-62 4.4.2.3 Extension cable for remote operation..................4-63 4.4.2.4 Inverter support loader software....................4-64 4.4.2.5 PG interface card (OPC-G1-PG) ....................4-65 4.4.2.6 PG interface (5 V line driver) card (OPC-G1-PG2) ..............
-
Page 114: Configuring The Frenic-Mega
4.1 Configuring the FRENIC-MEGA Configuring the FRENIC-MEGA This section lists the names and features of peripheral equipment and options for the FRENIC-MEGA series of inverters and includes a configuration example for reference. Refer to Figure 4.1 for a quick overview of available options. Figure 4.1 Quick Overview of Options... -
Page 115: Selecting Wires And Crimp Terminals
Selecting Wires and Crimp Terminals This section contains information needed to select wires for connecting the inverter to commercial power lines, motor or any of the optional/peripheral equipment. The level of electric noise issued from the inverter or received by the inverter from external sources may vary depending upon wiring and routing. - Page 116 Power supply capacity and power supply impedance which are calculated using values matching the inverter capacity recommended by Fuji Electric Systems. - The input RMS current listed in the above table will vary in inverse proportion to the power supply voltage, such as 230 VAC.
- Page 117 Power supply capacity and power supply impedance which are calculated using values matching the inverter capacity recommended by Fuji Electric Systems. - The input RMS current listed in the above table will vary in inverse proportion to the power supply voltage, such as 380 VAC.
- Page 118 Power supply capacity and power supply impedance which are calculated using values matching the inverter capacity recommended by Fuji Electric Systems. - The input RMS current listed in the above table will vary in inverse proportion to the power supply voltage, such as 380 VAC.
-
Page 119: Recommended Wires
4.2.1 Recommended wires Tables 4.2 and 4.3 list the recommended wires according to the internal temperature of your power control panel. ■ If the internal temperature of your power control panel is 50°C or below Table 4.2 Wire Size (for main circuit power input and inverter output) HD (High Duty) mode: Heavy duty load applications LD (Low Duty) mode: Light duty load applications Recommended wire size (mm... - Page 120 4.2 Selecting Wires and Crimp Terminals Table 4.2 Wire Size (for main circuit power input and inverter output) (continued) HD (High Duty) mode: Heavy duty load applications MD (Medium Duty) mode: Medium duty load applications LD (Low Duty) mode: Light duty load applications Recommended wire size (mm Main circuit power input Inverter output...
- Page 121 Table 4.2 Wire Size (for DC reactor, braking resistor, control circuits, and inverter grounding) (continued) HD (High Duty) mode: Heavy duty load applications LD (Low Duty) mode: Light duty load applications Recommended wire size (mm Braking resistor Auxiliary control Auxiliary fan Inverter DC reactor Nominal...
- Page 122 4.2 Selecting Wires and Crimp Terminals Table 4.2 Wire Size (for DC reactor, braking resistor, control circuits, and inverter grounding) (continued) HD (High Duty) mode: Heavy duty load applications MD (Medium Duty) mode: Medium duty load applications LD (Low Duty) mode: Light duty load applications Recommended wire size (mm Braking resistor...
- Page 123 ■ If the internal temperature of your power control panel is 40°C or below Table 4.3 Wire Size (for main circuit power input and inverter output) HD (High Duty) mode: Heavy duty load applications LD (Low Duty) mode: Light duty load applications Recommended wire size (mm Main circuit power input Inverter output...
- Page 124 4.2 Selecting Wires and Crimp Terminals Table 4.3 Wire Size (for main circuit power input and inverter output) (continued) HD (High Duty) mode: Heavy duty load applications MD (Medium Duty) mode: Medium duty load applications LD (Low Duty) mode: Light duty load applications Recommended wire size (mm Main circuit power input Inverter output...
- Page 125 Table 4.3 Wire Size (for DC reactor, braking resistor, control circuit, and inverter grounding) (continued) HD (High Duty) mode: Heavy duty load applications LD (Low Duty) mode: Light duty load applications Recommended wire size (mm Braking resistor Auxiliary control Auxiliary fan Inverter DC reactor Nominal...
- Page 126 4.2 Selecting Wires and Crimp Terminals Table 4.3 Wire Size (for DC reactor, braking resistor, control circuit, and inverter grounding) (continued) HD (High Duty) mode: Heavy duty load applications MD (Medium Duty) mode: Medium duty load applications LD (Low Duty) mode: Light duty load applications Recommended wire size (mm Braking resistor...
-
Page 127: Peripheral Equipment
Peripheral Equipment 4.3.1 Molded case circuit breaker (MCCB), residual-current-operated protective device (RCD)/earth leakage circuit breaker (ELCB) and magnetic contactor (MC) [ 1 ] Functional overview ■ MCCBs and RCDs/ELCBs* * With overcurrent protection Molded Case Circuit Breakers (MCCBs) are designed to protect the power circuits between the power supply and inverter's main circuit terminals ([L1/R], [L2/S] and [L3/T]) from overload or short-circuit, which in turn prevents secondary accidents caused by the broken inverter. - Page 128 4.3 Peripheral Equipment Driving the motor using commercial power lines MCs can also be used to switch the power supply of the motor driven by the inverter to a commercial power supply. Select the MC so as to satisfy the rated currents listed in Table 4.1, which are the most critical RMS currents for using the inverter.
- Page 129 Table 4.4 Rated Current of Molded Case Circuit Breaker (MCCB), Residual-Current-Operated Protective Device (RCD)/ Earth Leakage Circuit Breaker (ELCB) and Magnetic Contactor (MC) HD (High Duty) mode: Heavy duty load applications LD (Low Duty) mode: Light duty load applications MCCB, RCD/ELCB Nominal Power Rated current (A)
- Page 130 4.3 Peripheral Equipment Table 4.4 Rated Current of Molded Case Circuit Breaker (MCCB), Residual-Current-Operated Protective Device (RCD)/ Earth Leakage Circuit Breaker (ELCB) and Magnetic Contactor (MC) (continued) HD (High Duty) mode: Heavy duty load applications MD (Medium Duty) mode: Medium duty load applications LD (Low Duty) mode: Light duty load applications MCCB, RCD/ELCB...
- Page 131 Table 4.5 lists the relationship between the rated leakage current sensitivity of RCDs/ELCBs (with overcurrent protection) and wiring length of the inverter output circuits. Note that the sensitivity levels listed in the table are estimated values based on the results obtained by the test setup in the Fuji laboratory where each inverter drives a single motor.
-
Page 132: Surge Killers For L-Load
Refer to the catalog "Fuji Surge Killers/Absorbers (HS118: Japanese edition only)" for details. These products are available from Fuji Electric Technica Co., Ltd. Note: Do not connect the surge killers in the secondary (output) circuit of the inverter. -
Page 133: Arresters
Figure 4.4 shows their external dimensions and connection examples. Refer to the catalog "Fuji Surge Killers/Absorbers (HS118: Japanese edition only)" for details. These products are available from Fuji Electric Technica Co., Ltd. Three-phase (220 VAC) Three-phase (440 VAC) -
Page 134: Surge Absorbers
Installed parallel to a coil of an MC, solenoid valve, or L load, a surge absorber absorbs a surge voltage. Applicable surge absorber models are the S2-A-O and S1-B-O. Figure 4.5 shows their external dimensions. The surge absorbers are available from Fuji Electric Technica Co., Ltd. Unit: mm Figure 4.5 Surge Absorber Dimensions 4-21... -
Page 135: Filtering Capacitors Suppressing Am Radio Band Noises
400 V class. Use one of them no matter what the inverter capacity. Figure 4.6 shows their external dimensions. These products are available from Fuji Electric Technica Co., Ltd. Note: Do not use the capacitor in the inverter secondary (output) line. - Page 136 4.4 Selecting Options Selecting Options 4.4.1 Peripheral equipment options 4.4.1.1 Braking resistor (DBR) and braking unit [ 1 ] Braking resistor (DBR) A braking resistor converts regenerative energy generated from deceleration of the motor to heat for consumption. Use of a braking resistor results in improved deceleration performance of the inverter. Refer to Chapter 3, Section 3.2 "Selecting a Braking Resistor."...
- Page 137 [ 2 ] Braking unit Add a braking unit to the braking resistor to upgrade the braking capability of inverters with the following capacity. HD mode: 30 kW or above LD mode: 30 kW or above Inverters with a capacity of 22 kW or below have built-in IGBTs for the braking resistor. Figure 4.9 Braking Unit For the specifications and external dimensions of the braking units, refer to [ 3 ] and [ 4 ] in this Section.
- Page 138 4.4 Selecting Options [ 3 ] Specifications Table 4.6 Generated Loss in Braking Unit Model Generated loss (W) BU37-2C BU55-2C BU90-2C BU37-4C BU55-4C BU90-4C BU132-4C BU220-4C *10%ED Table 4.7 Braking Unit and Braking Resistor (Standard Model) for HD-mode Inverters Repetitive braking Option Maximum braking Continuous braking...
- Page 139 Table 4.8 Braking Unit and Braking Resistor (Standard Model) for LD-mode Inverters Repetitive braking Option Maximum braking Continuous braking Inverter type (each cycle is less Nominal torque (%) (100% braking torque) Power Braking unit Braking resistor than 100 (s)) applied supply motor Discharging...
- Page 140 4.4 Selecting Options Table 4.10 Braking Resistor (10%ED Model) for HD-mode Inverters Continuous braking Repetitive braking Option Maximum braking Nominal Inverter type (100% braking (each cycle is less Power torque (%) Braking resistor applied torque) than 100 (s)) supply motor Discharging Braking Average...
- Page 141 [ 4 ] External dimensions Braking resistors, standard models * DB220-4C should be used in pairs. The dimension above is for one unit. Braking resistors, 10% ED models 4-28...
- Page 142 4.4 Selecting Options Braking units Fan units for braking units Using this option improves the duty cycle [%ED] from 10%ED to 30%ED. 4-29...
-
Page 143: Power Regenerative Pwm Converter, Rhc Series
4.4.1.2 Power regenerative PWM converter, RHC series [ 1 ] Overview 4-30... - Page 144 4.4 Selecting Options [ 2 ] Specifications [ 2.1 ] Standard specifications 200 V class series 400 V class series (*1) When the power supply voltage is 200/400 V, 220/440 V, or 230/460 V, the output voltage is approximate 320/640 VDC, 343/686 VDC, 355/710 VDC, respectively.
- Page 145 [ 2.2 ] Common specifications Item Specifications Control method AVR constant control with DC ACR minor Running/Stopping Starts rectification when the converter is powered ON after connection. Starts boosting when it receives a run signal (terminals [RUN] and [CM] short-circuited or a run command via the communications link). After that, the converter is ready to run.
- Page 146 4.4 Selecting Options [ 3 ] Function specifications Terminal functions Symbol Name Functions L1/R, L2/S, Main circuit power Connects with the three-phase input power lines through a L3/T inputs dedicated reactor. P(+), N(-) Converter outputs Connects with the power input terminals P(+) and N(-) on an inverter.
- Page 147 Communications specifications Item Specifications Monitoring the running information, running status and function code General communication data, and controlling (selecting) the terminals [RUN], [RST] and specifications [X1]. * Writing to function codes is not possible. RS-485 (standard) Communicating with a PC or PLC. (The converter supports the Fuji general-purpose inverter protocol and Modbus RTU protocol.) Mounting the OPC-VG7-TL option enables communication with a...
- Page 148 4.4 Selecting Options Protective functions monitor Item Description Remarks displays: AC fuse blown Stops the converter output if the AC fuse (R-/T-phase only) is blown. AC overvoltage Stops the converter output upon detection of an AC overvoltage condition. AC undervoltage Stops the converter output upon detection of an AC undervoltage condition.
- Page 149 monitor Item Description Remarks displays: Memory error Stops the converter output if a data writing error or any other memory error occurs (when the checksums of the EEPROM and RAM do not match). Keypad Displays " " upon detection of a wire break communications error in initial communication with the keypad.
- Page 150 4.4 Selecting Options [ 4 ] Converter configuration List of configurators CT mode VT mode (*1) The charging box (CU) contains a combination of a charging resistor (R0) and a fuse (F). If no CU is used, it is necessary to prepare the charging resistor (R0) and fuse (F) at your end.
- Page 151 Basic connection diagrams • RHC7.5-2C to RHC90-2C (Applicable inverters: Three-phase 200 V class series, 7.5 to 90 kW) • RHC7.5-4C to RHC220-4C (Applicable inverters: Three-phase 400 V class series, 7.5 to 220 kW) *When a charging box is connected Symbol Part name Boosting reactor Filtering reactor...
-
Page 152: Selecting Options
4.4 Selecting Options • RHC280-4C to RHC400-4C (Applicable inverters: Three-phase 400 V, 280 to 400 kW) Symbol Part name Boosting reactor Filtering reactor Filtering capacitor Filtering resistor Charging resistor Fuse Magnetic contactor for charging circuit Magnetic contactor for power supply Magnetic contactor for filtering circuit (*1) Connect a stepdown transformer to limit the voltage of the sequence circuit to 220 V or below. - Page 153 [ 5 ] External dimensions PWM converter < Boosting reactor > 4-40...
- Page 154 4.4 Selecting Options < Filtering reactor > < Filtering capacitor > < Filtering resistor > 4-41...
- Page 155 < Charging box > The charging box contains a combination of a charging resistor and a fuse, which is essential in the configuration of the RHC-C series of PWM converters. Using this charging box eases mounting and wiring jobs. Capacity range 200 V class series: 7.5 to 90 kW in 10 types, 400 V class series: 7.5 to 220 kW in 14 types, Total 24 types As for 400 V class series with a capacity of 280 to 400 kW, the charging resistor and the fuse are separately...
- Page 156 4.4 Selecting Options ■ Generated loss In CT mode PWM converter Boosting reactor Filtering reactor Filtering resistor Generated Generated Generated Generated Type Type Type Type Q'ty loss (W) loss (W) loss (W) loss (W) RHC7.5-2C LR2-7.5C LFC2-7.5C GRZG80 0.42Ω RHC11-2C LR2-15C LFC2-15C GRZG150 0.2Ω...
-
Page 157: Dc Reactors (Dcrs)
4.4.1.3 DC reactors (DCRs) A DCR is mainly used for power supply matching and for input power factor correction (for reducing harmonic components). ■ For power supply matching - Use a DCR when the capacity of a power supply transformer exceeds 500 kVA and is 10 times or more the rated inverter capacity. - Page 158 4.4 Selecting Options Table 4.12 DC Reactors (DCRs) Nominal Power Rated Generated applied DC reactor Inductance supply Inverter type HD/LD current loss motor type (mH) voltage (kW) DCR2-0.4 FRN0.4G1 -2 0.75 FRN0.75G1 -2 DCR2-0.75 FRN1.5G1 -2 DCR2-1.5 DCR2-2.2 FRN2.2G1 -2 FRN3.7G1 -2 DCR2-3.7 DCR2-5.5...
- Page 159 Table 4.12 DC Reactors (DCRs) (continued) Nominal Power Rated Generated applied DC reactor Inductance supply Inverter type current loss motor type (mH) voltage (kW) DCR4-0.4 FRN0.4G1 -4 0.75 DCR4-0.75 FRN0.75G1 -4 DCR4-1.5 FRN1.5G1 -4 DCR4-2.2 FRN2.2G1 -4 DCR4-3.7 FRN3.7G1 -4 DCR4-5.5 FRN5.5G1 -4 DCR4-7.5...
- Page 160 4.4 Selecting Options Table 4.13 DC Reactors (DCRs) External Dimensions Nominal Power Dimensions (mm) applied DC reactor Mass supply Inverter type HD/LD Figure motor type (kg) Mounting Terminal voltage (kW ) hole hole DCR2-0.4 5.2×8 FRN0.4G1 -2 0.75 DCR2-0.75 5.2x8 FRN0.75G1 -2 DCR2-1.5 5.2x8...
- Page 161 Table 4.13 DC Reactors (DCRs) External Dimensions (continued) Nominal Power Dimensions (mm) applied DC reactor Mass supply Inverter type Figure motor type (kg) Mounting Terminal voltage (kW) hole hole FRN0.4G1 -4 DCR4-0.4 5.2x8 0.75 FRN0.75G1 -4 DCR4-0.75 5.2x8 FRN1.5G1 -4 DCR4-1.5 5.2x8 DCR4-2.2...
-
Page 162: Ac Reactors (Acrs)
4.4 Selecting Options 4.4.1.4 AC reactors (ACRs) Use an ACR when the converter part of the inverter should supply very stable DC power, for example, in DC link bus operation (shared PN operation). Generally, ACRs are used for correction of voltage waveform and power factor or for power supply matching, but not for suppressing harmonic components in the power lines. - Page 163 Table 4.14 AC Reactor (ACR) Nominal Reactance Power Rated Coil Generated applied AC reactor (mΩ/phase) supply Inverter type HD/LD current resistance loss motor type voltage (mΩ) 50 Hz 60 Hz (kW) ACR2-0.4A 1100 FRN0.4G1 -2 0.75 FRN0.75G1 -2 ACR2-0.75A ACR2-1.5A FRN1.5G1 -2 FRN2.2G1 -2 ACR2-2.2A...
- Page 164 4.4 Selecting Options Table 4.14 AC Reactor (ACR) (continued) Nominal Reactance Power Rated Coil Generated applied AC reactor (mΩ/phase) supply Inverter type HD/LD current resistance loss motor type voltage (mΩ) (kW) 50 Hz 60 Hz FRN0.4G1 -4 ACR4-0.75A 1920 2300 0.75 FRN0.75G1 -4 FRN1.5G1 -4...
- Page 165 Table 4.15 AC Reactors (ACRs) External Dimensions Nominal Power Dimensions (mm) applied AC reactor Mass supply Inverter type HD/LD Figure motor type (kg) Terminal voltage (kW) hole FRN0.4G1 -2 ACR2-0.4A 6x10 0.75 FRN0.75G1 -2 ACR2-0.75A 6x10 FRN1.5G1 -2 ACR2-1.5A 6x10 FRN2.2G1 -2 ACR2-2.2A 6x10...
- Page 166 4.4 Selecting Options Table 4.15 AC Reactors (ACRs) External Dimensions (continued) Nominal Power Dimensions (mm) applied AC reactor Mass supply Inverter type Figure motor type (kg) Terminal voltage (kW) hole FRN0.4G1 -4 ACR4-0.75A 6x10 0.75 FRN0.75G1 -4 FRN1.5G1 -4 ACR4-1.5A 6x10 FRN2.2G1 -4 ACR4-2.2A...
-
Page 167: Surge Suppression Unit (Ssu)
4.4.1.5 Surge suppression unit (SSU) If the drive wire for the motor is long, an extremely low surge voltage (micro surge) occurs at the wire end connected to the motor. Surge voltage causes motor degradation, insulation breakdown, or increased noises. The surge suppression unit (SSU) suppresses the surge voltage. -
Page 168: Output Circuit Filters (Ofls)
4.4 Selecting Options 4.4.1.6 Output circuit filters (OFLs) Insert an OFL in the inverter power output circuit to: - Suppress the surge voltage at motor terminal This protects the motor from insulation damage caused by the application of high voltage surge currents from the 400 V class series of inverters. - Page 169 Table 4.16 Output Circuit Filter (OFL) OFL- Carrier Nominal Inverter Power Rated frequency- Maximum Generated applied Overload power supply Inverter type Filter type current allowable frequency loss motor capability input voltage range (Hz) (kW) voltage (kHz) FRN0.4G1 -4 OFL-0.4-4A 0.75 FRN0.75G1 -4 OFL-1.5-4A FRN1.5G1 -4...
- Page 170 4.4 Selecting Options Table 4.17 Output Circuit Filter (OFL) Dimensions OFL- Filter (for 22 kW or below) Reactor (for 30 kW or above) Resistor and Capacitor (for 30 kW or above) For filters OFL-30-4A and greater, a reactor, resistor, and capacitor should be installed separately.
-
Page 171: Zero-Phase Reactor For Reducing Radio Noise (Acl)
4.4.1.7 Zero-phase reactor for reducing radio noise (ACL) An ACL is used to reduce radio frequency noise emitted by the inverter. An ACL suppresses the outflow of high frequency harmonics caused by switching operation for the power supply lines inside the inverter. Pass the power supply lines together through the ACL. If wiring length between the inverter and motor is less than 20 m, insert an ACL to the power supply lines;... - Page 172 4.4 Selecting Options 4.4.1.8 IP40 kit (P40G1- [ 1 ] Overview Mounting the IP40 kit on the FRENIC-MEGA standard model 1 (basic type) enables the inverter's enclosure to conform to the protection rating IP40 (totally enclosed). [ 2 ] Configuration Type Configuration P40G1-0.75...
- Page 173 Surrounding temperature -10 to +40°C Number of option cards (printed circuit boards) mountable on the inverter equipped with the IP40 kit The inverter equipped with the IP40 kit can accept only one more option card except the relay output interface card (OPC-G1-RY). It can accept two relay output interface cards. Any type of option cards is compatible with this IP 40 kit.
-
Page 174: Options For Operation And Communication
Model: RJ-13 (BA-2 B-characteristics, 1 kΩ) Panel hole size Unit: mm Note: The dial plate and knob must be ordered as separated items. Available from Fuji Electric Technica Co., Ltd. Model: WAR3W (3W B-characteristics, 1 kΩ) Panel hole size Unit: mm Note: The dial plate and knob must be ordered as separated items. -
Page 175: Multi-Function Keypad (Tp-G1-J1, Tp-G1-C1)
Japanese, English, German, French, Spanish, and Italian Language TP-G1-C1 Chinese, English, Japanese, and Korean Data copying function Capable of storing and copying function code data of up to three inverters Applicable inverters FRENIC-Multi series, FRENIC-Eco series, and FRENIC-MEGA series External view 4-62... -
Page 176: Extension Cable For Remote Operation
4.4 Selecting Options 4.4.2.3 Extension cable for remote operation The extension cable connects the inverter with the keypad (standard or multi-function) or USB−RS-485 converter to enable remote operation of the inverter. The cable is a straight type with RJ-45 jacks and its length is selectable from 5, 3, and 1 m. Table 4.19 Extension Cable Length for Remote Operation Type Length (m) -
Page 177: Inverter Support Loader Software
4.4.2.4 Inverter support loader software FRENIC Loader is support software which enables the inverter to be operated via the RS-485 communications facility. The main functions include the following: - Easy editing of function code data - Monitoring the operation statuses of the inverter such as I/O monitor and multi-monitor - Operation of inverters on a PC screen (Windows-based only) Refer to Chapter 8 "RUNNING THROUGH RS-485 COMMUNICATION"... -
Page 178: Pg Interface Card (Opc-G1-Pg)
4.4 Selecting Options 4.4.2.5 PG interface card (OPC-G1-PG) The PG interface card has a two-shifted pulse train (ABZ phase) input circuit for speed feedback and a power output circuit for feeding power to the connected PG (pulse generator). Mounting this interface card on the FRENIC-MEGA enables the following: (1) Speed control (vector control with speed sensor) by speed feedback through the PG (2) Pulse train input frequency command... - Page 179 Terminal functions Terminal Name Specification Power input terminal from the external device for PG +12 VDC ±10% or [P1] External power input * +15 VDC ±10% (Use the power source 150 mA or above which is larger than the PG current consumption.) Power output terminal for PG +12 VDC ±10%, 120 mA or [PO]...
- Page 180 4.4 Selecting Options Speed control (Vector control with speed sensor) To control motor speed, the inverter equipped with this interface card uses vector control with speed sensor. The inverter detects the actual motor speed sensing feedback signals sent from the PG (pulse generator) mounted on the motor output shaft.
-
Page 181: Pg Interface (5 V Line Driver) Card (Opc-G1-Pg2)
4.4.2.6 PG interface (5 V line driver) card (OPC-G1-PG2) The PG interface (5 V line driver) card has the following circuits: - Shifted phase pulse train (ABZ phase) input circuit for speed feedback (5 V line driver output type - Wire break detection circuit (Detection of wire breaks on the Z phase can be cancelled.) - Power output circuit for feeding power to the connected PG (pulse generator) Mounting this interface card on the FRENIC-MEGA enables speed control using the feedback signals (vector control with speed sensor). - Page 182 4.4 Selecting Options Terminal functions Terminal Name Specification Power input terminal from the external device for PG +5 VDC ±10% input * [P1] External power input * (Use the power supply 200 mA or above which is larger than the PG current consumption.) Power output terminal for PG [PO] Power output to PG...
- Page 183 Internal block diagram Shown below is the internal block diagram example where the internal power source (5 V) supplies power to the PG. (J1 is set to the INT position.) Each phase input circuit has a wire break detector. The A- and B-phase wire break detectors are always ON.
- Page 184 4.4 Selecting Options Speed control (Vector control with speed sensor) To control motor speed, the inverter equipped with this interface card uses vector control with speed sensor. The inverter detects the actual motor speed sensing feedback signals sent from the PG (pulse generator) mounted on the motor output shaft, decomposes the motor drive current into the exciting and torque current components, and controls each of components in vector.
-
Page 185: Relay Output Interface Card (Opc-G1-Ry)
4.4.2.7 Relay output interface card (OPC-G1-RY) The relay output interface card converts an inverter’s digital output to a mechanical contact (one transfer contact) output. It has two independent transfer contacts so that using two cards allows the user to activate up to four contact outputs. A signal to be output to each contact can be defined with function codes E20 to E23. - Page 186 4.4 Selecting Options Internal circuits [1A] [Y1]/[Y3] signal [1B] Actuator [1C] [2A] [Y2]/[Y4] signal [2B] Actuator [2C] Figure 4.17 Internal Circuits The relationship between function codes and relay output functions is as follows. Function code Functions Setting range Terminal [Y1] (Function selection) Terminal [Y2] (Function selection) 0 to 105 (For normal logic), or 1000 to 1105 (For negative logic)
-
Page 187: Digital Input Interface Card (Opc-G1-Di)
4.4.2.8 Digital input interface card (OPC-G1-DI) The digital input interface card has 16 digital input terminals (switchable between SINK and SOURCE). Mounting this interface card on the FRENIC-MEGA enables the user to specify frequency commands with binary code (8, 12, 15, or 16 bits) or BCD (4-bit Binary Coded Decimal) code. Ports available for the interface card This interface card can be connected to any one of the three option connection ports (A-, B-, and C-ports) on the FRENIC-MEGA. - Page 188 4.4 Selecting Options Connection example Connection example Power supply SINK mode SOURCE mode [P L C ] M E G A In te rfa c e c ard [M 1 ] Interfac e c a rd [M 1 ] + 24 V + 2 4 V S IN K S IN K...
- Page 189 Input signal name Terminal function and configuration details Frequency setting range: -(Maximum frequency) to +(Maximum frequency) 8-bit binary = -128 to +127 frequency command Setting resolution = Maximum frequency × (1/127) Frequency setting range: -(Maximum frequency) to +(Maximum frequency) 12-bit binary = -2048 to +2047 frequency command Setting resolution = Maximum frequency ×...
-
Page 190: Digital Output Interface Card (Opc-G1-Do)
4.4 Selecting Options 4.4.2.9 Digital output interface card (OPC-G1-DO) The digital output interface card has eight transistor output terminals (switchable between SINK and SOURCE). Mounting this interface card on the FRENIC-MEGA enables the user to monitor the output frequency and other items with binary code (8 bits). Ports available for the interface card This interface card can be connected to any of the three option connection ports (A-, B-, and C-ports) on the FRENIC-MEGA. - Page 191 Connection example Interface card [M2] SINK mode [O1] to [O8] 24 V Interface card [M2] 24 V SOURCE mode [O1] to [O8] Configuring inverter's function code Function code o21 (DO mode selection) provided for options specifies the item to be monitored by digital signals of this interface card.
-
Page 192: Analog Interface Card (Opc-G1-Aio)
4.4 Selecting Options 4.4.2.10 Analog interface card (OPC-G1-AIO) The analog interface card has the terminals listed below. Mounting this interface card on the FRENIC-MEGA enables analog input and analog output to/from the inverter. - One analog voltage input point (0 to ±10 V) - One analog current input point (4 to 20 mA) - One analog voltage output point (0 to ±10 V) - One analog current output point (4 to 20 mA) - Page 193 Symbol Name Functions Remarks - Outputs the monitor signal of analog DC voltage (0 to ±10 VDC). - One of the following signals can be issued from this terminal. - Output frequency (before or after slip compensation) - Output current - Output voltage - Output torque - Load factor...
- Page 194 4.4 Selecting Options Connection example Symbol Connection of shielded wire S hielded wire [P10] P otentiom eter [32] [32] 1k to 5kΩ [31] Shielded wire [C2] Constant current source [C2] 4 to 20 m A [31] Shielded wire [Ao+] [Ao] [Ao-] Shielded wire [CS+]...
- Page 195 Function Codes and Their Parameters for Terminal [32] (Continued) Function Name Data Description Remarks code (Offset adjustment) -5.0 to +5.0% Offset adjustment amount (Gain adjustment) 0.00 to 200.00% Gain adjustment amount (Filter setting) 0.00 to 5.00 s Filter constant (Gain base point) 0.00 to 100.00% Gain base point (Polarity) 0 Bipolar...
- Page 196 4.4 Selecting Options Function Codes and Their Parameters for Terminal [Ao] (Continued) Function Name Data Description Remarks code (Gain to output voltage) 0 to 300% (Polarity) 0 Bipolar Unipolar Function Codes and Their Parameters for Terminal [CS] Function Name Data Description Remarks code...
-
Page 197: T-Link Communications Card (Opc-G1-Tl)
4.4.2.11 T-Link communications card (OPC-G1-TL) The T-Link communications card is used to connect the FRENIC-MEGA series to a Fuji MICREX series of programmable logic controllers via a T-Link network. Mounting the communications card on the FRENIC-MEGA enables the user to specify and monitor run and frequency commands and configure and check inverter's function codes required for inverter running from the MICREX. - Page 198 4.4 Selecting Options Inverter's function codes dedicated to T-Link communication Function Data setting Function Description range * code Select run/frequency 0 to 3 Select from the following choices: command sources Frequency command Run command source source Inverter Inverter T-Link Inverter Inverter T-Link T-Link...
- Page 199 MICREX; the upper four words are control area for writing data from the MICREX into the inverter. This format has been designed to minimize the program change in the controller when the FRENIC5000 G9 series is replaced with the FRENIC-MEGA series. (MSB) (LSB)
-
Page 200: Sx-Bus Communications Card (Opc-G1-Sx)
4.4.2.12 SX-bus communications card (OPC-G1-SX) The SX-bus communications card is used to connect the FRENIC-MEGA series to a Fuji MICREX-SX series of programmable logic controllers via an SX bus. Mounting the communications card on the FRENIC-MEGA enables programmed control and monitoring of the inverter and configuring and checking of function codes required for inverter running, from the MICREX-SX. - Page 201 Inverter's function codes dedicated to SX-bus communication Function Data setting Function Description code range * Select run/frequency 0 to 3 Select from the following choices: command sources Frequency Run command command source source Inverter Inverter SX bus Inverter Inverter SX bus SX bus SX bus Select error processing for...
- Page 202 4.4 Selecting Options Area occupied in MICREX-SX and data allocation address Standard Format ■ When the standard format is selected (o30 = 0), SX-bus communication uses a 16-word area per inverter in the MICREX-SX I/O area as shown below. (A maximum of 10 inverters can be connected.) The lower 8-word area is used as a status area for reading out data from the inverter to the MICREX-SX, the upper 8-word one, as a control area for writing data from the MICREX-SX to the inverter.
-
Page 203: Cc-Link Communications Card (Opc-G1-Ccl)
4.4.2.13 CC-Link communications card (OPC-G1-CCL) CC-Link (Control & Communication Link) is an FA open field network system. The CC-Link communications card connects the inverter to a CC-Link master via CC-Link using a dedicated cable. It supports the transmission speed of 156 kbps to 10 Mbps and the total length of 100 to 1,200 m so that it can be used in wide range of systems requiring a high-speed or long-distance transmission, enabling a flexible system configuration. - Page 204 4.4 Selecting Options Inverter's function codes dedicated to CC-Link communication Function Data setting Function Description range * code Select run/frequency 0 to 3 Select from the following choices: command sources Frequency Run command command source source Inverter Inverter CC-Link Inverter Inverter CC-Link CC-Link...
-
Page 205: Profibus-Dp Communications Card (Opc-G1-Pdp)
4.4.2.14 PROFIBUS-DP communications card (OPC-G1-PDP) The PROFIBUS-DP communications card is used to connect the FRENIC-MEGA series to a PROFIBUS-DP master via PROFIBUS. Mounting the communications card on the FRENIC-MEGA enables the user to control the FRENIC-MEGA as a slave unit by configuring and monitoring run and frequency commands and accessing inverter's function codes from the PROFIBUS master. - Page 206 4.4 Selecting Options Inverter's function codes dedicated to PROFIBUS-DP communication The inverter's function codes listed in Table 4.23 should be configured for specifying run and frequency commands via PROFIBUS. Table 4.23 Inverter's Function Codes Required for Enabling Run and Frequency Commands via PROFIBUS Function Factory...
- Page 207 Node address (1) Configuring node address switches (SW1 and SW2) Before the inverter power is turned ON, the node address of the communications card should be specified with rotary switches SW1 and SW2 on the card. The setting range is from 00 to 99 in decimal. SW1 specifies a 10s digit of the node address and the SW2, a 1s digit.
-
Page 208: Devicenet Communications Card (Opc-G1-Dev)
4.4.2.15 DeviceNet communications card (OPC-G1-DEV) The DeviceNet communications card is used to connect the FRENIC-MEGA series to a DeviceNet master via DeviceNet. Mounting the communications card on the FRENIC-MEGA enables the user to control the FRENIC-MEGA as a slave unit by configuring and monitoring run and frequency commands and accessing inverter's function codes from the DeviceNet master. - Page 209 DIP switch configuration The DIP switch specifies the communication data rate (baud rate) and the node address (MAC ID) on DeviceNet as shown below. It offers a choice of baud rates (125, 250, and 500 kbps) and a choice of node address (MAC ID) ranging from 0 to 63.
- Page 210 4.4 Selecting Options Table 4.25 Function Code Group Group Group Group Group Group name Group Group name Group Group name code code code 2 02h Command/function data 9 09h Motor 2 parameters 19 13h Motor 3 parameters 3 03h Monitored data 10 0Ah Option functions 12 0Ch Motor 4 parameters 4 04h Fundamental functions...
-
Page 211: Canopen Communications Card (Opc-G1-Cop)
4.4.2.16 CANopen communications card (OPC-G1-COP) The CANopen communications card is used to connect the FRENIC-MEGA series to a CANopen master unit (e.g., PC and PLC) via a CANopen network. Mounting the communications card on the FRENIC-MEGA allows the user to control the FRENIC-MEGA as a slave unit by configuring run and frequency commands and accessing inverter's function codes from the CANopen master unit. - Page 212 4.4 Selecting Options The table below lists the other related inverter's function codes. Configure those function codes if necessary. Related Inverter's Function Codes Function Factory Function code name default Data setting range Description code Select error processing 0 to 15 for CANopen network breaks Set the operation timer...
-
Page 213: Option Cards For Operation And Communication
The table below lists the option cards, option connection ports, and applicable ROM/product versions. (Function enhancement or version update in the future may provide new options. For options not listed below, contact Fuji Electric or visit our website.) Option connection... -
Page 214: Meter Options
Model: FM-60 (10 VDC, 1 mA) Model: FM-80 (10 VDC, 1 mA) Unit: mm (View from the front of the panel) (View from the front of the panel) Available from Fuji Electric Technica Co., Ltd. Figure 4.18 Frequency Meter Dimensions and Connection Example 4-101... - Page 216 Chapter 5 FUNCTION CODES This chapter contains overview tables of function codes available for the FRENIC-MEGA series of inverters, function code index by purpose, and details of function codes. Contents 5.1 Overview of Function Codes ........................5-1 5.2 Function Code Tables..........................5-2 5.3 Function Code Index by Purpose ......................
- Page 217 5.4.2 E codes (Extension terminal functions)................... 5-102 5.4.3 C codes (Control functions) ......................5-139 5.4.4 P codes (Motor parameters) ......................5-144 5.4.5 H codes (High performance functions) ................... 5-149 5.4.6 A codes (Motor 2 parameters) b codes (Motor 3 parameters) r codes (Motor 4 parameters)..5-177 5.4.7 J codes (Application functions 1)....................
-
Page 218: Overview Of Function Codes
5.1 Overview of Function Codes 5.1 Overview of Function Codes Function codes enable the FRENIC-MEGA series of inverters to be set up to match your system requirements. Each function code consists of a 3-letter alphanumeric string. The first letter is an alphabet that identifies its group and the following two letters are numerals that identify each individual code in the group. -
Page 219: Function Code Tables
5.2 Function Code Tables The following descriptions supplement those given in the function code tables on page 5-4 and subsequent pages. Changing, validating, and saving function code data when the inverter is running Function codes are indicated by the following based on whether they can be changed or not when the inverter is running: Notation Change when running... - Page 220 5.2 Function Code Tables Using negative logic for programmable I/O terminals The negative logic signaling system can be used for the programmable, digital input and output terminals by setting the function code data specifying the properties for those terminals. Negative logic refers to the inverted ON/OFF (logical value 1 (true)/0 (false)) state of input or output signal.
- Page 221 The following tables list the function codes available for the FRENIC-MEGA series of inverters. F codes: Fundamental Functions Drive control Refer Default Code Name Data setting range setting page: F00 Data Protection 0: Disable both data protection and digital reference...
- Page 222 5.2 Function Code Tables Drive control Refer Default Code Name Data setting range setting page: F26 Motor Sound (Carrier frequency) 0.75 to 16 kHz (HD-mode inverters with 55 kW or below 5-86 and LD-mode ones with 18.5 kW or below 0.75 to 10 kHz (HD-mode inverters with 75 to 400 kW and LD-mode ones with 22 to 55 kW) 0.75 to 6 kHz...
- Page 223 E codes: Extension Terminal Functions Drive control Refer Default Code Name Data setting range setting page: Selecting function code data assigns the corresponding 5-102 function to terminals [X1] to [X9] as listed below. E01 Terminal [X1] Function 0 (1000): Select multi-frequency (0 to 1 steps) (SS1) E02 Terminal [X2] Function 1 (1001):...
- Page 224 5.2 Function Code Tables Drive control Refer Default Code Name Data setting range setting page: E16 Torque Limiter 2-1 -300% to 300%; 999 (Disable) 5-92 E17 Torque Limiter 2-2 -300% to 300%; 999 (Disable) 5-117 Selecting function code data assigns the corresponding 5-118 function to terminals [Y1] to [Y5A/C] and [30A/B/C] as listed below.
- Page 225 Drive control Refer Default Code Name Data setting range setting page: E30 Frequency Arrival (Hysteresis width) 0.0 to 10.0 Hz 5-127 E31 Frequency Detection 1 (Level) 0.0 to 500.0 Hz 60.0 5-128 (Hysteresis width) 0.0 to 500.0 Hz E34 Overload Early Warning/Current 0.00 (Disable);...
- Page 226 5.2 Function Code Tables Drive control Refer Default Code Name Data setting range setting page: Selecting function code data assigns the corresponding 5-102 function to terminals [FWD] and [REV] as listed below. 5-138 E98 Terminal [FWD] Function 0 (1000): Select multi-frequency (0 to 1 steps) (SS1) E99 Terminal [REV] Function 1 (1001):...
- Page 227 C codes: Control Functions of Frequency Drive control Refer Default Code Name Data setting range setting page: C01 Jump Frequency 1 0.0 to 500.0 Hz 5-139 (Hysteresis width) 0.0 to 30.0 Hz C05 Multi-frequency 1 0.00 to 500.00 Hz 0.00 0.00 0.00 0.00...
- Page 228 5.2 Function Code Tables P codes: Motor 1 Parameters Drive control Refer Default Code Name Data setting range setting page: P01 Motor 1 (No. of poles) 2 to 22 poles Y1 Y2 5-144 (Rated capacity) 0.01 to 1000 kW (when P99 = 0, 2, 3 or 4) Y1 Y2 0.01 to 1000 HP (when P99 = 1) (Rated current) 0.00 to 2000 A...
- Page 229 Drive control Refer Default Code Name Data setting range setting page: H09 Starting Mode (Auto search) 0: Disable 5-152 1: Enable (At restart after momentary power failure) 2: Enable (At restart after momentary power failure and at normal start) H11 Deceleration Mode 0: Normal deceleration 1: Coast-to-stop 5-154...
- Page 230 5.2 Function Code Tables Drive control Refer Default Code Name Data setting range setting page: H61 UP/DOWN Control 0: 0.00 Hz 5-53 (Initial frequency setting) 5-163 1: Last UP/DOWN command value on releasing the run command H63 Low Limiter (Mode selection) 0: Limit by F16 (Frequency limiter: Low) and continue to run 5-80 1: If the output frequency lowers below the one limited by 5-164...
- Page 231 Drive control Refer Default Code Name Data setting range setting page: H97 Clear Alarm Data 0: Disable 5-174 1: Enable (Setting "1" clears alarm data and then returns to "0.") H98 Protection/Maintenance Function 0 to 255: Display data in decimal format (Mode selection) Bit 0: Lower the carrier frequency automatically (0: Disabled;...
- Page 232 5.2 Function Code Tables Drive control Refer Default Code Name Data setting range setting page: A18 Motor 2 (Auto-tuning) 0: Disable ― 1: Tune while the motor stops. (%R1, %X and rated slip frequency) 2: Tune while the motor is rotating under V/f control (%R1, %X, rated slip frequency, no-load current, magnetic saturation factors 1 to 5, and magnetic saturation extension factors "a"...
- Page 233 b codes: Motor 3 Parameters Drive control Refer Default Code Name Data setting range setting page: b01 Maximum Frequency 3 25.0 to 500.0 Hz 60.0 ― b02 Base Frequency 3 25.0 to 500.0 Hz 50.0 b03 Rated Voltage at Base Frequency 3 0: Output a voltage in proportion to input voltage 80 to 240: Output an AVR-controlled voltage (for 200 V class series)
- Page 234 5.2 Function Code Tables Drive control Refer Default Name Data setting range setting page: b35 Motor 3 0.0% to 300.0% Y1 Y2 ― (Magnetic saturation extension factor "a") (Magnetic saturation extension 0.0% to 300.0% Y1 Y2 factor "b") (Magnetic saturation extension 0.0% to 300.0% Y1 Y2 factor "c")
- Page 235 Drive control Refer Default Code Name Data setting range setting page: r09 DC Braking 4 0.0 to 60.0 Hz ― (Braking starting frequency) (Braking level) 0% to 100% (HD mode), 0% to 80% (MD/LD mode) (Braking time) 0.00: Disable; 0.01 to 30.00 s 0.00 r12 Starting Frequency 4 0.0 to 60.0 Hz...
- Page 236 5.2 Function Code Tables Drive control Refer Default Code Name Data setting range setting page: r43 Speed Control 4 0.000 to 5.000 s 0.020 ― (Speed command filter) (Speed detection filter) 0.000 to 0.100 s 0.005 P (Gain) 0.1 to 200.0 times 10.0 I (Integral time) 0.001 to 9.999 s 0.100...
- Page 237 Drive control Refer Default Code Name Data setting range setting page: J68 Brake Signal (Brake-OFF current) 0% to 300% 5-195 (Brake-OFF frequency/speed) 0.0 to 25.0 Hz (Brake-OFF timer) 0.0 to 5.0 s (Brake-ON frequency/speed) 0.0 to 25.0 Hz (Brake-ON timer) 0.0 to 5.0 s (Brake-OFF torque) 0% to 300% (Speed selection) 0: Detected speed 1: Reference speed...
- Page 238 5.2 Function Code Tables y codes: LINK Functions Drive control Refer Default Code Name Data setting range setting page: y01 RS-485 Communication 1 1 to 255 5-205 (Station address) (Communications error processing) 0: Immediately trip with alarm 1: Trip with alarm after running for the period specified by timer y03 2: Retry during the period specified by timer y03.
- Page 239 Table A Factory Defaults Depending upon Inverter Capacity Auto-restart after momentary Auto-restart after momentary Inverter Inverter Torque boost 1 to 4 Torque boost 1 to 4 power failure (Restart time) power failure (Restart time) capacity capacity F09/A05/b05/r05 F09/A05/b05/r05 (kW) (kW) 0.75 18.5 5-22...
- Page 240 5.2 Function Code Tables Table B (1) Fuji Standard Motor, 8-series or Other Motor is Selected with Motor Selection (P99/A39/b39/r39 = 0 or 4) 200 V class series 5-23...
- Page 241 400 V class series 5-24...
- Page 242 5.2 Function Code Tables Table B (2) Fuji Standard Motor, 6-series is Selected with Motor Selection (P99/A39/b39/r39 = 3) 200 V class series 5-25...
- Page 243 400 V class series 5-26...
- Page 244 5.2 Function Code Tables Table B (3) Fuji Motor Exclusively Designed for Vector Control is Selected with Motor Selection (P99/A39/b39/r39 = 2) 200 V class series 5-27...
- Page 245 400 V class series 5-28...
- Page 246 5.2 Function Code Tables Table B (4) HP Rating Motor is Selected with Motor Selection (P99/A39/b39/r39 = 1) 200 V class series 5-29...
- Page 247 400 V class series 5-30...
-
Page 248: Function Code Index By Purpose
5.3 Function Code Index by Purpose 5.3 Function Code Index by Purpose 5.3.1 Configuring the minimal requirements for the inverter to just run the motor To run the motor simply with constant torque load under V/f control, the following function codes should be configured as minimal requirements. -
Page 249: Frequency Setting By Analog Input
5.3.2.2 Frequency setting by analog input Function Refer to Name code page: Set up the reference frequency using analog input (voltage or Frequency Command 1 5-53 current) applied to terminal [12], [C1], or [V2] from external equipment (analog frequency command source). Bias (Frequency command 1) Bias (Frequency command 1) (Bias 5-53... -
Page 250: Entering A Run Command
5.3 Function Code Index by Purpose Function Refer to Name code page: Set up the reference frequency with pulse train Frequency Command 1 5-53 input. Command (Pulse Rate Input) 5-204 (Pulse input format) (Filter time constant) (Pulse count factor 1) Pulse train input (Pulse count factor 2) Receive pulses from other motor's PG to... -
Page 251: Starting/Stopping The Motor
5.3.4 Starting/stopping the motor Function Refer to Name code page: Starting Starting Frequency 1 Start the motor smoothly. 5-83 frequency Starting Frequency 1 (Holding time) Starting Mode 5-152 (Auto search) (Auto search delay time 1) Search for the idling motor speed to restart the Auto search (Auto search delay time 2) motor without stopping and shock. -
Page 252: Adjusting The Running Performance
5.3 Function Code Index by Purpose Function Refer to Name code page: Allow the motor to coast to a stop when the Deceleration Mode 5-154 run command is turned OFF in order to minimize the variation of deceleration torque. Coast-to-stop Allow the motor to coast to a stop in order to prevent conflict with the mechanical brake. -
Page 253: Controlling The Motor
Function Refer to Name code page: Suppression of Output Current Fluctuation Damping 5-168 Suppress the fluctuation of the inverter output output current Gain for Motor 1 current. fluctuation Motor Sound Reduce an audible noise generated by the Motor sound (Carrier frequency) 5-86 motor. -
Page 254: Motor Parameters To Be Set Up
5.3 Function Code Index by Purpose Function Refer to Name code page: Motor/Parameter Switching 2 5-177 ASR Switching Time E01-E09 Terminals [X1] to [X9] Functions 5-102 (M2) Speed Control 1 (Speed command filter) (Speed detection filter) Speed control 5-199 Switch the gain and other speed control P (Gain) under vector parameters between two control modes. -
Page 255: Setting Up I/O Terminals
5.3.8 Setting up I/O terminals Function Refer to Name code page: Assignment of E01-E09 Terminal [X1] to [X9] Functions 5-102 functions to Assign functions (commands) to the digital general-purpose input terminals to control the inverter. input terminals Assignment of E20-E24 Terminal [Y1] to [Y5A/C] Functions 5-118 functions to Output inverter or motor running status to the general-purpose... -
Page 256: Keeping On Running The Motor
5.3 Function Code Index by Purpose 5.3.10 Keeping on running the motor Function Refer to Name code page: Auto-reset 5-150 Enable the auto-reset function that makes the (Times) inverter automatically attempt to reset the (Reset interval) Reset tripped state and restart even if an alarm E20-E24 Terminal [Y1] to [Y5A/C] Functions 5-118... -
Page 257: Outputting Status Signals
5.3.11 Outputting status signals Function Refer to Name code page: Frequency Detection 1 5-128 (Level) (Hysteresis width) Detection of Detect the motor running speed level. Frequency Detection 2 (Level) frequency Frequency Detection 3 (Level) E20-E24 Terminal [Y1] to [Y5A/C] Functions 5-118 (FDT, FDT2, FDT3) Frequency Arrival (Hysteresis... -
Page 258: Running In Various Operation Modes
5.3 Function Code Index by Purpose 5.3.12 Running in various operation modes Function Refer to Name code page: Jog (inch) the motor with the keys on the Jogging Frequency 5-141 keypad. Acceleration Time (Jogging) 5-65 Jogging Deceleration Time (Jogging) Jog (inch) the motor with input signals to E01-E09 Terminal [X1] to [X9] Functions 5-102... -
Page 259: Setting Up Controls Suited For Individual Applications
5.3.13 Setting up controls suited for individual applications 5.3.13.1 Droop control Function Refer to Name code page: Droop Control 5-156 Eliminate load unbalance using the droop control. E01-E09 Terminals [X1] to [X9] Functions 5-102 (DROOP) 5.3.13.2 PID process control Refer to Code Name page:... - Page 260 5.3 Function Code Index by Purpose Refer to Code Name page: PID Control (Remote command SV) 5-181 E01-E09 Terminal [X1] to [X9] Functions 5-102 Define two or more PID commands (SS4, SS8) PID command beforehand and switch between them with Multi-frequency 4 5-139 "Select multi-frequency"...
-
Page 261: Pid Dancer Control
Refer to Code Name page: "Under PID E20-E24 Terminal [Y1] to [Y5A/C] Functions 5-118 Output the "Under PID control" signal from control" signal (PID-CTL) the specified output terminal. output Convert a control amount into a physical PID Display Coefficient A Display of quantity of the process and display it on the PID Display Coefficient B... - Page 262 5.3 Function Code Index by Purpose Function Refer to Name code page: PID Control (Remote command SV) 5-181 E01-E09 Terminal [X1] to [X9] Functions 5-102 Define two or more PID commands (SS4, SS8) PID command beforehand and switch between them with Multi-frequency 4 5-139 "Select multi-frequency"...
-
Page 263: Customizing The Keypad
Function Refer to Name code page: Convert a control amount into a physical PID Display Coefficient A Display of quantity of the process and display it on the PID Display Coefficient B 5-130 process value keypad. 5.3.14 Customizing the keypad Function Refer to Name... -
Page 264: Controlling The Inverter Via Communications Line
5.3 Function Code Index by Purpose 5.3.15 Controlling the inverter via communications line Function Refer to Name code page: RS-485 Communication 1 5-205 (Station address) (Communications error processing) (Timer) (Baud rate) (Data length) (Parity check) (Stop bits) (No-response error detection time) (Response interval) (Protocol selection) <... -
Page 265: Activating The Protective Functions
5.3.16 Activating the protective functions 5.3.16.1 Protection of machinery with limiters Function Refer to Name code page: Frequency Limiter (High) 5-80 (Low) Low Limiter (Mode selection) Limit the frequency to protect the machinery. Maximum Frequency 1 5-62 Low Limiter (Lower limiting frequency) 5-164 Limit the motor rotational direction to protect the machinery. -
Page 266: Using Other Protective And Safety Functions
5.3 Function Code Index by Purpose Function Refer to Name code page: Protect the motor from overheating with the Thermistor (for motor) 5-155 PTC or NTC thermistor embedded in the (Mode selection) motor. (Level) Motor overheat < Switching the terminal [V2] 2-22 Use the Fuji VG motor (exclusively designed function between V2 and PTC/NTC >... - Page 267 Function Refer to Name code page: RS-485 Communication 1 (Communications error processing) (Timer) (No-response error detection time) Communications Detect a communications error. 5-205 error RS-485 Communication 2 (Communications error processing) (Timer) (No-response error detection time) PID feedback Stop the system if a PID feedback wire breaks PID Feedback Wire Break Detection 5-173 wire break (current input on [C1]).
-
Page 268: Maintenance
5.3 Function Code Index by Purpose 5.3.17 Maintenance 5.3.17.1 Maintenance of inverters Function Refer to Name code page: Set up the load conditions that match the Capacitance of DC Link Bus Service life of actual operating conditions at the user site for Capacitor DC link bus 5-159... -
Page 269: Details Of Function Codes
5.4 Details of Function Codes This section provides the details of the function codes. The descriptions are, in principle, arranged in the order of function code groups and in numerical order. However, highly relevant function codes are collectively described where one of them first appears. 5.4.1 F codes (Fundamental functions) Data Protection... - Page 270 5.4 Details of Function Codes Frequency Command 1 F18 (Bias, Frequency command 1) C30 (Frequency Command 2) C31 to C35 (Analog Input Adjustment for [12]) C36 to C39 (Analog Input Adjustment for [C1]) C41 to C45 (Analog Input Adjustment for [V2]) C50 (Bias (Frequency command 1), Bias base point) H61 (UP/DOWN Control, Initial frequency setting) d59, d61 to d63 (Command (Pulse Rate Input))
- Page 271 • When you start specifying the reference frequency or any other parameter with key, the least significant digit on the display blinks; that is, the cursor lies in the least significant digit. Holding down the key changes data in the least significant digit and generates a carry, while the cursor remains in the least significant digit.
- Page 272 5.4 Details of Function Codes Gain and bias If F01 = 3 (the sum of [12] + [C1] is enabled), the bias and gain are independently applied to each of the voltage and current inputs given to terminals [12] and [C1], and the sum of the two values is applied as the reference frequency.
- Page 273 Example: Setting the bias, gain, and their base points when the reference frequency 0 to 60 Hz follows the analog input of 1 to 5 VDC applied on terminal [12] with the maximum frequency 60 Hz (F03) (Point A) To set the reference frequency to 0 Hz for an analog input being at 1 V, set the bias to 0% (F18 = 0).
- Page 274 5.4 Details of Function Codes • Configuring F18 (Bias) and C50 (Bias base point) to specify an arbitrary value (Points A , and A ) gives the bias as shown below. • To input bipolar analog voltage (0 to ±10 VDC) to terminals [12] and [V2], set C35 and C45 data to "0."...
- Page 275 Specifying the initial value for the UP/DOWN control Specify the initial value to start the UP/DOWN control. Data for H61 Initial value to start the UP/DOWN control Mode fixing the value at "0": The inverter automatically clears the value to “0” when restarted (including powered ON).
- Page 276 5.4 Details of Function Codes [ 4 ] Using pulse train input (F01 = 12) Selecting the pulse train input format (d59) A pulse train in the format selected by the function code d59 can give a frequency command to the inverter. Three types of formats are available; the pulse train sign/pulse train input, the forward rotation pulse/reverse rotation pulse, and the A and B phases with 90 degree phase difference.
- Page 277 Pulse count factor 1 (d62), Pulse count factor 2 (d63) For the pulse train input, function codes d62 (Command (Pulse rate input), (Pulse count factor 1)) and d63 (Command (Pulse rate input), (Pulse count factor 2)) define the relationship between the input pulse rate and the frequency command (reference). Frequency reference (Hz) Pulse count factor 2 (d63)
- Page 278 5.4 Details of Function Codes Switching frequency command Using the terminal command Hz2/Hz1 assigned to one of the digital input terminals switches between frequency command 1 (F01) and frequency command 2 (C30). For details about Hz2/Hz1, refer to E01 to E09 (data = 11). Terminal command Hz2/Hz1 Frequency command source Follow F01 (Frequency command 1)
- Page 279 Maximum Frequency 1 F03 specifies the maximum frequency to limit the output frequency. Specifying the maximum frequency exceeding the rating of the equipment driven by the inverter may cause damage or a dangerous situation. Make sure that the maximum frequency setting matches the equipment rating.
- Page 280 5.4 Details of Function Codes Normal (linear) V/f pattern V/f pattern with three non-linear points Base Frequency 1 (F04) Set F04 data to the rated frequency printed on the nameplate labeled on the motor. - Data setting range: 25.0 to 500.0 (Hz) Rated Voltage at Base Frequency 1 (F05) Set F05 data to "0"...
- Page 281 In vector control, current feedback control is performed. In the current feedback control, the current is controlled with the difference between the motor induced voltage and the inverter output voltage. For a proper control, the inverter output voltage should be sufficiently higher than the motor induced voltage. Generally, the voltage difference is about 20 V for 200 V class series, about 40 V for 400 V class series.
- Page 282 5.4 Details of Function Codes F07, F08 Acceleration Time 1, Deceleration Time 1 E10, E12, E14 (Acceleration Time 2, 3 and 4) E11, E13, E15 (Deceleration Time 2, 3 and 4) H07 (Acceleration/Deceleration Pattern) H56 (Deceleration Time for Forced Stop) H54, H55 (Acceleration Time/Deceleration Time, Jogging) H57 to H60 (1st and 2nd S-curve Acceleration/Deceleration Range) F07 specifies the acceleration time, the length of time the frequency increases from 0 Hz to...
- Page 283 Acceleration/deceleration time Function code Acceleration/ Switching factor of acceleration/deceleration time deceleration time Refer to the descriptions of E01 to E09.) time time The combinations of ON/OFF states of Acceleration/ the two terminal commands RT2 and deceleration time 1 RT1 offer four choices of acceleration/ deceleration time 1 to 4.
- Page 284 5.4 Details of Function Codes Acceleration Deceleration Starting zone Ending zone Starting zone Ending zone S-curve (Weak) S-curve (Arbitrary) Acceleration rate Acceleration rate Deceleration rate Deceleration rate Setting range: for the 1st S-curve for the 2nd S-curve for the 1st S-curve for the 2nd S-curve 0 to 100% (Leading edge)
- Page 285 Curvilinear acceleration/deceleration Acceleration/deceleration is linear below the base frequency (constant torque) but it slows down above the base frequency to maintain a certain level of load factor (constant output). This acceleration/deceleration pattern allows the motor to accelerate or decelerate with its maximum performance.
- Page 286 5.4 Details of Function Codes For Fuji motors exclusively designed for vector control, you need not specify the electronic thermal overload protection with these function codes, because they are equipped with motor overheat protective function by NTC thermistor. Set F11 data to "0.00"...
- Page 287 Nominal Applied Motor and Characteristic Factors when P99 (Motor 1 Selection) = 1 or 3 Nominal Reference current Output frequency for Characteristic Thermal time applied for setting the motor characteristic factor factor (%) constant τ motor thermal time (Factory default) α1 α2 α3...
- Page 288 5.4 Details of Function Codes Example of Thermal Overload Detection Characteristics Function Code Details F10-F12 E codes C codes P codes H codes A codes b codes r codes J codes d codes ― y codes 5-71...
- Page 289 Restart Mode after Momentary Power Failure (Mode selection) H13 (Restart time) H14 (Frequency fall rate) H15 (Continuous running level) H16 (Allowable momentary power failure time) H92 and H93 (Continuity of Running, P and I) F14 specifies the action to be taken by the inverter such as trip and restart in the event of a momentary power failure.
- Page 290 5.4 Details of Function Codes Description Data for F14 Auto search disabled Auto search enabled As soon as the DC link bus voltage drops below the undervoltage 5: Restart at the detection level due to a momentary power failure, the inverter shuts down starting frequency the output so that the motor enters a coast-to-stop state.
- Page 291 • Under vector control with speed sensor Data for F14 Description 0: Trip immediately As soon as the DC link bus voltage drops below the undervoltage detection level due to a momentary power failure, the inverter issues undervoltage alarm and shuts down its output so that the motor enters a coast-to-stop state.
- Page 292 5.4 Details of Function Codes • When the power is restored, the inverter will wait 2 seconds for input of a run command. However, if the allowable momentary power failure time (H16) has elapsed after the power failure was recognized, the inverter will no longer wait 2 seconds for input of a run command and start operation in the normal starting sequence.
- Page 293 During a momentary power failure, the motor slows down. After power is restored, the inverter restarts at the frequency just before the momentary power failure. Then, the current limiting function works and the output frequency of the inverter automatically decreases. When the output frequency matches the motor speed, the motor accelerates up to the original output frequency.
- Page 294 5.4 Details of Function Codes • During auto search, if an overcurrent or overvoltage trip occurs, the inverter restarts the suspended auto search. • Perform auto search at 60 Hz or below. • Note that auto search may not fully provide the expected/designed performance depending on conditions including the load, motor parameters, power cable length, and other externally determined events.
- Page 295 Restart mode after momentary power failure (Restart time) (H13) H13 specifies the time period from an occurrence of a momentary power failure until the restart of the inverter. (When auto search is enabled, H46 (Auto search delay time 2) applies.) If the inverter starts the motor while motor’s residual voltage is still in a high level, a high inrush current may flow or an overvoltage alarm may occur due to an occurrence of temporary regeneration.
- Page 296 5.4 Details of Function Codes Restart after momentary power failure (Continuous running level) (H15) Continuity of running (P and I) (H92, H93) • Trip after decelerate-to-stop (F14 = 2) If a momentary power failure occurs when F14 is set to "2" (Trip after decelerate-to-stop), the inverter enters the control sequence of the decelerate-to-stop when the DC link bus voltage drops below the continuous running level specified by H15.
- Page 297 F15, F16 Frequency Limiter (High and Low) H63 (Low Limiter, Mode selection) Frequency Limiter (High and Low) (F15, F16) F15 and F16 specify the upper and lower limits of the output frequency or reference frequency, respectively. The object to which the limit is applied differs depending on the control system.
- Page 298 5.4 Details of Function Codes Bias (Frequency command 1) Refer to F01. Refer to the description of F01. F20 to F22 DC Braking 1 (Braking starting frequency, Braking level and Braking time) DC Braking (Braking response mode) These function codes specify the DC braking that prevents motor 1 from running by inertia during decelerate-to-stop operation.
- Page 299 It is also possible to use an external digital input signal as the terminal command DCBRK ("Enable DC braking"). As long as the DCBRK is ON, the inverter performs DC braking, regardless of the braking time specified by F22. For details about DCBRK, refer to E01 through E09 (data = 13). Turning the DCBRK ON even when the inverter is in a stopped state activates the DC braking.
- Page 300 5.4 Details of Function Codes F23 to F25 Starting Frequency 1, Starting Frequency 1 (Holding time) and Stop Frequency F38 and F39 (Stop Frequency, Detection mode and Holding time) H92 and H93 (Continuity of Running, P and I) d24 (Zero Speed Control) V/f control At the startup of an inverter, the initial output frequency is equal to the starting frequency 1 specified by F23.
- Page 301 Vector Control without/with Speed Sensor At the startup, the inverter first starts at the “0” speed and accelerates to the starting frequency according to the specified acceleration time. After holding the starting frequency for the specified period, the inverter again accelerates to the commanded speed according to the specified acceleration time.
- Page 302 5.4 Details of Function Codes Zero Speed Control (d24) (Under vector control with speed sensor only) To enable zero speed control under vector control with speed sensor, it is necessary to set the speed command (frequency command) at below the starting and stop frequencies. If the starting and stop frequencies are 0.0 Hz, however, the zero speed control is enabled only when the speed command is 0.00 Hz.
- Page 303 F26, F27 Motor Sound (Carrier frequency and Tone) H98 (Protection/Maintenance Function, Mode selection) Motor Sound (Carrier frequency) (F26) F26 controls the carrier frequency so as to reduce an audible noise generated by the motor or electromagnetic noise from the inverter itself, and to decrease a leakage current from the main output (secondary) wirings.
- Page 304 5.4 Details of Function Codes F29 to F31 Analog Output [FMA] (Mode selection, Voltage adjustment, Function) These function codes allow terminal [FMA] to output monitored data such as the output frequency and the output current in an analog DC voltage or current. The magnitude of such analog voltage or current is adjustable.
- Page 305 Function (F31) F31 specifies what is output to analog output terminal [FMA]. Data Function Meter scale [FMA] output for F31 (Monitor the following) (Full scale at 100%) Output frequency of the inverter Output frequency 1 (Equivalent to the motor (before slip Maximum frequency (F03) synchronous speed) compensation)
- Page 306 5.4 Details of Function Codes Pulse rate (F33) F33 specifies the pulse rate at which the output of the monitored item selected reaches 100%, in accordance with the specifications of the counter to be connected. - Data setting range: 25 to 6000 (p/s) Gain to output voltage (F34) F34 allows you to adjust the output voltage (average voltage) within the range of 0 to 300 (%).
- Page 307 The auto energy saving operation is also disabled. V/f characteristics The FRENIC-MEGA series of inverters offer a variety of V/f patterns and torque boosts, which include V/f patterns suitable for variable torque load such as general fans and pumps and for constant torque load (including special pumps requiring high starting torque). Two types of torque boosts are available: manual and automatic.
- Page 308 5.4 Details of Function Codes Torque boost • Manual torque boost (F09) - Data setting range: 0.0 to 20.0 (%), (100%/Rated voltage at base frequency) In torque boost using F09, constant voltage is added to the basic V/f pattern, regardless of the load.
- Page 309 Auto energy saving operation (H67) This feature automatically controls the supply voltage to the motor to minimize the total power loss of motor and inverter. (Note that this feature may not be effective depending upon the motor or load characteristics. Check the advantage of energy saving before you actually apply this feature to your machinery.) You can select whether applying this feature to constant speed operation only or applying to constant speed operation and accelerating/decelerating operation.
- Page 310 5.4 Details of Function Codes Vector control without/with speed sensor If the output torque of the inverter exceeds the torque limiter level, this control limits the current command to suppress the output torque within the torque limiter value. Related function codes Function Vector Name...
- Page 311 Analog torque limit values (E61 to E63) The torque limit values can be specified by analog inputs through terminals [12], [C1], and [V2] (voltage or current). Set E61, E62, and E63 (Terminal [12] Extended Function, Terminal [C1] Extended Function, and Terminal [V2] Extended Function) as listed below. Data for E61, E62, Function...
- Page 312 5.4 Details of Function Codes Torque limiter (Operating conditions) (H73) specifies whether torque limiter enabled disabled during acceleration/deceleration and running at constant speed. Data for H73 During accelerating/decelerating During running at constant speed Enable Enable Disable Enable Enable Disable Torque limiter (Frequency increment limit for braking) (H76) H76 specifies the increment limit of the frequency in limiting torque for braking.
- Page 313 V/f control with slip compensation active Applying any load to an induction motor causes a rotational slip due to the motor characteristics, decreasing the motor rotation. The inverter’s slip compensation function first presumes the slip value of the motor based on the motor torque generated and raises the output frequency to compensate for the decrease in motor rotation.
- Page 314 5.4 Details of Function Codes Vector control with speed sensor This control requires an optional PG (pulse generator) and an optional PG interface card to be mounted on a motor shaft and an inverter, respectively. The inverter detects the motor's rotational position and speed from PG feedback signals, decomposes the motor drive current into the exciting and torque current components, and controls each of components in vector.
- Page 315 Instantaneous Overcurrent Limiting (Mode selection) (H12) H12 specifies whether the inverter invokes the current limit processing or enters the overcurrent trip when its output current exceeds the instantaneous overcurrent limiting level. Under the current limit processing, the inverter immediately turns OFF its output gate to suppress the further current increase and continues to control the output frequency.
- Page 316 5.4 Details of Function Codes Calculating the discharging capability and allowable average loss of the braking resistor and configuring the function code data When using any non-Fuji braking resistor, inquire of the resistor manufacturer about the resistor rating and then configure the related function codes. The calculation procedures for the discharging capability and allowable average loss of the braking resistor differ depending on the application of the braking load as shown below.
- Page 317 Allowable average loss (F51) The allowable average loss refers to a tolerance for motor continuous operation, which is obtained based on the %ED (%) and motor rated capacity (kW). Function Data for F51 0.001 to 99.99 0.001 to 99.99 (kW) During deceleration: %ED(%) ×...
- Page 318 5.4 Details of Function Codes The MD-/LD-mode inverter is subject to restrictions on the function code data setting range and internal processing as listed below. Function Name HD mode MD mode LD mode Remarks codes DC braking 1 Setting range: (Braking Setting range: 0 to 80% In the MD/LD...
-
Page 319: E Codes (Extension Terminal Functions)
5.4.2 E codes (Extension terminal functions) Terminal [X1] to [X9] Functions E01 to E09 E98 and E99 (Terminal [FWD] and [REV] Functions) Function codes E01 to E09, E98 and E99 allow you to assign commands to terminals [X1] to [X9], [FWD], and [REV] which are general-purpose, programmable, digital input terminals. These function codes may also switch the logic system between normal and negative to define how the inverter logic interprets either ON or OFF status of each terminal. - Page 320 5.4 Details of Function Codes Function code Drive Related data control Terminal commands assigned Symbol function Active Active code 1018 DOWN (Decrease output frequency) DOWN 1019 Enable data change with keypad WE-KP J01 to J19 1020 Cancel PID control Hz/PID J56 to J62 1021 Switch normal/inverse operation...
- Page 321 Terminal function assignment and data setting Select multi-frequency (0 to 15 steps) -- SS1, SS2, SS4, and SS8 (Function code data = 0, 1, 2, and 3) The combination of the ON/OFF states of digital input signals SS1, SS2, SS4 and SS8 selects one of 16 different frequency commands defined beforehand by 15 function codes C05 to C19 (Multi-frequency 0 to 15).
- Page 322 5.4 Details of Function Codes Ready for jogging -- JOG (Function code data = 10) This terminal command is used to jog or inch the motor for positioning a workpiece. Turning this command ON makes the inverter ready for jogging. Refer to C20.
- Page 323 Operation Schemes • When the motor speed remains almost the same during coast-to-stop: • When the motor speed decreases significantly during coast-to-stop (with the current limiter activated): 5-106...
- Page 324 5.4 Details of Function Codes • Secure more than 0.1 second after turning ON the "Switch to commercial power" signal before turning ON a run command. • Secure more than 0.2 second of an overlapping period with both the "Switch to commercial power"...
- Page 325 Example of Sequence Circuit Note 1) Emergency switch Manual switch provided for the event that the motor drive source cannot be switched normally to the commercial power due to a serious problem of the inverter Note 2) When any alarm has occurred inside the inverter, the motor drive source will automatically be switched to the commercial power.
- Page 326 5.4 Details of Function Codes Example of Operation Time Scheme Alternatively, you may use the integrated sequence by which some of the actions above are automatically performed by the inverter itself. For details, refer to the description of ISW50 and ISW60. UP (Increase output frequency) and DOWN (Decrease output frequency) commands -- UP and DOWN (Function code data = 17 and 18) •...
- Page 327 Cancel PID control -- Hz/PID (Function code data = 20) Turning this terminal command ON disables the PID control. If the PID control is disabled with this command, the inverter runs the motor with the reference frequency manually set by any of the multi-frequency, keypad, analog input, etc. Terminal command Function Hz/PID...
- Page 328 5.4 Details of Function Codes When the PID control is enabled: The normal/inverse operation selection for the PID processor output (reference frequency) is as follows. PID control (Mode selection) (J01) Final operation Normal 1: Enable (normal operation) Inverse Inverse 2: Enable (inverse operation) Normal When the PID control is disabled: The normal/inverse operation selection for the manual reference frequency is as follows.
- Page 329 Force to stop -- STOP (Function code data = 30) Turning this terminal command OFF causes the motor to decelerate to a stop in accordance with the H56 data (Deceleration time for forced stop). After the motor stops, the inverter enters the alarm state with the alarm displayed.
- Page 330 5.4 Details of Function Codes Circuit Diagram and Configuration Main Circuit Configuration of Control Circuit Summary of Operation Output Input Function (Status signal and magnetic contactor) Code Inverter Details operation SW52-1 SW52-2 SW88 F codes ISW50 or ISW60 Run command E01-E09 52-1 52-2...
- Page 331 Timing Scheme Switching from inverter operation to commercial-power operation ISW50/ISW60: ON → OFF (1) The inverter output is shut OFF immediately (Power gate IGBT OFF) (2) The inverter primary circuit SW52-1 and the inverter secondary side SW52-2 are turned OFF immediately. (3) If a run command is present after an elapse of t1 (0.2 sec + time specified by H13), the commercial power circuit SW88 is turned ON .
- Page 332 5.4 Details of Function Codes Selection of Commercial Power Switching Sequence J22 specifies whether or not to automatically switch to commercial-power operation when an inverter alarm occurs. Data for J22 Sequence (upon occurrence of an alarm) Keep inverter-operation (Stop due to alarm.) Automatically switch to commercial-power operation •...
- Page 333 Sequence with an emergency switching function Sequence with an emergency switching function --Part 2 (Automatic switching by the alarm output issued by the inverter) 5-116...
- Page 334 5.4 Details of Function Codes Servo-lock command -- LOCK (Function code data = 47) Turning this terminal command ON enables a servo-lock command; turning it OFF disables a servo-lock command. Refer to J97 through J99. Pulse train input -- PIN (available only on terminal [X7]) (Function code data = 48) Pulse train sign -- SIGN (available on terminals except [X7]) (Function code data = 49) Assigning the command PIN to digital input terminal [X7] enables the frequency command by the pulse train input.
- Page 335 E20 to E23 Terminal [Y1] to [Y4] Function E24, E27 Terminal [Y5A/C] and [30A/B/C] Function (Relay output) E20 through E24 and E27 assign output signals (listed on the following pages) to general-purpose, programmable output terminals [Y1], [Y2], [Y3], [Y4], [Y5A/C] and [30A/B/C].
- Page 336 5.4 Details of Function Codes Explanations of each function are given in normal logic system "Active ON." Function code Drive Related data control function Terminal command assigned Symbol codes/signals Active Active (data) 1000 Inverter running 1001 Frequency (speed) arrival signal Y E30 1002 Frequency (speed) detected...
- Page 337 Function code Drive Related data control function Terminal command assigned Symbol codes/signals Active Active (data) 1043 Under PID control PID-CTL Y J01 Motor stopped due to slow 1044 PID-STP Y J08, J09 flowrate under PID control 1045 Low output torque detected U-TL 1046 Torque detected 1...
- Page 338 5.4 Details of Function Codes Inverter running -- RUN (Function code data = 0) Inverter output on -- RUN2 (Function code data = 35) These output signals tell the external equipment that the inverter is running at a starting frequency or higher. If assigned in negative logic (Active OFF), these signals can be used to tell the "Inverter being stopped"...
- Page 339 Auto-restarting after momentary power failure -- IPF (Function code data = 6) This output signal is ON either during continuous running after a momentary power failure or during the period after the inverter detects an undervoltage condition and shuts down the output until restart has been completed (the output has reached the reference frequency).
- Page 340 5.4 Details of Function Codes Cooling fan in operation -- FAN (Function code data = 25) With the cooling fan ON/OFF control enabled (H06 = 1), this output signal is ON when the cooling fan is in operation, and OFF when it is stopped. This signal can be used to make the cooling system of peripheral equipment interlocked for an ON/OFF control.
- Page 341 Reference loss detected -- REF OFF (Function code data = 33) This output signal comes ON when an analog input used as a frequency command source is in a reference loss state (as specified by E65) due to a wire break or a weak connection. This signal goes OFF when the normal operation under the analog input is resumed.
- Page 342 5.4 Details of Function Codes Motor stopped due to slow flowrate under PID control -- PID-STP (Function code data = 44) This output signal is ON when the inverter is in a stopped state due to the slow flowrate stopping function under PID control.) Refer to J08 through J09.
- Page 343 Speed valid -- DNZS (Function code data = 70) This output signal comes ON when the reference speed or detected one exceeds the stop frequency specified by function code F25. It goes OFF when the speed is below the stop frequency for 100 ms or longer.
- Page 344 5.4 Details of Function Codes Frequency Arrival (Hysteresis width) E30 specifies the detection level (hysteresis width) for the frequency (speed) arrival signal FAR and the frequency (speed) arrival signal 3 FAR3. Output Assigned Operating condition 1 Operating condition 2 signal data Always goes OFF when all the run commands are OFF or...
- Page 345 E31, E32 Frequency Detection (Level and Hysteresis width) E36 (Frequency Detection 2, Level) E54 (Frequency Detection 3, Level) When the output frequency exceeds the frequency detection level specified by E31, the FDT signal comes ON; when it drops below the "Frequency detection level minus Hysteresis width specified by E32,"...
- Page 346 5.4 Details of Function Codes Motor overload early warning signal -- OL The OL signal is used to detect a symptom of an overload condition (alarm code ) of the motor so that the user can take an appropriate action before the alarm actually happens. The OL signal turns ON when the inverter output current exceeds the level specified by E34.
- Page 347 E40, E41 PID Display Coefficient A, B These function codes specify PID display coefficients A and B to convert a PID command (process command or dancer position command) and its feedback into easy-to-understand physical quantities to display. - Data setting range: -999 to 0.00 to 9990 for PID display coefficients A and B Display coefficients for PID process command and its feedback (J01 = 1 or 2) E40 specifies coefficient A that determines the display value at 100% of the PID process command or its feedback, and E41 specifies coefficient B that determines the display value at...
- Page 348 5.4 Details of Function Codes Display coefficients for PID dancer position command and its feedback (J01 = 3) Under the PID dancer control, the PID command and its feedback operate within the range ±100%, so specify the value at +100% of the PID dancer position command or its feedback as coefficient A with E40, and the value at -100% as coefficient B with E41.
- Page 349 LED Monitor (Item selection) E48 (LED Monitor, Speed monitor item) E43 specifies the running status item to be monitored and displayed on the LED monitor. Specifying the speed monitor with E43 provides a choice of speed-monitoring formats selectable with E48 (LED Monitor). Display Function sample on...
- Page 350 5.4 Details of Function Codes LED Monitor (Display when stopped) E44 specifies whether the specified value (data = 0) or the output value (data = 1) to be displayed on the LED monitor of the keypad when the inverter is stopped. The monitored item depends on the E48 (LED monitor, Speed monitor item) setting as shown below.
- Page 351 Keypad (Menu display mode) E52 provides a choice of three menu display modes for the standard keypad as listed below. Data for E52 Menu display mode Menus to be displayed Function code data editing mode Menus #0, #1 and #7 Function code data check mode Menus #2 and #7 Full-menu mode...
- Page 352 5.4 Details of Function Codes Frequency Detection 3 (Level) Refer to E31. For details, refer to the description of E31. E55, E56 Current Detection 3 (Level, Timer) Refer to E34. For details, refer to the description of E34. E61 to E63 Terminal [12] Extended Function Terminal [C1] Extended Function Terminal [V2] Extended Function...
- Page 353 Saving of Digital Reference Frequency E64 specifies how to save the reference frequency specified in digital formats by the keys on the keypad as shown below. Data for E64 Function Auto saving when the main power is turned OFF The reference frequency will be automatically saved when the main power is turned OFF.
- Page 354 5.4 Details of Function Codes E78, E79 Torque Detection 1 (Level and Timer) E80, E81 Torque Detection 2/Low Torque Detection (Level and Timer) E78 specifies the operation level and E79 specifies the timer, for the output signal TD1. E80 specifies the operation level and E81 specifies the timer, for the output signal TD2 or U-TL. Operation level Timer Output signal...
- Page 355 In the inverter’s low frequency operation, as a substantial error in torque calculation occurs, no low torque can be detected within the operation range at less than 20% of the base frequency (F04). (In this case, the result of recognition before entering this operation range is retained.) The U-TL signal goes off when the inverter is stopped..
-
Page 356: C Codes (Control Functions)
5.4 Details of Function Codes 5.4.3 C codes (Control functions) C01 to C03 Jump Frequency 1, 2 and 3 Jump Frequency (Hysteresis width) These function codes enable the inverter to jump over three different points on the output frequency in order to skip resonance caused by the motor speed and natural frequency of the driven machinery (load). - Page 357 The combination of SS1, SS2, SS4 and SS8 and the selected frequencies are as follows. Selected frequency command Other than multi-frequency * C05 (multi-frequency 1) C06 (multi-frequency 2) C07 (multi-frequency 3) C08 (multi-frequency 4) C09 (multi-frequency 5) C10 (multi-frequency 6) C11 (multi-frequency 7) C12 (multi-frequency 8) C13 (multi-frequency 9)
- Page 358 5.4 Details of Function Codes • Manual speed command SS8, SS4 Selected frequency command – Other than multi-frequency – C05 (Multi-frequency 1) – C06 (Multi-frequency 2) – C07 (Multi-frequency 3) Jogging Frequency H54, H55 (Acceleration/Deceleration Time, Jogging) d09 to d13 (Speed Control (Jogging)) C20 specifies the operating condition (frequency) to apply in jogging operation.
- Page 359 Frequency Command 2 (Refer to F01.) For details of frequency command 2, refer to the description of F01. C31 to C35 Analog Input Adjustment for [12] C36 to C39 (Offset, Gain, Filter time constant, Gain base point, Polarity) C41 to C45 Analog Input Adjustment for [C1] (Offset, Gain, Filter time constant, Gain base point) Analog Input Adjustment for [V2]...
- Page 360 5.4 Details of Function Codes Gain To input bipolar analog voltage (0 to ±10 VDC) to terminals [12] and [V2], set C35 and C45 data to "0." Setting C35 and C45 data to "1" enables the voltage range from 0 to +10 VDC and interprets the negative polarity input from 0 to -10 VDC as 0 V.
-
Page 361: P Codes (Motor Parameters)
5.4.4 P codes (Motor parameters) The FRENIC-MEGA drives the motor under "V/f control," "vector control without speed sensor," "vector control with speed sensor," or other drive control, which can be selected with function codes. To use the integrated automatic control functions such as auto torque boost, torque calculation monitoring, auto energy saving operation, torque limiter, automatic deceleration (anti-regenerative control), auto search for idling motor speed, slip compensation, torque vector control, droop control, and overload stop, it is necessary to build a motor model in the inverter by specifying proper motor... - Page 362 5.4 Details of Function Codes Motor 1 (Auto-tuning) The inverter automatically detects the motor parameters and saves them in its internal memory. Basically, it is not necessary to perform tuning when a Fuji standard motor is used with a standard connection with the inverter. There are three types of auto tuning as listed below.
- Page 363 Functions in which the motor parameters affect the running capability Function Related function codes (representative) Auto torque boost Output torque monitor F31, F35 Load factor monitor F31, F35 Auto energy saving operation Torque limiter Anti-regenerative control (Automatic deceleration) Auto search Slip compensation Dynamic torque vector control Droop control...
- Page 364 P09 or P11, respectively, to improve output torque accuracy. P10 determines the response time for slip compensation. Basically, there is no need to modify the default setting. If you need to modify it, consult your Fuji Electric representatives. Function code...
- Page 365 P53, P54 Motor 1 (%X correction factors 1 and 2) P53 and P54 specify the factors to correct fluctuations of leakage reactance (%X). Basically, there is no need to modify the setting. Motor 1 (Torque current under vector control) P55 specifies the rated torque current under vector control without/with speed sensor. The combination of P99 (Motor 1 selection) and P02 (Motor 1 rated capacity) data determines the standard value.
-
Page 366: H Codes (High Performance Functions)
5.4 Details of Function Codes 5.4.5 H codes (High performance functions) Data Initialization H03 initializes the current function code data to the factory defaults or initializes the motor parameters. To change the H03 data, it is necessary to press the keys or keys (simultaneous keying). - Page 367 H04, H05 Auto-reset (Times and Reset interval) H04 and H05 specify the auto-reset function that makes the inverter automatically attempt to reset the tripped state and restart without issuing an alarm output (for any alarm) even if any protective function subject to reset is activated and the inverter enters the forced-to-stop state (tripped state).
- Page 368 5.4 Details of Function Codes • In the figure below, the inverter failed to restart normal operation within the number of reset times specified by H04 (in this case, 3 times (H04 = 3)), and issued the alarm output (for any alarm) ALM.
- Page 369 Rotational Direction Limitation H08 inhibits the motor from running in an unexpected rotational direction due to miss-operation of run commands, miss-polarization of frequency commands, or other mistakes. Data for H08 Function Disable Enable (Reverse rotation inhibited) Enable (Forward rotation inhibited) Under vector control, some restrictions apply to the speed command.
- Page 370 5.4 Details of Function Codes Auto search for idling motor speed Starting the inverter (with a run command ON, BX OFF, auto-reset, etc.) with STM being ON searches for the idling motor speed for a maximum of 1.2 seconds to run the idling motor without stopping it.
- Page 371 Depending on the motor characteristics, however, it may take time for residual voltage to disappear (due to the secondary thermal time constant of the motor). In such a case, the inverter starts the motor with the residual voltage remaining, which will cause an error in the speed search and may result in occurrence of an inrush current or an overvoltage alarm.
- Page 372 5.4 Details of Function Codes H26, H27 Thermistor (for motor) (Mode selection and Level) These function codes specify the PTC (Positive Temperature Coefficient)/NTC (Negative Temperature Coefficient) thermistor embedded in the motor. The thermistor is used to protect the motor from overheating or output an alarm signal. Thermistor (for motor) (Mode selection) (H26) H26 selects the function operation mode (protection or alarm) for the PTC/NTC thermistor as shown below.
- Page 373 Connect the PTC thermistor as shown below. The voltage obtained by dividing the input voltage on terminal [V2] with a set of internal resistors is compared with the detection level voltage specified by H27. <Control circuit> [13] DC +10 V Resistor (Operation level) 27kΩ...
- Page 374 5.4 Details of Function Codes Communications Link Function (Mode selection) y98 (Bus Link Function, Mode selection) Using the RS-485 communications link (standard/option) or fieldbus (option) allows you to issue frequency commands and run commands from a computer or PLC at a remote location, as well as monitor the inverter running information and the function code data.
- Page 375 Command sources specified by y98 (Bus link function, Mode selection) Data for y98 Frequency command Run command Follow H30 data Follow H30 data Via fieldbus (option) Follow H30 data Follow H30 data Via fieldbus (option) Via fieldbus (option) Via fieldbus (option) Combination of command sources Frequency command Via RS-485...
- Page 376 5.4 Details of Function Codes H42, H43 Capacitance of DC Link Bus Capacitor, Cumulative Run Time of Cooling Fan Cumulative Run Time of Capacitors on Printed Circuit Boards H47 (Initial Capacitance of DC Link Bus Capacitor H98 (Protection/Maintenance Function) Life prediction function The inverter has the life prediction function for some parts which measures the discharging time or counts the voltage applied time, etc.
- Page 377 Capacitance measurement of DC link bus capacitor (H42) Calculating the capacitance of DC link bus capacitor - The discharging time of the DC link bus capacitor depends largely on the inverter's internal load conditions, e.g. options attached or ON/OFF of digital I/O signals. If actual load conditions are so different from the ones at which the initial/reference capacitance is measured that the measurement result falls out of the accuracy level required, then the inverter does not perform measuring.
- Page 378 5.4 Details of Function Codes • Ensure that transistor output signals ([Y1] to [Y4]) and relay output signals ([Y5A] - [Y5C], and [30A/B/C]) will not be turned ON. • Disable the RS-485 communications link. If negative logic is specified for the transistor output and relay output signals, they are considered ON when the inverter is not running.
- Page 379 5) Turn OFF the inverter, and the following operations are automatically performed. The inverter measures the discharging time of the DC link bus capacitor and saves the result in function code H47 (Initial capacitance of DC link bus capacitor). The conditions under which the measurement has been conducted will be automatically collected and saved.
- Page 380 5.4 Details of Function Codes Mock Alarm H97 (Clear Alarm Data) H45 causes the inverter to generate a mock alarm in order to check whether external sequences function correctly at the time of machine setup. Setting the H45 data to "1" displays mock alarm on the LED monitor.
- Page 381 Low Limiter (Mode selection) Refer to F15.) For details, refer to the description of F15. Low Limiter (Lower limiting frequency) H64 specifies the lower limit of frequency to be applied when the current limiter, torque limiter, automatic deceleration (anti-regenerative control), or overload prevention control is activated.
- Page 382 5.4 Details of Function Codes FRENIC-MEGA series of inverters have two braking control modes; torque limit control and DC link bus voltage control. Understand the feature of each control and select the suitable one. Control mode Control process Operation mode...
- Page 383 DC link bus, there is no alternate-current input. In such cases, set H72 data to "0," otherwise the inverter cannot operate. If you use a single-phase power supply, contact your Fuji Electric representative. H73 to H75 Torque Limiter (Operating conditions, Control target, and Target quadrants) (Refer to F40.)
- Page 384 5.4 Details of Function Codes Service Life of DC Link Bus Capacitor (Remaining time) H77 displays the remaining time before the service life of DC link bus capacitor expires in units of ten hours. At the time of a printed circuit board replacement, transfer the service life data of the DC link bus capacitor to the new board.
- Page 385 Count the run time of commercial power-driven motor 1, 2, 3 and 4 -- CRUN-M1, CRUN-M2, CRUN-M3 and CRUN-M4 (E01 to E09, data = 72, 73, 74 and 75) Even when a motor is driven by commercial power, not by the inverter, it is possible to count the cumulative motor run time 1 to 4 (H94, A51, b51, r51) by detecting the ON/OFF state of the auxiliary contact of the magnetic contactor for switching to the commercial power line.
- Page 386 5.4 Details of Function Codes H81, H82 Light Alarm Selection 1 and 2 If the inverter detects a minor abnormal state "light alarm", it can continue the current l-al operation without tripping while displaying the "light alarm" indication on the LED l-al monitor.
- Page 387 Selecting light alarm factors To set and display the light alarm factors in hexadecimal format, each light alarm factor has been assigned to bits 0 to 15 as listed in Tables 5.1 and 5.2. Set the bit that corresponds to the desired light alarm factor to "1."...
- Page 388 5.4 Details of Function Codes Hexadecimal expression A 4-bit binary number can be expressed in hexadecimal format (1 hexadecimal digit). The table below shows the correspondence between the two notations. The hexadecimals are shown as they appear on the LED monitor. Table 5.4 Binary and Hexadecimal conversion Binary Hexadecimal...
- Page 389 Pre-excitation--EXITE (E01 to E09, data = 32) When this input signal comes ON, pre-excitation starts. After the delay time for establishing magnetic flux has elapsed, a run command is inputted. When the run command is inputted, the pre-excitation ends and acceleration starts. Use an external sequence to control the time for establishing magnetic flux.
- Page 390 5.4 Details of Function Codes PID Feedback Wire Break Detection Using the terminal [C1] (current input) for PID feedback signal enables wire break detection and alarm ( ) issuance. H91 specifies whether the wire break detection is enabled, or the duration of detection.
- Page 391 Clear Alarm Data H45 (Mock Alarm) H97 clears alarm data (alarm history and relevant information) stored in the inverter. To clear alarm data, simultaneous keying of " key + key" is required. Data for H97 Function Disable Enable (Setting "1" clears alarm data and then returns to "0.") Protection/Maintenance Function (Mode selection) H98 specifies whether to enable or disable automatic lowering of carrier frequency, input phase loss protection, output phase loss protection, judgment threshold on the life of DC link...
- Page 392 5.4 Details of Function Codes Judgment on the life of DC link bus capacitor (Bit 4) Whether the DC link bus capacitor has reached its life is judged by measuring the discharging time after power OFF. The discharging time is determined by the capacitance of the DC link bus capacitor and the load inside the inverter.
- Page 393 To set data of function code H98, assign the setting of each function to each bit and then convert the 8-bit binary to the decimal number. Refer to the assignment of each function to each bit and a conversion example below. Factory Function Bit data = 0...
-
Page 394: A Codes (Motor 2 Parameters) B Codes (Motor 3 Parameters) R Codes (Motor 4 Parameters)
5.4 Details of Function Codes 5.4.6 A codes (Motor 2 parameters) b codes (Motor 3 parameters) r codes (Motor 4 parameters) The FRENIC-MEGA can switch control parameters even when it is running so that a single inverter can drive four motors by switching them or turn the energy saving operation ON or OFF for the setup change (e.g., gear switching) that causes the moment of inertia of the machinery to change. - Page 395 If A42, b42 or r42 is set to "0" (Motor (Switch to the 2nd, 3rd or 4th motor)), the combination of M2, M3 and M4 switches the motor to any of the 2nd to 4th motors and also switches the function code group enabled to the one corresponding to the selected motor, as listed in Table 5.5.
- Page 396 5.4 Details of Function Codes Table 5.5 Function Codes to be Switched (continued) Function code Object of Name parameter motor motor motor motor switching Motor selection Slip compensation (Operating conditions) Output current fluctuation damping gain for motor Speed control (Speed command filter) (Speed detection filter) P (Gain) I (Integral time)
-
Page 397: J Codes (Application Functions 1)
5.4.7 J codes (Application functions 1) PID Control (Mode selection) Under PID control, the inverter detects the state of a control target object with a sensor or the similar device and compares it with the commanded value (e.g., temperature control command). - Page 398 5.4 Details of Function Codes - Using J01 enables switching between normal and inverse operations against the PID control output, so you can specify an increase/decrease of the motor rotating speed to the difference (error component) between the commanded (input) and feedback amounts, making it possible to apply the inverter to air conditioners.
- Page 399 Offset (C31, C36, C41) C31, C36 or C41 configures an offset for an analog voltage/current input. The offset also applies to signals sent from the external equipment. Filter time constant (C33, C38, C43) C33, C38, and C43 provide the filter time constants for the voltage and current of the analog input.
- Page 400 5.4 Details of Function Codes [ 3 ] PID command with UP/DOWN control (J02 = 3) When the UP/DOWN control is selected as a PID speed command, turning the terminal command UP or DOWN ON causes the PID speed command to change within the range from 0 to 100%.
- Page 401 Selecting Feedback Terminals For feedback control, determine the connection terminal according to the type of the sensor output. • If the sensor is a current output type, use the current input terminal [C1] of the inverter. • If the sensor is a voltage output type, use the voltage input terminal [12] of the inverter, or switch over the terminal [V2] to the voltage input terminal and use it.
- Page 402 5.4 Details of Function Codes Example 2. When the output level of the external sensor is 0 to 10 VDC: • Use terminal [12] designed for voltage input. • When the external sensor's output is of unipolar, the inverter controls the speed within the range of 0 to 100%.
- Page 403 P (Proportional) action An operation in which the MV (manipulated value: output frequency) is proportional to the deviation is called P action, which outputs the MV in proportion to deviation. However, the MV alone cannot eliminate deviation. Gain is data that determines the system response level against the deviation in P action. An increase in gain speeds up response, but an excessive gain may oscillate the inverter output.
- Page 404 5.4 Details of Function Codes D (Differential) action An operation in which the MV (manipulated value: output frequency) is proportional to the differential value of the deviation is called D action, which outputs the MV that differentiates the deviation. D action makes the inverter quickly react to a rapid change of deviation. The effectiveness of D action is expressed by differential time as parameter, that is J05 data.
- Page 405 Refining the system response waveforms is shown below. 1) Suppressing overshoot Increase the data of J04 (Integral time) and decrease that of J05 (Differential time.) 2) Quick stabilizing (moderate overshoot allowable) Decrease the data of J03 (Gain) and increase that of J05 (Differential time). 3) Suppressing oscillation whose period is longer than the integral time specified by J04 Increase the data of J04 (Integral time).
- Page 406 5.4 Details of Function Codes Feedback filter (J06) J06 specifies the time constant of the filter for feedback signals under PID control. - Data setting range: 0.0 to 900.0 (s) - This setting is used to stabilize the PID control loop. Setting too long a time constant makes the system response slow.
- Page 407 For the slow flowrate stopping function, see the chart below. Pressurization before slow flowrate stopping (J08 and J09) Specifying J08 (Pressurization starting frequency) and J09 (Pressurizing time) enables pressurization control when the frequency drops below the level specified by J15 (Stop frequency for slow flowrate) for the period specified by J16.
- Page 408 5.4 Details of Function Codes PID Control (Anti reset windup) J10 suppresses overshoot in control with the PID processor. As long as the deviation between the feedback and the PID command is beyond the preset range, the integrator holds its value and does not perform integration operation.
- Page 409 Hold: During the power-on sequence, the alarm output is kept OFF (disabled) even when the monitored quantity is within the alarm range. Once it goes out of the alarm range, and comes into the alarm range again, the alarm is enabled. Latch: Once the monitored quantity comes into the alarm range and the alarm is turned ON, the alarm will remain ON even if it goes out of the alarm range.
- Page 410 5.4 Details of Function Codes J18, J19 PID Control (Upper limit of PID process output, Lower limit of PID process output) The upper and lower limiters can be specified to the PID output, exclusively used for PID control. The settings are ignored when PID cancel is enabled and the inverter is operated at the reference frequency previously specified.
- Page 411 PID Control (Speed command filter) Not used. PID Control (Dancer reference position) J57 specifies the dancer reference position in the range of -100% to +100% for dancer control. If J02 = 0 (keypad), this function code is enabled as the dancer reference position. It is also possible to modify the PID command with the keys.
- Page 412 5.4 Details of Function Codes J68 to J70 Brake Signal (Brake-OFF current, Brake-OFF frequency/speed and Brake-OFF timer) J71, J72 Brake Signal (Brake-ON frequency/speed and Brake-ON timer) J95, J96 Brake Signal (Brake-OFF torque and Speed selection) These function codes are for the brake releasing/turning-on signals of vertical carrier machines.
- Page 413 Operation time chart under V/f control Operation time chart under vector control without speed sensor Operation time chart under vector control with speed sensor • If the zero speed control is enabled under vector control with speed sensor, set J95 (Brake-OFF torque) at 0%. •...
- Page 414 5.4 Details of Function Codes J97 to J99 Servo-lock (Gain, Completion timer, Completion width) Servo-lock This function servo-locks the inverter to hold the motor within the positioning completion range specified by J99 for the period specified by J98 even if an external force applies to the load.
- Page 415 ■ Servo-lock (Gain) (J97) J97 specifies the gain of the servo-lock positioning device to adjust the stop behavior and shaft holding torque. ↔ Small Large ↔ Stop behavior Response slow, but smooth Response quick, but hunting large ↔ Shaft holding torque Small Large Monitor for servo-lock control...
-
Page 416: D Codes (Application Functions 2)
5.4 Details of Function Codes 5.4.8 d codes (Application functions 2) d01 to d04 Speed Control 1 (Speed command filter, Speed detection filter, P (Gain) and I (Integral time)) Speed Control 1 (Output filter) These function codes control the speed control sequence for normal operations. Block diagram of the speed control sequence Speed command filter (d01) d01 specifies a time constant determining the first order delay of the commanded-speed input... - Page 417 P gain Definition of "P gain = 1.0" is that the torque command is 100% (100% torque output of each inverter capacity) when the speed deviation (commanded speed – actual speed) is 100% (equivalent to the maximum speed). Determine the P gain according to moment of inertia of machinery loaded to the motor output shaft.
- Page 418 5.4 Details of Function Codes d14 to d17 Feedback Input (Pulse input format, Encoder pulse resolution, Pulse count factor 1 and Pulse count factor 2) These function codes specify the speed feedback input under vector control with speed sensor. Feedback Input, Pulse input format (d14) d14 specifies the speed feedback input format.
- Page 419 Feedback Input, Pulse count factor 1 (d16) and Pulse count factor 2 (d17) d16 and d17 specify the factors to convert the speed feedback input pulse rate into the motor shaft speed (r/min). - Data setting range: 1 to 9999 Specify the data according to the transmission ratios of the pulley and gear train as shown below.
- Page 420 5.4 Details of Function Codes d21, d22 Speed Agreement/PG Error (Hysteresis width and Detection timer) PG Error Processing These function codes specify the detection levels of the speed agreement signal DSAG and PG error detected signal PG-ERR. Speed agreement signal DSAG (E20 to E24 and E27, data = 71) Speed Agreement/PG Error (Hysteresis width (d21) and Detection timer (d22)) - Data setting range: d21 = 0.0 to 50.0%, 100% at the maximum speed d22 = 0.00 to 10.00 (s)
- Page 421 Zero Speed Control (Refer to F23.) Refer to the description of F23. ASR Switching Time (Refer to A42.) Refer to the description of A42. Refer to the description of F23. d32, d33 Torque control (Speed limit 1 and Speed limit 2) If a regenerative load (which is not generated usually) is generated under droop control, or if function codes are incorrectly configured, the motor may rotate at an unintended high speed.
-
Page 422: Y Codes (Link Functions)
For the setting of y codes, refer to the descriptions of y01 to y10. FRENIC-MEGA series of inverters has a USB port on the keypad. To use the FRENIC Loader via the USB port, simply set the station address (y01) to "1"... - Page 423 Communications error processing (y02 for port 1 and y12 for port 2) y02 or y12 specifies the error processing to be performed if an RS-485 communications error occurs. RS-485 communications errors include logical errors (such as address error, parity error, framing error), transmission protocol error, and physical errors (such as no-response error specified by y08 and y18).
- Page 424 5.4 Details of Function Codes Parity check (y06 for port 1 and y16 for port 2) y06 or y16 specifies the property of the Data for y06 Parity parity bit. and y16 For FRENIC Loader, no setting is required None since Loader automatically sets the even (2 stop bits for Modbus RTU) parity.
- Page 425 Protocol selection (y10 for port 1) y10 specifies the communications protocol Data for y10 Protocol for port 1. Modbus RTU protocol For FRENIC Loader (via the RS-485 communications link), only y10 can be used FRENIC Loader protocol for protocol selection. Set the y10 data at Fuji general-purpose "1."...
- Page 426 5.4 Details of Function Codes Loader Link Function (Mode selection) This is a link switching function for FRENIC Loader. Rewriting the data of y99 to enable RS-485 communications from Loader helps Loader send the inverter the frequency and/or run commands. Since the data to be set in the function code of the inverter is automatically set by Loader, no keypad operation is required.
-
Page 428: Block Diagrams For Control Logic
Chapter 6 BLOCK DIAGRAMS FOR CONTROL LOGIC This chapter provides the main block diagrams for the control logic of the FRENIC-MEGA series of inverters. Contents 6.1 Symbols Used in Block Diagrams and their Meanings................6-1 6.2 Drive Frequency Command Block......................6-2 6.3 Drive Command Block .......................... -
Page 430: Symbols Used In Block Diagrams And Their Meanings
6.1 Symbols Used in the Block Diagrams and their Meanings FRENIC-MEGA series of inverters is equipped with a number of function codes to match a variety of motor operations required in your system. Refer to Chapter 5 "FUNCTION CODES" for details of the function codes. -
Page 431: Drive Frequency Command Block
6.2 Drive Frequency Command Block B alanceless-bum pless (F01,C 30 = 8) LE D m onitor Key operation on the keypad S election of norm al/inverse 0,1,2 operation R eference frequency C 53 S w itch M otor speed in r/m in norm al/inverse operation Load shaft speed... - Page 432 6.2 Drive Frequency Command Block Select Enable Ready for Select frequency Multi-function Select local communications multi- jogging command 2/1 Frequency keypad (keypad) link via RS-485 frequency Hz2/Hz1 command 1 operation or fieldbus SS1,SS2, SS4,SS8 × Remote/local decision Frequency limiter (High) ×...
-
Page 433: Drive Command Block
6.3 Drive Command Block Figure 6.2 Drive Command Block... - Page 434 6.3 Drive Command Block This page is intentionally left blank.
-
Page 435: Control Block
6.4 Control Block 6.4.1 V/f control Maximum frequency 1 Base frequency 1 Rotational Starting frequency 1 direction (Holding time) limitation Stop frequency "0" (Holding time) Forward Drive frequency rotation command inhibited ACC/DEC processor Reverse rotation inhibited "-1" Droop control Acceleration/ Calculated torque deceleration pattern... - Page 436 6.4 Control Block Power Rectifier DC link bus supply capacitor Cooling fan Motor Cooling fan ON/OFF Output currents Gate drive circuit control (Iu, Iv, Iw) Cooling fan PWM signals ON/OFF control Instantaneous overcurrent limiting (Mode selection) Output current (Iu, Iv, Iw) Alarm Comparator Current limit level...
-
Page 437: Vector Control With/Without Speed Sensor
6.4.2 Vector control with/without speed sensor Figure 6.4 (1) Block of Vector Control with/without Speed Sensor... - Page 438 6.4 Control Block Figure 6.4 (2) Block of Vector Control with/without Speed Sensor...
-
Page 439: Pid Process Control Block
6.5 PID Process Control Block Balanceless-bumpless (F01,C30 = 8) LED monitor Key operation on the keypad 0,1,2 Reference frequency Motor speed in r/min Load shaft speed command Frequency command 1 Line speed command Display speed in % [12] × Gain Bias "0"... - Page 440 6.5 PID Process Control Block Enable Select Cancel PID communications multi-frequency control link via RS-485 SS1, SS2 Hz/PID or fieldbus Under PID control Inverter running PID-CTL Frequency limiter (High) Manual speed command Communications link function Drive frequency Multi-frequency 1 Jump Bus link function command frequency...
-
Page 441: Pid Dancer Control Block
6.6 PID Dancer Control Block Balanceless-bumpless (F01,C30 = 8) LED monitor Key operation on the keypad 0,1,2 Reference frequency Motor speed in r/min Load shaft speed command Frequency Line speed command command 1 Display speed in % × [12] Polarity Polarity Gain Bias... - Page 442 6.6 PID Dancer Control Block Enable Select Select frequency multi-frequency command 2/1 communications link Hz2/Hz1 via RS-485 or fieldbus SS1, SS2 Frequency limiter (High) Primary Communications frequency command Jump Drive frequency link function command frequency Bus link function Loader link function 0,2,6 1,3 to 5,7,8 Frequency...
-
Page 443: Fma/Fmp Output Selector
6.7 FMA/FMP Output Selector Analog output [FMA] Voltage Mode selection (Function) adjustment Hardware switch SW4 = VO Analog output Voltage output Output frequency 1 × [FMA] Output frequency 2 SW4 = IO Output current Current output × Output voltage Output torque Load factor Input power PID feedback amount... -
Page 444: Keypad Functions (Operating With The Keypad
Chapter 7 KEYPAD FUNCTIONS (OPERATING WITH THE KEYPAD) This chapter describes the names and functions of the keypad and inverter operation using the keypad. The inverter features three operation modes (Running, Programming and Alarm modes) which enable you to run and stop the motor, monitor running status, set function code data, display running information required for maintenance, and display alarm data. -
Page 446: Led Monitor, Keys And Led Indicators On The Keypad
7.1 LED Monitor, Keys and LED Indicators on the Keypad LED Monitor, Keys and LED Indicators on the Keypad As shown at the right, the keypad consists of 7-segment LED monitor a four-digit LED monitor, six keys, and five LED indicators. UP key indicators The keypad allows you to run and stop the... - Page 447 Table 7.1 Overview of Keypad Functions (continued) LED Monitor, Item Keys, and Functions LED Indicators These three LED indicators identify the unit of numeral displayed on the LED monitor in Running mode by combination of lit and unlit states of them.
- Page 448 7.1 LED Monitor, Keys and LED Indicators on the Keypad LED monitor In Running mode, the LED monitor displays running status information (output frequency, current or voltage); in Programming mode, it displays menus, function codes and their data; and in Alarm mode, it displays an alarm code which identifies the alarm factor if the protective function is activated.
-
Page 449: Overview Of Operation Modes
Overview of Operation Modes FRENIC-MEGA features the following three operation modes: ■ Running mode : After powered ON, the inverter automatically enters this mode. This mode allows you to specify the reference frequency, PID command value and etc., and run/stop the motor with the keys. - Page 450 7.2 Overview of Operation Modes Figure 7.4 illustrates the transition of the LED monitor screen during Running mode, the transition between menu items in Programming mode, and the transition between alarm codes at different occurrences in Alarm mode. (*1) The speed monitor allows you to select the desired one from the seven speed monitor items by using function code E48.
-
Page 451: Running Mode
Running Mode When the inverter is turned on, it automatically enters Running mode in which you can: (1) Monitor the running status (e.g., output frequency and output current), (2) Configure the reference frequency and other settings, (3) Run/stop the motor, (4) Jog (inch) the motor, (5) Switch between remote and local modes, and (6) Monitor light alarms... - Page 452 7.3 Running Mode *1 A value exceeding 9999 cannot be displayed as is on the 4-digit LED monitor screen, so the LED monitor displays one-tenth of the actual value with the x10 LED lit. *2 When the LED monitor displays an output voltage, the 7-segment letter in the lowest digit stands for the unit of the voltage "V."...
-
Page 453: Monitoring Light Alarms
7.3.2 Monitoring light alarms The FRENIC-MEGA identifies abnormal states in two categories--Heavy alarm and Light alarm. If l-al the former occurs, the inverter immediately trips; if the latter occurs, the inverter shows the the LED monitor and blinks the KEYPAD CONTROL LED but it continues to run without tripping. Which abnormal states are categorized as a light alarm ("Light alarm"... -
Page 454: Setting Up Frequency And Pid Commands
7.3 Running Mode 7.3.3 Setting up frequency and PID commands You can set up the desired frequency and PID commands by using keys on the keypad. It is also possible to set up the frequency command as load shaft speed, motor speed or speed (%) by setting function code E48. - Page 455 • To input bipolar analog voltage (0 to ±10 VDC) to terminals [12] and [V2], set C35 and C45 data to "0." Setting C35 and C45 data to "1" enables the voltage range from 0 to +10 VDC and interprets the negative polarity input from 0 to -10 VDC as 0 V. •...
- Page 456 7.3 Running Mode Table 7.4 PID Process Command Manually Set with Key and Requirements PID control PID control LED monitor Multi- frequency (Mode selection) (Remote command SV) With SS4, SS8 PID process command by keypad 1 or 2 Other than 0 ON or OFF PID process command Other than 0...
- Page 457 ■ Settings under PID dancer control To enable the PID dancer control, you need to set the J01 data to "3." Under the PID control, the items that can be specified or checked with keys are different from those under the regular frequency control, depending upon the current LED monitor setting. If the LED monitor is set to the speed monitor (E43 = 0), the item accessible is the primary frequency command;...
- Page 458 7.3 Running Mode Setting up the primary frequency command with keys under PID dancer control When function code F01 is set to "0" ( keys on keypad) and frequency command 1 is selected as a primary frequency command (when disabling the frequency setting command via communications link, multi-frequency command, and PID control), switching the LED monitor to the speed monitor in Running mode enables you to modify the frequency command with the keys.
-
Page 459: Running/Stopping The Motor
7.3.4 Running/stopping the motor By factory default, pressing the key starts running the motor in the forward direction and pressing the key decelerates the motor to stop. key is enabled only in Running mode. The motor rotational direction can be selected by changing the setting of function code F02. -
Page 460: Remote And Local Modes
7.3 Running Mode 7.3.6 Remote and local modes The inverter is available in either remote or local mode. In the remote mode that applies to ordinary operation, the inverter is driven under the control of the data settings stored in the inverter, whereas in the local mode that applies to maintenance operation, it is separated from the control system and is driven manually under the control of the keypad. -
Page 461: External Run/Frequency Command
7.3.7 External run/frequency command By factory default, run and frequency commands are sourced from the keypad. This section provides other external command source samples--an external potentiometer (variable resistor) as a frequency command source and external run switches as run forward/reverse command sources. Set up those external sources using the following procedure. -
Page 462: Programming Mode
7.4 Programming Mode Programming Mode The Programming mode provides you with these functions--setting and checking function code data, monitoring maintenance information and checking input/output (I/O) signal status. The functions can be easily selected with the menu-driven system. Table 7.9 lists menus available in Programming mode. The leftmost digit (numerals) of each letter string on the LED monitor indicates the corresponding menu number and the remaining three digits indicate the menu contents. - Page 463 Figure 7.5 illustrates the menu-driven function code system in Programming mode. Figure 7.5 Menu Transition in Programming Mode 7-18...
-
Page 464: Setting Up Basic Function Codes Quickly -- Menu #0 "Quick Setup" --
7.4 Programming Mode ■ Selecting menus to display The menu-driven system allows you to cycle through menus. To cycle through necessary menus only for simple operation, use function code E52 that provides a choice of three display modes as listed below. - Page 465 Listed below are the function codes (including those not subject to quick setup) available on the FRENIC-MEGA. A function code is displayed on the LED monitor on the keypad in the following format: ID number in each function code group Function code group Table 7.11 Function Codes Available on FRENIC-MEGA Function Code Group Function Codes...
- Page 466 7.4 Programming Mode Changing, validating, and saving function code data when the inverter is running Some function code data can be changed while the inverter is running, whereas others cannot. Further, depending on the function code, modifications may or may not validate immediately. For details, refer to the "Change when running"...
-
Page 467: Setting Up Function Codes -- Menu #1 "Data Setting" --
1 second or longer in the same way as with the frequency settings. This action is called "Cursor movement." It is possible to change or add function code items subject to quick setup. For details, consult your Fuji Electric representatives. 7.4.2 Setting up function codes -- Menu #1 "Data Setting"... - Page 468 7.4 Programming Mode Figure 7.7 Menu Transition in Menu #1 "Data Setting" 7-23...
- Page 469 Basic key operation The basic key operation in Menu #1 "Data Setting" is just like that in Menu #0 "Quick Setup." (1) Turn the inverter ON. It automatically enters Running mode. In that mode, press the key to switch to Programming mode. The function selection menu appears. !f__ (2) Use the keys to display the desired function code group from the choices...
-
Page 470: Checking Changed Function Codes -- Menu #2 "Data Checking" --
7.4 Programming Mode 7.4.3 Checking changed function codes -- Menu #2 "Data Checking" -- Menu #2 "Data Checking" in Programming mode allows you to check function codes that have been changed. Only the function codes whose data has been changed from the factory defaults are displayed on the LED monitor. -
Page 471: Monitoring The Running Status -- Menu #3 "Drive Monitoring" --
7.4.4 Monitoring the running status -- Menu #3 "Drive Monitoring" -- Menu #3 "Drive Monitoring" is used to monitor the running status during maintenance and trial running. The display items for "Drive Monitoring" are listed in Table 7.12. Figure 7.9 shows the menu transition in Menu #3 "Drive Monitoring."... - Page 472 7.4 Programming Mode Table 7.12 Drive Monitor Display Items monitor Item Unit Description shows: 3_00 Output frequency Output frequency before slip compensation 3_01 Output frequency Output frequency after slip compensation 3_02 Output current Output current 3_03 Output voltage Output voltage 3_04 Calculated torque Calculated output torque of the motor in %...
- Page 473 Table 7.12 Drive Monitor Display Items (continued) monitor Item Unit Description shows: 3_16 (Not used.) ― ― 3_17 (Not used.) ― ― 3_18 (Not used.) ― ― 3_19 (Not used.) ― ― 3_20 (Not used.) ― ― PID output value in %. (100% at the maximum frequency) 3_21 PID output value If PID control is disabled, "...
- Page 474 7.4 Programming Mode Table 7.14 Running Status 2 ( 3_23 ) Bit Assignment Notation Content Notation Content Speed limiting (under torque control) (Not used.) Motor selection 00: Motor 1 01: Motor 2 10: Motor 3 11: Motor 4 ...
-
Page 475: Checking I/O Signal Status -- Menu #4 "I/O Checking" --
7.4.5 Checking I/O signal status -- Menu #4 "I/O Checking" -- Using Menu #4 "I/O Checking" displays the I/O status of external signals including digital and analog I/O signals without using a measuring instrument. Table 7.17 lists check items available. The menu transition in Menu #4 "I/O Checking"... - Page 476 7.4 Programming Mode Basic key operation To check the status of the I/O signals, set function code E52 to "2" (Full-menu mode) beforehand (1) Turn the inverter ON. It automatically enters Running mode. In that mode, press the key to switch to Programming mode.
- Page 477 Table 7.17 I/O Check Items (continued) LED monitor Item Description shows: PG pulse rate Shows the pulse rate (kp/s) of the A/B phase signal 4_17 (A/B phase signal from the fed back from the slave PG. slave PG) PG pulse rate Shows the pulse rate (kp/s) of the Z phase signal fed 4_18 (Z phase signal from the slave...
- Page 478 7.4 Programming Mode • Displaying I/O signal status in hexadecimal Each I/O terminal is assigned to bit 15 through bit 0 as shown in Table 7.19. An unassigned bit is interpreted as "0." Allocated bit data is displayed on the LED monitor as four hexadecimal digits ( each).
- Page 479 Displaying control I/O signal terminals on digital input and output interface cards (optional) The LED monitor can also show the signal status of the terminals on the optional digital input and output interface cards, just like the signal status of the control circuit terminals. Table 7.20 lists the assignment of digital I/O signals to the LED segments.
-
Page 480: Reading Maintenance Information -- Menu #5 "Maintenance Information" --
7.4 Programming Mode 7.4.6 Reading maintenance information Menu #5 "Maintenance Information" -- %che Menu #5 "Maintenance Information" ( ) contains information necessary for performing maintenance on the inverter. Figure 7.11 shows the menu transition in Menu #5 "Maintenance information." Figure 7.11 Menu Transition in Menu #5 "Maintenance Information" Basic key operation To view the maintenance information, set function code E52 to "2"... - Page 481 Table 7.21 Display Items for Maintenance Information Monitor Item Description shows: Shows the content of the cumulative power-ON time counter of the inverter. Counter range: 0 to 65,535 hours Display: Upper 2 digits and lower 3 digits are displayed alternately. Cumulative run ⇔...
- Page 482 7.4 Programming Mode Table 7.21 Display Items for Maintenance Information (continued) Monitor Item Description shows: Shows the input watt-hour of the inverter. Display range: *001 9999 Input watt-hour = Displayed value × 100 kWh 5_09 Input watt-hour To reset the integrated input watt-hour and its data, set function code E51 to "0.000."...
- Page 483 Table 7.21 Display Items for Maintenance Information (continued) Monitor Item Description shows: Shows the content of the cumulative power-ON time counter of motor 1. Counter range: 0 to 99,990 hours 9999 Display range: The x10 LED turns ON. Cumulative motor 5_23 Actual cumulative motor run time (hours) = run time...
- Page 484 7.4 Programming Mode Table 7.21 Display Items for Maintenance Information (continued) Monitor Item Description shows: Shows the factor of the latest light alarm as an alarm code. Light alarm factor 5_36 (Latest) For details, refer to the description of H81 in Chapter 5. Shows the factor of the last light alarm as an alarm code.
-
Page 485: Reading Alarm Information -- Menu #6 "Alarm Information" --
7.4.7 Reading alarm information -- Menu #6 "Alarm Information" -- Menu #6 "Alarm Information" shows the causes of the past 4 alarms in alarm code. Further, it is also possible to display alarm information that indicates the status of the inverter when the alarm occurred. Figure 7.12 shows the menu transition in Menu #6 "Alarm Information"... - Page 486 7.4 Programming Mode Table 7.22 Alarm Information Displayed LED monitor shows: Item displayed Description (item No.) 6_00 Output frequency Output frequency before slip compensation 6_01 Output current Output current 6_02 Output voltage Output voltage 6_03 Calculated torque Calculated motor output torque 6_04 Reference frequency Frequency specified by frequency command...
- Page 487 Table 7.22 Alarm Information Displayed (continued) LED monitor shows: Item displayed Description (item No.) No. of consecutive This is the number of times the same alarm occurs 6_15 occurrences consecutively. Simultaneously occurring alarm codes (1) 6_16 Multiple alarm 1 ---- ("...
-
Page 488: Copying Data -- Menu #7 "Data Copying" --
7.4 Programming Mode 7.4.8 Copying data -- Menu #7 "Data Copying" -- Menu #7 "Data Copying" is used to read function code data out of an inverter for storing it in the keypad or writing it into another inverter. It is also used to verify the function code data stored in the keypad with the one configured in the inverter. - Page 489 Basic key operation (1) Turn the inverter ON. It automatically enters Running mode. In that mode, press the key to switch to Programming mode. The function selection menu appears. 'cpy (2) Use the keys to display "Data Copying" ( read (3) Press the key to proceed to the list of data copying functions (e.g.
- Page 490 • The function codes stored in the keypad and ones registered in the inverter are not compatible with each other. (Either of the two may have been revised or upgraded in a non-standard or incompatible manner. Consult your Fuji Electric representative.) 7-45...
-
Page 491: Alarm Mode
Alarm Mode If an abnormal condition arises, the protective function is invoked and issues an alarm, then the inverter automatically enters Alarm mode. At the same time, an alarm code appears on the LED monitor. 7.5.1 Releasing the alarm and switching to Running mode Remove the cause of the alarm and press the key to release the alarm and return to Running mode. - Page 492 7.5 Alarm Mode Figure 7.14 summarizes the possible transitions between different menu items. Figure 7.14 Menu Transition in Alarm Mode 7-47...
-
Page 493: Usb Connectivity
7.6 USB Connectivity The keypad has a USB port (mini B connector) on its face. To connect a USB cable, open the USB port cover as shown below. Connecting the inverter to a PC with a USB cable enables remote control from FRENIC Loader. On the PC running FRENIC Loader, it is possible to edit, check, manage, and monitor the function code data in real-time, to start or stop the inverter, and to monitor the running or alarm status of the inverter. - Page 494 Chapter 8 RUNNING THROUGH RS-485 COMMUNICATION This chapter describes an overview of inverter operation through the RS-485 communications facility. Refer to the RS-485 Communication User's Manual (MEH448) for details. Contents 8.1 Overview on RS-485 Communication ......................8-1 8.1.1 RS-485 common specifications......................8-2 8.1.2 Terminal specifications for RS-485 communications .................
-
Page 496: Overview On Rs-485 Communication
8.1 Overview on RS-485 Communication Overview on RS-485 Communication The FRENIC-MEGA has two RS-485 communications ports at the locations shown below. (1) Communications port 1: RJ-45 connector for the keypad (2) Communications port 2: RS-485 terminals (Control circuit terminals SD, DX-, and DX+) RS-485 terminals (SD, DX-, and DX+) (which facilitate multi-drop connection.) RJ-45 connector... -
Page 497: Common Specifications
8.1.1 RS-485 common specifications Items Specifications Protocol FGI-BUS Modbus RTU Loader commands (supported only on the standard version) Compliance Fuji general-purpose Modicon Modbus Dedicated protocol inverter protocol RTU-compliant (Not disclosed) (only in RTU mode) No. of supporting Host device: 1 stations Inverters: Up to 31... -
Page 498: Terminal Specifications For Rs-485 Communications
8.1 Overview on RS-485 Communication 8.1.2 Terminal specifications for RS-485 communications [ 1 ] RS-485 communications port 1 (for connecting the keypad) The port designed for a standard keypad uses an RJ-45 connector having the following pin assignment: Signal name Function Remarks 1 and 8... -
Page 499: Connection Method
8.1.3 Connection method • Up to 31 inverters can be connected to one host equipment. • The protocol is commonly used in the FRENIC series of general-purpose inverters, so programs for similar host equipment can run/stop the inverter. (The parameters specifications may differ depending on the equipment.) •... - Page 500 Multi-drop connection using the RS-485 communications port 2 (on the terminal block) Host equipment Host equipment USB or RS-232C RS-485 (4-wire) Terminating resistor (112Ω) Shield − RS-485 converter FRENIC-MEGA series Inverter 1 − RS-232C RS-485 converter Station No. 01 Off-the-shelf one (2-wire) (2-wire) Using the built-in FRENIC-MEGA series...
-
Page 501: Communications Support Devices
8.1.4 Communications support devices This section describes the devices required for connecting the inverter to a PC having no RS-485 interface or for connecting two or more inverters in multi-drop network. [ 1 ] Communications level converters Usually PCs are not equipped with an RS-485 communications port but with an RS-232C port. To connect inverters to a PC, therefore, you need an RS-232C–RS-485 converter or a USB–RS-485 converter*. -
Page 502: Noise Suppression
8.1 Overview on RS-485 Communication [ 2 ] Requirements for the cable (COM port 1: for RJ-45 connector) Use a standard 10BASE-T/100BASE-TX LAN cable (US ANSI/TIA/EIA-568A category 5 compliant, straight type). The RJ-45 connector (COM port 1) has power source pins (pins 1, 2, 7 and 8) exclusively assigned to keypads. -
Page 503: Overview Of Frenic Loader
Overview of FRENIC Loader FRENIC Loader is a software tool that supports the operation of the inverter via an RS-485 communications link. It allows you to remotely run or stop the inverter, edit, set, or manage the function codes, monitor key parameters and values during operation, as well as monitor the running status (including alarm information) of the inverters on the RS-485 communications network. -
Page 504: Connection
8.2 Overview of FRENIC Loader (Note 1) FRENIC Loader cannot be used with inverters that do not support SX protocol (protocol for handling Loader commands). (Note 2) Use a PC with as high a performance as possible, since some slow PCs may not properly refresh the operation status monitor and Test-run windows. -
Page 505: Multi-Monitor
Comparison You can compare the function code data currently being edited with that saved in a file or stored in the inverter. To perform a comparison and review the result displayed, click the Comparison tab and then click the Compared with inverter tab or click the Compared with file tab, and specify the file name. The result of the comparison will be displayed also in the Comparison Result column of the list. -
Page 506: Running Status Monitor
8.2 Overview of FRENIC Loader 8.2.3.3 Running status monitor The running status monitor offers four monitor functions: I/O monitor, System monitor, Alarm monitor, and Meter display. You can choose an appropriate monitoring format according to the purpose and situation. I/O monitor Allows you to monitor the ON/OFF states of the digital input signals to the inverter and the transistor output signals. -
Page 507: Test-Running
8.2.3.4 Test-running The Test-running feature allows you to test-run the motor in the forward or reverse direction while monitoring the running status of the selected inverter. Select monitor item Frequency reference Select what is to be displayed (e.g., Enter or select the frequency command output frequency or current) here using to write it into the inverter. -
Page 508: Real-Time Trace
8.2 Overview of FRENIC Loader 8.2.3.5 Real-time trace The real-time trace monitors up to 4 analog readouts and up to 8 digital ON/OFF signals to display the running status of a selected inverter in real-time waveforms. • Sampling interval: Fixed at 200 ms •... -
Page 509: Historical Trace
8.2.3.6 Historical trace The historical trace monitors the running status of a selected inverter in greater detail with more contiguous waveforms than in the real-time trace. • Sampling interval: 1 to 200 ms • Size of data saved: 2 kilobytes •... -
Page 510: Usb Port On The Standard Keypad
8.2 Overview of FRENIC Loader 8.2.3.7 USB port on the standard keypad The USB port on the standard keypad allows you to connect a computer supporting USB connection and use the FRENIC Loader. As described below, various information of the inverter saved in the keypad memory can be monitored and controlled on the computer. -
Page 512: Troubleshooting
Chapter 9 TROUBLESHOOTING This chapter describes troubleshooting procedures to be followed when the inverter malfunctions or detects an alarm or a light alarm condition. In this chapter, first check whether any alarm code or the "light alarm" l-al indication ( ) is displayed or not, and then proceed to the troubleshooting items. -
Page 514: Protective Functions
9.1 Protective Functions 9.1 Protective Functions The FRENIC-MEGA series of inverters has various protective functions as listed below to prevent the system from going down and reduce system downtime. The protective functions marked with an asterisk (*) in the table are disabled by factory default. Enable them according to your needs. - Page 515 Table 9.1 Abnormal States Detectable ("Heavy Alarm" and "Light Alarm" Objects) "Heavy "Light Ref. Code Name alarm" alarm" Remarks page objects objects √ Instantaneous overcurrent 9-11 √ Ground fault 30 kW or above 9-12 √ Overvoltage 9-12 √ Undervoltage 9-13 √...
-
Page 516: Before Proceeding With Troubleshooting
If an abnormal pattern appears on the LED monitor Go to Section 9.6. l-al while neither an alarm code nor "light alarm" indication ( ) is displayed If any problems persist after the above recovery procedure, contact your Fuji Electric representative. -
Page 517: If Neither An Alarm Code Nor "Light Alarm" Indication
9.3 If Neither an Alarm Code Nor "Light Alarm" Indication l-al ) Appears on the LED Monitor This section describes the troubleshooting procedure based on function codes dedicated to motor 1 which are marked with an asterisk (*). For motors 2 to 4, replace those asterisked function codes with respective motor dedicated ones (refer to Chapter 5, Table 5.8). - Page 518 9.3 If Neither an Alarm Code Nor "Light Alarm" Indication ( l-al ) Appears on the LED Monitor Possible Causes What to Check and Suggested Measures (7) The reference frequency was Check that a reference frequency has been entered correctly, using Menu below the starting or stop #4 "I/O Checking"...
- Page 519 [ 2 ] The motor rotates, but the speed does not increase. Possible Causes What to Check and Suggested Measures (1) The maximum frequency Check the data of function code F03* (Maximum frequency). currently specified was too Correct the F03* data. low.
- Page 520 9.3 If Neither an Alarm Code Nor "Light Alarm" Indication ( l-al ) Appears on the LED Monitor [ 3 ] The motor runs in the opposite direction to the command. Possible Causes What to Check and Suggested Measures (1) Wiring to the motor is Check the wiring to the motor.
- Page 521 [ 5 ] Grating sound is heard from the motor or the motor sound fluctuates. Possible Causes What to Check and Suggested Measures (1) The specified carrier Check the data of function codes F26 (Motor sound (Carrier frequency)) frequency is too low. and F27 (Motor sound (Tone)).
-
Page 522: Momentary Power Failure
9.3 If Neither an Alarm Code Nor "Light Alarm" Indication ( l-al ) Appears on the LED Monitor Possible Causes What to Check and Suggested Measures (7) The output frequency is Check whether data of torque limiter related function codes (F40, F41, limited by the torque limiter. -
Page 523: Problems With Inverter Settings
9.3.2 Problems with inverter settings [ 1 ] Nothing appears on the LED monitor. Possible Causes What to Check and Suggested Measures (1) No power (neither main power Check the input voltage and interphase voltage unbalance. nor auxiliary control power) Turn ON a molded case circuit breaker (MCCB), a residual-current- supplied to the inverter. -
Page 524: If An Alarm Code Appears On The Led Monitor
9.4 If an Alarm Code Appears on the LED Monitor Possible Causes What to Check and Suggested Measures *fn: (6) The function code(s) to be If Menu #0 "Quick Setup" ( ) is selected, only the particular changed does not appear. function codes appear. - Page 525 [ 2 ] Ground fault Problem A ground fault current flew from the output terminal of the inverter. Possible Causes What to Check and Suggested Measures (1) Inverter output terminal(s) Disconnect the wiring from the output terminals ([U], [V], and [W]) grounded (ground fault).
- Page 526 9.4 If an Alarm Code Appears on the LED Monitor [ 4 ] Undervoltage Problem DC link bus voltage has dropped below the undervoltage detection level. Possible Causes What to Check and Suggested Measures Release the alarm. (1) A momentary power failure occurred.
- Page 527 [ 6 ] Output phase loss Problem Output phase loss occurred. Possible Causes What to Check and Suggested Measures (1) Inverter output wires are Measure the output current. broken. Replace the output wires. (2) The motor winding is broken. Measure the output current. Replace the motor.
- Page 528 9.4 If an Alarm Code Appears on the LED Monitor Possible Causes What to Check and Suggested Measures (3) Incorrect setting of function Check whether the "Enable external alarm trip" terminal command code data. THR has been assigned to an unavailable terminal (with E01 through E09, E98, or E99).
- Page 529 [ 11 ] Braking resistor overheated Problem The electronic thermal protection for the braking resistor has been activated. Possible Causes What to Check and Suggested Measures (1) Braking load is too heavy. Reconsider the relationship between the braking load estimated and the real load.
- Page 530 9.4 If an Alarm Code Appears on the LED Monitor [ 14 ] Overload of motor 1 through 4 Problem Electronic thermal protection for motor 1, 2, 3, or 4 activated. Motor 1 overload Motor 2 overload Motor 3 overload Motor 4 overload Possible Causes What to Check and Suggested Measures...
- Page 531 Possible Causes What to Check and Suggested Measures (6) Cooling fan's airflow volume Check the cumulative run time of the cooling fan. Refer to Chapter 7, decreased due to the service life Section 7.4.6 "Reading maintenance information – Menu #5 expired or failure.
- Page 532 The control PCB (on which the CPU is mounted) is defective. Contact your Fuji Electric representative. [ 19 ] Keypad communications error Problem A communications error occurred between the standard keypad or the multi-function keypad and the inverter.
- Page 533 [ 21 ] Option communications error Problem A communications error occurred between the option card and the inverter. Possible Causes What to Check and Suggested Measures (1) There was a problem with the Check whether the connector on the option card is properly engaged connection between the option with that of the inverter.
- Page 534 9.4 If an Alarm Code Appears on the LED Monitor Possible Causes What to Check and Suggested Measures (4) The rated capacity of the motor Check whether the rated capacity of the motor is three or more ranks was significantly different from lower, or two or more ranks higher than that of the inverter.
- Page 535 Check if occurs each time the power is turned ON. The control PCB (on which the CPU is mounted) is defective. Contact your Fuji Electric representative. [ 27 ] Hardware error Problem The LSI on the power printed circuit board malfunctions.
- Page 536 9.4 If an Alarm Code Appears on the LED Monitor Possible Causes What to Check and Suggested Measures (3) The motor speed does not increase Check the data of function code F44 (Current limiter (Level)). due to the current limiter Change the F44 data correctly.
- Page 537 (1) The braking transistor is broken. Check whether resistance of the braking resistor is correct or there is a misconnection of the resistor. Consult your Fuji Electric representative for repair. [ 33 ] Positioning control error Problem: An excessive positioning deviation has occurred when the servo-lock function was activated.
- Page 538 9.5 If the "Light Alarm" Indication ( l-al ) Appears on the LED Monitor l-al 9.5 If the "Light Alarm" Indication ( ) Appears on the LED Monitor If the inverter detects a minor abnormal state "light alarm", it can continue the current operation l-al without tripping while displaying the "light alarm"...
-
Page 539: If An Abnormal Pattern Appears On The Led Monitor While Neither An Alarm Code Nor
9.6 If an Abnormal Pattern Appears on the LED Monitor while Neither an Alarm Code nor "Light Alarm" l-al Indication ( ) is Displayed [ 1 ] – – – – (center bar) appears Problem A center bar (– – – –) appeared on the LED monitor. Possible Causes What to Check and Suggested Measures (1) When PID control had been... - Page 540 Appendices Contents App. A Advantageous Use of Inverters (Notes on electrical noise) ............... A-1 A.1 Effect of inverters on other devices ....................A-1 A.2 Noise ..............................A-2 A.3 Noise prevention ..........................A-4 App. B Japanese Guideline for Suppressing Harmonics by Customers Receiving High Voltage or Special High Voltage........................
-
Page 542: App. A Advantageous Use Of Inverters (Notes On Electrical Noise
App. A Advantageous Use of Inverters (Notes on electrical noise) App. A Advantageous Use of Inverters (Notes on electrical noise) - Disclaimer: This document provides you with a summary of the Technical Document of the Japan Electrical Manufacturers' Association (JEMA) (April 1994). It is intended to apply to the domestic market only. -
Page 543: A.2 Noise
Noise This section gives a summary of noises generated in inverters and their effects on devices subject to noise. [ 1 ] Inverter noise Figure A.1 shows an outline of the inverter configuration. The inverter converts AC to DC (rectification) in a converter unit, and converts DC to AC (inversion) with 3-phase variable voltage and variable frequency. - Page 544 App. A Advantageous Use of Inverters (Notes on electrical noise) [ 2 ] Types of noise Noise generated in an inverter is propagated through the main circuit wiring to the power supply and the motor so as to affect a wide range of applications from the power supply transformer to the motor.
-
Page 545: Noise Prevention
Figure A.5 Electrostatic Induced Noise (3) Radiation noise Noise generated in an inverter may be radiated through the air from wires (that act as antennas) at the input and output sides of the inverter so as to affect peripheral devices. This noise is called "radiation noise"... - Page 546 App. A Advantageous Use of Inverters (Notes on electrical noise) [ 2 ] Implementation of noise prevention measures There are two types of noise prevention measures--one for noise propagation routes and the other for noise receiving sides (that are affected by noise). The basic measures for lessening the effect of noise at the receiving side include: Separating the main circuit wiring from the control circuit wiring, avoiding noise effect.
- Page 547 What follows is noise prevention measures for the inverter drive configuration. (1) Wiring and grounding As shown in Figure A.7, separate the main circuit wiring from control circuit wiring as far as possible regardless of being located inside or outside the system control panel containing an inverter. Use shielded wires and twisted shielded wires that will block out extraneous noises, and minimize the wiring distance.
- Page 548 App. A Advantageous Use of Inverters (Notes on electrical noise) (3) Anti-noise devices To reduce the noise propagated through the electrical circuits and the noise radiated from the main circuit wiring to the air, a line filter and power supply transformer should be used (refer to Figure A.10).
- Page 549 [ 3 ] Noise prevention examples Table A.2 lists examples of the measures to prevent noise generated by a running inverter. Table A.2 Examples of Noise Prevention Measures Target Phenomena Noise prevention measures device Notes When operating an inverter, 1) Install an LC filter at the 1) The radiation radio noise enters into an AM...
- Page 550 App. A Advantageous Use of Inverters (Notes on electrical noise) Table A.2 Continued Target Phenomena Noise prevention measures device Notes Tele- When driving a ventilation 1) Connect the ground 1) The effect of the phone fan with an inverter, noise terminals of the motors inductive filter (in a...
- Page 551 Table A.2 Continued Target Phenomena Noise prevention measures device Notes 1) Insert a 0.1 µF capacitor Photo- A photoelectric relay 1) If a low-current electric malfunctioned when the between the output circuit at the relay inverter was operated. common terminal of the malfunctioning amplifier of the side is observed,...
- Page 552 App. A Advantageous Use of Inverters (Notes on electrical noise) Table A.2 Continued Target Phenomena Noise prevention measures device Notes Pressure A pressure sensor 1) Install an LC filter on 1) The shielded sensor malfunctioned. the input side of the parts of shield inverter.
-
Page 553: App. B Japanese Guideline For Suppressing Harmonics By Customers Receiving High Voltage Or Special High Voltage
[ 1 ] Guideline for suppressing harmonics in home electric and general-purpose appliances Our three-phase, 200 V class series inverters of 3.7 kW or less (FRENIC-MEGA series) were the products of which were restricted by the "Guideline for Suppressing Harmonics in Home Electric and General-purpose Appliances"... -
Page 554: Compliance To The Harmonic Suppression For Customers Receiving High Voltage Or Special High Voltage
Japanese Guideline for Suppressing Harmonics for Customers Receiving High Voltage or Special High Voltage App. B (2) Regulation The level (calculated value) of the harmonic current that flows from the customer's receiving point out to the system is subjected to the regulation. The regulation value is proportional to the contract demand. - Page 555 Table B.2 "Input Rated Capacities" of General-purpose Inverters Determined by the Applicable Motor Ratings Applicable motor 0.75 18.5 rating (kW) 200 V 0.57 0.97 1.95 2.81 4.61 6.77 9.07 13.1 17.6 21.8 (kVA) 400 V 0.57 0.97 1.95 2.81 4.61 6.77 9.07 13.1...
- Page 556 Japanese Guideline for Suppressing Harmonics for Customers Receiving High Voltage or Special High Voltage App. B (2) Calculation of harmonic current Usually, calculate the harmonic current according to the Sub-table 3 "Three-phase bridge rectifier with the smoothing capacitor" in Table 2 of the Guideline's Appendix. Table B.5 lists the contents of the Sub-table 3.
- Page 557 Note: If the contract demand is between two specified values listed in Table B.7, calculate the value by interpolation. Note: The correction coefficient β is to be determined as a matter of consultation between the customer and electric power company for the customers receiving the electric power over 2000 kW or from the special high voltage lines.
-
Page 558: App. C Effect On Insulation Of General-Purpose Motors Driven With 400 V Class Inverters
App. C Effect on Insulation of General-purpose Motors Driven with 400 V Class Inverters App. C Effect on Insulation of General-purpose Motors Driven with 400 V Class Inverters - Disclaimer: This document provides you with a summary of the Technical Document of the Japan Electrical Manufacturers' Association (JEMA) (March, 1995). -
Page 559: Effect Of Surge Voltages
Figure C.2 Measured Example of Wiring Length and Peak Value of Motor Terminal Voltage Effect of surge voltages The surge voltages originating in LC resonance of wiring may be applied to the motor terminals and depending on their magnitude sometimes cause damage to the motor insulation. When the motor is driven with a 200 V class inverter, the dielectric strength of the insulation is no problem since the peak value at the motor terminal voltage increases twice due to the surge voltages (the DC voltage is only about 300 V). -
Page 560: Regarding Existing Equipment
App. C Effect on Insulation of General-purpose Motors Driven with 400 V Class Inverters [ 2 ] Suppressing surge voltages There are two ways for suppressing the surge voltages, one is to reduce the voltage rise time and another is to reduce the voltage peak value. (1) Output reactor If wiring length is relatively short, the surge voltages can be suppressed by reducing the voltage rise time (dv/dt) with the installation of an AC reactor on the output side of the inverter. -
Page 561: App. D Inverter Generating Loss
App. D Inverter Generating Loss The table below lists the inverter generating loss. Generating loss (W) Power HD mode LD mode MD mode supply Inverter type voltage Low carrier High carrier Low carrier High carrier Low carrier High carrier frequency frequency frequency frequency... -
Page 562: App. E Conversion From Si Units
App. E Conversion from SI Units App. E Conversion from SI Units All expressions given in Chapter 3, "SELECTING OPTIMAL MOTOR AND INVERTER CAPACITIES" are based on SI units (The International System of Units). This section explains how to convert expressions to other units. [ 1 ] Conversion of units (6) Inertia constant (1) Force... - Page 563 [ 2 ] Calculation formula (4) Acceleration torque (1) Torque, power, and rotation speed Driving mode π • ≈ τ (r/min) • • • ∆ min) • • τ ≈ • • • ∆ η ≈ 1.026 (r/min) (kgf • •...
-
Page 564: App. F Allowable Current Of Insulated Wires
App. F Allowable Current of Insulated Wires App. F Allowable Current of Insulated Wires The tables below list the allowable current of IV wires, HIV wires, and 600 V cross-linked polyethylene insulated wires. IV wires (Maximum allowable temperature: 60°C) Table F.1 (a) Allowable Current of Insulated Wires Aerial wiring Wiring in the duct (Max. - Page 565 600 V Cross-linked Polyethylene Insulated wires (Maximum allowable temperature: 90°C) Table F.1 (c) Allowable Current of Insulated Wires Allowable current Aerial wiring Wiring in the duct (Max. 3 wires in one duct) Wire size reference value 35°C 40°C 45°C 50°C 55°C 35°C 40°C...
-
Page 566: App. G Replacement Information
/MEGA (%) series with that for the conventional inverter series in percentage, assuming the area for the FRENIC-MEGA series to be 100%. If this value is greater than 100%, it means that the mounting area required for the FRENIC- MEGA series is smaller than that of other series. - Page 567 Standard models FRENIC-MEGA HD mode vs. FRENIC5000G9S FRENIC-MEGA HD mode FRENIC5000G9S Nominal Mounting Power External dimensions (mm) External dimensions (mm) Mounting area Volume Volume applied area supply motor voltage /MEGA /MEGA (kW) (X10 (X10 (X10 (X10 100.0% 87.1% 0.75 100.0% 89.7% 100.0% 100.0%...
- Page 568 App. G Replacement Information FRENIC-MEGA HD mode vs. FRENIC5000G11S FRENIC-MEGA HD mode FRENIC5000G11S Nominal Mounting Mounting Power External dimensions (mm) External dimensions (mm) Volume Volume applied area area supply motor voltage /MEGA /MEGA (kW) (X10 (X10 (X10 (X10 93.5 36.5 - -...
-
Page 569: Terminal Arrangements And Symbols
G.2 Terminal arrangements and symbols This section shows the difference in the terminal arrangements and their symbols between the FRENIC-MEGA series and the replaceable inverter series. Control circuit terminals arrangement comparison A-28... - Page 570 App. G Replacement Information Main circuit terminals arrangement and screw sizes comparison FRENIC5000G9S vs. FRENIC-MEGA A-29...
- Page 571 FRENIC5000G11S vs. FRENIC-MEGA A-30...
- Page 572 App. G Replacement Information Terminal symbols and functions comparison FRENIC5000G9S/P9S vs. FRENIC-MEGA FRENIC5000G9S/P9S FRENIC-MEGA Classifi- cation Symbols Name Symbols Name R, S, T Main circuit power inputs L1/R, L2/S, L3/T Main circuit power inputs Auxiliary power input for the Auxiliary power input for the R0, T0 control circuit R0, T0...
- Page 573 FRENIC5000G9S/P9S FRENIC-MEGA Classifi- cation Symbols Name Symbols Name Transistor output 1 Transistor output 1 Transistor output 2 Transistor output 2 Transistor output 3 Transistor output 3 Transistor output 4 Transistor output 4 Transistor output 5 Y5A, Y5C General purpose relay output Transistor output common Transistor output common (RUN) Inverter running...
- Page 574 App. G Replacement Information FRENIC5000G11S/P11S vs. FRENIC-MEGA FRENIC5000G11S/P11S FRENIC-MEGA Classifi- cation Symbols Name Symbols Name L1/R, L2/S, L3/T Main circuit power terminal L1/R, L2/S, L3/T Main circuit power inputs Auxiliary control-power input Auxiliary power input for the R0, T0 R0, T0 terminal control circuit U, V, W...
- Page 575 FRENIC5000G11S/P11S FRENIC-MEGA Classifi- cation Symbols Name Symbols Name UP (Increase output (UP) UP command frequency) DOWN (Decrease output (DOWN) DOWN command DOWN frequency) Edit permission command Enable data change with (WE-KP) WE-KP (data change permission) keypad (Hz/PID) PID control cancellation Hz/PID Cancel PID control Switch normal/inverse (IVS) Forward/inverse switching...
-
Page 576: Function Codes
This section describes the replacement information related to function codes that are required when replacing the conventional inverter series (e.g., FRENIC5000G9S/P9S and FRENIC5000G11S/P11S) with the FRENIC-MEGA series. It also provides the conversion table for the torque boost setting. [ 1 ] FRENIC5000G9S vs. FRENIC-MEGA p. - Page 577 A-36...
- Page 578 App. G Replacement Information A-37...
- Page 579 A-38...
- Page 580 App. G Replacement Information A-39...
- Page 581 A-40...
- Page 582 App. G Replacement Information A-41...
- Page 583 A-42...
- Page 584 App. G Replacement Information A-43...
- Page 585 A-44...
- Page 586 App. G Replacement Information A-45...
- Page 587 A-46...
- Page 588 App. G Replacement Information A-47...
- Page 589 A-48...
- Page 590 App. G Replacement Information A-49...
- Page 591 A-50...
- Page 592 App. G Replacement Information A-51...
- Page 593 A-52...
- Page 594 App. G Replacement Information A-53...
- Page 595 A-54...
- Page 596 App. G Replacement Information A-55...
- Page 597 A-56...
- Page 598 App. G Replacement Information A-57...
- Page 599 A-58...
- Page 600 App. G Replacement Information A-59...
- Page 601 A-60...
- Page 602 App. G Replacement Information A-61...
- Page 603 A-62...
- Page 604 App. G Replacement Information A-63...
- Page 605 A-64...
- Page 606 App. G Replacement Information A-65...
- Page 607 A-66...
- Page 608 App. G Replacement Information Torque boost conversion tables FRENIC5000G9S/P9S (22 kW or below) vs. FRENIC-MEGA G9S/P9S FRENIC-MEGA Remarks Data for 07 0.0% 2.9% 5.8% 8.6% Adjust the torque boost using H50 and H51 as 11.5% needed. 14.4% 17.3% 20.0% 20.0% 0.0% 2.6% 5.1%...
- Page 609 FRENIC5000G9S/P9S (30 kW or above) vs. FRENIC-MEGA G9S/P9S FRENIC-MEGA Remarks Data for 07 4.4% 4.4% 4.4% 4.4% Adjust the torque boost using H50 and H51 as 5.0% needed. 6.3% 7.5% 8.8% 10.0% 4.4% 4.4% 4.4% 4.4% Adjust the torque boost 4.4% using H50 and H51 as 5.6%...
- Page 610 App. G Replacement Information FRENIC5000G11S/P11S (22 kW or below) vs. FRENIC-MEGA G11S/P11S FRENIC-MEGA Remarks Data for F09 7.0% 8.3% 9.5% 10.8% Adjust the torque boost using H50 and H51 as 12.0% needed. 13.3% 14.5% 15.8% 17.0% 7.0% 8.1% 9.2% 10.3% Adjust the torque boost 11.5% using H50 and H51 as...
- Page 611 FRENIC5000G11S/P11S (30 kW or above) vs. FRENIC-MEGA G11S/P11S FRENIC-MEGA Remarks Data for F09 8.0% 9.3% 10.5% 11.8% Adjust the torque boost using H50 and H51 as 13.0% needed. 14.3% 15.5% 16.8% 18.0% 8.0% 9.1% 10.2% 11.3% Adjust the torque boost 12.5% using H50 and H51 as 13.6%...
- Page 612 Glossary This glossary explains the technical terms that are frequently used in this manual.
- Page 614 Glossary Acceleration time Auto search A period required for an inverter to increase its Automatically searching for the rotational speed output from 0 Hz to the maximum frequency. It and direction of the motor idling without power should be specified, taking into account the inertia supplied in order for the inverter to smoothly drive of the machinery (load).
- Page 615 Base frequency Constant torque load The minimum frequency at which an inverter’s Machinery (load) that requires a constant torque output voltage becomes constant. independent of the inverter’s output frequency (motor speed). The power consumption increases in Related function codes: F04, A02, b02 and r02 proportion to the motor speed.
- Page 616 Glossary DC link bus voltage Encoder (PG: pulse generator) The voltage of the DC link bus that is an inverter One type of rotational sensor, directly mounted on input circuit to convert the input AC power to the the output shaft of a vector motor. It generally DC power.
- Page 617 HD (High Duty) mode LD (Low Duty) mode A mode that applies to the inverter for driving a A mode that applies to the inverter for driving a motor whose capacity is identical to the inverter's motor whose capacity is one rank or two ranks one.
- Page 618 Glossary Mock alarm Overload current rating The overload current that the inverter can tolerate, Alarm intentionally caused by activating the inverter expressed in percentage of the rated output current protective function in order to check whether external level and its permissible period. sequences function correctly at the time of machine setup.
- Page 619 Rated output current Servo-lock Holding the current position of the motor shaft at An RMS current that flows through the inverter's the stopped state in servo system under vector output terminals under the rated output conditions control with speed sensor, even if any external force (that is, when the output voltage, current, frequency is applied to the motor shaft.
- Page 620 Glossary Speed control range STOP key priority An index to show the controllable speed range Giving priority to the STOP key on the keypad, relative to the rated motor speed (base speed). It is which always enables the STOP key during inverter expressed by a ratio, for example, 1:1500 that running.
- Page 621 Torque boost Universal DO The compensation process for a voltage drop in a To relay a digital command signal sent the upper low frequency region when an inverter drives a controller (e.g., PLC) to the peripheral equipment three-phase induction motor. using any of the output terminals (if free) on the inverter.
- Page 622 Glossary Vector control without speed sensor Introduced in response to a strong demand from the market for a control mode using no speed sensor (PG: pulse generator) in environments where it is difficult to structurally mount a PG near the motor shaft or to suppress inductive noises on the PG signal wiring.
- Page 624 Index...
- Page 626 Index Current limiter, 5-97 AC reactor (ACR), 4-49 Curvilinear acceleration/deceleration, 5-68 Acceleration time, 5-65 ACL, 4-58 Alarm information, 7-40 Dancer control, 5-180 Alarm mode, 7-46 Data copying, 7-43 Analog input, 2-12, 5-54 Data protection, 7-45 Analog interface card, 4-79 DC braking, 5-81 Analog output, 2-18 DC reactor (DCR), 4-44 Anti reset windup, 5-191...
- Page 627 Main circuit, 2-12 Gain, 5-55, 5-185, 5-194, 5-199 Maintenance information, 7-35 Ground fault, 2-9 MD (Medium Duty for medium duty load applications), 3-17 MD (Medium duty) mode, 1-3 HD (High Duty for heavy duty load applications), Medium duty load, 3-17 3-17 Mock alarm, 5-163 HD (High duty) mode, 1-3...
- Page 628 Index Programming mode, 7-4 STOP key priority, 5-173 Protective functions, 2-48 Surge absorbers, 4-21 PTC thermistor, 2-13 Surge killers for L-load, 4-19 Pulse train input, 4-65, 5-59 Surge suppression unit, 1-10, 4-54 PWM converter, 4-30 Surge voltage, 1-10, 4-19, A-17 PWM, 1-12 Switch to commercial power, 5-105 SX-bus communications card, 4-87...
- Page 629 MEMO...
- Page 630 MEMO...
- Page 631 MEMO...
- Page 632 In no event will Fuji Electric Systems Co., Ltd. be liable for any direct or indirect damages resulting from the application of the information in this manual.
- Page 634 Fuji Electric Systems Co., Ltd. Gate City Ohsaki, East Tower, 11-2, Osaki 1-chome Shinagawa-ku, Tokyo 141-0032, Japan Phone: +81-3-5435-7283 Fax: +81-3-5435-7425 Printed in Japan 2009-7(G09b/F07) CM 00FIS Information in this manual is subject to change without notice.
Need help?
Do you have a question about the FRENIC-MEGA Series and is the answer not in the manual?
Questions and answers