Advertisement
Quick Links
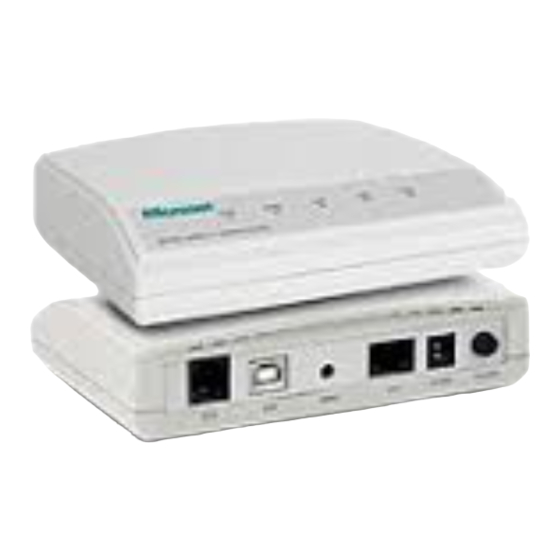
Hardware Installation
1. Plug the provided RJ-11 cable into ADSL port on the router and
1.
insert the other end into Modem jack on splitter or phone jack on
1.
the wall.
2. Take the RJ-45 Cable, plug one end into LAN port on the router
1.
and other end into the PC's Ethernet port.
3. Plug power adapter to POWER jack on the router and the other
1.
end to a power outlet. Press On/Off to power on this router.
Access Management Web UI
1. Check the computer's network has been configured to get IP
1.
automatically or has IP in the same network of 192.168.1.0.
2. Verify IP status by DOS command (ipconfig for Windows
1.
2000/XP or winipcfg for Windows 95/98).
3. Open Internet browser, enter the default IP address in the URL
1.
line, Press Enter to browse the router.
4.
The authentication page pops up. Key in the password then click
1.
OK to access the web UI.
Default IP Address : 192.168.1.1
User name : admin
Password : admin
PS.: For more inforamtion please refer the manual on the CD.
FCC Certifications
This device complies with Part 15 of the FCC rules. Operation is
subject to the following two conditions:
9.
(1) This device may not cause harmful interference, and
9.
(2) This device must accept any interference received,
9.
including interference that may cause undesired operation.
CE Mark Warning
This is a Class B product. In a domestic environment, this product
may cause radio interference, in which case the user may be
required to take adequate measures.
5
P/N: 2300-0444
7
Configuring Connection Mode
Here describes the settings of PPPoE/PPPoA. Please refer the
manual on the CD if other connection modes adapted.
1. Prepare the ADSL account information provided from your ISP .
1.
It should include the items list below:
a. Encapsulation: PPPoE, PPPoA
b. Multiplex: VC or LLC
c. Virtual Circuit ID: VPI/VCI
d. User name and password
2. Once login the web UI, open Quick Start and click RUN
1.
WIZARD. Quick Setup page will pop up on the screen.
3. Click Next then enter the new password and confirm the entry.
4. Click Next. Select time zone of your location then click Next.
5. Select PPPoE/PPPoA then click Next.
6. Type in your user name, password, VPI/VCI values and select
1.
the correct Encapsulation mode. Click Next twice to save the
1.
setting in this router. Wait the window turns to next page, click
1.
Close to close the page.
7. Under Maintenance, find Time Zone page, click Save to enable
1.
SNTP service thus this router can get the current time from
1.
Internet time server.
8. Go to Status. Scroll down the page, the ADSL line has been set
1.
up while WAN table showing CONNECTED and getting IP from
1.
ISP.
9. Now, client can surf Internet via this router.
Quick Installation Guide
ADSL2+ Modem Router
Model No.: SP3361/SP3364F
Web: www.micronet.com.tw
6
Advertisement

Related Manuals for MicroNet SP3361


Summary of Contents for MicroNet SP3361
- Page 1 This is a Class B product. In a domestic environment, this product may cause radio interference, in which case the user may be required to take adequate measures. Quick Installation Guide ADSL2+ Modem Router Model No.: SP3361/SP3364F P/N: 2300-0444 Web: www.micronet.com.tw...
- Page 2 • Provide 1 RJ-11 port for ADSL connection, 1 RJ-45 Ethernet and router, this LED will be flashing. • LAN port and 1 USB port (SP3361) When connection 10/100MB with end user is • Provide 1 RJ-11 port for ADSL connection, 4 RJ-45 Ethernet established, this LED will light up.
Need help?
Do you have a question about the SP3361 and is the answer not in the manual?
Questions and answers