
Related Manuals for Delta NT Series


Summary of Contents for Delta NT Series
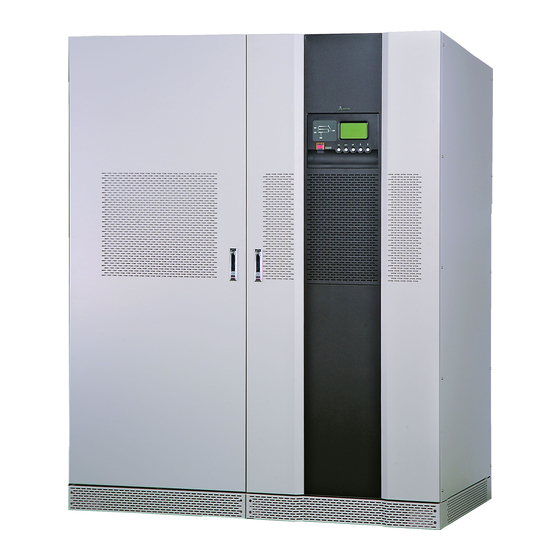
- Page 1 The power behind competitiveness Delta UPS - Ultron Family NT Series, Three Phase 10-500 kVA User Manual www.deltapowersolutions.com...
- Page 2 Failure to heed these instructions and warnings will void the warranty. Copyright © 2018 by Delta Electronics Inc. All Rights Reserved. All rights of this User Manual (“Manual”), including but not limited to the contents, information, and figures are solely owned and reserved by Delta Electronics Inc.
-
Page 3: Table Of Contents
Table of Contents Table of Contents Chapter 1 : Important Safety Instructions ------------------------------- 1 Chapter 2 : Introduction ------------------------------------------------------- 3 Chapter 3 : Operation Modes ------------------------------------------------ 4 Normal Mode (Single) --------------------------------------------- 4 Back-up Mode (Single) -------------------------------------------- 5 Reserve AC Supply Mode (Single) ----------------------------- 6 Maintenance Bypass Mode (single) ---------------------------- 7 ECO Mode (only for Single Unit) -------------------------------- 8 Normal Mode (Parallel) -------------------------------------------- 9... - Page 4 RS-485 Pin Assignment ------------------------------------------64 Chapter 5 : External Battery Cabinet -------------------------------------65 External Battery Cabinet Usage Warnings ------------------65 Chapter 6 : UPS Display and Settings -----------------------------------67 Control Panel -------------------------------------------------------67 LCD Display Screen-----------------------------------------------68 Chapter 7 : UPS Operation --------------------------------------------------87 ------------------------87 Ultron NT Series...
- Page 5 Table of Contents Start-up Procedures ----------------------------------------------87 7.2.1 Normal Mode Start-up Procedures (Single) -------------------------87 7.2.2 Battery Mode Start-up Procedures (Single) -------------------------88 7.2.3 Manual Bypass Mode Start-up Procedures (Single) --------------88 7.2.4 ECO Mode Start-up Procedures (Single)_ only Applicable to Single Unit with Capacity above 260kVA (Included) -----------90 7.2.5 Normal Mode Start-up Procedures (Parallel) -----------------------91 7.2.6...
-
Page 6: Chapter 1 : Important Safety Instructions
The protective device shall be a four-pole device and shall disconnect all line conductors and the neutral conductor. Do not open or damage the battery or batteries. The released electrolyte is harmful to the skin and eyes and may be toxic. Ultron NT Series... - Page 7 Chapter 1 Important Safety Instructions A battery can present a risk of electric shock and high short-circuit current. The following precautions should be observed before replacement of batteries: 1. Remove watches, rings, or other metal objects. 2. Use tools with insulated handles. 3.
-
Page 8: Chapter 2 : Introduction
Chapter 2 : Introduction The NT series UPS is a dedicated design for large scales of power systems such as data centers, communication systems, satellite systems, network rooms, medical devices, monitoring, safety and emergency systems as well as factory facilities. -
Page 9: Chapter 3 : Operation Modes
Chapter 3 Operation Modes Chapter 3 : Operation Modes There are four basic operation modes for the NT series UPS, either of which can operation modes are described as follows. 3.1 Normal Mode (Single) MANUAL BYPASS BREAKER RESERVE RESERVE INPUT... -
Page 10: Back-Up Mode (Single)
Figure 3-2-b: Status Block of Back-up Mode (260-500kVA) When the utility AC power fails or unstable voltage occurs, the batteries will instantly provide DC power to keep continuous operation. Hence, the UPS output will not be interrupted. Ultron NT Series... -
Page 11: Reserve Ac Supply Mode (Single)
Chapter 3 Operation Modes 3.3 Reserve AC Supply Mode (Single) Power Flow MANUAL BYPASS BREAKER Power Flow RESERVE RESERVE INPUT Power Flow BREAKER Power Flow LOAD OUTPUT BREAKER RECTIFIER INPUT BREAKER MAINS RECTIFIER INVERTER STATIC SWITCH BATTERY BANK Figure 3-3-a: Status Block of Reserve AC Power Supply Mode (10-200kVA) MANUAL BYPASS Power Flow SWITCH... -
Page 12: Maintenance Bypass Mode (Single)
As a result, risks will not exist in the UPS so service personnel can perform maintenance safely (see Figure 3-4-a and 3-4-b). NOTE : If only single input power is available, please utilize the same power Ultron NT Series... -
Page 13: Eco Mode (Only For Single Unit)
Chapter 3 Operation Modes 3.5 ECO Mode (only for Single Unit) MANUAL BYPASS Power Flow BREAKER/ SWITCH Power Flow Power Flow Power Flow RESERVE RESERVE INPUT BREAKER/ SWITCH LOAD OUTPUT BREAKER/ SWITCH RECTIFIER INPUT BREAKER/ SWITCH RECTIFIER INVERTER MAINS STATIC SWITCH BATTERY BANK Figure 3-5: Status Block of ECO Mode (10-500kVA) In ECO mode, it is the reserve AC power to supply power to the connected loads via... -
Page 14: Normal Mode (Parallel)
LOAD MANUAL BYPASS SWITCH RESERVE RESERVE INPUT SWITCH Power Flow Power Flow Power Flow Power Flow OUTPUT RECTIFIER INPUT SWITCH MAINS SWITCH RECTIFIER INVERTER STATIC SWITCH BATTERY BANK Figure 3-6-b: Parallel Status Block of Normal Mode (260-500kVA) Ultron NT Series... -
Page 15: Back-Up Mode (Parallel)
Chapter 3 Operation Modes units fails and its loads are less than the sum of rated-load values of other units in parallel, the rest of units can share the sum of loads; otherwise, all UPS units will shut down inverters and switch to the reserve AC power to supply power to the loads (see Figure 3-6-a and 3-6-b). -
Page 16: Reserve Ac Supply Mode (Parallel)
MANUAL BYPASS BREAKER Power Flow RESERVE RESERVE INPUT BREAKER Power Flow Power Flow RECTIFIER INPUT OUTPUT BREAKER BREAKER MAINS RECTIFIER INVERTER STATIC SWITCH BATTERY BANK Figure 3-8-a: Parallel Status Block of Reserve AC Power Supply Mode (10-200kVA) Ultron NT Series... - Page 17 Chapter 3 Operation Modes UPS1 Power Flow MANUAL BYPASS SWITCH Power Flow RESERVE RESERVE INPUT SWITCH Power Flow Power Flow OUTPUT RECTIFIER INPUT SWITCH MAINS SWITCH RECTIFIER INVERTER STATIC SWITCH BATTERY BANK Power Flow UPS2 LOAD Power Flow MANUAL BYPASS SWITCH Power Flow RESERVE...
-
Page 18: Maintenance Bypass Mode (Parallel)
Power Flow UPS2 LOAD Power Flow MANUAL BYPASS SWITCH RESERVE RESERVE INPUT SWITCH Power Flow OUTPUT RECTIFIER INPUT SWITCH MAINS SWITCH RECTIFIER INVERTER STATIC SWITCH BATTERY BANK Figure 3-9-b: Parallel Status Block of Maintenance Bypass Mode (260-500kVA) Ultron NT Series... -
Page 19: Hot Standby Redundancy
Chapter 3 Operation Modes When maintenance is needed and the reserve AC power is normal, the parallel UPS units can be switched from inverter mode to bypass mode manually with continuous power delivering to the loads. Under such conditions, the internal power will be completely cut off except that each parallel UPS's terminals and manual bypass breaker or switch still have high voltage. -
Page 20: Common Battery
In order to reduce costs, the O/P of UPS1 could simultaneously connect to UPS2, UPS3, etc.. 3.11 Common Battery To save on costs and installation space, the parallel UPS units can share the same external battery cabinet(s). Please see Figure 3-11-a and 3-11-b. Ultron NT Series... - Page 21 Chapter 3 Operation Modes UPS1 MANUAL BYPASS BREAKER RESERVE RESERVE INPUT BREAKER Power flow Power flow Power flow Power flow OUTPUT RECTIFIER INPUT BREAKER MAINS BREAKER RECTIFIER INVERTER STATIC SWITCH Power flow BATTERY BANK LOAD UPS2 MANUAL BYPASS BREAKER RESERVE RESERVE INPUT BREAKER Power flow...
-
Page 22: Dry Contacts
3.12 Dry Contacts Figure 3-12 The NT series UPS provides 6 sets of programmable dry contacts that can be set as Normally Open or Normally Closed. The default settings of the 6 sets of dry contacts are described as follows. - Page 23 Chapter 3 Operation Modes BAT_LOW: When the main AC power is abnormal, it is the batteries to supply power to the loads and the battery discharging voltage exceeds the setting values (lower than 330V). RES Fail: When the UPS runs in normal mode and the reserve AC power is BATT Test Fail: When the battery test is executed, the battery test result shows abnormalities.
-
Page 24: Chapter 4 : Installation & Wiring
Chapter 4 : Installation & Wiring 4.1 UPS Mechanism Data (Model 400/ 230Vac only) Figure 4-1 Rating Width Depth Height (kVA) (mm) (mm) (mm) 10~80K - 6P 1400 10~60K - 12P Figure 4-1 Bottom View (Front) Figure 4-2 Ultron NT Series... - Page 25 Chapter 4 Installation & Wiring (Model 400/ 230Vac only) Figure 4-3 Rating Width Depth Height (kVA) (mm) (mm) (mm) 80K - 12P 1700 100~120K - 6P Figure 4-3 Bottom View (Front) Figure 4-4...
- Page 26 (100kVA Model_ Input: 480Vac; Bypass: 208/ 120Vac; Output: 208/ 120Vac) Figure 4-5 Rating Width Depth Height (kVA) (mm) (mm) (mm) 1200 1700 Figure 4-5 Bottom View (Front) Figure 4-6 Ultron NT Series...
- Page 27 Chapter 4 Installation & Wiring (Model 400/ 230Vac only) Figure 4-7 Rating Width Depth Height (kVA) (mm) (mm) (mm) 100~160K - 1200 1700 160~200K - Figure 4-7 Bottom View (Front) Figure 4-8...
- Page 28 (Model 400/ 230Vac only) Figure 4-9 Rating Width Depth Height (kVA) (mm) (mm) (mm) 200K - 12P 1400 1700 Figure 4-9 Bottom View 1400 (Front) Figure 4-10 Ultron NT Series...
- Page 29 Chapter 4 Installation & Wiring (Model 400/ 230Vac only) Figure 4-11 Rating Width Depth Height (kVA) (mm) (mm) (mm) 1600 1950 Figure 4-11 Bottom View (Front) Figure 4-12...
- Page 30 (Model 400/ 230Vac only) Figure 4-13 Rating Width Depth Height (kVA) (mm) (mm) (mm) 800+ 1950 1100 Figure 4-13 Bottom View (Front) Figure 4-14 Ultron NT Series...
-
Page 31: External Battery Cabinet
Chapter 4 Installation & Wiring 4.2 External Battery Cabinet Figure 4-15 External Battery Cabinet Dimensions Table (Figure 4-15) Battery Type Width (mm) Depth (mm) Height (mm) 12V/ 26AH × 29PCS 1400 12V/ 40AH × 29PCS 1400 12V/ 26AH × 58PCS 1700 12V/ 40AH ×... -
Page 32: External & Internal Views
4.3 External & Internal Views 4.3.1 10~80kVA Front view: LCD control panel Figure 4-16 Lateral view: open the front door Figure 4-17 open the door Figure 4-16 Figure 4-17 Ultron NT Series... - Page 33 Chapter 4 Installation & Wiring Front view with door open: one battery start-up switch, two fuses, Figure 4-18 four breakers, one SMART slot, and communication interfaces (NT-Q board). LCD Control Panel Battery start-up switch SMART slot B ATT .ST ART Fuses (From left to right) K EY _P RO...
-
Page 34: 120Kva
4.3.2 100~120kVA Front view: LCD control panel. Figure 4-19 Lateral view: open the front door. Figure 4-20 open the door Figure 4-20 Figure 4-19 Ultron NT Series... - Page 35 Chapter 4 Installation & Wiring Front view with door open: one battery start-up switch, two fuses, Figure 4-21 four breakers, one SMART slot, and communication interfaces (NT-Q board). LCD Control Panel Battery start-up switch C AU TI ON: SMART slot Fuses (From left to right) 1.
-
Page 36: 100Kva (Input: 480Vac; Bypass: 208/ 120Vac; Output: 208/ 120Vac)
4.3.3 100kVA (Input: 480Vac; Bypass: 208/ 120Vac; Output: 208/ 120Vac) Front view: LCD control Panel. Figure 4-22 Lateral view: open the front doors. Figure 4-23 Figure 4-22 open the front doors Figure 4-23 Ultron NT Series... - Page 37 Chapter 4 Installation & Wiring Front view with door open: one battery start-up switch, four fuses, Figure 4-24 four breakers, one SMART slot, and communication interfaces (NT-Q board). LCD control panel Battery start-up switch Fuses (From left to right) SMART slot 1.
-
Page 38: 200Kva
4.3.4 160~200kVA Front view: LCD control Panel. Figure 4-25 Lateral view: open the front doors. Figure 4-26 Figure 4-25 open the front doors Figure 4-26 Ultron NT Series... - Page 39 Chapter 4 Installation & Wiring Front view with door open: one battery start-up switch, two fuses, Figure 4-27 four breakers, one SMART slot, and communication interfaces (NT-Q board). LCD control panel Battery start-up Rectifier input switch breaker Fan fuse (left)/ SMART slot Power fuse (right) UPS output breaker...
-
Page 40: 400Kva
4.3.5 260~400kVA Front view: LCD control Panel. Figure 4-28 Lateral view: open the front doors. Figure 4-29 Figure 4-28 open the front doors Figure 4-29 Ultron NT Series... - Page 41 Chapter 4 Installation & Wiring Front view with door open: four fuses, four switches, one SMART Figure 4-30 slot, and communication interfaces (NT-Q board). UPS output switch Reserve input switch SMART slot Manual Fuses (From left bypass switch to right) Fan fuse/ Fan fuse/ Power fuse/ Power fuse Rectifier...
-
Page 42: 500Kva
4.3.6 500kVA Front view: LCD control panel. Figure 4-31 Lateral view: open the front doors. Figure 4-32 Figure 4-31 open the front doors Figure 4-32 Ultron NT Series... -
Page 43: Installation Environment And Safety Precaution
Chapter 4 Installation & Wiring Front view with door open: seven fuses, four switches, one SMART Figure 4-33 slot, and communication interfaces (NT-Q board). Manual Rectifier input switch bypass switch Fuses (From left to right) 1. Rectifier’s UPS output transformer switch fan fuse 2. -
Page 44: Electrical Connection Precaution
UPS, and connect the UPS neutral (N) with the ground ( When UPSs are paralleled, the length of each unit's input cables (reserve AC power) plus output cables must be the same. This ensures that the parallel Ultron NT Series... -
Page 45: Nt-Series 500Kva Installation And Wiring
UPS and its current is even. For more information, please contact your local dealer, sales representative or Delta customer service. to any other grounding system. 4.5.2 NT-series 500kVA Installation and Wiring NT-series 500kVA consists of two cabinets. - Page 46 Figure 4-35 NOTE: The above mentioned cabinet connection procedures can only be executed after the UPS is fixed in the designated location. After the cabinet connection is done, do not move the UPS by any tools or Ultron NT Series...
- Page 47 Chapter 4 Installation & Wiring 2. Connect the grounding wire See Figure 4-36. BYPASS RECTIFIER UPS OUTPUT INPUT UPS OUTPUT P.S. FUSE FUSE BATTERY RESERVE INPUT When use non-standard type of external battery cabinet, pl e ase refer to the us er manual for BATT.CABINET proper sizing of short-circuit GROUND...
- Page 48 CABLES CONENCTION UPS OUTPUT INPUT P.S. FUSE FUSE BATTERY RESERVE INPUT When use non-standard type of external battery cabinet, please r efer to the user manual for BATT.CABINET proper sizing of short-circuit protection. GROUND RESERVE Figure 4-38 Ultron NT Series...
- Page 49 Chapter 4 Installation & Wiring 6. Connect the provided + & - cooper bars to the inverter’s + & - bus bars Take out the provided screws and + & - cooper bars from the package, and Figure 4-39. The size of the provided + &...
- Page 50 Figure 4-40. RECTIFIER’s & BUS BARS Figure 4-40 Ultron NT Series...
- Page 51 Chapter 4 Installation & Wiring (2) Take out the provided screws and + & - cooper bars from the package, and Figure 4-41. The size of the provided + cooper bar is smaller than that of the provided - cooper bar.
- Page 52 UPS OUTPUT INPUT P.S. F USE FUSE BATTERY RESERVE INPUT INPUT OUTPUT When use non-standard type of external battery cabinet, please refer to the user manual for BATT.CABINET proper sizing of short-circuit GROUND protection. RESERVE GROUND Figure 4-43 Ultron NT Series...
-
Page 53: Ups Installation Checklist
Chapter 4 Installation & Wiring 4.6 UPS Installation Checklist All the following items need to be checked before UPS installation: Whether the floor area where the UPS is placed has enough supporting strength. Whether the entrances and hallways have enough space for UPS transpor- tation. -
Page 54: Floor Weight Loading Table
External Battery Cabinet Battery Type 12V/ 26AH 12V/ 40AH 12V/ 26AH 12V/ 40AH 12V/ 100AH (AH) x 29PCS x 29PCS x 58PCS x 58PCS x 29PCS Weight 1118 1420 (Kg) Weight loading 1084 1066 1497 1764 (kg/m Ultron NT Series... -
Page 55: Cable Selection
Chapter 4 Installation & Wiring 4.8 Cable Selection The table below shows the cable rating of each model. BAT. BAT. GND. Capacity Voltage Voltage C.B. Cable C.B. Cable C.B. Cable Cable Fuse Cable (mm²) (VA) (mm²) (mm²) (mm²) (mm²) 120/ 208 120/ 208 220/ 380 220/ 380... - Page 56 220/380 660GH-315A 260k 315NHG2B A50QS800-4 A50QS800-4 FWH-300A 277/480 277/480 220/380 220/380 320k 400NHG2B FWH-400A A50QS1000-4 A50QS1000-4 277/480 277/480 220/380 220/380 400k 500NHG3B FWH-400A A50QS1000-4 A50QS1200-4 277/480 277/480 220/380 220/380 FWH-1600A 500K 630NHG3B FWH-600A A50QS1200-4 A50QS800-4*2 277/480 277/480 Ultron NT Series...
-
Page 57: Electrical Connections
Chapter 4 Installation & Wiring ), copper wires with temperature ) when connecting to AC and DC wiring terminals. Model Wiring Location Wire Gauge ( Bolt Type Torque (lb-in) ( Main Input 4/0 AWG X 1 220±8 Res. Input 2/0 AWG X 2 220±8 GES104NT, Output... -
Page 58: 60Kva Output 220/ 380Vac Terminal Wiring Diagram
Cabinet Ground Battery - Ground 4.9.2 10~60kVA Output 220/ 380Vac Terminal Wiring Diagram Single input: When there is only one input source, the wiring diagram is as follows. Output Battery Input Battery+ Cabinet Ground Ground Battery - Ultron NT Series... -
Page 59: 80Kva Output 220/ 380Vac Terminal Wiring Diagram
Chapter 4 Installation & Wiring Dual input: When there are two input (mains and reserve) sources, remove the cables (wire number 1B, 2B and 3B) from the input terminals. The wiring diagram is as follows. Input Reserve Output Battery+ Battery Ground Cabinet Battery -... -
Page 60: 100Kva Output 220/ 380Vac Terminal Wiring Diagram
Ground Ground Battery - 4.9.4 100kVA Output 220/ 380Vac Terminal Wiring Diagram Single input: When there is only one input source, the wiring diagram is as follows. 1B 2B 3B Output Input Battery Battery Cabinet Ground Ground Ultron NT Series... -
Page 61: 100Kva Output 208/ 120Vac Terminal Wiring Diagram (Only For Dual Input Application)
Chapter 4 Installation & Wiring Dual input: When there are two input (mains and reserve) sources, remove the cables (wire number 1B, 2B and 3B) from the input terminals. The wiring diagram is as follows. Input Reserve Output Battery Battery Cabinet Ground Ground... -
Page 62: 120Kva Output 220/ 380Vac Terminal Wiring Diagram
Dual input: When there are two input (mains and reserve) sources, remove the cables (wire number 1B, 2B and 3B) from the input terminals. The wiring diagram is as follows. Input Output Reserve Battery Cabinet Battery Ground Ground Ultron NT Series... -
Page 63: 160/ 200Kva Output 220/ 380Vac Terminal Wiring Diagram
Chapter 4 Installation & Wiring 4.9.7 160/ 200kVA Output 220/ 380Vac Terminal Wiring Diagram Single input: When there is only one input source, the wiring diagram is as follows. Input Battery Battery Cabinet Output Ground Ground Dual input: When there are two input (mains and reserve) sources, remove the cables (wire number 1B, 2B and 3B) from the input terminals. -
Page 64: 260/ 400Kva Output 220/ 380Vac Terminal Wiring Diagram
INPUT and RESERVE terminals, connect the mains source to the INPUT terminals (R/ S/ T/ N) and connect the reserve source to the RESERVE terminals (R/ S/ T/ N). The wiring diagram is as follows. Battery Cabinet Ground Ground BATTERY Ultron NT Series... -
Page 65: 500Kva Output 220/ 380Vac Terminal Wiring Diagram
Chapter 4 Installation & Wiring 4.9.9 500kVA Output 220/ 380Vac Terminal Wiring Diagram Single input: When there is only one input source, the wiring diagram is as follows. COPPER BARS UPS OUTPUT BYPASS RECTIFIER UPS OUTPUT INPUT P.S. FUSE FUSE BATTERY INPUT RESERVE... -
Page 66: Ups Parallel Wiring Diagram (Single Input)
When the total number of the parallel UPS units is more than four, please install a load sharing choke between each parallel UPS and its connected For more information, please contact your local dealer, sales representative or Delta customer service. Ultron NT Series... -
Page 67: Ups Parallel Wiring Diagram (Dual Input)
When the total number of the parallel UPS units is more than four, please install a load sharing choke between each parallel UPS and its connected For more information, please contact your local dealer, sales representative or Delta customer service. -
Page 68: Communication Interfaces (Nt-Q Board)
-- Ethernet power GENERATOR CNQ17 -- Generator contact CONTACT RS-485 CNQ 2 -- RS-485 port CNQ 9 RS-485 -- RS-485 port CNQ 7 PARALLEL -- UPS parallel communication port CNQ 8 PARALLEL -- UPS parallel communication port Ultron NT Series... -
Page 69: Dry Contact Wiring Diagram (Default Value)
Chapter 4 Installation & Wiring 4.11 Dry Contact Wiring Diagram (Default Value) +12VR RLQ1 RELAY-SPDT DRY1 +12VR CNQ14 DRY1COM RLQ2 DRY 1: NORMAL : P1-2 NO DRY1NO RELAY-SPDT DRY2 DRY2COM DRY 2: RESERVE : P3-4 NO DRY2NO +12VR RLQ3 RELAY-SPDT DRY3 CNQ15 DRY3COM... -
Page 70: Chapter 5 : External Battery Cabinet
Chapter 5 : External Battery Cabinet The NT series UPS must be connected to at least one external battery cabinet to ensure that the critical loads connected are protected when a power failure occurs. 5.1 External Battery Cabinet Usage Warnings To ensure that the batteries are fully charged, please charge the batteries at least 8 hours before initial use of the UPS. - Page 71 Chapter 5 External Battery Cabinet 3. Low Battery Shutdown: 290~310Vdc (default: 300Vdc) NOTE : If you want to modify the default low battery shutdown setting, please contact your local dealer or customer service. Battery number for each string: 12V × 29 PCS. NOTE : You can also choose 12V ×...
-
Page 72: Chapter 6 : Ups Display And Settings
” simultaneously for 3 seconds to turn on the inverter and press “OFF” and “ ” simultaneously for 3 seconds to 11. “ ” “ ” “ ” buttons: Control the LCD display and set up parameters. 12. LCD display. Ultron NT Series... -
Page 73: Lcd Display Screen
Chapter 6 UPS Display and Settings 6.2 LCD Display Screen 1. Button functions: (A) “ ” “ ” and “ ” buttons: a. Use the “ ” and “ ” buttons to choose different functions, and then press the “ ”... - Page 74 3 8 1 V 5 9 . 9Hz UPS Output 5 9 . 9Hz UPS Output Frequency Frequency To leave the “Measure Page”, press the “ ” and “ ” buttons simultaneously to return to the “Main Menu”. Ultron NT Series...
- Page 75 Chapter 6 UPS Display and Settings 5. In “Main Menu”, press the “ ” or “ ” button to choose “Parameter Setting” and press the “ ” button to enter the “Parameter Setting” menu. Before entering the “Parameter Setting” menu, password needs to be keyed in. Use the “...
- Page 76 Voltage Battery Stop Install Voltage Date Charge Replace Voltage Remind 5-3.1. Press the “ ” or “ ” button to choose “Capacity AH” and press the “ ” button to enter the “Battery Capacity AH” setting page. Ultron NT Series...
- Page 77 Chapter 6 UPS Display and Settings Press the “ ” or “ ” button to set up the battery capacity AH and press the “ ” To leave the “Battery Capacity AH” setting page, press the “ ” and “ ”...
- Page 78 ” button to enter the “Battery Test Voltage” setting page. Press the “ ” or “ ” button to set up Battery the battery test voltage and press the Test Voltage 3 3 5 V “ ” Ultron NT Series...
- Page 79 Chapter 6 UPS Display and Settings To leave the “Battery Test Voltage” setting page, press the “ ” and “ ” buttons simultaneously to go back to the “Battery Setting” menu. 5-3.7. Press the “ ” or “ ” button to choose “Test Time” and press the “ ”...
- Page 80 ” and “ ” buttons simultaneously to go back to the “Battery Setting” menu. To leave the “Battery Setting” menu, press the “ ” and “ ” buttons simultaneously to go back to the “Parameter Setting” menu. Ultron NT Series...
- Page 81 Chapter 6 UPS Display and Settings 5-4. Press the “ ” or “ ” button to choose “Time and Date” and press the “ ” button to enter the “Time and Date” setting page. Press the “ ” or “ ”...
- Page 82 ” button to choose “Language Setting” and press the “ ” button to enter the “Language Setting” page. Press the “ ” or “ ” button to choose Chinese “Chinese” or “English” and press the English “ Ultron NT Series...
- Page 83 Chapter 6 UPS Display and Settings To leave the “Language Setting” page, press the “ ” and “ ” buttons simultaneously to go back to the “Parameter Setting” menu. To leave the “Parameter Setting” menu, press the “ ” and “ ”...
- Page 84 “Battery Test OK”. When the batteries are abnormal, the LCD screen will show “Battery Test Fail”. battery test. NOTE : When several UPS units share the common battery, the battery test cannot be executed. Ultron NT Series...
- Page 85 Chapter 6 UPS Display and Settings Press the “ ” and “ ” buttons simul- Battery Test OK taneously to go back to the “System Control” menu. Battery Test Fail Please check battery aging and make sure make sure battery line is normal 6-4.
- Page 86 Force Bypass in any status. Choose OFF: The UPS has normal out- put. Only when the inverter is abnormal can the reserve AC power supply power to the connected loads. Ultron NT Series...
- Page 87 Chapter 6 UPS Display and Settings Press the “ ” and “ ” buttons simultaneously to go back to the “System Con- trol” menu. System Control To leave the “ ” menu, press the “ ” and “ ” buttons simultaneously Main Menu to go back to the “...
- Page 88 Inverter short circuit. (Inverter voltage too low) (R phase) Inverter short circuit. (Inverter voltage too Low) (S phase) Inverter short circuit. (Inverter voltage too Low) (T phase) Inverter short circuit. (Peak current protect) Inverter o/p voltage abnormal. (316J or 332J protect) Ultron NT Series...
- Page 89 Chapter 6 UPS Display and Settings Event code UPS Status ECO to Inverter. (Bypass voltage abnormal) (R phase) ECO to Inverter. (Bypass voltage abnormal) (S phase) ECO to Inverter. (Bypass voltage abnormal) (T phase) ECO to Inverter. (Inverter - Bypass voltage abnormal) (3 phase) ECO to Inverter.
- Page 90 9. UPS Status Code The number of “UPS record” shown on the LCD indicates the code of UPS Passby Record Discharge status. Please refer to the following Times table. Bypass Times Running Times 0 Year 5Day 13Hour 5Min Ultron NT Series...
- Page 91 Chapter 6 UPS Display and Settings Code UPS Status Inhibit bypass output Load on reserve Do inverter test Load on inverter Load on inverter at backup mode Low battery Low battery shutdown UPS shutdown due to short-circuit 30 58 Manual bypass on Parallel communication cable abnormal UPS shutdown due to inverter fault UPS shutdown due to inverter overload...
-
Page 92: Chapter 7 : Ups Operation
At this moment, it will be the inverter to supply power to the connected loads, and the LCD will display ‘Normal Mode 30 seconds, the UPS will automatically execute a battery test to check if the connected batteries are normal or not. Ultron NT Series... -
Page 93: Battery Mode Start-Up Procedures (Single)
Chapter 7 UPS Operation voltage (per phase). If normal, turn on the UPS Output breaker or switch. 7.2.2 Battery Mode Start-up Procedures (Single) NOTE : 1. Before executing the following start-up procedures, please refer to 7.1 2. Battery start function is customized and only applicable to the model that has the built-in battery contactor. - Page 94 8. When the UPS is running in Manual Bypass Mode, there is no high voltage inside the UPS except the wiring terminals and Manual Bypass breaker or Manual Bypass breaker or switch during UPS maintenance process to avoid electric shock. Ultron NT Series...
-
Page 95: Eco Mode Start-Up Procedures (Single)_ Only Applicable To Single Unit With Capacity Above 260Kva (Included)
Chapter 7 UPS Operation 7.2.3.2 From Manual Bypass Mode to Normal Mode (Single) NOTE : Before executing the following start-up procedures, please refer to 7.1 1. Connect all fuses. 2. Turn on the Reserve Input breaker or switch and UPS Output breaker or switch. 3. -
Page 96: Normal Mode Start-Up Procedures (Parallel)
4. Use the RS-232 and UPS parameter setting software (please contact service the parallel ID No. (At Max. 8 Units) Parallel ID No. Rectifier Input breaker or switch and wait about 30 seconds. After that, the DC BUS voltage will be established. Battery breaker. Ultron NT Series... -
Page 97: Battery Mode Start-Up Procedures (Parallel)
Chapter 7 UPS Operation seconds, and its inverter will start up. Once the inverter voltage is established, the LCD will display ‘Bypass Mode 8. Repeat the above-mentioned Step 7 to the rest of the parallel UPSs. After the will activate and each LCD will display ‘Normal Mode The output voltage difference must be lower than 5V. -
Page 98: Manual Bypass Mode Start-Up Procedures (Parallel)
If you perform the following turn-off procedures to each parallel UPS, all power supplying to the UPS will be completely cut off. Please make sure the critical loads connected to the UPS have already been safely shut down Ultron NT Series... - Page 99 Chapter 7 UPS Operation seconds. If the total connected loads are less than the total capacity of the rest will display ‘Inhibit Output rest of the parallel UPSs. If the total loads are greater than the total capacity of the rest of the parallel setup range).
- Page 100 Once the inverter voltage is established, the LCD will display ‘Bypass Mode 9. Repeat the above-mentioned Step 8 to the rest of the parallel UPSs. After the will activate and each LCD will display ‘Normal Mode Ultron NT Series...
- Page 101 Chapter 7 UPS Operation WARNING: to the UPS have already been safely shut down before you perform the turn- UPS Output breaker or switch. 2. Press the ‘OFF reserve AC power is normal, the power will be switched from inverter to bypass, and the LCD will display ‘Bypass Mode Battery breaker.
-
Page 102: To Single Unit With Capacity Above 260Kva (Included)
UPS will be completely cut off. Please make sure the critical loads connected to the UPS have already been safely shut down before you UPS Output switch. 2. Press the ‘OFF Bypass Mode Battery breaker. t switch. Ultron NT Series... - Page 103 Chapter 7 UPS Operation 5. (1) Wait about 5 minutes for the DC CAP to discharge, and ensure that the LCD shows the battery voltage lower than 5V. Or, (2) Press the ‘ON DC CAP to discharge, and ensure that the LCD shows the battery voltage lower Reserve Input switch.
- Page 104 If you perform the following turn-off procedures to each parallel UPS, all power supplying to the UPS will be completely cut off. Please make sure the critical loads connected to the UPS have already been safely shut down OFF status. To Manual Bypass breaker or switch. Ultron NT Series...
-
Page 105: Chapter 8 : Optional Accessories
Chapter 8 Optional Accessories Chapter 8 : Optional Accessories suggested. The 12-pluse rectifier is composed of one transformer and two rectifiers. After receiving the AC input power, the transformer will (1) transfer the input voltage into and 7 total input current harmonic distortion considerably. In general, the total input current harmonic distortion is about 32~38% with use harmonic distortion to 10~18%. -
Page 106: Remote Monitor
If the reserve AC power is abnormal, the connected loads will be power-supplied by the inverter. ECO mode is only applicable to the UPS with capacity above 260kVA (included). For the capacity below 200kVA (included), the function of ECO mode is optional. Ultron NT Series... - Page 107 Appendix 1 Power rating kVA (P.F.=0.9) 10 15 20 30 40 50 60 80 100 120 160 200 260 320 400 500 380 / 220, 400 / 230, 415 / 240 or 480/ 277, 208/ 120 (3 4W+G) Nominal voltage 380, 400, 415 or 480 , 208 , 220 (3 3W+G) Voltage range ±20...
- Page 108 6-pulse rectifier. For models that install the 12-pulse rectifier and any other customized models, please contact your local dealer, sales representative or Delta customer service for their weight and dimensions. 3. Please refer to the rating label for the safety rating.
-
Page 109: Appendix 2 : Warranty
Appendix 2 Warranty Appendix 2 : Warranty Seller warrants this product, if used in accordance with all applicable instructions, to be free from original defects in material and workmanship within the warranty period. If the product has any failure problem within the warranty period, Seller will repair or replace the product at its sole discretion according to the failure situation. - Page 110 5011326204...
Need help?
Do you have a question about the NT Series and is the answer not in the manual?
Questions and answers