Coemar LEDko EXT Instruction Manual
Hide thumbs
Also See for LEDko EXT:
- User manual (45 pages) ,
- Instruction manual (38 pages) ,
- Manual (29 pages)
Table of Contents
Advertisement
Quick Links
Download this manual
See also:
Instruction Manual
Advertisement
Table of Contents

Related Manuals for Coemar LEDko EXT


Summary of Contents for Coemar LEDko EXT
- Page 1 Instruction manual Version 2.0...
- Page 2 Please note in the space provided above the relative service information of the model and the retailer from whom you purchased your LEDko EXT: this information will assist us in providing spare parts, repairs or in answering any technical enquiries with the utmost speed and accuracy.
-
Page 3: Table Of Contents
Index 1. Packaging and transportation ......................Pag. 5 1.1 Packaging ................................Pag. 5 1.2 Transportation ..............................Pag. 5 2. General information ............................. Pag. 5 2.1 Safety informations ............................Pag. 5 2.2 Warranty conditions ............................. Pag. 6 2.3 EC norms ................................Pag. 6 3. Product specifications ..........................Pag. 7 3.1 Technical characteristics ..........................Pag. - Page 4 10. Spare parts ............................... Pag. 24 11. Maintenance ..............................Pag. 24 11.1 Firmware update ............................Pag. 24 11.2 Periodic cleaning ............................Pag. 24 11.3 Periodic controls ............................Pag. 24 11.4 Fuses ................................Pag. 24 12. F.A.Q. and answers ..........................Pag. 25...
-
Page 5: Packaging And Transportation
Packing list Ensure the packaging contains: 1 LEDko EXT 1 Instruction manual Transportation The LEDko EXT should be transported in either its original packaging or in an appropriate flight case. . General information Safety informations Fire prevention: 1. Never locate the fixture on any flammable surface. -
Page 6: Warranty Conditions
3. The level of technology of LEDko EXT requires the use of specialised personnel for all service applications; refer all work to your authorised Coemar service centre. 4. A good earth connection is essential for the proper functioning of the projector. -
Page 7: Product Specifications
Product specifications Technical characteristics Power supply 90-230Vac, 50-60Hz Maximum current 0.88 A @ 230 VaC, 2.25 A @ 90 VaC Power factor Cosϕ = 0.95 Power consumption 200 watt Color temperature Fixed white color temperature 3200 K or 5600 K Weight 14.0 Kg (30.8 lbs) Storage temperature... -
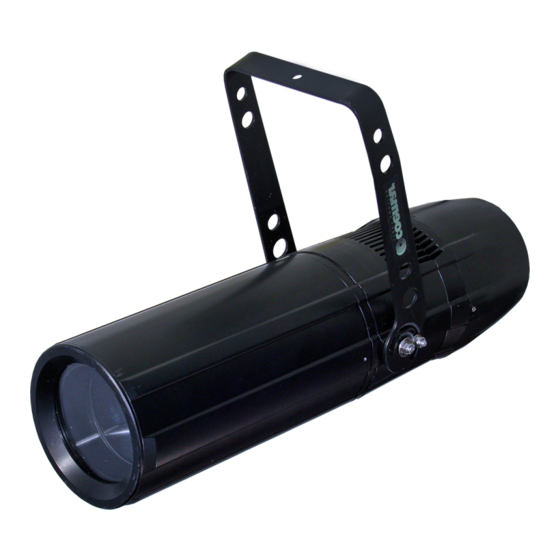
Page 8: Unit's Main Components
Unit’s main components Components description A Yoke with mounting holes B Cooling assembly C Optical holder tube D Locking screw for yoke... -
Page 9: Back Panel Description
Back panel description Display Plus Botton Menu Botton Minus Botton Enter Botton DMX Out DMX In Power In... -
Page 10: Installation
. Installation Mechanical installation LEDko EXT may be hung from an appropriate structure in any position or on tripod. If hanging the fixture from a lighting truss or similar, we recommend the use of an appropriate clamp “A”, as shown in the following diagram. -
Page 11: Adjusting Unit's Tilt
Adjusting unit’s tilt 1. In order to adjust the tilt of the unit simply loose the side screw “B” on the yoke, adjust the tilt and lock the yoke by tightening the screw again. 4.4 Optical group and framing system Follow these steps in order to configure the optical group properly: 1. -
Page 12: How To Remove The 'Dual Gobo Rotator
4. It is possible to regulate the blades “D” to achieve the desired shape, use the four thumbscrews “E” that you can see behind the blades to free or block them; 5. It is possible to use the gobos, to do so open the gobo holder, insert a normal gobo or a glass gobo and close the gobo holder;... -
Page 13: How To Insert The Glass/Metal Gobo
The unit may operates at voltages ranges from 90 to 230VaC at a frequency of 50 or 60 Hz. It is not needed to effect any setup procedures: LEDko EXT will automatically adjust its operation to suit any frequency or voltage within this range. -
Page 14: Control Signal Connections
The use of a thermal/magnetic circuit breaker is recommended. Strict adherence to • regulatory norms is strongly recommended. LEDko EXT should not be powered through a dimmer as this may damage the internal • switching power supply. Prior to connecting the device to mains power, ensure that the mains characteristics are •... -
Page 15: Turning On The Projector
1 to channel 5 of your DMX 512 controller. Accordingly a second unit should be addressed as A006, a third one as A011 and so on. The operation must be carried out on every LEDko EXT which has an address different from A001. -
Page 16: Dmx Chart
. DMX chart DMX Chart 5/1 channels type of channel function effect decimal percentage control master dimmer proportional adjust luminous output intensity from 0 to 100% 0 - 255 0% - 100% spare channel step no effect 0 - 255 0% - 100% dimmer fine proportional... -
Page 17: Display Panel Functions
ENTER button to access to any other function. By suitably using all the functions of LEDko EXT, which can be activated through its display panel, it is possible to change some of the parameters and to add some functions. Changing the preset settings made by Coemar can vary the functions of the projector so that it will respond differently to the controller;... -
Page 18: Main Functions Menu
Main functions menu (FUNC) Tungsten: Mimics the slow dimming curve of tung- tUnG sten lamps. Dimmer: [Tungsten] It allows the selection of different dimmer curves: exponential (default), logarithmic and linear; Test: Allows to manually set the DMX channels controlled by a DMX console: dIMM • Dimmer: sets the luminous intensity;... - Page 19 DMX channels: Shows the DMX mode and number of 5 CH channels selectable; Channels] [DMX channels] Display functions: Changes the display settings: 1 CH • Reverse: rotates the display of 180°; • Auto: Sets or disables the automatic Channel] display turn off function, which would occour after 10 seconds of inactivity;...
-
Page 20: Measure (Meas)
Measures menu (MEAS) Temperature: tEMP Shows the current temperature values: t.LEd • LED: shows the LED module temper- [LED Temperature] ature; [Temperature] • Board: shows the electronic board temperature. Volt: [Board Temperature] Shows the power supply voltage. vOLt DMX Input: Shows the value of the DMX channels [Supply Voltage] received by the fixture on every channel... - Page 21 LED: Shows the percentage value of the LED status. [LED Status] Fre: Shows the operating frequency of the LED (611 Hz as default). Fan speed: Shows the voltage in which the fan is op- erating Usage hours: [LED Frequency] Shows the hour counter of the fixture: • Unit: shows the overall hours of life of the fixture;...
-
Page 22: Electronic Alignment Of The Leds
Electronic alignment of the leds The display panel of LEDko EXT allows the electronic alignment of the LEDs, this procedure is performed by Coemar at the time of testing, this procedure may be useful for special effects or in case of replacement of internal components (PCBs, LEDs, etc...). -
Page 23: Special Functions Of The Fixture
Error messages If a malfunction occurs, LEDko EXT has a self-diagnostic system that will show the error message on the display. The following table will explain in detail the most common errors. If, despite of suggested intervention, the problem persists, call the Coemar Service Center. -
Page 24: Spare Parts
. Accessories and Spare parts All the components of LEDko EXT are available as spare parts from your Coemar dealer or Service. Accurate description of the fixture, model number and type will assist us in providing for your requirements in an efficient and effective manner. -
Page 25: F.a.q. And Answers
. F.A.Q. and answers The following list shows common issues that may be simply solved. If issues persist, the unit must be repaired by a qualified personnel or just contact your Coemar service. Question Possible solution Projector not powered on: • Make sure the power cable is plugged in or test the input... - Page 26 User notes ......................................................................................................................................................................................................................................................................................................................................................................................................................................................................................................................................................
- Page 27 English Information on disposal of the equipment The equipment at the end of its useful life must be disposed of at an appropriate recycling center for waste electrical and electronic equipment. The treatment and disposal of environmentally friendly, helps prevent potential negative environmental and health and promote the reuse and / or recycling of materials making up the equipment.
- Page 28 Coemar Lighting s.r.l. Via Carpenedolo 90 46043 Castiglione delle Stiviere, Mantova, Italy phone. +39 0376/1514412 - fax +39 0376/1514380 info@coemar.com Coemar reserves the right to effect modifications without notification...
Need help?
Do you have a question about the LEDko EXT and is the answer not in the manual?
Questions and answers