
Related Manuals for Xerox DocuMate 6710


Summary of Contents for Xerox DocuMate 6710
- Page 1 05-0969-100 August 2018 Xerox ® DocuMate 6710 ® Scanner Scanner User Guide for Microsoft Windows. ®...
- Page 2 © 2018 Xerox Corporation. All rights reserved. Xerox®, Xerox and Design® and DocuMate® are registered trademarks of Xerox Corporation in the United States and/or other countries and are used under license from Xerox Corporation. Visioneer is a trademark licensee of Xerox®. BR24079 Content ©...
- Page 3 Restricted Rights Legend Use, duplication, or disclosure is subject to restrictions as set forth in contract subdivision (c)(1)(ii) of the Rights in Technical Data and Computer Software Clause 52.227-FAR14. Material scanned by this product may be protected by governmental laws and other regulations, such as copyright laws.
-
Page 4: Table Of Contents
Maintenance Information......................1-3 Product Safety Certification ......................1-4 Environmental Health and Safety Contacts................1-4 2-Welcome ......................... 2-1 What’s in the Box..........................2-1 System Requirements........................2-2 Documentation ...........................2-2 The Xerox ® DocuMate ® 6710 Scanner Features..............2-3 3-Scanner Setup....................... 3-1 Unpack the Scanner ..........................3-1 Install the Separation roller......................3-3 Connect the Scanner Power Cord....................3-4... - Page 5 ® ® Xerox DocuMate 6710 Table of Contents Unsupported Document Types ....................5-2 Scanning from the Automatic Document Feeder (ADF) ..........5-2 Preparing Documents for Scanning................5-2 Loading Documents......................5-3 Manual Feed............................5-4 Exit page control ..........................5-4 Scanning Interfaces ..........................5-5 6-Maintenance......................6-1 Safety Precautions ..........................6-1 Hardware Properties..........................6-1...
- Page 6 ® ® Table of Contents Xerox DocuMate 6710 7-Appendix A: Regulatory Information............7-1 Basic Regulations..........................7-1 United States (FCC Regulations)..................7-1 European Union........................7-1 Turkey (RoHS Regulation) ....................7-2 Copy Regulations..........................7-2 United States ...........................7-2 Canada ............................7-3 Other Countries........................7-4 8-Appendix B: Compliance Information............8-1 Product Recycling & Disposal ......................8-1 USA &...
- Page 7 ® ® Xerox DocuMate 6710 Table of Contents User Guide...
-
Page 8: 1-Safety
These include safety agency examination, approval, and compliance with established environmental standards. ® To ensure the continued safe operation of your Xerox equipment, follow these safety guidelines at all times: Do these: •... -
Page 9: Electrical Information
Plug the power cable directly into a correctly grounded electrical outlet. If you are not sure whether or not an outlet is correctly grounded, consult an electrician. ® Do not use an adapter to connect any Xerox equipment to an electrical outlet that lacks a ground connection terminal. -
Page 10: Electical Symbols
® ® Safety Xerox DocuMate 6710 Electical symbols The following symbols are displayed on the scanners name plate: Alternating Current Direct Current (AC Adaptor/Imprinter) WARNING: This equipment must be connected to a protective earth circuit This equipment is supplied with a plug that has a protective earth pin. This plug will only fit into an earthed electrical outlet. -
Page 11: Product Safety Certification
IEC 60950-1 Environmental Health and Safety Contacts Contact Information ® For more information on Environment, Health, and Safety in relation to this Xerox product and supplies, please contact the following customer help lines: North America & Europe (Phone): 1-800-ASK-XEROX North America & Europe (Fax): 1-585-422-8217... -
Page 12: 2-Welcome
DocuMate 6710 Welcome ® Your new Xerox scanner can quickly scan stacks of single-sided or double-sided pages and place their electronic images on your computer. What’s in the Box Before proceeding, check the contents of the box. If items are missing or damaged, contact the dealer where you purchased the scanner. -
Page 13: System Requirements
® ® Xerox DocuMate 6710 Welcome System Requirements Minimum Recommended Processor 2Ghz Intel Core 2 Duo 4.0GHz i7 7th generation Optical Drive DVD Rom drive capable of DVD Rom drive capable of reading Dual reading Dual layer DVDs layer DVDs... -
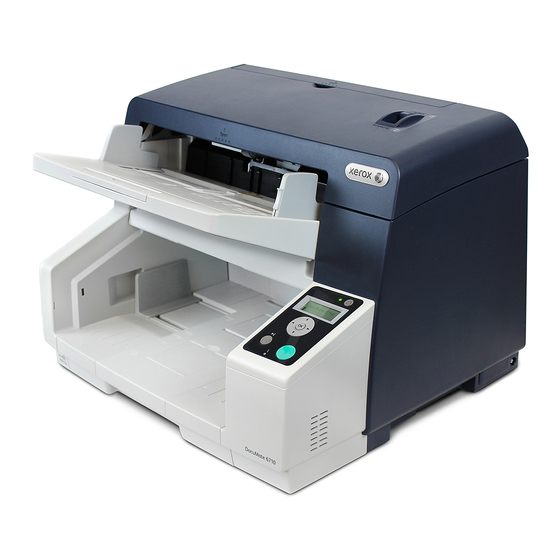
Page 14: The Xerox ® Documate ® 6710 Scanner Features
® ® The Xerox DocuMate 6710 Scanner Features Input Tray—Holds the documents in the Automatic Document Feeder for scanning. Paper Guides—Slide to adjust to document width. - Page 15 ® ® Xerox DocuMate 6710 Welcome Control panel—Scanner hardware controls. – Power switch—Turns the scanner’s power on or off. – Status light— The status light indicates the current state of the scanner. – LCD screen—Shows the current scan settings. –...
-
Page 16: 3-Scanner Setup
Scanner Setup Unpack the Scanner Use care when unpacking, moving and assembling the scanner. Follow these instructions to prevent injury and damage to the scanner. Remove the scanner from the shipping box, verify all parts listed on page 2-1 are in the box. We recommend that you keep the original packing materials in case you need them later. - Page 17 ® ® Xerox DocuMate 6710 Scanner Setup Place the scanner on a level surface near the computer. Keep at least 10 inches of space on every side of the scanner for the input and exit tray extensions, performing maintenance, and to have sufficient air flow for ventilation.
-
Page 18: Install The Separation Roller
® ® Scanner Setup Xerox DocuMate 6710 Install the Separation roller Pull on the scanner cover release and lift the lid to open the scanner. Flip open the double feed prevention roller cover. Align the plastic gear end on the right side of the roller with the gears in the roller compartment. -
Page 19: Connect The Scanner Power Cord
® ® Xerox DocuMate 6710 Scanner Setup Press gently on the metal bar on the left side to lock the roller in place with the black tab in the compartment. Press gently on the compartment cover to lock in the scanner. Make sure this cover is fully closed as it may break and cause damage to the scanner if it is not properly in place. - Page 20 ® ® Scanner Setup Xerox DocuMate 6710 Plug the power cord into the scanner and into a wall outlet. Note: Do not turn on the scanner until after you install the software. User Guide...
- Page 21 ® ® Xerox DocuMate 6710 Scanner Setup User Guide...
-
Page 22: 4-Installation
Installation Please make sure of the following before you begin installation: • If you are prompted to reboot during installation, please select “No”. Finish installing the rest of the software, then close all open windows and reboot your computer. • The information in this guide may cover software not provided with the scanner you purchased. -
Page 23: Install The Software And Connect The Scanner
® ® Xerox DocuMate 6710 Installation Install the Software and Connect the Scanner Start Microsoft Windows and make sure that no other applications are running. Insert the installation disc into your computer’s DVD-ROM drive. The disc automatically starts. The Select Language window opens. Click the drop-down menu arrow and select the language to use. - Page 24 ® ® Installation Xerox DocuMate 6710 A prompt will be shown to allow the installer to search online for software updates. Select No to install the software on the disc only. If online updates are approved, it will first check to see if there are newer versions of the installer.
- Page 25 ® ® Xerox DocuMate 6710 Installation Make sure the boxes for Scanner Driver and Visioneer OneTouch are selected, as well as any other applications you want to install. Note: The software provided with your scanner may differ slightly from the list shown in the window.
-
Page 26: Installing The Scanner Driver
® ® Installation Xerox DocuMate 6710 13. After the download has begun, it can be paused. If changes to the selections are required, it is necessary to click Reset while the download is paused. This will allow the settings to be changed. -
Page 27: Connect The Usb Cable And Turn On The Power
DocuMate 6710 Installation On the Xerox License Agreement window, read the license agreement. If you accept the terms, select I Agree then click Next. If you choose not to accept the license agreement, click Cancel. Click Close on the Installation Interrupted window. - Page 28 ® ® Installation Xerox DocuMate 6710 Turn on the scanner power. The status light comes on and flashes indicating that the scanner is receiving power. Your computer recognizes that a scanner has been plugged into the USB port and automatically loads the appropriate software to run the scanner.
-
Page 29: Installing The User Utility
The default options on this window will put the shortcut icon in your Windows All Programs list in the Xerox folder. We recommend that you keep the default options on this window and just click on Next to proceed with the installation. -
Page 30: Installing Visioneer Onetouch
® ® Installation Xerox DocuMate 6710 Click on Finish to close the ISIS installation complete window. Installing Visioneer OneTouch The Visioneer OneTouch software installation will start automatically after you click Close on the driver Installation Complete window. Click Next on the Welcome to the OneTouch Setup Wizard. -
Page 31: Installing Additional Applications
® ® Xerox DocuMate 6710 Installation Note: If you selected other software to install from the DVD the installation for that software will automatically start after you click Close on the Installation Complete window. Follow the instructions on-screen to install each application you selected. -
Page 32: Register Your Scanner
Press Enter on your computer’s keyboard or click the option on screen to go to the web address. ® When the Xerox scanners web page loads click on Register Your Product. Fill in the registration form, all required fields have an asterisk (*). - Page 33 ® ® Xerox DocuMate 6710 Installation 4-12 User Guide...
-
Page 34: 5-Loading Documents To Scan
Loading Documents to Scan Always remove any staples or paper clips from documents before inserting them into the scanner. Staples and paper clips can jam the feed mechanism and scratch the internal components. Also remove any labels, stickers, or Post-It™ notes that may come off during the scanning process and get stuck in the scanner. -
Page 35: Unsupported Document Types
® ® Xerox DocuMate 6710 Loading Documents to Scan We recommend you limit the amount or completely avoid scanning documents that are in this list. • Curled, wrinkled or folded documents may cause paper jams or multiple pages being fed through the scanner at one time. -
Page 36: Loading Documents
® ® Loading Documents to Scan Xerox DocuMate 6710 • Pinch the ends to align the leading edges slantwise to help prevent multiple pages from being fed through at a single time. Loading Documents Adjust the paper guide for the width of paper, and make sure the input and output trays are fully extended. -
Page 37: Manual Feed
® ® Xerox DocuMate 6710 Loading Documents to Scan Manual Feed You can select either Automatic or Manual Scanning mode using the switch on the top of the scanner. When manual feed is selected, the input tray will rise to its highest position. -
Page 38: Scanning Interfaces
® ® Loading Documents to Scan Xerox DocuMate 6710 Scanning Interfaces • Scanner Button Panel—When you press the Start/Stop button on the scanner, the documents are scanned using the scans settings for the first OneTouch scan function. The scanned image is then sent to a destination on your computer or network drive. - Page 39 ® ® Xerox DocuMate 6710 Loading Documents to Scan • TWAIN and WIA Interface—This option uses your scanner’s TWAIN interface to scan. Select scanning options before scanning, put the document in the scanner, then click the Scan button in the TWAIN interface window.
-
Page 40: 6-Maintenance
® ® Maintenance Xerox DocuMate 6710 Maintenance This section contains information about maintenance, troubleshooting, uninstalling, scanner specifications, and spare parts. Safety Precautions When servicing the scanner you should take the following precautions to ensure your safety and prevent damage to the scanner. -
Page 41: Device Settings
® ® Xerox DocuMate 6710 Maintenance To open the scanner hardware properties page: • Windows 7 and later—from the Windows Control Panel, open Hardware and Sound and then Devices and Printers. Right-click on the scanner and then select Scan properties from the list. -
Page 42: Driver Settings
Launch Xerox User Utility—the Xerox User Utility helps you monitor the scanner status and maintenance information. This button will be disabled if the Xerox User Utility is not installed. You can install the User Utility from the installation disc or download it from the support page for your scanner at www.xeroxscanners.com. -
Page 43: Clearing Paper Jams
® ® Xerox DocuMate 6710 Maintenance Please see the TWAIN scanning guide on the installation disc for instructions. Clearing Paper Jams If your scanner stops scanning due to a paper jam in the Automatic Document Feeder, use the following procedure to remove the paper from the scanner. -
Page 44: Cleaning The Inside Of The Scanner
® ® Maintenance Xerox DocuMate 6710 If there is any accumulation of dust in the indentations around the buttons, use the blower to gently blow away the dust. When you’re finished, press the power button to turn the scanner back on. -
Page 45: Cleaning The Adf Rollers
® ® Xerox DocuMate 6710 Maintenance Cleaning the ADF Rollers Pull on the scanner cover release and lift the lid to open the scanner. The following illustration shows where the rollers are located in the scanner. Use a roller cleaning paper to clean all of the rollers indicated in the illustration. - Page 46 ® ® Maintenance Xerox DocuMate 6710 From the main screen, click the Maintenance Setting button. Click on Clear Counter next to the After Clean Roller counter field. The clean roller count will now be reset to 0. Close the User Utility.
-
Page 47: Cleaning The Scanner Glass And Background Plates
® ® Xerox DocuMate 6710 Maintenance Cleaning the Scanner Glass and Background Plates Pull on the scanner cover release and lift the lid to open the scanner. The following illustration shows the location of the glass and background plates in the top and bottom of the scanner. -
Page 48: Cleaning The Adf Sensors
® ® Maintenance Xerox DocuMate 6710 Note: Do not clean the sensors with the roller cleaning paper. Preparation • Turn off the scanner prior to cleaning the sensors. • Locate the Blower accessory that was provided with your scanner, this is what you will use to clean the sensors. -
Page 49: Replacing The Rollers
® ® Xerox DocuMate 6710 Maintenance Point the tip of the blower at the sensor and squeeze the blower to direct a puff of air at the sensor head to remove dust. Do this for each sensor in the scanner. -
Page 50: Replacing The Feed Roller Module
® ® Maintenance Xerox DocuMate 6710 When you are done replacing the rollers, close the scanner carefully pressing down on both sides of the cover until it locks in place. Do not slam down the cover. Replacing the Feed Roller Module The roller will wear out and is designed to be a user-replaceable part. -
Page 51: Replacing The Separation Roller
® ® Xerox DocuMate 6710 Maintenance Insert the right side of the roller module into the scanner, then carefully angle the left of the roller module into the scanner. Be careful while inserting the roller module as the gears will engage as you place the module in the scanner. - Page 52 ® ® Maintenance Xerox DocuMate 6710 Carefully pull and hold the black tab on the left side of the roller away from the bar. Gently lift the left side of the roller bar up and then pull the roller out of the scanner toward the left, releasing the roller from the gears on the right side of the compartment.
-
Page 53: Installing An Imprinter
® ® Xerox DocuMate 6710 Maintenance Press gently on the metal bar on the left side to lock the roller in place with the black tab in the compartment. Place the roller compartment cover in the scanner and lower it into place. -
Page 54: Installing An Ink Cartridge
® ® Maintenance Xerox DocuMate 6710 Insert the pins on the right side of the imprinter unit into the holes on the scanner. Angle the imprinter down into the scanner until the pins on the left side line up with the slots in the scanner. -
Page 55: Adjusting The Printing Position
The vertical start position is set in the scanning interface you are using. User Utility The User Utility is a software program designed to help maintain and troubleshoot your Xerox scanner. On installation you were prompted to place an icon on your Windows desktop. If you selected yes, simply double-click on the user utility icon to open the software. -
Page 56: Main Screen Options
Maintenance Xerox DocuMate 6710 Click on Xerox from the programs list. Select User Utility to open the software. If you are prompted to select a scanner, make sure your scanner is selected then click on OK. Main Screen Options This section briefly describes the options on the main interface of the User Utility. The following sections contain detailed instructions on using some of the options in this utility. - Page 57 ® ® Xerox DocuMate 6710 Maintenance • Imprinter: indicates if an imprinter is installed in the scanner, with a status of either Enable or Disable, and the type of imprinter installed. The imprinter is an optional accessory that you can purchase for the scanner. Please refer to our website www.xeroxscanners.com...
-
Page 58: Scanner Error Codes
® ® Maintenance Xerox DocuMate 6710 • System: displays the number of pages scanned through the ADF after the last counter update. About—click on the About button to see more information about the application. Select Scanner—clicking on this button opens a window for you to select a different scanner if you have multiple scanners installed. - Page 59 Plug the USB cable and power cable back into the scanner. Turn the scanner back on. If you are still unable to scan, contact Xerox Technical Support. Please refer to the Technical Support Card you received with the scanner for contact information.
-
Page 60: Setting Sleep Mode
® ® Maintenance Xerox DocuMate 6710 Error Code Message Cause Resolution — **Warning** The image sensor Clean the image sensor as described in the cover in the section “Cleaning the Inside of the Scanner” on The scanner’s scanner is dirty. -
Page 61: Shading Adjustment
® ® Xerox DocuMate 6710 Maintenance When the Buzzer Setting window opens, select the option you want. Buzzer Setting—click on either On or Off to set the scanner alert sounds. Scanner alert sounds include double-page-feed detection, paper jam error, lamp errors, etc... - Page 62 ® ® Maintenance Xerox DocuMate 6710 Click on Start Shading to begin the shading adjustment. The shading adjustment utility will guide you through the rest of the steps. When prompted to clean the scanner click on OK to proceed only if you have already cleaned the scanner during preparation.
-
Page 63: Troubleshooting
® ® Xerox DocuMate 6710 Maintenance Restoring the Default Shading Adjustment You can reset the shading adjustment to the factory default setting if completing a shading adjustment does not improve the image quality. Open the scanner User Utility application. On the main window click on the User Shading... button. - Page 64 Did you select another image source in the scanning software? If you use multiple imaging devices with your computer, such as a camera, all-in-one printer, or another scanner, ® ® you may have selected another source for images. Make sure Xerox DocuMate 6710 is selected as the scanner.
-
Page 65: Uninstalling Your Scanner
® ® Xerox DocuMate 6710 Maintenance Problem: The paper jams the ADF. To reduce the number of paper jams, smooth and straighten the paper before scanning, and adjust the guides to the paper size. Paper fed into the ADF at an angle can cause the feed mechanism to jam. - Page 66 Windows 7 and later: Open Programs and Features Uninstalling the scanner driver: ® ® In the list of installed programs click on Xerox DocuMate 6710 driver. Click the Change/Remove or Uninstall button. Click Yes when asked to confirm that you want to remove the driver.
-
Page 67: Xerox Documate 6710 Specifications
® ® Xerox DocuMate 6710 Maintenance ® ® Xerox DocuMate 6710 Specifications Scanner Specifications Document Requirements Minimum Item Size 1.9 x 2.8 inches (48 x 71 mm) Maximum Item Size 12.09 x 100 inches (307 x 2540 mm) Capacity 300 pages of 20 lb printer paper (75~80 g/m2) Paper Thickness 5–42 lbs. - Page 68 ® ® Maintenance Xerox DocuMate 6710 Scanner Specifications Cable Information AC Power Cord US—2P+G, 10A/125V, L=2000mm, 3X18AWG, Black, RoHS EUR(CEE)—2P+G, 10A/250V, 3*1.00mm2, L=2000mm, Black, RoHS UK(BS/PSB)—2P, 10A/250V, 3*1.00mm2, L=2000mm, Black, RoHS USB 3.0 cable 2400 mm Software Information Supported Operating...
-
Page 69: Xerox ® Documate ® 6710 Parts List
® ® Xerox DocuMate 6710 Maintenance ® ® Xerox DocuMate 6710 Parts List Part Name Part Number Roller Exchange Kit 70-0609-000 USB 3.0 Cable 35-0256-000 Power Cord 35-0257-000 (U.S.) 35-0258-000 (EUR) 35-0259-000 (U.K.) Blower 57-0159-000 Roller Cleaning Paper 05-0722-000 Shading Paper... -
Page 70: 7-Appendix A: Regulatory Information
(1) This device may not cause harmful interference, and (2) this device must accept any interference received, including interference that may cause undesired operation. ® Changes and modifications to this equipment not specifically approved by Xerox may void the user’s authority to operate this equipment. -
Page 71: Turkey (Rohs Regulation)
Xerox DocuMate 6710 Appendix A: Regulatory Information A full declaration of conformity, defining the relevant directives and referenced standards, can be obtained from your Xerox Limited representative or by contacting: Environment, Heath and Safety Xerox Corporation Oxford Road Uxbridge UBS 1HE... -
Page 72: Canada
® ® Appendix A: Regulatory Information Xerox DocuMate 6710 Copyrighted material, unless permission of the copyright owner has been obtained or the reproduction falls within the “fair use” or library reproduction rights provisions of the copyright law. Further information of these provisions may be obtained from the Copyright Office, Library of Congress, Washington, D.C. -
Page 73: Other Countries
® ® Xerox DocuMate 6710 Appendix A: Regulatory Information Documents, registers or records kept by public officials charged with the duty of making or issuing certified copies thereof, where the reproduction falsely purports to be a certified copy thereof. Copyrighted material or trademarks of any manner or kind without the consent of the copyright or trademark owner. -
Page 74: 8-Appendix B: Compliance Information
Product Recycling & Disposal USA & Canada ® If you are managing the disposal of your Xerox product, please note that the product may contain lead, mercury, Perchlorate, and other materials whose disposal may be regulated due to environmental considerations. The presence of these materials is fully consistent with global regulations applicable at the time that the product was placed on the market. - Page 75 ® ® Xerox DocuMate 6710 Appendix B: Compliance Information The ENERGY STAR and ENERGY STAR MARK are registered United States trademarks. The ENERGY STAR Imaging Equipment Program is a team effort between U.S., European Union and Japanese governments and the office equipment industry to promote energy-efficient copiers, printers, fax, multifunction machine, personal computers, and monitors.
Need help?
Do you have a question about the DocuMate 6710 and is the answer not in the manual?
Questions and answers