
Subscribe to Our Youtube Channel
Related Manuals for Blastrac 1-8DEZMKII


Summary of Contents for Blastrac 1-8DEZMKII
- Page 1 MODEL 1-8DEZMKII Shot Blasting System WALK BEHIND MANUAL PUSH Trust the Original Surface Preparation Experts blastrac.com 800.256.3440...
- Page 2 FORWARD Blastrac is pleased that you have selected this Blast Cleaning System for your surface preparation requirements. This environmentally safe, closed-cycle, surface preparation machine has been designed and built for abrasive blast cleaning of horizontal surfaces. This manual has been prepared to assist the operator and the maintenance personnel in understanding the machine so that it may be operated in the most efficient manner and maintained in the best condition.
- Page 3 Receipt of Machine Examine the shipment carefully for possible damage that might have occurred while in transit. If any damage is noted, notify the transportation carrier immediately and advise Blastrac.
-
Page 4: Table Of Contents
Operating Instructions 1-8DEZ Table of Contents Page Number Safety Precautions Safety Instructions Mechanical Ventilation Operator Responsibilities Operator Responsibilities Description and Function Blast Unit – General Blast Unit – Abrasive Cleaning Head Blast Unit – Abrasive Control Valve Blast Unit – Rebound Chamber (Plenum) Blast Unit –... - Page 5 Operating Instructions 1-8DEZ Table of Contents Blast Wheel Replacement Blast Wheel Replacement Troubleshooting 10.1 Troubleshooting 10.2 Ventilation System (4-54SP Dust Collector) 10.3 Vacuum Adjustment Specifications 11.1 Blast Unit Recommended Spare Parts 12.1 Recommended Spare Parts List Reference Drawings General Assembly 421-0001...
-
Page 6: Safety Precautions
Operating Instructions 1-8DEZ Safety Precautions Section 1 Safety Instructions Safety – Mechanical Safety - Ventilation... -
Page 7: Safety Instructions
AND UNDERSTAND ALL OF THE OPERATING INSTRUCTIONS PRIOR TO OPERATING OR MAINTAINING ON THE 1-8DEZ. These Blastrac operating instructions have been specifically prepared for operating and maintenance personnel working with the Model 1-8DEZ shot-blasting system. The information in this manual is intended to provide an understanding of the 1-8DEZ to minimize safety risks and maximize 1-8DEZ performance. -
Page 8: Mechanical
Operating Instructions 1-8DEZ Safety Precautions 1.1 Cont’d Before actual shotblasting can begin, the operator should be certain that the 1-8DEZ will clear all obstructions in the work area. Work areas must be dry and clean (no loose debris) before cleaning can begin. WARNING: INTRODUCTION OF LOOSE DEBRIS MAY CAUSE A CATASTROPHIC FAILURE RESULTING IN SERIOUS INJURY. - Page 9 Sticky, tar related and rubber ® surfaces should be avoided when using the Blastrac 1-8DEZ. Always drain unused abrasive from the 1-8DEZ and empty the dust collector hopper before transporting the...
-
Page 10: Ventilation
Operating Instructions 1-8DEZ Safety Precautions 1.3 Ventilation The 1-8DEZ will not operate correctly without a dust collector. The dust collector aids in the recovery of the abrasive and removes potentially hazardous dust from the air stream. If the machine is leaving shot on the ground or emitting dust, make sure your dust collector is operating correctly. -
Page 11: Operator Responsibilities
Operating Instructions 1-8DEZ Owner/Operator Responsibilities Section 2 Owner/Operator Responsibilities... -
Page 12: Operator Responsibilities
Blastrac equipment. 3. The owner/operator shall provide the necessary blasting media in accordance with the recommendations of a Blastrac technician so that the 1-8DEZ will operate at maximum efficiency. 4. The owner/operator shall perform all maintenance and basic repair functions as stated and described in this manual. -
Page 13: Description And Function
Operating Instructions 1-8DEZ Description and Function Section 3 Blast Unit – General Blast Unit – Abrasive Cleaning Head Blast Unit – Abrasive Control Valve Blast Unit – Rebound Chamber (Plenum) Blast Unit – Deflector Plate / Hopper Blast Unit – Abrasive Seals Blast Unit –... -
Page 14: Blast Unit - General
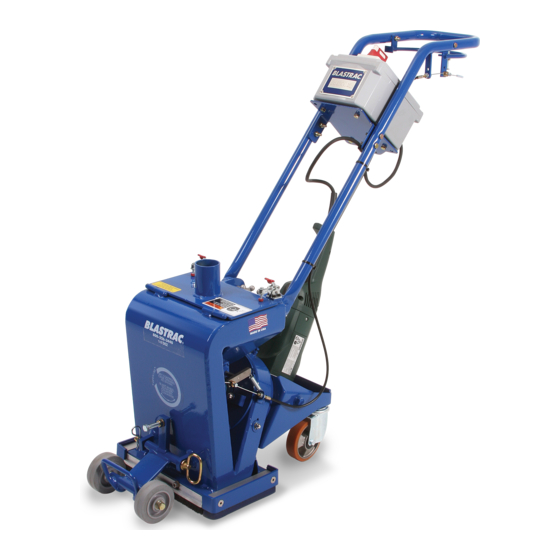
Description and Function 3.1 Blast Unit – General ® The Blastrac equipment series described herein includes the 1-8DEZ Blast Unit. This model is used in conjunction with the Turbo Vacuum Dust Collector. Each combination comprises a horizontal surface preparation, closed cycle, shotblasting system. The blast unit directs high velocity, metallic abrasive toward the work surface. -
Page 15: Blast Unit - Abrasive Control Valve
Operating Instructions 1-8DEZ Description and Function 3.2 Cont’d The blast wheel is equipped with a cast in place impeller for easy maintenance. This impeller pre-accelerates the abrasive to the wheel blades in controlled portions. The impeller also acts as a timing device to ensure proper placement of abrasive on the blade face. -
Page 16: Blast Unit - Deflector Plate / Hopper
Operating Instructions 1-8DEZ Description and Function 3.5 Blast Unit – Deflector Plate / Hopper This section (3.5) refers to Figure Number 3 on page 15. Once the contaminated abrasive leaves the rebound plenum, it enters the separator and immediately encounters the deflector plate. The deflector plate slows the abrasive down even more before it enters a tray at the bottom of the deflector plate. -
Page 17: Cleaning Media (Abrasive)
The 1-8DEZ is designed to operate with abrasive in sizes S-110 through S-330. The selection of proper abrasive is very important to the performance of the Blastrac shot cleaning system. Your Blastrac representative can help with the proper selection of abrasive for your particular application. -
Page 18: Figure #1
Operating Instructions 1-8DEZ Description and Function BLAST WHEEL POLYURETHANE SEAL FEED SPOUT/ CONTROL CAGE CLAMP GRINDER ADAPTER PLATE FEED SPOUT ARBOR NUT CONTROL CAGE DRIVE HUB ABRASIVE CLEANING HEAD FIGURE #1... -
Page 19: Figure #2
Operating Instructions 1-8DEZ Description and Function SPRING HOPPER LEVER CABLE ANCHOR ABRASIVE CONTROL VALVE CONTROL CABLE PIVOT FEED SPOUT CLOSED OPEN 90° CLOSED OPEN ABRASIVE CONTROL VALVE FIGURE #2... -
Page 20: Figure #3
Operating Instructions 1-8DEZ Description and Function AIR OUTLET VACUUM DEFLECTOR LID ASSEMBLY CLAMP HINGE VACUUM SLOT SCREEN STORAGE HOPPER REBOUND PLENUM ABRASIVE VALVE ANCHOR ABRASIVE VALVE ABRASIVE/ CONTAMINANTS IN AIR SEPARATOR 1-8DEZ FIGURE #3... -
Page 21: Start-Up Procedures And Precautions
Operating Instructions 1-8DEZ Start-Up, Operation, and Shut-Down Procedures Section 4 Start-Up Blast Cleaning Shut-Down... -
Page 22: Start-Up Procedures
8. Check the area you are about to clean. Be sure that it is free of all debris that can clog or damage the 1-8DEZ. Be sure that the surface is moisture free. Blastrac machinery is designed to work on surfaces free from debris. 9. Make certain that the abrasive control valve is in the closed position. Remove the separator lid and check that the shot hopper is free of debris and abrasive. -
Page 23: Blast Cleaning
Operating Instructions 1-8DEZ Start-Up, Operation, and Shut-Down Procedures 4.1 Cont’d should reach the bottom of the screen. Do not overfill. Replace the separator lid and secure clamps (see figure #3, page 15). 10. Check the magnetic seals on the bottom of the blast unit for metallic contaminants such as nuts, bolts, etc. -
Page 24: Shut Down
Operating Instructions 1-8DEZ Start-Up, Operation, and Shut-Down Procedures 4.2 Cont’d 3. The blast unit and the dust collector should be arranged so that the dust collector is centrally located. Blasting in straight lines will always give the best, most consistent results. -
Page 25: Setting The Correct Blast Pattern
Operating Instructions 1-8DEZ Setting The Correct Blast Pattern Section 5 Setting the Correct Blast Pattern... -
Page 26: Setting The Correct Blast Pattern
1. Wheel Rotation - The blast wheel must be rotating in the proper direction indicated ® on the housing that surrounds the blast wheel. Most Blastrac machines rotate in a clockwise direction when looking at the machine from the operator’s position. - Page 27 Operating Instructions 1-8DEZ Setting The Correct Blast Pattern 5.1 Cont’d 5. The initial setting of a machine rotating in a counter-clockwise direction should be between 8:30 and 10:30 as indicated in Figures B and C. The resultant-cleaning path will determine the final setting. These settings will vary with the abrasive size and the surface being cleaned.
-
Page 28: Edging Mode
Operating Instructions 1-8DEZ Edging Mode Section 6 Changing the Edging Mode... -
Page 29: Changing The Edging Mode
Operating Instructions 1-8DEZ Edging Mode 6.1 Changing The Edging Mode Refer to Figure Number 5 The model 1-8DEZ is capable of cleaning surfaces within 1 / 2 inch of vertical obstructions. (This is along the side of the machine. The 1-8DEZ can be pushed as close as 1-1/2 inches from the front of the machine.) Performing the following steps sets up the edging mode: 1. -
Page 30: Figure #4
Operating Instructions 1-8DEZ Edging Mode MAGNETIC SEAL ASSEMBLY FIGURE #4... -
Page 31: Equipment Calibration
Operating Instructions 1-8DEZ Equipment Calibration Section 7 Equipment Calibration... -
Page 32: Equipment Calibration
4. Exhaust Hose Length - 25 feet of 2” I.D. exhaust hose; longer or shorter sections of hose may affect abrasive consumption or abrasive cleaning. ® Contact your Blastrac representative before changing the exhaust hose length. 5. Dust Collector – Inspect Dust Collector at 15-minute intervals to see how quickly the dustbin is being filled. -
Page 33: Wear Parts
Operating Instructions 1-8DEZ Wear Parts Section 8 Wear Parts Maintenance Log... - Page 34 Thin at Wheel Entry Remove and replace Remove and replace; Control Cage 5 Hrs. Eroded Edges adjust pattern ® Rebound Thin Sections; Contact Blastrac 50 Hrs. Chamber Wear on Welds. Service Center ® Abrasive Thin Sections; Contact Blastrac 20 Hrs.
-
Page 35: Maintenance Log
Operating Instructions 1-8DEZ Wear Parts 8.2 Maintenance Log MAINTENANCE LOG Liners – Inspect for wear Checked Change Blastwheel/cage - Inspect for wear Checked Change Filters - Inspect – clean or replace Checked Change Power Cords - Inspect for splits or cuts Checked Change Shot valve –... -
Page 36: Blast Wheel Replacement
Operating Instructions 1-8DEZ Blast Wheel Replacement Section 9 Blast Wheel Replacement... -
Page 37: Blast Wheel Replacement
Operating Instructions 1-8DEZ Blast Wheel Replacement 9.1 Blast Wheel Replacement WARNING: THE 1-8DEZ MUST BE PLACED IN THE MAINTENANCE MODE (SEE SECTION 1.2) PRIOR TO ATTEMPTING TO INSPECT, CHANGE, OR ADJUST THE BLAST WHEEL. 1. Loosen the two control cage clamps that secure the feed spout and control cage. 2. - Page 38 The assembly of the blast wheel and its associated parts are illustrated on Figure 1 ® page 13 in Section 3, Description and Function. Original Blastrac wheels are designed and dynamically balanced for use at high speeds. Use of any other blast wheel may...
-
Page 39: Troubleshooting
Operating Instructions 1-8DEZ Mechanical Troubleshooting Section 10 10.1 Blast Unit – Mechanical Troubleshooting 10.2 Dust Collector – Ventilation System 10.3 Vacuum Adjustment – Operating Tips... -
Page 40: Troubleshooting
Operating Instructions 1-8DEZ Mechanical Troubleshooting 10.1 Mechanical Troubleshooting WARNING: PLEASE REFER TO THE SPECIFIC SAFETY AND MAINTENANCE RECOMMENDATIONS THROUGHOUT THIS MANUAL AND THE MANUALS OF THE COMPONENTS BEING MAINTAINED BEFORE ATTEMPTING ANY MAINTENANCE. FAILURE TO ADHERE TO THESE RECOMMENDATIONS COULD RESULT IN EQUIPMENT DAMAGE, SERIOUS INJURY OR DEATH. - Page 41 Operating Instructions 1-8DEZ Mechanical Troubleshooting 10.1 Cont’d Trouble Possible Cause Remedy Increased cleaning time. a. Storage hopper. a. Check abrasive level. b. Contaminated b. Abrasive may contain abrasive. substantial percentage of fines and contaminants. Check ventilation. c. Abrasive feed and c.
-
Page 42: Ventilation System (4-54Sp Dust Collector)
10.3 Vacuum Adjustment – Operating Tips ® For normal concrete surfaces, Blastrac does not recommend using more than the 25 feet of exhaust hose supplied with the blast system. Adding additional hose can cause insufficient suction, which will allow unwanted dust and contaminants to accumulate in the abrasive, thereby causing premature wear to the blast wheel and liners. -
Page 43: Specifications
Operating Instructions 1-8DEZ Specifications Section 11 11.1 Specifications – Blast Unit... -
Page 44: Blast Unit
Operating Instructions 1-8DEZ Specifications 11.1 Specifications – Blast Unit 1-8DEZ MECHANICAL DATA Length (Base) 24 inches Length (including handle in normal position) 45 inches Height (excluding handle) 19.5 inches Height (including handle in normal position) 38 inches Width 12-3/8 inches Weight 123 pounds Vacuum Hose Length... -
Page 45: Recommended Spare Parts
Operating Instructions 1-8DEZ Recommended Spare Parts Section 12 12.1 Recommended Spare Parts List... -
Page 46: Recommended Spare Parts List
Operating Instructions 1-8DEZ Recommended Spare Parts 12.1 Recommended Spare Parts List Part # Description 4923050-EU Wheel Kit 6908250-EU Liner/Left Hand Side 6908260-EU Liner/Right Hand Side 4973070-EU Liner/Top P000001 Abrasive Control Valve **9675770 Feed Spout **6849120 Feed Spout Seal *P002639 Arbor Nut *Items included in Wheel Kit. - Page 47 P004262 11/13/2013 1-8DEZ 120V 60 HZ POLY V2 BOM ITEM NUMBER DESCRIPTION P004258 ENCLOSURE, 8X6X4, MODIFIED w/ HOLES P004249 ALUMINUM BACK PANEL MOTOR CIRCUIT PROTECTOR, ROTARY P004250 OPERATOR, 17-23 AMP MOTOR CIRCUIT PROTECTOR, ROTARY P004251 OPERATOR HANDLE, SHAFT & ADAPTER AMMETER, AC, 2.5", UL VERSION, 30 AMP, SELF- P000443 CONTAINED...
- Page 48 ITEM QTY. PART NUMBER Description REMARKS P002618-EU Blast housing 6962960 Steering Handle 6962970 Abrasive Control Handle 9763240 Control cage bracket P001087 Front Caster Assy 9700120 Control cage clamp P002647-EU Electrical control Box Mtg Plate 6811540 Side skirt retainer PA-10038 Handle Mount 4923050-EU Blast wheel kit P003128-EU...
- Page 49 13201 North Santa Fe Avenue Oklahoma City, OK 73114 Ph: 800-256-3440 F: 405-478-8608 blastrac.com Product Warranty Standard Equipment Products: Blastrac warrants its Blastrac Standard Equipment Products against defects in quality of material and workmanship, under normal and proper use for a period of 1 Year from the date of delivery, as noted on the returned warranty registration card, or, in the case of Rental Fleet Machines, 180 Days from the date of assignment to Rental Fleet.
- Page 50 Blastrac Returned Merchandise Authorization (RMA) Form. Blastrac will then send the RMA form to the customer authorizing the return of the parts for warranty evaluation. The parts must be received within sixty (60) days following the RMA origination date or the warranty claim will be denied.
- Page 51 ® the information recorded here by registering online at blastrac.com, or complete this page and fax to 866-485-1046, or if you prefer, detach and mail to: Blastrac, 13201 North Santa Fe Avenue, Oklahoma City, OK 73114-9901...
- Page 52 Contact Blastrac Canada 5125 Timberlea Blvd. Mississauga, Ontario, Canada L4W 2S3 Tel: 1-866-669-6643 Fax: 866-669-6644 www.blastrac.ca...
Need help?
Do you have a question about the 1-8DEZMKII and is the answer not in the manual?
Questions and answers