
Related Manuals for Triax TDX


Summary of Contents for Triax TDX
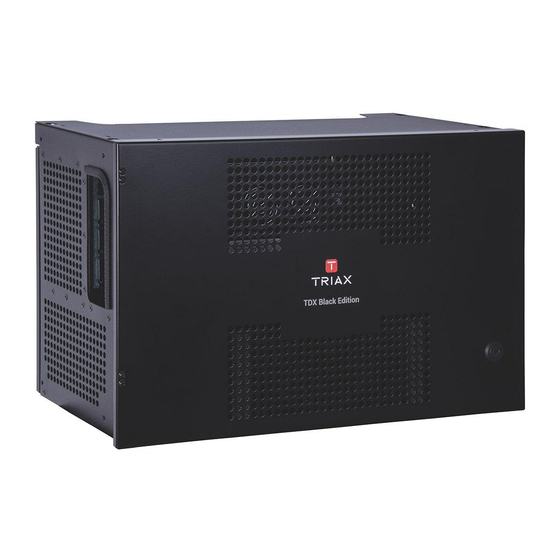
- Page 1 User Manual TDX Headend System Main Unit Black Edition Model Item no. TDX Headend System Main Unit – Black edition 492091 Version Date 891072C 01/2017 Content / Inhaltsverzeichnis / Table des matières...
-
Page 2: Table Of Contents
TDX Headend System Main Unit Black Edition Safety Precautions ........................................3 Environment ..........................................3 Power supply ..........................................3 Weight ............................................3 Earth .............................................. 3 Disposal ............................................3 Black Edition – what’s new .............................4 New features in Black edition ...................................... 4 New user interface (GUI) –... -
Page 3: Safety Precautions
TDX Headend System Main Unit Black Edition Format file system in flash ......................................25 Force TDX systemcontroller in failsafe mode ................................25 Reinitialize SD card ........................................25 IP out service list ........................................26 System information ..............................27 Viewing system information ...................................... 27 Duplicated PID‘s.......................................... -
Page 4: Black Edition - What's New
TRIAX Service Agreement, the safe & sound deal, comes in 3 levels – Pay-As-You-Go, BASIC and PLUS. The TRIAX Service Agreement ensures your solutions are always up and running, always up to date and always backed up by the best service and support;... -
Page 5: Introduction
Black Edition Introduction The TDX cabinet is designed to accommodate up to 16 input modules and 6 quad output modules. Up to three TDX headends can be combined as one system of up to 48 input muxes and 72 output channels. - Page 6 TDX Headend System Main Unit Black Edition Distributes services from IP output input slots (16 in total) AUX 1 & 2 modules Connects the main unit with subunits 1 Extractor fans Link 1 & 2 and 2. Can also be used in conjunction...
-
Page 7: Single Headend Installation
TDX Headend System Main Unit Black Edition Single headend installation Mounting The headend can be mounted either on a system rack or directly onto a wall. Rack installation Wall installation Attach the mounting brackets to the headend with the supplied screws. -
Page 8: Multi Headend Installation
TDX Headend System Main Unit Black Edition Multi Headend installation Up to three headends can be combined to further increase the number of services provided. The headends are physically installed as per installation of single headend, i.e. by using the supplied brackets described above. -
Page 9: Connection Units - Direct Connection
TDX Headend System Main Unit Black Edition Connection units – direct connection Note that direct connection hardware configurations require the Connection type field in the service tool’s Admin/IP Settings/Setup window to be set to ‘Direct’ 1. 1x Main – 1x sub Insert SFP copper transceivers into the “Link 1“sockets... -
Page 10: Connecting Units - Switch Connection
Switch. Triax recommends that a network switch is used for connecting the main and subunits even if IP services are not currently supported. The network switch used must support IGMP ver. 2 and contain a sufficient number of ports to connect to the Link sockets on the main and subunits. -
Page 11: Input Modules
TDX Headend System Main Unit Black Edition Input modules 16 input modules can be installed per headend unit. Hot swap technology is used in the headend, meaning that modules can be inserted/removed/moved when the headend is in operation. Input module types Each input module is identified through the use of a specifically coloured label. -
Page 12: Attaching Cables
TDX Headend System Main Unit Black Edition Attaching cables Signal cables can be attached when all input modules have been installed. Route the cables either through the cable openings on the top or on the sides of the headend. Attach the signal cables to the ‘IN’ connector on the input module. -
Page 13: Output Modules
TDX Headend System Main Unit Black Edition Output modules Six output modules, each consisting of four RF channels can be installed in a headend unit. Hot Flash technology is used in the headend, meaning that output modules can be inserted/removed/moved while the headend is running. -
Page 14: System Monitoring
TDX Headend System Main Unit Black Edition System monitoring Input modules – LED status Green - flashing The module is yet to be configured yet. Each input module has an LED on the front to Green No errors, and the tuner is locked to the frequency. -
Page 15: Service Tool - System Requirements
TDX Headend System Main Unit Black Edition Headend LED Name Colour Message type/usage Green – constant Power is on and the headend is operational. Sub Unit 2 in multi-unit System Status Green – flashing The headend is booting up. installation An error has been detected in the headend, which must be investigated. -
Page 16: Starting Service Tool
TDX Headend System Main Unit Black Edition Physical connection to headend Connect a Cat5e shielded cable or better between the computer’s network port and the configuration port on the headend. Starting service tool Open a web browser window. Enter ‘http://192.168.0.100’ in the web address field. -
Page 17: Tabs
TDX Headend System Main Unit Black Edition Tabs Accesses the various tabs used to configure the headend’s input and output modules. The service tool’s ‘home’ window. Provides system overview information and System configuration activation/control. Input Tab for configuring input modules and services. -
Page 18: Language
TDX Headend System Main Unit Black Edition The system language, locale, and time zone need to be specified on each headend unit. It is also necessary to specify IP addresses for headends which are located on a distribution network. Language Press the Admin button at the top right-hand corner of the System window. -
Page 19: Time Set By Ntp Server
Press the UPDATE button, down below. Time set by NTP server It is possible to have the time in the TDX set by a NTP server. Primary Secondary time server can be setup using either a. IP address like “192.168.30.31”... -
Page 20: Features And License Keys
The TDX Black Edition is delivered with a free of charge 30-day installation period with unlimited access to all available Features. When TDX Black Edition is initialized for the first time, you have to start the 30-day Trial Period. The START TRIAL box is automatically displayed, and you start the trial by pressing START. -
Page 21: Ip Settings
TDX Headend System Main Unit Black Edition IP settings It may be necessary to specify specific IP addresses for the headend to avoid network IP address conflicts. Note: Headend IP addresses can be reset to factory default settings if required. This is done via the ID switch located on the headend unit(s). -
Page 22: Snmp Settings
TDX Headend System Main Unit Black Edition IP settings - continued Remaining steps are valid for all multi-unit installations. The 512 IP addresses used by the headend(s) must not conflict with any of the IP addresses used either within the network or for services. -
Page 23: Cas Server Settings
Press the UPDATE button, down below. NOTE: CAS system should be connected to the TDX system. TDX should have quality input signal and user should have a license. Rebooting Press the Admin button at the top of the right- hand corner of the System window. -
Page 24: Firmware Updating
TDX Headend System Main Unit Black Edition Firmware updating Firmware updates are available from the support/ helpdesk sites at TRIAX Always read the release notes to determine whether the headend would benefit from available firmware updates or not. Press the CHANGE FIRMWARE button... -
Page 25: Format File System In Flash
Format file system in flash Force TDX systemcontroller in failsafe mode If data in the TDX needs to be deleted, then you need to format file If there is a S/W version mismatch inside the TDX system – then the system in flash of the TDX. -
Page 26: Ip Out Service List
The service list can be used for TV sets. Panasonic is one TV set vendor that supports this service list as service discovery. The list is used for communication between the TDX system controller and the TDX EPG server. This service list contains IP adress and port number ... -
Page 27: System Information
TDX Headend System Main Unit Black Edition System information Viewing system information Detailed information is available on headend units: Select the System tab. Select the main unit or one of the subunits in the System information list area. The System information for unit window is displayed. The... -
Page 28: Managing Configuration Files
Select the System tab. Press the Load from TDX button. Navigate to where the configuration file is to be saved. Enter a name for the configuration file. -
Page 29: Uploading
Any module differences will need to be manually configured. Select the System tab. Press the Load to TDX button. Navigate to the folder where the configuration file to be uploaded is located. Select the file. Press the Open button. -
Page 30: Ip Input Configurations
The TDX headend system supports up to 7 TS packets per IP packet at IP inputs. The TDX headend system does not support IP fragmentation at IP inputs, which may occur if the IP packets are transmitted over a network with a Maximum Transmission Unit (MTU) less than approximately 80 + N*188 bytes, where N is the number of packets per IP packet.. -
Page 31: Specifying Eit/Epg Source
TDX Headend System Main Unit Black Edition Creating - continued Important: If the IP input uses MPTS streams, then each stream can contain one or more services. An MPTS stream may use the same PID (Package ID) for two or more of the services that it contains. -
Page 32: Eit For Viasat Services
TDX Headend System Main Unit Black Edition Specify the desired IP address and associated IP port number in the corresponding fields. Open the Alternative EIT source drop-down list. Select the EIT source to be used. Press the Update button. Check the Selected services checkbox for one or... -
Page 33: Creating
NOTE: Licenses for IP output are required to be able to use the IPTV functionality in the headend. The licenses can be purchased from Triax Sales, and need to be activated, see “Activating licenses”. Select the Output tab. Select the IP outputs sub-tab. -
Page 34: Modifying
TDX Headend System Main Unit Black Edition View the Status information area, down below, to see the following: The link’s RTP status The transfer bitrate The number of license services used. The total number of purchased service licenses ... -
Page 35: Eit - Every Ip Service
TDX Headend System Main Unit Black Edition If you want to distribute EIT information in connection with your IP output, you can choose between: distributing EIT information with every single IP service, or use a barker channel for carrying all EIT information for the IP output. -
Page 36: Pid Handling
TDX Headend System Main Unit Black Edition Select the Network tab in the Service Tool. Open the EIT drop-down list. Select “Barker channel”. Specify the IP address for the EIT barker channel in the EIT barker IP address field. Specify the associated port number in the EIT barker IP port field. - Page 37 TDX Headend System Main Unit Black Edition From S/W version 4.0.1 it is possible to filter or even remap the PID. Find output and press SERVICES button. A box opens – by pressing the SELECT SERVICES you can select/deselect specific services.
-
Page 38: Snmp Traps
Trap generated when an input module has an error, e.g. module no longer locked to frequency, missing module etc, OID: 1.3.6.1.4.1.41359.1.1.1.8 CIInsertion Trap generated when a CI module is inserted in the TDX. CIRemoval 1.3.6.1.4.1.41359.1.1.1.9 Trap generated when a CI module is removed from the TDX. ModuleInsertion 1.3.6.1.4.1.41359.1.1.1.10... - Page 39 TDX Headend System Main Unit Black Edition This page is intentionally left blank ! Diese Seite ist mit Absicht leer ! Cette page a été laissée blanche intentionnellement ! Esta página se ha dejado en blanco intencionalmente ! Denne side er med vilje efterladt tom...
- Page 40 Copyright © 2016 TRIAX. All rights reserved. The TRIAX Logo and TRIAX, TRIAX Multimedia are registered trademarks or trademarks of the TRIAX Company or its affiliates. All specifications in this guide are subject to change without further notice.
Need help?
Do you have a question about the TDX and is the answer not in the manual?
Questions and answers