Snapmaker Artisan Quick Start Manual
Hide thumbs
Also See for Artisan:
- Quick start manual (172 pages) ,
- Quick start manual (20 pages) ,
- Assembly manual (87 pages)
Table of Contents
Advertisement
Quick Links
Advertisement
Table of Contents

Related Manuals for Snapmaker Artisan


Summary of Contents for Snapmaker Artisan
-
Page 2: Table Of Contents
Before You Start ............................01 1.1 Disclaimer..................................02 1.2 Intended Use ................................... 02 1.3 Safety Information ................................03 1.4 Safety Labels on Your Snapmaker ..........................06 Before You Start 1.5 Specifications .................................. 07 1.6 Parts List ..................................08 1.7 Assembly Instructions ..............................10 1.8 Used Symbols .................................. -
Page 3: Disclaimer
- An air purifier should be used depending on the type and constituent of the materials you are going to use, as means without the prior written permission of Snapmaker. We reserve the right to modify or revise this guide in some materials may release hazardous and toxic fumes when laser engraved or cut. - Page 4 - Airway Irritation Gases and fumes may irritate the airways and potentially be extremely dangerous. If airway irritation occurs, https://snapmaker.com/...
-
Page 5: Safety Labels On Your Snapmaker
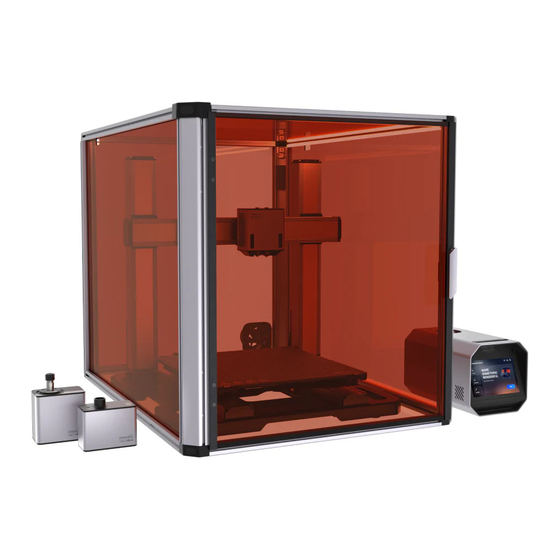
06-07 Before You Start 1.4 Safety Labels on Your Snapmaker 1.5 Specifications Enclosure Label Warning Location Minimum Footprint (W × D × H) 1035 mm × 1690 mm × 705 mm Material Profile: Aluminum alloy Panel: Acrylic sheet Take care to avoid injury from sharp objects (e.g., On the 200W CNC Laser Engraving &... -
Page 6: Parts List
× 1 (wide) × 1 (narrow) × 1 × 4 × 5 × 1 × 2 * The appearance of certain parts may change with product iterations, while their functionalities in offering a reliable user experience will https://snapmaker.com/ remain unaffected. -
Page 7: Assembly Instructions
CNC carving and cutting, and familiarize you with the Enclosure settings with concise instructions and graphics. The workflows described in this guide are what we consider to be the most convenient ones for you to quickly get started. For other workflows and more information, refer to our online User Manual in Snapmaker Wiki (https://wiki.snapmaker.com). -
Page 8: Enclosure Settings
12-13 Enclosure Settings 2.1 Enable/Disable Door Detection The column-2 of the Enclosure features a hall switch to detect whether the door is opened or closed in real time. Enclosure Settings You can tap Settings > Enclosure to enable or disable Door Detection during a 3D printing or CNC process. During a laser process, Door Detection is enabled by default and cannot be disabled. -
Page 9: Turn On/Off Led Strips And The Exhaust Fan
In this case, you can turn on the exhaust fan after printing. To protect your health and prevent environmental pollution, we recommend using Snapmaker Air Purifier or other air purifying devices during such a 3D printing process. -
Page 10: Laser Engraving And Cutting
16-17 Laser Engraving and Cutting 3.1 Preparations 3.1.1 Set Up the Machine 1. Turn on the power switch on the back of the Integrated Controller. Laser Engraving and Cutting To restart your machine, wait for at least 5 seconds after power-off. 2. - Page 11 Restart the machine, and tap Settings > About Machine on the Touchscreen to check the verification code. The red laser emitter is a Class 2 laser product. Do NOT look directly into its aperture when the laser beam is being emitted. https://snapmaker.com/...
- Page 12 Camera Capture. During this process, the machine will engrave a square on a piece of blank paper and capture its image to calibrate the camera. Every time after you have reassembled the module or machine, you need to redo the Camera Calibration. https://snapmaker.com/...
- Page 13 For ease of operation, you can first detach the laser engraving and cutting platform from the Congrats! machine, fasten the material on the platform, and install the platform back onto the machine. You are now ready to engrave and cut. https://snapmaker.com/...
-
Page 14: Getting Started
3.2 Getting Started 3.2.1 Install Snapmaker Luban 1. On the Snapmaker official website, click Software in the navigation bar. Then, download and install our tailor- made software Snapmaker Luban (hereafter Luban). 2. Launch Luban, select the language, machine model, and module type, and then click Complete to save the settings. - Page 15 After the photo is captured, click Confirm. For detailed information about generating G-code files, refer to our online User Manual in Snapmaker Wiki (https://wiki.snapmaker.com). https://snapmaker.com/...
- Page 16 - Start From Work Origin: To use this mode, you must first manually focus the laser and set the Thickness Measurement and click Start. Work Origin. For detailed steps, refer to our online User Manual in Snapmaker Wiki (https://wiki. snapmaker.com).
-
Page 17: Maintenance
Touchscreen. Dust and grease may accumulate on the laser lens protector over time, which will significantly decrease the For more detailed information, refer to our online User Manual in Snapmaker Wiki (https://wiki. engraving and cutting capability of the laser. Therefore, you need to clean the laser lens protector to recover the snapmaker.com). -
Page 18: Cnc Carving And Cutting
32-33 CNC Carving and Cutting 4.1 Preparations 4.1.1 Set Up the Machine 1. Turn on the power switch on the back of the Integrated Controller. CNC Carving and Cutting To restart your machine, wait for at least 5 seconds after power-off. 2. - Page 19 CNC bit. All the three slots as illustrated can be used to fasten the material. 2. Check the positions of the screws to ensure that they are not over-screwed and penetrating the CNC carving and cutting platform. https://snapmaker.com/...
- Page 20 2. First, put on the CNC Safety Goggles. Then, insert the CNC bit into the ER11 collet (the double-flute flat end mill is required for our test model) and keep pushing the bit until its end bottoms against the shell of the ER11 collet. Handle the CNC bits with caution and keep them away from children. https://snapmaker.com/...
-
Page 21: Getting Started
4.2.1 Install Snapmaker Luban 1. On the Snapmaker official website, click Software in the navigation bar. Then, download and install our tailor- made software Snapmaker Luban (hereafter Luban). 2. Launch Luban, select the language, machine model, and module type, and then click Complete to save the settings. - Page 22 G-code file to your machine via Wi-Fi. You can also click and enter the IP address of your machine to manually connect it with Luban. To check the IP address, tap Settings > About Machine on the Touchscreen. https://snapmaker.com/...
- Page 23 Luban. Determine where the carving will take place by setting the work origin. The work origin corresponds to the (0, 0) For more detailed information, refer to our online User Manual in Snapmaker Wiki (https://wiki. coordinate origin in the software.
- Page 24 Z axis by tapping the Z- or Z+ button to adjust the height of the CNC bit. If you can feel slight resistance when pulling out the calibration card and wrinkle the card when you push it forward, then the work origin of the Z axis is properly set. 0.1 mm https://snapmaker.com/...
- Page 25 Do NOT rinse the CNC Module with water, and it is also not recommended to wipe the module To change the settings with alcohol. during machining, tap https://snapmaker.com/...
-
Page 26: Maintenance
3. Squeeze out the A glue and B glue in a 1:1 proportion; Share! Share your finished work in our Facebook group and our forum. Do NOT mistakenly screw the lid of the A glue on the B glue. https://snapmaker.com/... - Page 27 The cotton swab is a single-use tool. If there is still dust remaining on the dust screen after wait for at least 24 hours before reuse to ensure that the mixed glue is cured. you wipe it once, take a new cotton swab and repeat Step 3 to clean it again. https://snapmaker.com/...
-
Page 28: Resources
Resources You can learn more about the usage, maintenance, and troubleshooting of your printer in Snapmaker Wiki: https://wiki.snapmaker.com We are here for you whenever you need support: https://support.snapmaker.com For any sales inquiries: sales@snapmaker.com For product purchases: https://shop.snapmaker.com Share anything you want with other Snapmaker users in our forum:...
Need help?
Do you have a question about the Artisan and is the answer not in the manual?
Questions and answers