Advertisement
Quick Links
Advertisement

Related Manuals for Snapmaker Ray


Summary of Contents for Snapmaker Ray
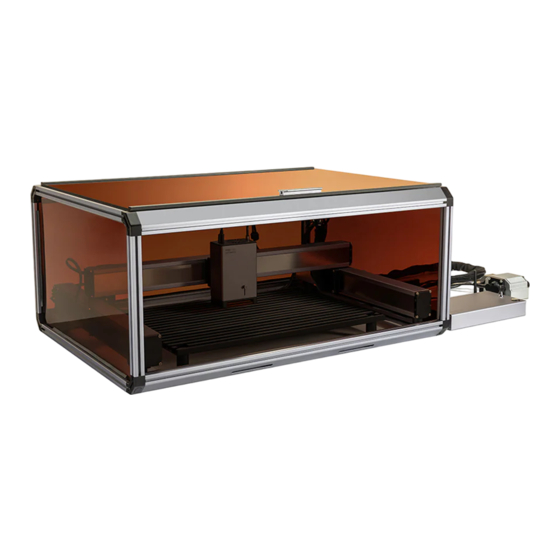
- Page 1 | Ray ASSEMBLY GUIDE MAKE SOMETHING WONDERFUL...
-
Page 2: Table Of Contents
Installing the Air Assist Pump Initial Setup Note: If you have purchased the Ray bundle with the 20W/40W Laser Module and Enclosure, please assemble in the above order. If you have purchased other bundles, skip the steps that include items you do not have. -
Page 3: Before You Start
BEFORE START Quick Start Guide |... - Page 4 Before You Start 1.1 Parts List 1.1.1 Parts List of the Machine Body...
- Page 5 The Laser Module and the Air Assist Pump are not included if you purchase the Ray Machine Body separately. Quick Start Guide |...
- Page 6 Before You Start 1.1.2 Parts List of the Enclosure...
- Page 7 Quick Start Guide |...
- Page 8 Exhaust Venting Enclosure Air Purifier The Snapmaker Enclosure helps An air purifier should be used prevent the risk of laser leakage d e p e n d i n g o n t h e t y p e a n d...
- Page 9 1.3 Space Requirements Quick Start Guide |...
- Page 10 Before You Start 1.4 Tips and Notes for Assembly It is recommended that at least two people lift the machine and the Enclosure. Collect and sort the cables in time lest anyone should trip over them. Do NOT press the steel strip. To install multiple screws in one step: 1.
- Page 11 1.5 Used Symbols Ignoring this type of message might result in malfunction or WARNING damage of the product and injuries to users. CAUTION Details you should be aware of throughout the process. Provides supplementary information for a better EXPLANATION understanding of the instruction. Tips offer you convenient operations and additional options.
-
Page 12: Assembling The Machine
Assembling the Machine Assembling the Machine... - Page 13 Assembling the Machine Quick Start Guide |...
- Page 14 Assembling the Machine 01 Attach the foot holder to the cylindrical foot. Cylindrical Foot × 4 Foot Holder × 4...
- Page 15 Assembling the Machine 02 Attach the cylindrical foot to the foot connector. Foot Connector × 4 Quick Start Guide |...
- Page 16 Assembling the Machine 03 Identify one Linear Module labeled with "Y" on the cable connector. It will be the left Y axis. Y-axis Linear Module × 1 Take care to avoid injury from sharp edges of the steel strip. Do not press the steel strip.
- Page 17 Assembling the Machine 04 Attach two foot components to the left Y axis. Ensure that the foot connector is aligned with the linear module. H3.0 Hex Key × 1 M5 × 12 Screw × 4 Quick Start Guide |...
- Page 18 Assembling the Machine 05 Identify one Linear Module labeled with "Y" on the cable connector. It will be the right Y axis. Y-axis Linear Module × 1 Take care to avoid injury from sharp edges of the steel strip. Do not press the steel strip.
- Page 19 Assembling the Machine 06 Attach two foot components to the right Y axis. Ensure that the foot connector is aligned with the linear module. M5 × 12 Screw × 4 Quick Start Guide |...
- Page 20 Assembling the Machine 07 Insert the dowels of the left linear module connector into the dowel holes of the left Y-axis slider. Left Linear Module Connector × 1...
- Page 21 Assembling the Machine 08 Attach the left linear module connector to the left Y axis. M5 × 12 Screw × 4 Quick Start Guide |...
- Page 22 Assembling the Machine 09 Insert the dowels of the right linear module connector into the dowel holes of the right Y-axis slider. Right Linear Module Connector × 1...
- Page 23 Assembling the Machine 10 Attach the right linear module connector to the right Y axis. M5 × 12 Screw × 4 Quick Start Guide |...
- Page 24 Assembling the Machine 11 Move the linear module connectors to their lowest reachable points. Take care to avoid injury from sharp edges of the steel strip. Do not press the steel strip.
- Page 25 Assembling the Machine 12 The Linear Module labeled with "X" on the cable connector will be the X axis. Insert the dowels of the left linear module connector into the dowel holes of the X axis. X-axis Linear Module × 1 Quick Start Guide |...
- Page 26 Assembling the Machine 13 Attach the X axis to the left linear module connector. The screws installed in this step should not be fully tightened until Step 17. M5 × 12 Screw × 4...
- Page 27 Assembling the Machine 14 Insert the dowels of the right linear module connector into the dowel holes of the X axis. Quick Start Guide |...
- Page 28 Assembling the Machine 15 Attach the X axis to the right linear module connector. The screws installed in this step should not be fully tightened until Step 17. M5 × 12 Screw × 4...
- Page 29 16 Assembling the Machine Move the X axis to its lowest possible position, adjust the Y-axis position to ensure that the Y axes are level with each other. Quick Start Guide |...
- Page 30 Assembling the Machine 17 Tighten the screws on the linear module connectors.
- Page 31 Assembling the Machine 18 Attach the cable clips to the X axis. M5 × 12 Screw × 2 Cable Clip × 2 Quick Start Guide |...
- Page 32 Assembling the Machine 19 Attach the cable clips to the left Y axis. M5 × 12 Screw × 3 Cable Clip ×3...
- Page 33 Assembling the Machine 20 Fix the left Y-axis cable to the cable clips on the left Y axis. Quick Start Guide |...
- Page 34 Assembling the Machine 21 Attach the cable clips to the right Y axis. M5 × 12 Screw × 7 Cable Clip ×7...
- Page 35 Assembling the Machine 22 Fix the right Y-axis cable to the cable clips on the right Y axis. Quick Start Guide |...
- Page 36 Assembling the Machine 23 Attach the toolhead bracket to the X axis. Toolhead Bracket × 1 M5 × 16 Flat Head Screw × 4...
- Page 37 Assembling the Machine 24 Loosen the handle of the toolhead bracket, and slide the toolhead into the bracket. Laser Module × 1 Quick Start Guide |...
- Page 38 Assembling the Machine 25 Adjust the height of the toolhead vertically until the bottom of the slider is level with the bottom of the bracket. Then, tighten the handle of the bracket. The purpose of adjusting the height of the toolhead is to ensure that it does not interfere with the subsequent placement of the laser engraving and cutting platform.
- Page 39 Assembling the Machine 26 Insert the toolhead cable into the toolhead. Toolhead Cable × 1 Make sure the connector is in the right orientation. Quick Start Guide |...
- Page 40 Assembling the Machine 27 Fix the toolhead cable with the cable clips on the X axis.
- Page 41 Assembling the Machine 28 Fix the toolhead cable with the cable clips on the right Y axis. Quick Start Guide |...
- Page 42 Assembling the Machine 29 Fix the X-axis cable with the cable clips on the right Y axis.
- Page 43 Assembling the Machine 30 Attach the M5 air tube connector to the toolhead. M5 Air Tube Connector × 1 Quick Start Guide |...
- Page 44 Assembling the Machine 31 Insert the air tube into the M5 air tube connector. Air Tube × 1 To pull out the air tube, firmly press the round c l a m p o f t h e a i r t u b e connector while pulling.
- Page 45 Assembling the Machine 32 Fix the toolhead cable and the air tube with cable ties, as illustrated. Cable Tie × 3 You can cut a longer cable tie into multiple shorter cable ties for use. Quick Start Guide |...
- Page 46 Assembling the Machine 33 Fix the toolhead cable, the X-axis cable, and the air tube with cable ties, as illustrated. Cable Tie × 5...
- Page 47 Assembling the Machine 34 Screw the Wi-Fi antenna into the integrated controller, then rotate the antenna so that it is facing upwards. Integrated Controller × 1 Wi-Fi Antenna × 1 Quick Start Guide |...
- Page 48 Assembling the Machine 35 Insert the microSD card into the integrated controller. microSD Card × 1...
- Page 49 Assembling the Machine 36 Attach the foot to the cylindrical foot. Cylindrical Foot × 4 Foot × 4 Quick Start Guide |...
- Page 50 Attach the cylindrical foot to the laser engraving and cutting platform. Laser Engraving and Cutting Platform × 1 For instructions on how to place the platform, refer to section 3.2 Placing the laser engraving and cutting platform, in the online Quick Start Guide at: https://wiki.snapmaker.com/en/snapmaker_ray/manual/quick_start_guide...
- Page 51 Quick Start Guide |...
- Page 52 Assembling the Enclosure...
-
Page 53: Assembling The Enclosure
Assembling the Enclosure Assembling the Enclosure Quick Start Guide |... - Page 54 Assembling the Enclosure 01 Identify two short beams (without any LED strips) and attach four profile connectors to both ends of the beams. Screw Number Screwdriver M5 × 12 H3.0 Profiles rank by length: long beam > short beam > column. Make sure the alignment tabs of the profile connectors are inside the profile grooves.
- Page 55 Assembling the Enclosure 02 Attach the four columns to the profile connectors. Screw Number Screwdriver M5 × 12 H3.0 Quick Start Guide |...
- Page 56 Assembling the Enclosure 03 Identify the long beam-3 (with the Enclosure converter) and attach it to the profile connectors. Screw Number Screwdriver M5 × 30 H3.0 Make sure the inside of all profile connectors faces inward.
- Page 57 Assembling the Enclosure 04 Identify the long beam-1 (with the air inlet) and attach it to the profile connectors. Screw Number Screwdriver M5 × 30 H3.0 Quick Start Guide |...
- Page 58 Assembling the Enclosure 05 Insert one of the front/back panels, the left side panel, and the right side panel into the frame. Make sure the opening for the exhaust fan is positioned near the back panel with the snap bushing opening located beneath. Make sure the edges of all panels are inserted into the grooves of the corresponding profiles.
- Page 59 Assembling the Enclosure 06 Identify two short beams (with LED strips) and attach four profile connectors to both ends of the beams. Screw Number Screwdriver M5 × 12 H3.0 Quick Start Guide |...
- Page 60 Assembling the Enclosure 07 Attach the short beams (with LED strips) installed with the profile connectors to the columns. Screw Number Screwdriver M5 × 12 H3.0 Make sure the inside of all profile connectors faces inward.
- Page 61 Assembling the Enclosure 08 Identify the long beam-4 (with the hinges) and attach it to the profile connectors. Screw Number Screwdriver M5 × 30 H3.0 Make sure the screw holes of the hinges on the long beam-4 face upward. Quick Start Guide |...
- Page 62 Assembling the Enclosure 09 Insert the LED strip cord into the socket of the left LED strip and the 2-pin socket on the left side of the Enclosure converter, and tuck the cord into the gap between the left-rear column and the left side panel.
- Page 63 Assembling the Enclosure 10 Insert the eight sealing plugs into the outer side of all profile connectors. Quick Start Guide |...
- Page 64 Assembling the Enclosure 11 Rotate the frame 180° horizontally, then cut out 4 appropriately-sized sealing strips and press them respectively into the outer gaps between profiles and the back panel. Make sure to install the sealing strips correctly.
- Page 65 Assembling the Enclosure 12 Attach the snap bushing to the right side panel. Quick Start Guide |...
- Page 66 Assembling the Enclosure 13 Attach the exhaust fan guard, the exhaust fan, and the hose connector to the right side panel. Screw Number Screwdriver M4 × 40 & Wing Nut H2.5...
- Page 67 Assembling the Enclosure 14 Insert the exhaust fan cord into the middle socket on the left side of the Enclosure converter, and secure it with the cable clip. Quick Start Guide |...
- Page 68 Assembling the Enclosure 15 Put the hose into the hose clamp and secure the hose to the hose connector.
- Page 69 Assembling the Enclosure 16 Insert the Enclosure cable into the right side of the Enclosure converter and thread the cable through the snap bushing from the inside out. Quick Start Guide |...
- Page 70 Assembling the Enclosure 17 Take out the hall switch cord and insert it into the 4-pin socket on the left side of the Enclosure converter. Cords rank by length: hall switch cord > LED strip cord.
- Page 71 Assembling the Enclosure 18 Insert the hall switch cord into the gap between the left-front column and the left-bottom short beam and the panels, then secure it with the cable clip. Quick Start Guide |...
- Page 72 Assembling the Enclosure 19 Move the X axis to the indicated position to prevent collision between the toolhead and other parts of the machine during the process of moving the machine into the Enclosure. Take care to avoid injury from sharp edges of the steel strip. Do not press the steel strip.
- Page 73 Assembling the Enclosure 20 Move the machine into the Enclosure. Make sure the machine does not collide with the Enclosure while moving. It is recommended that at least two people operate together. Quick Start Guide |...
- Page 74 Assembling the Enclosure 21 Thread the toolhead cable, the air tube, and the three linear module cables through the snap bushing from the inside out.
- Page 75 Assembling the Enclosure 22 Move the X axis to its maximum forward position, then adjust the position of the Y axes to ensure that the Y axes are aligned with each other. The axes of the machine are likely to slide when moved into the Enclosure.
- Page 76 Assembling the Enclosure 23 Insert the last panel into the frame as the front panel.
- Page 77 Assembling the Enclosure 24 Insert the other end of the Hall switch line into the Hall switch of the long beam-2 (with the hall switch). Quick Start Guide |...
- Page 78 Assembling the Enclosure 25 Identify the long beam-2 and attach it to the profile connectors. Then, secure the hall switch cord with the cable clip. Screw Number Screwdriver M5 × 30 H3.0 Make sure the "UP" word in the label faces upward.
- Page 79 Assembling the Enclosure 26 Connect the left and right LED strips with the LED strip cord tucked inside the groove of the long beam-2. Quick Start Guide |...
- Page 80 Assembling the Enclosure 27 Cut out 12 appropriately-sized sealing strips and press them respectively into the outer gaps between profiles and the remaining panels.
- Page 81 Assembling the Enclosure 28 Attach the Enclosure door and complete the Enclosure assembly. Screw Number Screwdriver M4 × 12 H2.5 Quick Start Guide |...
- Page 82 Assembling the Enclosure 29 Inserted the Enclosure cable into the Enclosure socket of the integrated controller, as illustrated.
- Page 83 Quick Start Guide |...
-
Page 84: Installing The Air Assist Pump
Installing the Air Assist Pump Installing the Air Assist Pump... - Page 85 Installing the Air Assist Pump Quick Start Guide |...
- Page 86 Installing the Air Assist Pump 01 Use the cable collector to organize the air tube together with other cables. Cable Collector × 1 It takes a machine with an Enclosure installed as illustrating, the step demonstrated applies to the scenario of the machine without the Enclosure.
- Page 87 Installing the Air Assist Pump 02 Attach the M8 air tube connector to the air assist pump. Air Assist Pump × 1 M8 Air Tube Connector × 1 Quick Start Guide |...
- Page 88 Installing the Air Assist Pump 03 Insert the other end of the air tube into the M8 air tube connector. Air Tube × 1 To pull out the air tube, firmly press the round c l a m p o f t h e a i r t u b e connector while pulling.
- Page 89 Installing the Air Assist Pump 04 Insert the cable of the air assist pump into the illustrated port of the integrated controller. Quick Start Guide |...
-
Page 90: Initial Setup
Initial Setup Initial Setup To complete the initial setup and the Luban's example project tailored for your first creative experience, refer to the online instructions in Wiki at: https://wiki.snapmaker.com/en/snapmaker_ray/manual/quick_start_guide.
Need help?
Do you have a question about the Ray and is the answer not in the manual?
Questions and answers