Sign In
Upload
Download
Table of Contents
Contents
Add to my manuals
Delete from my manuals
Share
URL of this page:
HTML Link:
Bookmark this page
Add
Manual will be automatically added to "My Manuals"
Print this page
×
Bookmark added
×
Added to my manuals
Manuals
Brands
JVC Manuals
Clock Radio
RA-D38B
Instruction manual
JVC RA-D38B Instruction Manual
Dab
Hide thumbs
1
2
Table Of Contents
3
4
5
6
7
8
9
10
11
12
13
14
15
16
17
18
19
20
21
22
23
24
25
26
27
28
29
30
31
32
page
of
32
Go
/
32
Contents
Table of Contents
Bookmarks
Table of Contents
Table of Contents
Safety Warnings
Unpacking
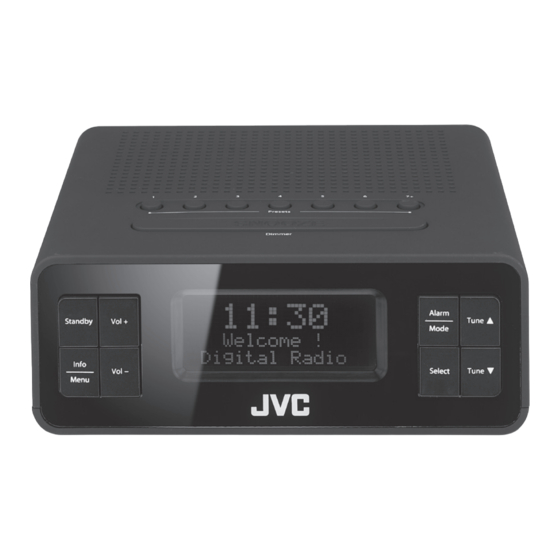
Product Overview
Front View
Rear View
Top View
Connections
Using Earphones
Turning the Radio on for the First Time
Basic Operation
Switching ON/OFF
Selecting Modes
Adjusting the Volume
Automatically Setting the Clock
System Settings
Setting a Sleep Timer
Setting the Time and Date
Alarm
Software Version
Factory Reset
Backlight
DAB Operation
Full Scan
Secondary Services
Manual Tune
Saving Preset Stations
Recalling a Preset Station
DAB Display Modes
FM Operation
Auto Scan
Manual Tune
Scan Setting
Saving Preset Stations
Recalling a Preset Station
FM Display Modes
Maintenance
Cleaning the Unit
Hints and Tips
Product Fiche and Specifications
Useful Information and Licences
Advertisement
Quick Links
1
Turning the Radio on for the First Time
2
Selecting Modes
3
Setting the Time and Date
4
Setting a Sleep Timer
5
Alarm
6
Backlight
Download this manual
Instruction Manual
DAB Clock Radio
RA-D38B / RA-D38H
Table of
Contents
Previous
Page
Next
Page
1
2
3
4
5
Advertisement
Table of Contents
Need help?
Do you have a question about the RA-D38B and is the answer not in the manual?
Ask a question
Questions and answers
Subscribe to Our Youtube Channel
Related Manuals for JVC RA-D38B
Clock Radio JVC RAP51 Notes On Usage
Battery power suuply (1 page)
Clock Radio JVC RAP51 Information
Battery backup (1 page)
Clock Radio JVC RA-D38H Instruction Manual
Dab (32 pages)
Clock Radio JVC RA-E111B Instruction Manual
(41 pages)
Clock Radio JVC RA-E211B Instruction Manual
Projection alarm clock radio (41 pages)
Clock Radio JVC RA-F221Z Instruction Manual
Clock radio with projection (47 pages)
Clock Radio JVC RA-F320B Operating Instructions Manual
Alarm clock radio (53 pages)
Clock Radio JVC RA-F324B Operating Instructions Manual
Clock radio with colour led screen (51 pages)
This manual is also suitable for:
Ra-d38h
Table of Contents
Save PDF
Print
Rename the bookmark
Delete bookmark?
Delete from my manuals?
Login
Sign In
OR
Sign in with Facebook
Sign in with Google
Upload manual
Upload from disk
Upload from URL


Need help?
Do you have a question about the RA-D38B and is the answer not in the manual?
Questions and answers