Table of Contents
Advertisement
Quick Links
BUILT-IN TWIN OVEN
MODEL: ESPERTO EBO-F7018TW(SS)
Owner's Manual
Please read this manual carefully before
operating your set.
Retain it for future reference.
Record model number and serial number
of the set.
See the label attached on the set and
quote this information to your dealer when
you require service.
For The Warranty Terms & Conditions, Please Refer To Warranty Certificate
Advertisement
Table of Contents

Related Manuals for Elba ESPERTO EBO-F7018TW(SS)


Summary of Contents for Elba ESPERTO EBO-F7018TW(SS)
- Page 1 BUILT-IN TWIN OVEN MODEL: ESPERTO EBO-F7018TW(SS) Owner’s Manual Please read this manual carefully before operating your set. Retain it for future reference. Record model number and serial number of the set. See the label attached on the set and quote this information to your dealer when you require service.
-
Page 2: Safety Instructions
INSTRUCTIONS FOR INSTALLATION AND USE Using This Manual This Owner’s Manual contains important information on safety and instructions intended to assist you in the operation and maintenance of your appliance. Please take the time to read this Owner’s Manual before using your oven and keep this book for future reference. The following symbols are used in the text of this Owner’s Manual SAFETY INSTRUCTIONS Installation of this oven must be performed only by a qualified technician. - Page 3 Never pour water into the oven when it is hot. It will damage the enamel surface. The oven door must be closed during cooking. Do not rest bake ware on the open oven door. This appliance is not intended for use by person (including children) with reduced physical, sensory or mental capabilities unless they have been given supervision or instruction concerning use of the appliance by a person responsible for their safety.
- Page 4 Oven interior Do not use coarse scouring pad or cleaning sponges. Do not use coarse scouring pads or cleaning sponges. To avoid damaging the enameled oven surfaces, use commercially available oven cleaners. Oven glass door The oven door is equipped with three sheets of glass placed against each other. The inner & middle sheets can be removed for cleaning.
-
Page 5: Installing The Oven
INSTALLING THE OVEN Electrical installation of this appliance must be performed only by a qualified electrician. Installing into a low cabinet Connecting to the mains power supply Electrical connections must be made as per the connection plate fixed to the back of the appliance by a technician who must ensure that the appliance has been connected up in accordance with fitting instructions and local regulations. -
Page 6: Parts And Features
Installing into a high cabinet Observe minimum clearance requirements. The oven should be slid into place at the proper angle of alignment. PARTS AND FEATURES Oven Racks Levels 4 and 5 are used mainly for the grill function. Please refer to the cooking guides provided throughout this manual to determine appropriate shelf levels for your dishes. -
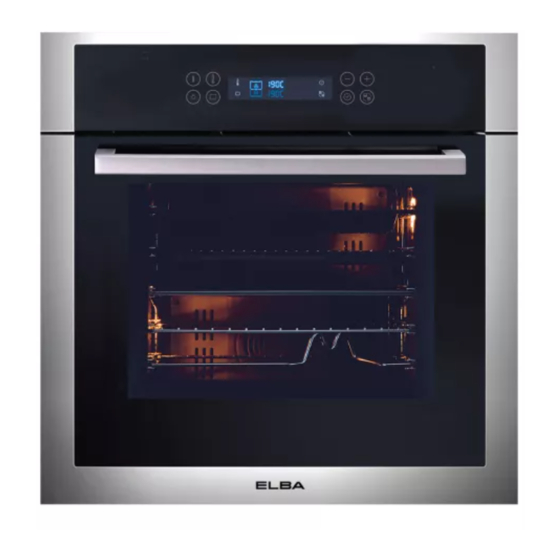
Page 7: Oven Controls
OVEN CONTROLS 1. On/Off Button 2. Function Button 3. Temperature Button 4. Window Display 5. Timer Button 6. Upper and Lower Exchange Button 7. Time / Temp/ Function Control Knob 8. Light Button Special features The oven comes equipped with the following special features. Divider modes: When the divider inserted, the appliance’s divider facility enables independent cooking in two separated partitions, enhancing energy efficiency. - Page 8 Accessories The following accessories are provided with your oven. 1. Wire grill 2. Wire roast 3. Baking tray 4. Deep pan 5. Rotisserie spit 6. Divider (used in level 3) If you hear two beeps after inserting the divider, which means you can use divider function. When you take off the divider, two beeps means this function cannot be used.
-
Page 9: Before You Begin
WARNING: To cook in the lower, upper or twin divider modes, you must insert the divider. Safety shutoff: If a cooking time is not entered, the oven will shut itself off after 2 hours. This oven’s electrical circuitry features a thermal shutoff system. If the oven heats to abnormally high temperatures, the system will shut off the power supply to the heating elements for a period of time or oven for all along. -
Page 10: Oven Functions
OVEN FUNCTIONS The features of this oven include the following functions: CONVENTIONAL Suggested temperature: 200 °C The conventional function is ideal for baking and roasting foods arranged on one rack. Both the top and bottom heating elements operate to maintain the oven temperature. Before starting to cook you should preheat the oven. -
Page 11: Top Heat + Convection
TOP HEAT + CONVECTION Suggested temperature: 190 °C This setting should be used when cooking cakes placed on one shelf and biscuits that must be well browned or crispy on the bottom. It is also good for pizzas, quiches lorraine and cheesecakes. The top heating element is in operation and the fan operates to constantly circulate the hot air. -
Page 12: Bottom Heat + Convection
GRILL Suggested temperature: 240 °C The grill function grills large quantities of flat foods, such as steaks, schnitzels and fish. It is also suitable for toasting. Both the top outside element and the top inside element are on in this mode. - Page 13 Meat balls in sauce (250-500g) 180-200 A pan on a Wire grill 25-35 Use a frying pan Puff pastry fans (500-1000g) Baking tray 15-23 Brush egg yolk Cannelloni in sauce (250-500g) A pan on a Wire grill 22-30 Use a pan Yeast dough pies with filling 180-200 Baking tray...
-
Page 14: Oven Use
PROBE Meats Minutes Oven Temp Internal Temp. 165℃ 60℃ 20-24 Rib, Boneless Rib, Rare Top Sirloin 165℃ 70℃ 24-28 Medium Well (1360 to 2270g) 165℃ 75℃ 28-32 Beef 165℃ 60℃ Beef Tenderloin, Rare Top Sirloin 10-14 165℃ 70℃ 14-18 Medium Well Bone-in Boneless 165℃... - Page 15 If you want to change the partition, Touch the Function Button and hold for about 3 seconds. Then touch the Function Button to select the desired partition. Insert Divider Marking Oven Function Usage Information Divider 1. Convection Upper This mode saves energy and time when 2.
-
Page 16: Twin Mode
TWIN MODE The upper and lower modes operate at the same time. It is possible to set which mode activates first. When one of the dishes has finished cooking in twin mode and you would like to change the cooking time or temperature of the other partition, touch the Function Button to select the mode (upper or lower) that you would like to continue operating, then touch the Time Button and the Temperature Button to select the cooking time or temperature. -
Page 17: Setting The Oven Temperature
SETTING THE OVEN TEMPERATURE In Single, Upper and Lower Modes 1. Touch the Temperature Button and hold for about 3 seconds, the temperature will flash. 2. Touch the Time / Temp/ Function Adjust Button “+” or “-” to adjust the temperature in increments of 5 °C. -
Page 18: Cook Time
In Twin Mode End times for the upper and lower modes can be selected using the Time Button, the upper and lower exchange button and the Time/ Temp/ Function Adjust Button. the Time Button several times until the end time icon and the three digits on the Touch display begin to flash (upper or lower). -
Page 19: Delayed Start
DELAYED START If the end time is entered after the cook time has already been set, the cook time and the end time are calculated and if necessary the oven sets a delayed start point. 1. Touch the Time Button Example: Current time is 03:30 and the desired cook time is 5 hours. -
Page 20: Cleaning And Maintenance
CLEANING AND MAINTENANCE Cleaning The Oven Door For normal use, the oven door should not be removed but if removal is necessary, for example, for cleaning, follow these instructions. Removing The Door 1. Open the door to full extend as Figure 1. 2. -
Page 21: Changing The Lamp
3. Gently pull out the inner and middle panes of glass as Figure 4. Clean the sheets with warm water or washing-up liquid and polish dry with a soft clean cloth. Assembling The Door Reassemble the door by following the above procedures backwards. CHANGING THE LAMP Danger of electric shock! Before replacing the oven light bulb, take the following steps:... -
Page 22: Troubleshooting
TROUBLESHOOTING What should I do if the oven doesn’t heat up? Check to see if one of the following actions resolves the issue: ● The oven may not be switched on. Switch the oven on. ● The clock may not be set. Set the clock (see section “Setting the clock”). ●... -
Page 23: Technical Data
TECHNICAL DATA MODEL ELBA ESPERTO EBO-F7018TW(SS) RATED POWER 220-240V ~ 50/60Hz VOLUME (TOTAL CAPACITY) 70 L MAX TEMPERATURE 270ºC OUTPUT POWER 4,190W to 4,985W NETT WEIGHT 42.7 KG GROSS WEIGHT 46.2 KG PRODUCT DIMENSION (WxHxD) 594 x 594 x 569 mm...
Need help?
Do you have a question about the ESPERTO EBO-F7018TW(SS) and is the answer not in the manual?
Questions and answers