Table of Contents
Advertisement
Quick Links
BUILT-IN OVEN
MODEL: EBO-G7010TFT(SS)
Owner's Manual
Please read this manual carefully before
operating your set.
Retain it for future reference.
Record model number and serial number
of the set.
See the label attached on the set and
quote this information to your dealer when
you require service.
For The Warranty Terms & Conditions, Please Refer To Warranty Certificate
Advertisement
Table of Contents

Related Manuals for Elba EBO-G7010TFT


Summary of Contents for Elba EBO-G7010TFT
- Page 1 BUILT-IN OVEN MODEL: EBO-G7010TFT(SS) Owner’s Manual Please read this manual carefully before operating your set. Retain it for future reference. Record model number and serial number of the set. See the label attached on the set and quote this information to your dealer when you require service.
-
Page 2: Table Of Contents
CONTENTS SAFETY PRECAUTIONS …………..…………………………………………………………………………………………….1 ATTENTIONS …………………………………………………………………………………………………………………………2 INSTALLATION …………………..…………………………………………………………………………………………….2 BEFORE THE INSTALLATION………………………………………………………………………………………………2 INSTALLATION OF BUILT-IN OVEN…………………………………………………………………………………………3 ACCESSORIES………………………………………………………………………………………………………………………3 CONNECTION OF THE APPLIANCE …………………………………………………………………………………………5 FITTING ON A POWER SUPPLY CABLE……………………………………………………………………………………5 CONNECTING THE SUPPLY CABLE TO THE MAINS…………………………………………………………………5 HOW TO USE YOUR OVEN ……………………………………………………………………………………………………….5 PRODUCT DESCRIPTIONS ……………………………………………………………………………………………………….6 OVEN CONTROL PANEL……………………………………………………………………………………………………………..6... -
Page 3: Safety Precautions
We recommend that you read the instructions in this owner’s manual carefully before using it for the best performance and to extend the lifespan of your appliance, as it will provide you with all the instructions you require to ensure its safe installation, use and maintenance. 1. -
Page 4: Attentions
In order to avoid electric shock, please make sure the oven has been shut off before carrying out the maintenance. Use only original accessories provided by ELBA or its authorized service center. Do not use wet parts of body to touch the oven. -
Page 5: Installation Of Built-In Oven
3.2 Installation of Built-in Oven The material of the cabinet should be insulated, and the clearance between the edge of the cabinet and the oven should be over 100mm for ventilation. The panels of the adjacent cabinets must be made of heat-resistant material which can withstand temperatures of up to 100℃. In compliance with current safety standards, contact with the electrical parts of the oven must not be possible once it has been installed. - Page 6 Shelves Positioning To ensure the appliance to operate safely, correct placement of the shelves on the side rails is required. This is to ensure that the food will not slide out during removal of the shelves. Rotisserie Usage The rotisserie works in combination with the grill element to heat the food equally.
-
Page 7: Connection Of The Appliance
4. CONNECTION OF THE APPLIANCE 4.1 Fitting on a Power Supply Cable The appliance has to be equipped with a three-core power supply cable which is designed to operate with an alternating current. The AC power supply should be supplied with 220-240V, 50/60Hz and a minimum 15A distribution circuit fuse or at least 15A distribution circuit breaker. -
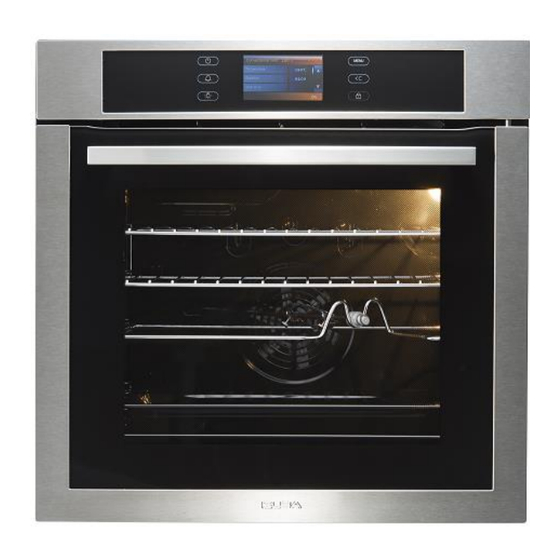
Page 8: Product Descriptions
Place the baking tray provided at the bottom shelf of the oven to prevent any sauce and/or grease from dripping onto the bottom of the oven only when grilling food or when using the rotisserie. For all other types of baking, never use the bottom shelf and never place anything on the bottom of the oven when it is in operation because this could damage the enamel. -
Page 9: Display Descriptions
6.2 Display Descriptions Number Descriptions Menu Current Time Program Selection Scroll Up Scroll Down Press to turn on appliance. The main menu appears in the display with a list of options. Select the program by touching the screen. If the desire program is not appear in display screen, please scroll up or down to search for the programs. -
Page 10: Symbol
6.4 Symbol The following symbols will be appear in the display screen. Symbol Descriptions You may scroll up or down by touching button. A tick will appear behind the option which is currently selected. This indicates additional information is available. This information window will be turn off by selecting OK button. -
Page 11: Programs And Functions
7. PROGRAMS AND FUNCTIONS 7.1 Selecting the Cooking Programs To select the cooking programs, turn the knob to desire program. The detail programs as below: Symbol Function Descriptions Defrost: The circulation of air at room temperature enables quicker thawing of frozen food (without the use of any heat). -
Page 12: Setting For The First Time
7.2 Setting for the first time To enter the basic settings for the first time use, in the main menu, scroll down until “Setting” menu. The list of options will show as follow: Date Time Clock Format ... - Page 13 BUZZER TONE Click buzzer tone setting and select the buzzer toner volume by sliding the screen. Slide left to turn the volume to lower and slide right to turn the volume to higher. Click “OK” to save and return back to setting interface. TEMPERATURE UNITS Click temperature units setting and select the temperature units by touching the screen.
-
Page 14: Oven Functions
7.3 Oven Functions The features of this oven include the following functions: CONVECTIONAL HEAT Suggested temperature: 200 °C The convectional function is ideal for baking and roasting foods arranged on one rack. Both the top and bottom heating elements operate to maintain the oven temperature. Before starting to cook you should preheat the oven. - Page 15 DEFROST Suggested temperature: - The defrost function is perfect for gently defrosting frozen meat, poultry, bread, cream cakes and much more. Food Item Shelf Level Temperature (ºC) Preheating Time (Mins) Cooking Time (Mins) Frozen Food TOP HEAT Suggested temperature: 220 °C This top heat function should be used when cooking cakes placed on one shelf and biscuits that must be well browned.
- Page 16 BAKE Suggested temperature: 180 °C The rear radiant element and fan will operate. The temperature range can be set within the range of 50-250ºC. This program is used to circulate a hot air around the inner cavity of the oven. Suitable for cooking small sized cakes or puff.
- Page 17 MULTI COOKING Suggested temperature: 190 °C The top grilling element switches on with the combination of the fan and bottom heating elements provides more even heat distribution with multi cooking item. This program ideally for cook food with several racks. Food such as meat is place on the bottom rack and delicate food is place on the top rack.
-
Page 18: Oven Operation
7.4 Oven Operation Below is the quick overview for the oven operation. 1. Press to turn on appliance. The main menu appears in the display with a list of options. Select the program by touching the screen. If the desire program is not appear in display screen, please scroll up or down to search for the programs. - Page 19 04:15 (12Hours Clock format) and you duration has been set for 2 hours. The finish time automatically will become 06:15. If the cooking time is shorter, you may key in the finish timer by using the keyboard input. The oven will end operate on the set timer). Click “OK”...
-
Page 20: Changing The Running Program
Below is the meat probe outlet and probe socket location If the meat probe has been removed while the program is running, the screen will display the message as below. Press “OK” to return to the main menu. If the meat probe has been insert and program is running, the screen will display the message as below. -
Page 21: Cancel The Running Program
7.6 Cancel the running program In the program is running, you may touch button to return to the function interface. The display will show the message as below. Touch “YES” to back on the function interface and will terminate the running program. If you wish to continue to running program, touch “NO” to continue. -
Page 24: Cleaning And Maintenance
8. CLEANING AND MAINTENANCE Before cleaning or performing maintenance on your oven, disconnect the oven from the power supply. To extend the lifespan of your oven, it must be cleaned frequently. The enamel or stainless steel parts should be cleaned with lukewarm water without using any abrasive powders or corrosive substances which could damage the surface. -
Page 25: Technical Specification
5. Clean the glass and other components with an appropriate cleaner. Dry thoroughly, and place on a soft surface. 6. Reassemble the door by following the above procedures backwards. 9. TECHNICAL SPECIFICATION Model EBO-G7010TFT(SS) Capacity 220 – 240V Voltage Frequency 50/60Hz 2,850 –...
Need help?
Do you have a question about the EBO-G7010TFT and is the answer not in the manual?
Questions and answers