Owon SDS6062 Quick Manual
Sds series
smart digital storage c
Hide thumbs
Also See for SDS6062:
- User manual (94 pages) ,
- Service manual (47 pages) ,
- User manual (110 pages)

Related Manuals for Owon SDS6062


Summary of Contents for Owon SDS6062
- Page 1 SDS Series Smart Digital Storage Oscilloscopes Quick Guide Test Equipment Depot - 800.517.8431 - 99 Washington Street Melrose, MA 02176 TestEquipmentDepot.com...
- Page 2 The information in this manual was correct at the time of printing. However, OWON will continue to improve products and reserves the rights to changes specification at any time without notice.
- Page 3 Test Equipment Depot - 800.517.8431 - 99 Washington Street Melrose, MA 02176 TestEquipmentDepot.com...
-
Page 4: Table Of Contents
Table of Contents 1. General Safety Requirements ..................1 2. Safety Terms and Symbols ....................2 3. Quick Start ........................4 Introduction to the Structure of the Oscilloscope ..............4 Front Panel ............................... 4 Left Side Panel ............................5 Right Side Panel ............................5 Rear Panel .............................. -
Page 5: General Safety Requirements
1.General Safety Requirements 1. General Safety Requirements Before any operations, please read the following safety precautions to avoid any possible bodily injury and prevent this product or any other products connected from damage. In order to avoid any contingent danger, this product is only used within the range specified. -
Page 6: Safety Terms And Symbols
2.Safety Terms and Symbols 2. Safety Terms and Symbols Safety Terms Terms in this manual. The following terms may appear in this manual: Warning: Warning indicates the conditions or practices that could result in injury or loss of life. Caution: Caution indicates the conditions or practices that could result in damage to this product or other property. - Page 7 2.Safety Terms and Symbols Warning The channels should adopt common basis during measuring. To prevent short circuits, the 2 probe ground must not be connected to 2 different non-isolated DC level. The diagram of the oscilloscope ground wire connection: Probe Oscilloscope Electrical Outlet Signal Input...
-
Page 8: Quick Start
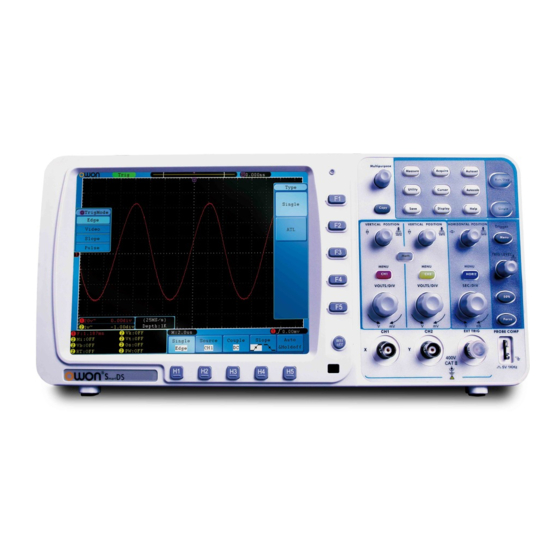
3.Quick Start 3. Quick Start Introduction to the Structure of the Oscilloscope When you get a new-type oscilloscope, you should get acquainted with its front panel at first and the SDS series digital storage oscilloscope is no exception. This chapter makes a simple description of the operation and function of the front panel of the SDS series oscilloscope, enabling you to be familiar with the use of the SDS series oscilloscope in the shortest time. -
Page 9: Left Side Panel
3.Quick Start (if there is battery inside DSO) Light off: Only powered by battery without connecting AC Power 4. Control (key and knob) area 5. Probe Compensation: Measurement signal (5V/1KHz) output. (The signal parameters could be adjusted in SDS7072(V)) 6. EXT Trigger Input 7. -
Page 10: Rear Panel
3.Quick Start the oscilloscope regarded as "host device". For example: upgrading software by USB flash disk needs to use this port. 2. USB Device port: It is used to transfer data when external USB equipment connects to the oscilloscope regarded as "slave device". For example: to use this port when connect PC to the oscilloscope by USB. -
Page 11: Control (Key And Knob) Area
3.Quick Start Control (key and knob) Area Figure 3-5 Keys Overview 1. Menu option setting: H1 - H5 2. Menu option setting: F1 - F5 3. Menu off:turn off the menu ○ 4. M knob(Multipurpose knob): when a M symbol appears in the menu, it indicates you can turn the M knob to select the menu or set the value. -
Page 12: User Interface Introduction
Test Equipment Depot - 800.517.8431 - 99 Washington Street Melrose, MA 02176 TestEquipmentDepot.com 3.Quick Start User Interface Introduction Figure 3-6 Illustrative Drawing of Display Interfaces 1. Waveform Display Area. 2. The state of trigger, including: Auto: Automatic mode and acquire waveform without triggering. Trig: Trigger detected and acquire waveform. - Page 13 3.Quick Start 11. The waveform of CH1. 12. The positions of two purple dotted line cursors measurements. 13. The yellow pointer shows the trigger level position for CH2. 14. The waveform of CH2. 15. The frequency of the trigger signal of CH1. 16.
-
Page 14: How To Implement The General Inspection
Test Equipment Depot - 800.517.8431 - 99 Washington Street Melrose, MA 02176 TestEquipmentDepot.com 3.Quick Start How to Implement the General Inspection After you get a new SDS series oscilloscope, it is recommended that you should make a check on the instrument according to the following steps: 1. -
Page 15: How To Implement The Probe Compensation
3.Quick Start Connect the probe tip and the ground clamp to the connector of the probe compensator. 3. Press the "Autoset" Button. The square wave of 1 KHz frequency and 5V peak-peak value will be displayed in several seconds (see Figure 3-7). Figure 3-7 Auto set Check CH2 by repeating Step 2 and Step 3. -
Page 16: How To Set The Probe Attenuation Coefficient
3.Quick Start Overcompensated Compensated correctly Under compensated Figure 3-8 Displayed Waveforms of the Probe Compensation Repeat the steps mentioned if needed. Figure 3-9 Adjust Probe How to Set the Probe Attenuation Coefficient The probe has several attenuation coefficients, which will influence the vertical scale factor of the oscilloscope. -
Page 17: How To Use The Probe Safely
3.Quick Start Figure 3-10 Attenuation Switch Caution: When the attenuation switch is set to 1X, the probe will limit the bandwidth of the oscilloscope in 5MHz. To use the full bandwidth of the oscilloscope, the switch must be set to 10X. How to Use the Probe Safely The safety guard ring around the probe body protects your finger against any electric shock, shown as Figure 3-11. -
Page 18: Introduction To The Vertical System
3.Quick Start menu; turn the M knob to choose Adjust. Press H2 button to choose the option "Self Cal"; run the program after everything is ready. Introduction to the Vertical System As shown in Figure 3-12, there are a few of buttons and knobs in VERTICAL CONTROLS. -
Page 19: Introduction To The Horizontal System
3.Quick Start Turn the vertical "VOLTS/DIV" knob and change the "Vertical Scale Factor (Voltage Division)", it can be found that the scale factor of the channel corresponding to the status bar has been changed accordingly. Press buttons of "CH1 MENU", "CH2 MENU" and "Math", the operation menu, symbols, waveforms and scale factor status information of the corresponding channel will be displayed in the screen. -
Page 20: Introduction To The Trigger System
3.Quick Start Introduction to the Trigger System As shown in Figure 3-14, there are one knob and three buttons make up "TRIGGER CONTROLS". The following practices will direct you to be familiar with the setting of the trigger system gradually. Figure 3-14 Trigger Control Zone Press the "Trigger Menu"... -
Page 21: How To Use Autoscale
3.Quick Start The measured values can be detected on each channel simultaneously. Only if the waveform channel is in the ON state, the measurement can be performed. The automatic measurement cannot be performed in the following situation: 1) On the saved waveform. 2) On the mathematical waveform. -
Page 22: Communication With Pc
4.Communication with PC 4. Communication with PC SDS series digital storage oscilloscope support communications with a PC through USB, LAN or COM port. You can use the Oscilloscope communication software to store, analyze, display the data and remote control. Here is how to connect with PC. First, install the Oscilloscope communication software on the supplied CD. -
Page 23: Using Lan Port
Here we set the IP address to 192.168.1.71. Figure 4-2 Set the network parameters of the computer (3) Set the network parameters of the OWON Oscilloscope Software. Run the software on the computer; choose the "Ports-settings" of the "Communications" menu item. -
Page 24: Connect Through A Router
4.Communication with PC Figure 4-3 Set the network parameters of the OWON Oscilloscope Software (4) Set the network parameters of the oscilloscope. In the oscilloscope, press the Utility button and press H1 button, turn the M knob to select the LAN Set; press the H2 button, the set menu is displayed on the right. - Page 25 192.168.1.1. Figure 4-5 Set the network parameters of the computer (3) Set the network parameters of the OWON Oscilloscope Software. Run the software on the computer; choose the "Ports-settings" of the "Communications" menu item. Set "Connect using" to LAN. About the IP, the first three bytes is same as the IP in the step (2), the last byte should be different.
-
Page 26: Using Com Port
4.Communication with PC (4) Set the network parameters of the oscilloscope. In the oscilloscope, press the Utility button and press H1 button, turn the M knob to select the LAN Set; press the H2 button, the set menu is displayed on the right. Set the IP and the Port to the same value as the "Ports-settings"... -
Page 27: Performance Parameters
Note: "V" for VGA interface (optional), SDS8302 and SDS9302 including VGA interface as default. Model Bandwidth Sample rate Rise time Horizontal Scale(S/div) ≤ 5.8 ns SDS6062(V) 60 MHz 500 MS/s 5 ns/div – 100 s/div, step by1-2-5 ≤ 5.0 ns SDS7072(V) 70 MHz... -
Page 28: Appendix
6.Appendix 6. Appendix Appendix A: Enclosure Standard Accessories: A pair of Passive probe: 1.2 m, 1:1 (10:1) 1x CD (PC link application software) 1x Power cord: up to the standards of the country in which it is used. ...
Need help?
Do you have a question about the SDS6062 and is the answer not in the manual?
Questions and answers