Table of Contents
Advertisement
Quick Links
Advertisement
Table of Contents

Related Manuals for Promax PROMAX-12


Summary of Contents for Promax PROMAX-12
- Page 1 PROMAX- QAM ANALYSER - 0 MI2000 -...
-
Page 2: Safety Notes
SAFETY NOTES Read the user’s manual before using the equipment, mainly "SAFETY RULES" paragraph. The symbol on the equipment means "SEE USER’S MANUAL". In this manual may also appear as a Caution or Warning symbol. WARNING AND CAUTION statements may appear in this manual to avoid injury hazard or damage to this product or other property. - Page 3 SAFETY RULES The safety could not be assured if the instructions for use are not closely followed. Use this equipment connected only to devices or systems with their common at ground potential. This equipment can be used in Over-Voltage Category I installations and Pollution Degree 2 environments.
- Page 4 Symbols related with safety: Descriptive Examples of Over-Voltage Categories Cat I Low voltage installations isolated from the mains. Cat II Portable domestic installations. Cat III Fixed domestic installations. Cat IV Industrial installations.
-
Page 5: Table Of Contents
TABLE OF CONTENTS 1 GENERAL ....................1-1 1.1 Description ..................1-1 2 SETTING UP ..................... 2-3 2.1 Package Content ................2-3 2.2 Power supply ................. 2-4 2.2.1 Battery charge ................2-4 2.2.2 Recommendations for using ............2-5 2.3 Installation and start-up ..............2-5 2.3.1 Contrast adjustment .............. - Page 6 4 CONNECTION TO A COMPUTER ..............4-53 5 CONTROL SOFTWARE PROMAX-12..............5-54 5.1 Software Installation ..............5-54 5.2 Starting the program ..............5-54 5.3 Firmware Updating ................5-55 5.4 Editing a channel plan or a channel plan group ........5-56 5.5 Datalogger ...................5-58 6 SPECIFICATIONS ..................6-59 6.1 Specifications PROMAX-12 ..............6-59...
-
Page 7: General
In addition, with the HUM function is possible to detect a modulation at low frequency that affects the carrier and produces a distinctive hum in both image and audio. As a Level Meter, the PROMAX- enables the following measurements: Canales analógicos: ►... - Page 8 The instrument is powered by means of an internal rechargeable battery. All these functions have been brought together in one instrument weighing only half a kilo. The ergonomic, sturdy design makes the PROMAX- a working tool without parallel.
-
Page 9: Setting Up
2 SETTING UP Package Content Check that your package contains the following elements: analyser. PROMAX- F/female - F/female input adapter. Mains Adapter 100-240V/50-60 Hz. Mains cable for EUROPE and other countries. Carrying bag. Rubber holster. Quick reference guide. NOTE: Keep the original packaging, since it is specially designed to protect the equipment. -
Page 10: Power Supply
The instrument has a 100-240V / 50-60 Hz mains adapter, to power the instrument or to recharge the battery. CAUTION: Before using the power adapter, make sure that the adapter is suitable for the mains voltage. Figure 1. PROMAX- connected to the power adapter. January 2015... -
Page 11: Recommendations For Using
), the battery must be recharged. When a fully discharged battery is installed, it is possible that, due to residual charges, the PROMAX- may start up. In this case, the instrument will automatically disconnect before the low battery indicator appears on the display. -
Page 12: Equipment Details
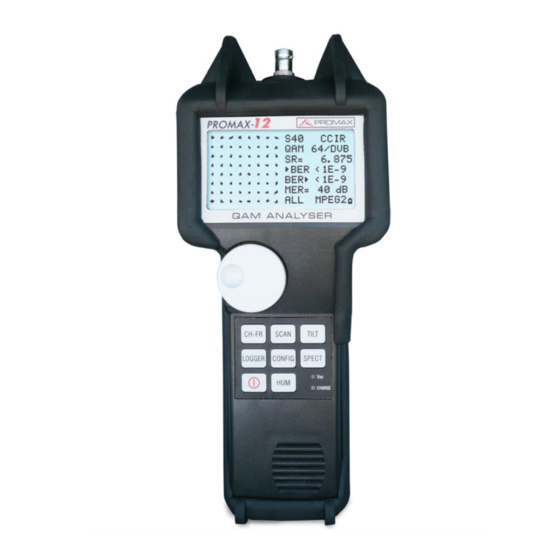
Equipment Details Front View Figure 2. January 2015... - Page 13 Keyboard Figure 3. Selects the CHANNEL - FREQUENCY operating mode. Selects the SCAN operating mode. Selects the TILT operating mode. Selects the DATALOGGER operating mode. On/Off key. Selects the SPECTRUM ANALYSER operating mode. Access to CONFIGURATION menus specific to each operating mode and to the global configuration menu of the unit.
-
Page 14: Operating Instructions
3 OPERATING INSTRUCTIONS Operating instructions and Navigation Operating Modes ► The PROMAX- has the following independent operating modes: It changes between frequency tuning and channel tuning. The operating mode measures the video carrier level, the Carrier/Noise ratio (C/N), the Video/Audio ratio (V/A) and activates audio carrier... - Page 15 The TILT operating mode shows on the display, both graphically and numerically, the level difference between any four frequencies, previously defined as pilot channels, in order to obtain information about band equalisation. This function can be applied to the forward band and to the return path, independently.
- Page 16 Navegation ► To access any operating mode, simply press the corresponding key. The parameters relative to a particular operating mode can be modified through the configuration menu associated to the mode. In order to access the configuration menu associated to a particular operating mode, simply press the .
-
Page 17: Global Configuration Menu
Global configuration menu In order to access the global configuration menu, from any operating mode (SCAN, CH-FR, SPECT, etc.), you must press the key repeatedly until you see at the top of the screen the headline “Global Config: ½”. The global configuration menu consists of two pages (attached figure shows the first one), to switch from one to the other simply press the key. - Page 18 DATE ► To enter the date select the DATE field and press the rotary selector. First change the year field, then the month and finally the day. The parameters which may be modified on the second page of the global configuration menu of the unit are as follows: Figure 7.
-
Page 19: Edit Channel Plan
SCAN and LOGGER. When a channel has been deactivated, this one will not be able to be tuned nor to be measured. This property allows to make agile the operation of the PROMAX- , because it allows to activate only those channels in which we are interested. -
Page 20: Scan Operating Mode
-2.00 to +2.00 MHz. To modify the rest of characteristics of the channel plans it is necessary to use the control software available in the PROMAX download area at the website (www.promaxelectronics.com) To exit the Edit Channel Plan function, press any other function key. - Page 21 Figure 8. SCAN mode, full span. To change the span (bandwidth represented on the screen), first select it by pressing the rotary knob until you see the "sp" shade (at the middle bottom of the screen). Then turn the rotary knob .
- Page 22 To change the tune, press again the rotary knob . The field Channel will be activated again. Turning the rotary knob will be possible to change its value. The attached figure shows a horizontal line at 45 dBµV. This line allows establishing judgements of channel level acceptance easily.
-
Page 23: Scan Mode Configuration
IMPORTANT: In the SCAN operating mode, all channels are considered as analogue. When the power of a digital channel is measured in this mode, the instrument does not carry out the integration of the power values, but it just measures at the central frequency of the digital channel. -
Page 24: Channel-Frequency Operating Mode
POWER MEASUREMENT ► It allows to define if the measurement of the power is carried out on the channel bandwidth (CHAN) indicated by the MARKER or over the full band between 5 and 1005 MHz (ΣPWR). IMPORTANT: To leave the SCAN operating mode configuration menu, just press the key of the operating mode you wish to access. - Page 25 Figure 14. Access to the measurement functions, CH-FR operation mode. January 2015 3-19...
-
Page 26: Channel Tuning
3.4.1.1 channels) If the tuned channel has been defined as analogue by means of the Edit Channel Plan function (see section Global Configuration Menu), the PROMAX- will display a screen as the one shown in the attached figure. Figure 15. V/A and C/N Level measurement. -
Page 27: Channels)
PROMAX- characteristics (level and frequency offset), press the rotary selector again. In the attached figure, the audio carrier level (AUDIO Carrier) is 64 dBµV and the frequency offset is 5.50 MHz (F). It also shows if the audio (whether Level, FM or AM) is activated (a speaker appears) or not (the speaker does not appear). - Page 28 Second order beats show up within the channel, around the video carrier, but as the relative position of the video carrier in all the channels can be different, it is difficult to determine where they are going to appear, as a consequence we would have to be made a sweep within all the channel.
- Page 29 MEASURING METHOD ► When pressing the rotary selector again, we will access to the CSO-CTB distortion products measuring screen. First of all it will appear the message REMOVE CARRIER. PRESS TO MEASURE. That is to say, once the video carrier level on which it is desired to make the measurement appears on the screen, you must press the rotary selector in order that the unit retains the carrier level and comes to calculate the CSO and CTB...
-
Page 30: Power And C/N Ratio Measurement (Dvb-C / Dvb-T / Dab) (Only For Digital Channels)
Power and C/N ratio measurement (DVB-C / DVB-T / DAB) (only 3.4.1.4 for digital channels) When the tuned channel has been defined as digital by means of the Edit Channel Plan function (see section 4.2.1 Global Configuration Menu) a screen as shown in the attached figure will appear. - Page 31 Digital channels power measurement is carried out by means of an integration method. The equipment divides the bandwidth of the channel (CHANNEL BW) in sections of 230 kHz (4 by each MHz approximately) and measures the contribution of each one to the total power of the channel. This way, a very exact measurement is obtained, specially in the case of degraded channels, because the channel flatness is had in consideration.
-
Page 32: Constellation Diagram Representation, Bit Error Rate (Ber) And Modulation Error Ratio (Mer) Measurement (Only For Digital Channels)
Figure 21. Example of digital channels spectrum. Taking as example the previous figure, if we suppose that for the channels that appear in the figure it has defined a bandwidth of 8 MHz, in the relative mode of measurement the equipment will take as value for NOISE FREQ. = 4.5 MHz. -
Page 33: Channel Tuning Configuration
Figure 22. Constellation Diagram representation and Pre-BER, Post-BER and MER measurement in a digital channel. 3.4.1.6 Channel tuning configuration In CHANNEL-FREQUENCY mode, when the instrument works in channel tuning, if you press the CONFIG key you will access the first page of the configuration menu of the parameters relating on this mode (Fig.23). - Page 34 To access the second page of the GLOBAL CONFIGURATION screen, press again the CONFIG key (Fig. 24). Figura 24. Digital Channel Configuration. 2/2. To change a parameter value, turn the rotary selector until the field is activated (it will appear shaded) and then press the rotary selector, the value of the parameter will be activated and you will be able to change it by turning the rotary selector.
- Page 35 CONFIGURATION parameters of DIGITAL CHANNELS in CHANNEL TUNING mode DESCRIPTION PARAMETER VALUES Digital channel bandwidth CHANNEL BW From 0.3 to 9.9 MHz. Frequency where noise is NOISE FREQ. ± 99.9 MHz (relative mode). measured in the C/N 5.00 863.00 measurement. (absolute mode).
-
Page 36: Frequency Tuning
IMPORTANT: To exit the CHANEL-FREQUENCY CONFIGURATION menu, press the mode of operation to which you want to access. 3.4.2 Frequency Tuning Pressing the CH-FR key you can switch between tuning by channel or tuning by frequency and vice versa. Figure 26. Frequency tuning. To verify you are working on the Frequency Tuning mode, check what field is shaded: If the channel is shaded, then you are working in Channel Tuning Mode. -
Page 37: Level Mode
There are three modes of frequency tuning measurements: Level Mode. Analogue Mode. Digital Mode. You can change the measurement mode from the Configuration menu (see section Frequency Tuning Configuration). 3.4.2.1 Level Mode In the level Mode it appears a screen where the level of the input signal is represented by a bar graph and by a numeric value. - Page 38 It also shows the V/A ratio and the C/N ratio in dB. Figure 28. Audio Carrier Measurement. ► It shows the power level of the audio carrier at the frequency tuned. It is represented by a bar graph and in numeric value. It also measures the V/A ratio and the offset between the audio signal and the video signal.
-
Page 39: Digital Mode
CSO-CTB intermodulation measurement. ► On the screen appears: the level of the video carrier, the CSO measure, the deviation of the frequency from which has been obtained the minimum ratio, the CTB measure and whether the Carrier is OFF or ON. Figure 30. -
Page 40: Frequency Tuning Configuration
To switch to Constellation Diagram press the rotary knob. Constellation Diagram. ► In this mode is shown the Constellation Diagram and other related measures (Fig. 32). QAM modulation type. Encoding type detected. Symbol rate (SR). Error rate obtained for the Post-BER digital signal (BER after FEC) indicated by BER Error rate obtained for the Pre-BER digital signal (BER before FEC) indicated by... - Page 41 Depending on the type of measurement, the Configuration menu changes. There are three types of measurements in frequency tuning: ANALOGUE, DIGITAL and LEVEL. Each one can be selected from the FREQ. MODE option on the CONFIGURATION menu. Figure 33. Config Level. The options available on the Configuration menu in the LEVEL measurement mode are next: Freq.
- Page 42 Figure 34. AN. FR CONFIG:1/2. options available Configuration menu ANALOGUE measurement mode are next: Freq. Mode: It allows you to change the measurement signal among ANL ► (Analogue), DIG (digital) and LEV (Power Level). Freq. Step: It allows you to change the step of frequency. This is put ►...
- Page 43 Press CONFIG again to CONFIGURATION next page 2/2. Figure 35. Analogue Configuration Screen 2/2. CTB Showed: The CTB SHOWED parameter allows defining the method of ► measurement for the CTB. IN CH (within the channel) is the suitable method whenever the carrier of the channel in study can be turned off.
-
Page 44: Spectrum Analyser Operating Mode
Noise mode: In this mode there are three options: AF (frequency offset), ► BW/2 (half the bandwidth), FREQ (noise frequency). Press CONFIG again to CONFIGURATION next page 2/2. Figure 37. CONFIG QAM: 2/2. ANNEX ITU-T: System used according to the country. Possible values are ►... -
Page 45: Spectrum Operating Mode (Spt)
3.5.1 Spectrum operating mode (SPT) In the SPECTRUM mode, the equipment provides a spectral analysis of the band; the span and the reference level are variable. The spectral analysis can be done in the forward band or in the return path as it is selected in the spectrum configuration menu;... - Page 46 By pressing the rotary selector again the reference level may be modified. Figure 40. SPECT mode, span reduction. Pressing the rotary selector a second time will activate the tuning frequency field of the marker, being possible to tune new frequencies. The attached figure shows an horizontal line at 45 dBµV.
-
Page 47: Max Operating Mode
3.5.2 Max operating mode The SPECTRUM operating mode also permits to be configured as maximum hold (MAXIMUM INGRESS). This option selected Spectrum Configuration menu. In the MAX mode, the equipment holds on the screen the maximum measured level through a dotted line. Figure 42. -
Page 48: Min Operating Mode
3.5.3 Min operating mode This measurement permits to detect permanent channel interferences that in an other way could remain masked because of the variable nature of the signal. It is interesting in analogue channel measurements as well as in digital channel. To select this representation mode you must select the MIN mode, MINIMUM INGRESS (see section Spectrum mode configuration menu). -
Page 49: Spectrum Analyser Mode Configuration
3.5.4 Spectrum analyser mode configuration Pressing the CONFIG key will access the parameter configuration menu for the SPECTRUM function. Figure 45. SPECT mode configuration. To change the value assigned to one parameter, turn the rotary selector until its field is activated (this will appear shadowed) and then press. The value of the parameter will be activated and may be changed by turning the rotary selector. -
Page 50: Tilt Operating Mode
REF. LINE ► It permits to activate / deactivate and to define the reference line level in 1 dB steps from 20 to 120 dBµV (dBµV units). This line appears on the spectrum representation. IMPORTANT: To leave the configuration menu of the SPT mode, just press the key of the operating mode you wish to access. -
Page 51: Tilt Mode Configuration
The pilots may be defined in two ways: By frequency ► Using the TILT configuration menu. See section Tilt mode configuration. By channel (only pilots in the forward band). ► From the SCAN mode. In order to do this: Place the marker over the channel you want as low pilot Press the SCAN key , and the message ‘PILOT 1: PRESS TILT’... - Page 52 To change a given parameter turn the rotary selector until the field is activated (this will appear shadowed) and then press. The value of the parameter will be activated and may be changed by turning the rotary selector. When the value you want appears, press the rotary selector to validate it.
-
Page 53: Hum Operating Mode
HUM Operating Mode The HUM operating mode measures the HUM value (%). This feature also identifies automatically the type of voltage (DC or AC) at the input, the voltage and the frequency for alternating voltage. The HUM is buzz at low frequency modulation that affects the carrier, producing a distinctive hum in both image and audio, especially in analogue signals. -
Page 54: Hum Configuration Mode
3.7.1 Hum Configuration mode In the HUM mode, when pressing the CONFIG key , it gives access to the first page of the configuration menu with the parameters related to this mode. Figure 50. HUM Configuration. To access the different configurable parameters just turn the rotary knob and once the field you want to change appears shaded, press the rotary knob;... -
Page 55: Datalogger Operating Mode
DATALOGGER operating mode The LOGGER function permits to automatically measure the level, the Carrier/Noise ratio and the Video/Audio ratio (the latter only in the case of analogue channels) as well as the power channel and MER measurements of each active channel in the channel plan (see paragraph Channel Plan editor at section Unit Global Configuration). - Page 56 To carry out a logger acquisition you must select the MEASURE function, for this purpose turn the rotary selector and when this field appears shadowed press it, in this way you will access to the logger. Next press again the rotary selector in order that the equipment makes all the measurements defined in the LOGGER configuration menu over all the active channels of the channel plan (see Edit Channel Plan function at section “Global configuration menu”).
-
Page 57: Datalogger Configuration
The time and date when measurements were taken appear at the end of the list measurements, following order: hour:minute:second month:day:year. To return to the initial menu of the LOGGER function press LOGGER key. 3.8.1 Datalogger configuration From the LOGGER mode, when pressing the CONFIG key we will access to the configuration menu. - Page 58 IMPORTANT: To leave the configuration menu of the DATALOGGER mode, just press the key of the operating mode you wish to access. January 2015 3-52...
-
Page 59: Connection To A Computer
DATE: Allows to update the equipment software ► version. The PROMAX- software control is available in the download area at the PROMAX website: http://www.promax.es/ing/downloads/software-and-firmware For more details about PROMAX- software, check the next chapter. January 2015 4-53... -
Page 60: Control Software Promax-12
5 CONTROL SOFTWARE PROMAX-12 Software Installation If you do not have the file installation, download it from the PROMAX website download area (http://www.promax.es/ing/downloads/software-and- firmware). Please, before installing the program read the following instructions. In case of doubt, contact with our technical service. -
Page 61: Firmware Updating
Figure 55. In the resulting window, double-click the icon which is in the top left hand. By this way it establishes communication between your instrument and computer. Your computer scans its ports looking for the one connected to your instrument and then, it finds out what model is. If during scanning it detects your instrument, the program displays a message on the screen, with information about the model and the port used. -
Page 62: Editing A Channel Plan Or A Channel Plan Group
Click the upgrade icon at the top of the main window. It opens a new window where you should select the upgrade file from a list. Then click on the Upgrade button. If your instrument is properly upgraded, the program shows a message box to confirm it. - Page 63 Figure 57. To create a new group of channel plans, use the arrows placed between the two boxes, in order to pass plan files to the group box (right box) or vice versa. Eventually, when you have all plans you want for your group, assign a name for the group on the top box and save it.
-
Page 64: Datalogger
Datalogger Click the icon . It opens the Datalogger window. Figure 58. To receive an index with all existing loggers in your instrument, you should click the button “Receive Index”. Once the index is downloaded, you can see all loggers in a list on the screen. Double-click the logger you want to see. -
Page 65: Specifications
6 SPECIFICATIONS Specifications PROMAX- TUNING Tuning range From 5 to 1005 MHz. Tuning mode By channels or by frequency. Channel plan 10 channel plans, each one with a maximum of 140 channels. Factory start-up channel plans: CCIR, EIA, OIRL, HRC, IRC, UK, AUNA, ST2L, AUST , ONO. - Page 66 Reduction of the measurement range depending on the number of channels. Up to 10 channels 110 dBμV. From 11 to 20 channels 107 dBμV. From 21 to 50 channels 103 dBμV. From 51 to 80 channels 101 dBμV. Readout Digital in dBµV, dBmV or dBm and analogue through a graphic bar.
- Page 67 VIDEO / AUDIO RATIO MEASUREMENT (ANALOGUE CHANNELS) Measurement Ratio of video to audio carrier levels. Measurement range From 0 to 40 dB. Audio subcarrier frequency Variable 4-9 MHz. Accuracy ± 3 dB (from 5 to 40 °C) (5-1005 MHz). CARRIER / NOISE RATIO MEASUREMENT Measurement Analogue channels Ratio between carrier level and the channel's noise level.
- Page 68 SCAN Span Variable: 10, 30, 100, 300 MHz and full band (from 5 to 1005 MHz, according to the channel plan). Reference level Variable from 60 to 120 dBµV in 10 dB steps. TILT Indication Numerical and by level bar. Analysed band Forward (5 to 1005 MHz) or Return path (5 to 80 MHz).
- Page 69 HUM value from 2 % to 10 % Accuracy ± 1%. VOLTMETER Alternating / Direct voltage automatic detection Measurement range Voltage 5 - 90 V Alternate 5 - 30 V Direct Accuracy ±2 % Alternating frequency 10 Hz - 200 kHz Accuracy ±2 % AUDIO...
- Page 70 MECHANICAL FEATURES Dimensions A. 70 (90 on the display) x 218 H x 50 D mm. Weight 825 g. (including battery and holster). RECOMMENDATIONS ABOUT THE PACKING It is recommended to keep all the packing material in order to return the equipment, if necessary, to the Technical Service.
-
Page 71: Maintenance
7 MAINTENANCE Instructions for returning by mail Instruments returned for repair or calibration, either within or outwit the guarantee period, should be forwarded with the following information: Name of the Company, name of the contact person, address, telephone number, receipt (in the case of coverage under guarantee) and a description of the problem or the service required. -
Page 72: Components Which User Can Not Replace
Components which user can not replace 7.4.1 Not replaceable fuses by user F003: FUS 0.5 A T 125 V F004: FUS 2.5 A T 125 V F005: FUS 7 A T 125 V January 2015 7-66... - Page 73 PROMAX ELECTRONICA, S. L. Francesc Moragas, 71-75 08907 L’HOSPITALET DE LLOBREGAT (Barcelona) SPAIN Tel. : 93 184 77 00 * Tel. Intl. : (+34) 93 184 77 02 Fax : 93 338 11 26 * Fax Intl. : (+34) 93 338 11 26 http://www.promaxelectronics.com...
Need help?
Do you have a question about the PROMAX-12 and is the answer not in the manual?
Questions and answers