Table of Contents
Advertisement
Quick Links
- 1 Smoke Alarm: What to Do When the Alarm Sounds
- 2 Other Alarm Visual and Audible Indicators
- 3 Troubleshooting Guide
- 4 Activation and Wireless Alarm Network
- 5 Setting up a Wireless Alarm Network
- 6 Resetting a Device's Wireless Settings
- 7 Operation and Testing
- 8 Recognizing Nuisance Alarms
- Download this manual
IntellIgent WIreless
smoke Alarm User guide
Photoelectric Smoke Alarm with Voice
and Wireless Interconnect – Battery Operated
Model Q4000DCS-WCB
Model Q4000DCS-WCL
Model Q4000DCS-WBB
Model Q4000DCS-WBL
Model Q4000LDCS-WCH (Safety Light)
Model Q4000LDCS-WBH (Safety Light)
WIreless Interconnect:
You do NOT need a home wi-fi system to use
these units. Multiple wireless units create their
own independent wireless alarm network.
Quell alarms connect to each other wirelessly
via communication on the 915-928 MHz band.
PhotoelectrIc smoKe AlArm
10-yeAr seAled
lIthIUm bAttery
WIreless Interconnect
VoIce AlArm
P/N: 137071, 137073, 137077,
137072, 137074, 137078
P/N:0316-7201-00
Advertisement
Table of Contents

Subscribe to Our Youtube Channel
Related Manuals for Quell Q4000DCS-WCB


Summary of Contents for Quell Q4000DCS-WCB
-
Page 1: Wireless Interconnect
You do NOT need a home wi-fi system to use these units. Multiple wireless units create their own independent wireless alarm network. Quell alarms connect to each other wirelessly via communication on the 915-928 MHz band. PhotoelectrIc smoKe AlArm 10-yeAr seAled... - Page 2 Please thoroughly read this user guide and save the document for future reference and to pass on to any subsequent owner. Quell® is a registered trademark of Chubb Fire & Security Pty Ltd. Copyright © 2017 Chubb Fire & Security Pty Ltd. All rights reserved.
-
Page 3: Table Of Contents
Contents 1. Smoke Alarm: what to do when the alarm sounds ... . . 1 2. Other Alarm Visual and Audible Indicators ....2 3. -
Page 4: Smoke Alarm: What To Do When The Alarm Sounds
1. Smoke Alarm: What To Do When the Alarm Sounds Smoke alarm pattern is three long beeps (ISO 8201) with voice “Fire!,” a 1.5 second pause, and three long beeps repeating. The red LED blinks in time with alarm pattern. •... -
Page 5: Other Alarm Visual And Audible Indicators
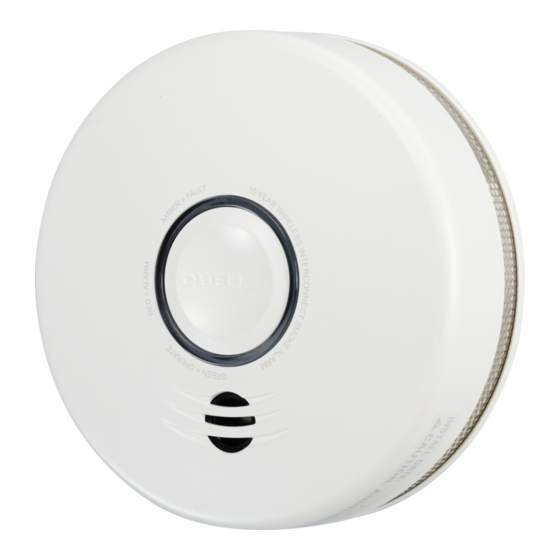
2. Other Alarm Visual and Audible Indicators Operational Mode Visual Indications Audible Indications Action/Note: normal (standby) Green LED blink approx every 60 sec. test (button press • 4 patterns of Red/Amber/Green. • Button press sound Perform Test/Hush button when no alarm press once a week to verify •... -
Page 6: Troubleshooting Guide
If you require further information please contact Product Support at 1800 654 435 or write us at: Chubb Fire & Security Pty Ltd t/a Quell, 33-39 Talavera Road, Macquarie Park, NSW 2113 Australia. Our website is www.quell.com.au. -
Page 7: Introduction, Product Features & Specifications
4. Introduction, Product Features and Specifications Introduction This alarm detects products of combustion using photoelectric technology. Ten (10) years after the unit was installed, this unit will automatically alert you that it is time to replace the unit. This is called “End of Unit Life” mode. See Section 3 Troubleshooting Guide. -
Page 8: Limitations Of Smoke Alarms
5. Limitations of Smoke Alarms WArnIng: PleAse reAd cAreFUlly And thoroUghly • Life safety from fire in residential occupancies is based primarily on early notification to occupants of the need to escape, followed by the appropriate egress actions by those occupants. •... -
Page 9: Recommended Locations For Smoke Alarms
6. Recommended Locations for Smoke Alarms refer to your local state and federal laws or contact your local fire brigade to determine the minimum installation requirements (Figure 6.1 A and Figure 6.1 b ). recommended locations • In every room where someone sleeps with the door closed. The closed door may prevent an alarm located outside from waking the sleeper. - Page 10 DINING KITCHEN BEDROOM BEDROOM ROOM BEDROOM HALL BEDROOM LIVING ROOM BEDROOM LIVING Smoke Alarms for Minimum Protection KITCHEN ROOM Smoke Alarms for Additional Protection Ionisation Type Smoke Alarm with Alarm BASEMENT Silencer (Hush) or Photoelectric Type MULTIPLE FLOOR PLAN SINGLE FLOOR PLAN FIGURE 6.1 A FIGURE 6.1 B HALL...
- Page 11 30 cm (12 in) CEILING MINIMUM 500mm NOT IN THIS AREA 1000mm DEAD AIR ANYWHERE IN THIS AREA DO NOT INSTALL BEST PLACEMENT DO NOT INSTALL ACCEPTABLE PLACEMENT PEAK CEILING SIDE WALL FIGURE 6.2 A 500mm NOT IN THIS AREA 1000mm ANYWHERE IN THIS DEAD AIR...
- Page 12 to minimise nuisance alarms avoid these locations: • Do not install within 0.9m of the following: the door to a kitchen, or a bathroom that contains a tub or shower, forced air supply ducts used for heating or cooling, ceiling or whole house ventilating fans, or other high air-flow areas. •...
-
Page 13: Activation And Wireless Alarm Network
915-928 MHz band. • A maximum of 24 Quell Safety devices may be interconnected. The interconnect system should not exceed the following individual limits: 12 smoke alarms and/or 18 alarms total (smoke, CO, Smoke/ CO Combination, heat, etc.) and/or 6 remote signaling devices and / or relay modules. -
Page 14: Setting Up A Wireless Alarm Network
7.1 Setting Up a Wireless Alarm Network Creating an interconnected wireless alarm network is a simple process, with intelligent “self-enrollment” features, and user-friendly voice prompts. ACTIVATION A. remoVe All deVIces From theIr PAcKAgIng TOOL b. PoWer UP All deVIces • Locate the red wheel on the back of the device. -
Page 15: Adding Another Device To An Existing Wireless Alarm Network
F. WIreless setUP comPlete! If all devices flash green and “Sonar” ping has stopped, the devices are now connected. Congratulations! g. PleAse select locAtIon And InstAll AlArm Please see section 8 “Installation / Mounting Instructions” 7.2 Adding Another Wireless Device to an Existing Wireless Alarm Network For various reasons, you might want to add additional units to your existing USE ACTIVATION... -
Page 16: Resetting A Device's Wireless Settings
7.3 Resetting a Device’s Wireless Settings If you encounter an issue at any point during the wireless network setup process, you may reset the device by following the directions below. A. begIn reset “Resetting wireless Press and hold the button on the device for 8-9 seconds until you hear settings.”... -
Page 17: Installation / Mounting Instructions
8. Installation / Mounting Instructions cAUtIon: thIs UnIt Is seAled (InclUdIng the bAttery). the coVer Is not remoVAble! Once the steps to setup the wireless alarm network have been completed, please proceed to the following installation steps. 1. To obtain aesthetic alignment of the alarm with the hallway or wall, the “A” line on the mounting bracket should be parallel with the hallway when ceiling mounting or horizontal when wall mounting. -
Page 18: Operation And Testing
9. Operation and Testing operation The alarm is operating once it is activated and testing is complete. When products of combustion (smoke) are sensed, the unit sounds a loud alarm with voice messages. See Sections 1 and 2 for alarm signal descriptions. testing Test your alarm weekly by pressing and releasing the test button quickly. -
Page 19: Recognizing Nuisance Alarms
10. Recognizing Nuisance Alarms smoke nuisance hUsh : If you know why the alarm is sounding, and you can verify that it is not a life threatening situation, you can push the button on the initiating unit (green LED flashing every second) to silence the alarm for 8-10 minutes. If the smoke is not too dense, that unit, and all interconnected units will silence. -
Page 20: Battery
11. Battery note: This alarm is powered by a non-replaceable, sealed lithium battery system. No battery installation or replacement is necessary for the life of the alarm. ImPortAnt: Constant exposure to high or low humidity or temperatures may reduce battery life. WArnIng: no serVIceAble PArts InclUded. -
Page 21: Cleaning Your Alarm
13. Cleaning Your Alarm your Alarm should be cleaned at least once a year You can clean the interior of your alarm (sensing chamber) by using compressed air or a vacuum cleaner hose and blowing or vacuuming through the openings around the perimeter of the alarm. The outside of the alarm can be wiped with a damp cloth. -
Page 22: Good Safety Habits
A UTC Climate, Controls & Security Company blocked even with properly located detectors. 33-39 Talavera Road,Macquarie Park, NSW 2113 Australia www.quell.com.au Installation Date: Chubb New Zealand Alarm Model(S): A UTC Climate, Controls &... -
Page 23: Warranty & Contact Details
Quell warrants to the original consumer purchaser that each new smoke alarm will be free from defects in materials and workmanship under normal use for a period of 10 years from the date of purchase.To the extent permitted by law, Quell agrees to repair or replace (at our discretion) any defective product on presentation of the proof of purchase. -
Page 24: Service
Customer Service at 1800-654-435 or write to us at: Chubb Fire & Security Pty Ltd, 33-39 Talavera RD, Macquarie Park 2113 NSW. Website: www.quell.com.au Quell® is a registered trademark of Chubb Fire & Security Pty Ltd. This warranty is provided by: Chubb Fire & Security Pty Ltd...
Need help?
Do you have a question about the Q4000DCS-WCB and is the answer not in the manual?
Questions and answers