Table of Contents
Advertisement
Advertisement
Table of Contents

Subscribe to Our Youtube Channel
Related Manuals for Dish Network 135331


Summary of Contents for Dish Network 135331
- Page 2 ARNING AND TTENTION YMBOLS You must be aware of safety when you install and use this system. This User Guide provides various procedures. If you do some of these procedures carelessly, you could injure or kill yourself or damage equipment or property. Some other procedures require special attention.
-
Page 3: Table Of Contents
ABLE OF ONTENTS Safety Instructions ..........2 Introduction ............3 Setting Up the Kit ..........5 Setting Up the Signal Converter......5 Setting Up the Remote Control ......9 Remote Control Operation ....... 10 Changing the Receiver and Remote Control Addresses..........10 Checking the Remote Control Address....11 Setting Up to Control Other Devices ....11 Operating Modes.......... -
Page 4: Safety Instructions
AFETY NSTRUCTIONS Read these instructions. Keep these instructions. Heed all warnings. Follow all instructions. Do not use this apparatus near water. Clean only with a dry cloth. Do not block any ventilation openings. Install in accordance with the manufacturer’s instructions. Do not install near any heat sources such as radiators, heat registers, stoves, or other apparatus (including amplifiers) that produce heat. -
Page 5: Introduction
NTRODUCTION The IR-to-UHF Pro Upgrade Kit lets you use an ultra-high frequency (UHF) remote to control an infrared (IR) DISH Network satellite TV receiver from much farther away than with an IR remote control, even through walls that block IR signals. - Page 6 The remote control that comes with the kit gives you easy access to all the features of a DISH Network satellite TV receiver. You can set up the remote to control the satellite TV receiver and up to three other devices.
-
Page 7: Setting Up The Kit
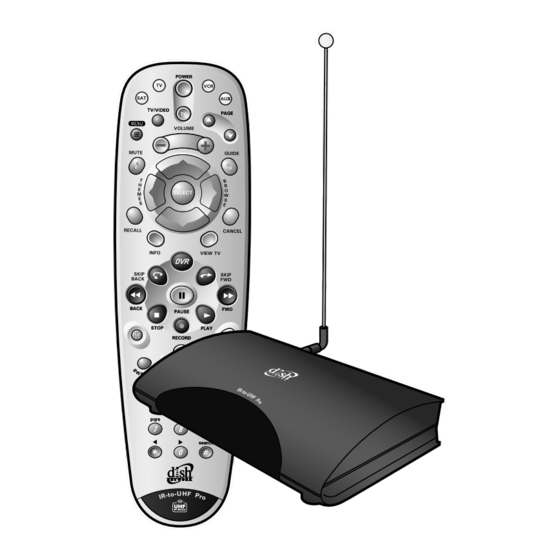
ETTING P THE The kit includes a UHF Pro remote control, batteries, an IR extender cable, an IR clip, an AC adapter, a converter, and a UHF antenna. Figure 4. Parts of the IR-to-UHF Pro Upgrade Kit ETTING P THE IGNAL ONVERTER 1. - Page 8 Tighten the connection only by hand. If you use a wrench, you may over-tighten the connection and damage your equipment. Such damage is not covered by the Limited Warranty. b. Make sure the REMOTE KEY switch matches the UHF Pro key at the bottom of the remote.
- Page 9 Figure 7. IR Sensor behind a lens 5. To secure the IR head, peel the paper off the strip of tape on the head (the IR signal goes through the tape), and stick the head into place. 6. For DISH Player-DVR 522 and DISH Player-DVR 625, place the IR head about ¼”...
- Page 10 a. Attach the IR head clip to the receiver’s bottom panel, on the grate directly behind the front panel’s IR sensor. You must center the clip on the second slot from the left. There is a CLIP label on the bottom panel of some DISH 301, DISH 311, and DISH 322 receivers.
-
Page 11: Setting Up The Remote Control
ETTING P THE EMOTE ONTROL NSTALLING ATTERIES The remote control requires AAA batteries. When you replace old batteries, you should replace all of the batteries. Use batteries of the same kind, for example, alkaline or carbon zinc, and don’t mix batteries of different kinds. -
Page 12: Remote Control Operation
4. On the UHF Pro remote control that came with the kit, press and hold the SAT mode button for three seconds until all mode buttons light. Then, let go. 5. Use the NUMBER PAD buttons to enter the number you wrote in step 3. -
Page 13: Checking The Remote Control Address
EVICES To use the remote to control other devices (such as a TV, VCR, DVD player, tuner/amplifier, or a second DISH Network satellite receiver), you must first program it to control these other devices. You can do this by either following the instructions in Setting Up Using Device Code Tables on page 12, or the Setting Up Using Device Codes Scan procedure described on page 13. - Page 14 Also, when you use the remote to control your VCR in Limited Mode, you will only be able to use the POWER and VCR function buttons. The section Setting Up Using Device Codes Tables has a step that tells the remote control to go into Limited Mode. : Limited Mode can not be used with audio amplifiers.
- Page 15 9. Turn the device back on and try some other buttons to make sure they work. Sometimes, the blank POWER button works when other buttons don’t. If the code works for other buttons, stop here. 10. If the code you entered doesn’t work, do steps 3 through 9 again with another device code from the tables.
- Page 16 ECOND ATELLITE ECEIVER If you have another DISH Network satellite receiver installed, you can use this remote in AUX mode to control the second receiver. You can program the remote to control any other DISH Network satellite receiver, except for following: •...
- Page 17 2. Press the POUND (#) button twice. The mode button flashes the number for each digit of the device code, with a pause between the groups of flashes. A quick flash is for zero. For example, if the code is 570, the mode button flashes five times, pauses, flashes seven times, pauses, and flashes once quickly.
- Page 18 7. Press the plus (+) and minus (-) sides of the VOLUME button. The device’s volume changes and the AUX mode button lights instead of the TV mode button. To set the remote back to control the TV volume: 1. Press and hold the TV mode button for three seconds, and then let go of it.
-
Page 19: Operating Modes
PERATING ODES You can set the remote to four different modes to control the receiver or other devices. You may need to change the remote address to operate the receiver. See Setting Up to Control the Receiver on page 9. You must set up the remote to control a device like a TV, VCR, or DVD player. - Page 20 OWER UTTONS Press the blank POWER button to turn the receiver on or off. Press the TV POWER button to turn your TV off and on. : You must set up the remote to control the TV for the Note TV POWER button to work.
- Page 21 UIDE UTTON Press this button to open the . When you have the Program Guide open, press this button to change between your Program Guide Favorite Lists RROW UTTONS • Change channels while watching a program- Press the UP or DOWN arrow button.
- Page 22 UTTON • Program information - Press the INFO button for more information when you watch a program, or when you have the , or list open. Program Guide Browse Banner Themes • Help - Press the INFO button to see help information when a Help button appears in a menu.
- Page 23 UTTON Press the PLAY button to play back a recorded event. Also, press this button to switch from pause, fast forward, or back to normal play back. UTTON Press the STOP button to stop recording a program or to stop playing a recorded program.
- Page 24 UTTON Press the BACK button to: • Move back through a program four times as fast as normal play. Press this button a second time to move back at 15 times, a third time to move back at 60 times, and a fourth time to move back at 300 times as fast as normal play.
- Page 25 OSITION UTTON Press the POSITION button to move the window to different positions on the TV screen. Each time you press this button, the window moves to a different position. See your receiver user’s guide for more information on using the PIP feature. UTTON Press the SWAP button to swap the video in the main display with the video in the...
- Page 26 screen, press the SELECT button to 3. If you see the System Info close the screen. You have recovered your satellite video. 4. If you do not see the screen, repeat steps 2 and 3 until System Info you have recovered your satellite video. : Press any remote control button other than the RECOVER Note button to end this procedure.
-
Page 27: Controlling A Tv (Or A Second Tv)
UTTON Press the STAR button to back space while using the search function of your receiver. A high definition satellite receiver may use this button to toggle through the available display modes (Normal, Zoom) for widescreen displays. See your receiver user’s guide for more information. (#) B OUND UTTON... - Page 28 OWER UTTONS Press either POWER button to turn the TV on or off. : If you set up the remote to control one TV in TV mode and an Note additional TV in AUX mode, pressing the TV POWER button controls only the TV you set up in TV mode.
-
Page 29: Controlling Avcr
ECALL UTTON Press this button to go back to the last TV channel you watched. Press it again to switch between the last two TV channels you watched. : These buttons do not change the channels on the TV if the Note remote control is in Limited Mode. - Page 30 VCR M UTTON You must first set up the remote to control the VCR or DVD player. See Setting Up to Control Other Devices on page 11. Then press the VCR mode button to set the remote to VCR mode. The VCR mode button will stay lit for two seconds to show you’ve set the remote to VCR mode.
-
Page 31: Controlling A Tuner Or Amplifier
VCR B UTTONS Press the PLAY button to play a videotape or DVD. Press the STOP button to stop playing or recording on a videotape. Press the STOP button to stop playing a DVD. Press the PAUSE button to pause a videotape or DVD. Press this button or the PLAY button to play the tape or DVD. - Page 32 OWER UTTON Press the blank POWER button to turn the tuner or amplifier on or off. Press the TV POWER button to turn the TV on or off. UTTON Press this button to turn on or off the sound. : Program the remote to control the device’s volume by following Note the instructions on page 15.
-
Page 33: Changing Frequencies
HANGING REQUENCIES If you have more than one IR-to-UHF Pro Converter kit in your house, or if you think you are experiencing interference from another source (for example, another remote control), you can change the frequency of the kit. The remote control included with your kit has a switchable key at the bottom that matches the switch on the back of the converter. - Page 34 5. Turn the key over to match the setting of the switch. 6. Reinstall the key in the remote control. 7. If you have not already installed batteries, install them now. See Installing Batteries for further details. 8. Slide the battery cover back into place.
-
Page 35: Device Codes
658, 665, 670, 672 665, 670, 672 Dell 772, 773, 774 Apex 743, 744, 745 Dimensia 645, 650 Archer DISH Network 722, 742 Audiovox 620, 657, 662, 672 Dixi 566, 620 Bell & Howell 590, 669, 675 Dumont 501, 627, 652... - Page 36 Codes Codes Emerson 526, 534, 535, 536, JC Penney 505, 506, 516, 525, 537, 538, 539, 541, 526, 543, 546, 631, 573, 590, 627, 636, 645, 646, 650, 652, 642, 648, 652, 654, 653, 654, 658, 659, 655, 657, 658, 659, 664, 667, 668, 670, 660, 661, 662, 665, 673, 676, 678, 680,...
- Page 37 Codes Codes Megatron 627, 654 Philco 505, 506, 525, 536, 568, 573, 610, 651, Memorex 590, 627, 653, 654, 652, 653, 654, 655, 659, 675, 678, 720 656, 659, 660, 664, 665, 666, 669, 671, 504, 505, 506, 542, 672, 674, 677, 723, 571, 573, 627, 652, 724, 729 653, 654, 656, 660,...
- Page 38 Codes Codes Samsung 505, 506, 516, 523, Tandy 521, 605 526, 566, 573, 612, Tatung 509, 651, 663, 698 627, 647, 652, 653, 654, 655, 656, 658, Technics 508, 673, 676 659, 664, 665, 667, Techwood 523, 573, 652, 654, 669, 670, 679, 680, 660, 676 704, 717, 730, 738...
- Page 39 VCR C ODES CODES Programming in AUX mode Finlux 549, 556, 588 Press 1 before entering the VCR Fisher 548, 549, 581, 584, code. 588, 608, 610, 684, CODES Fuji Funai Aiwa 588, 622, 623 Garrard Akai 513, 514, 515, 516, 517, 518, 520, 568, 550, 551, 552, 554, 572, 591, 605, 607,...
- Page 40 CODES CODES Philips 554, 556, 585, 678, Magnasonic 685, 687 Pioneer 562, 573, 574, 575, Magnavox 527, 533, 554, 556, 576, 600, 674, 680, 678, 679, 684, 685 Portland 546, 677 Marantz 554, 556, 581, 585, 592, 594, 600, 602, Proscan 605, 607 674, 677, 678, 683...
- Page 41 CODES TV/VCR TV Codes Codes Zenith Sylvania 554, 556, 567, 588, 678, 679 DVD P LAYER ODES Symphonic 588, 594, 683, 688 Tandy 581, 588 Programming in AUX mode Press 1 before entering the DVD Tashiko 588, 676 code. Tatung 594, 682 Teac 588, 594, 682...
- Page 42 UNER MPLIFIER ODES DVD Players Codes Programming in AUX mode Panasonic 639, 662, 663, 714, 715, 716, 717, 734 Press 2 before entering the tuner/ amplifier code. Philips 640, 641 Pioneer 665, 718, 719 Tuner/ Codes Proscan Amplifier Qwestar 721, 723 Aiwa 636, 641, 656, 687, 718, 720, 724, 726,...
- Page 43 Tuner/ Codes Amplifier Sansui Sanyo Sharp 712, 713, 714, 715, Sherwood 646, 670, 736, 738, Sony 639, 645, 650, 687, 728, 729, 730 Teac 684, 737 Technics 643, 644, 652, 742, Toshiba Yamaha 663, 730, 731, 732, 733, 745, 747...
-
Page 44: Troubleshooting The Kit
ROUBLESHOOTING THE What’s Happening What’s Wrong What You Can Do Note: When the converter picks The kit doesn’t work The converter may well. That is, when you be picking up stray up stray UHF signals, even when press a remote control UHF signals from you don’t press a remote button, button, either nothing... - Page 45 What’s Happening What’s Wrong What You Can Do • • When you press a The converter Make sure the front side of the button on the remote may not be facing converter, with the DISH control, the red light the satellite Network symbol, points flashes inside the receiver’s front...
- Page 46 • The receiver may be picking up stray IR signals from another DISH Network remote control being used nearby. • Your UHF Pro remote You may be Make sure the UHF antenna is control does not work...
-
Page 47: Limited Warranty
ARRANTY This warranty extends only to the original user (“you,” “your”) of the DISH Network IR-to-UHF Pro Upgrade Kit (“the Kit”) and is limited to the purchase price of the Kit. EchoStar Technologies Corporation and its affiliated companies (“we,” “our,” “us”) warrant the Kit against defects in materials or workmanship as follows. -
Page 48: Advance Exchange Program
This warranty gives you specific legal rights which may vary from state to state. Some states do not allow the exclusion or limitations of incidental or consequential damages, or allow limitations on the duration of an implied warranty, so those limitations may not apply to you. DVANCE XCHANGE ROGRAM... -
Page 49: If You Need Help
1. Please review these Instructions. 2. Please see Troubleshoot the Kit on page 42. 3. Call the Customer Service Center at 1-800-333-DISH (3474). Please have the date of purchase and your customer account number ready. 4. A representative will help you. 5. -
Page 50: Regulatory Factors
EGULATORY ACTORS EchoStar Technologies Corporation, 94 Inverness Terrace East, Englewood CO., (303) 706-4000, declares that: This device complies with Part 15 of the FCC Rules. Operation is subject to the following two conditions: (1) this device may not cause harmful interference, and (2) this device must accept any interference received, including interference that may cause undesired operation. - Page 51 EchoStar Technologies Corporation, Technical Publications, 94 Inverness Terrace East, Englewood, Colorado 80112 Part Number: 135331 Printed in the United States of America. DISH Network is a registered trademark of EchoStar Satellite L.L.C.
Need help?
Do you have a question about the 135331 and is the answer not in the manual?
Questions and answers