Table of Contents
Advertisement
Advertisement
Table of Contents

Related Manuals for Dish Network 20.1


Summary of Contents for Dish Network 20.1
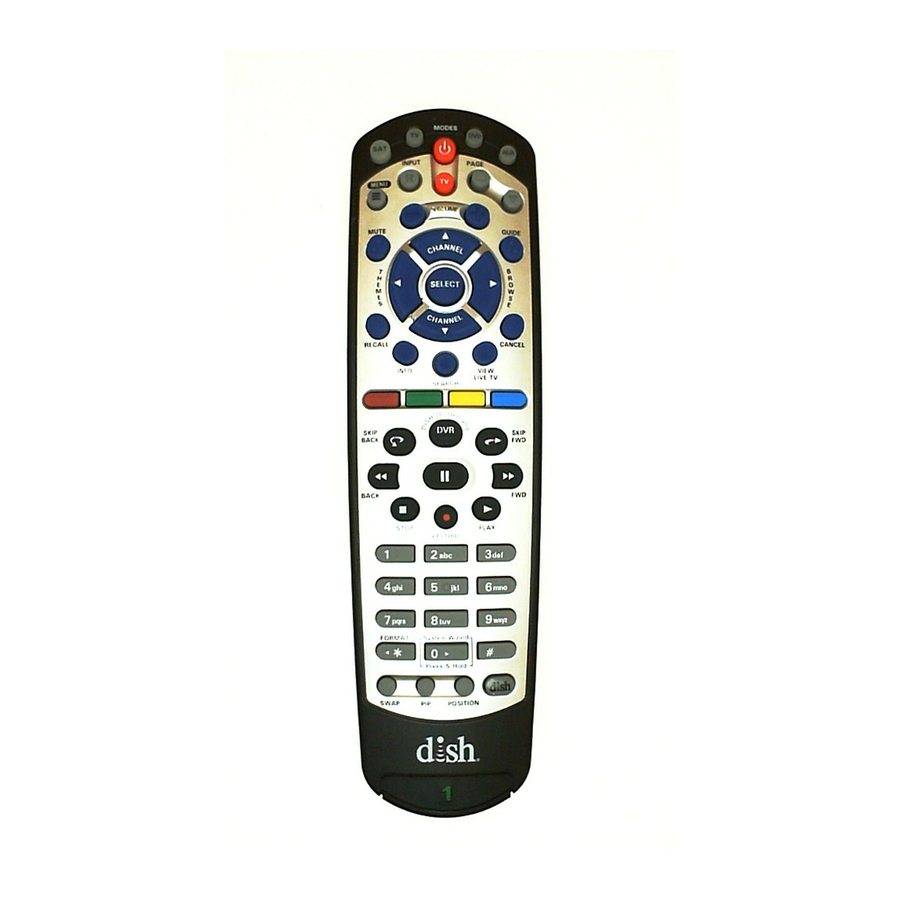
- Page 1 Remote User Guide...
-
Page 2: Safety Instructions
90 Inverness Drive Circle East, Englewood, Colorado 80112. Document Number: 180532 Printed in DISH Network is a registered trademark of DISH Network L.L.C. All product names, trade names, or corporate names mentioned in this User Guide are acknowledged to be the... - Page 3 Configuring the 20.1 Remote The 20.1 remote does not require any configuration. Go to Insert the Batteries (page 2). Configuring the 21.1 Remote Complete the following steps to configure your remote. Pull the remote battery cover off. Decide whether to use IR or UHF signals for the remote.
- Page 4 Insert the Batteries Pull the remote battery cover off. Insert 4 AAA batteries, making sure to match the plus (+) ends with the plus markings on the battery case. Replace the remote battery cover.
- Page 5 Using System Wizard Note: Not all receivers support System Wizard. If System Wizard does not appear, continue with page 4 or page 5 to make your remote work with your receiver. Use System Wizard initially to set up the remote to work with the receiver.
- Page 6 Making 20.1 and 21.1 IR Remote Work with Receiver For 20.1 and 21.1 IR Use the following instructions to configure your remote while using IR signals. Note: Use these instructions if your receiver does not support System Wizard. Turn your receiver and...
- Page 7 Making 21.1 UHF Remote Work with Receiver For 21.1 UHF Use the following instructions if you have configured your remote to use UHF signals. Note: Use these instructions if your receiver does not support System Wizard. Verify the UHF antenna is installed on the back of the receiver.
- Page 8 SAT Mode To use the features described in this section, make sure you are in SAT mode by pressing the SAT Mode button. Note: Some features may not be available depending on your receiver model. Power & TV Power Press this Top button turns the receiver on/off button for Bottom button turns the TV on/off...
- Page 9 TV Mode Press this button for TV Mode Power Input & TV Power Switch between Turn the TV on/off TV inputs TV Menu Access menu features available Volume on some TVs Control TV Mute volume Turn TV volume Up/Down on or off Arrow Buttons Channel up/ Recall...
- Page 10 DVD Mode Press this button for DVD Mode Power & TV Power Top button turns the DVD player/VCR power on and off Bottom button turns the TV on and off Input Switch VCR between Up/Down its TV & VCR mode Arrow Buttons Channel up/ down on VCR...
- Page 11 DVR Functions Press twice to go to the list of recorded programs. Plays a live or recorded program. Pauses a live or recorded program. Stops recording a program. Records a program. Press BACK once to reverse the program four times as fast as normal play.
- Page 12 DVR Functions, continued Press SKIP FWD to skip ahead about 30 seconds in the program. Press PAUSE and then press BACK to reverse the program in slow motion at 1/4 the speed of normal play. Press BACK again to reverse at normal speed. Press PAUSE and then press FWD to forward the program in slow motion at 1/15 the speed of normal play.
- Page 13 Programming Remote to Control Another Device Entering a Code Turn the device and receiver Find the brand name of the TV Codes This table contains the manufacturer codes for programming the remote control to operate your TV. If your TV brand is device listed in the code not listed or if the codes do not work, the remote may not control your TV.
- Page 14 Learning From Another Device’s Remote on page 24 to program the key to the DISH Network remote. If you are unable to find a code that works, try the instructions for Scanning the Remote Database on...
- Page 15 Programming Remote to Control Another Device Scanning the Remote Database Turn the device and receiver on. Press and hold the correct Mode button for the device until all Mode buttons light up. Skip this step if programming TV or DVD Mode buttons. For AUX Mode only.
- Page 16 Displaying Device Code To identify the device code that your remote control is using, complete the following steps: Press and hold the Mode button until all the Mode buttons light up and then release it. When you release the Mode button, the selected Mode button flashes.
- Page 17 Placing Remote in Limited Mode Limited Mode locks out all the device mode operations except for the device’s power, Mute, and Volume. This prevents you from accidentally tuning away from satellite programming. Note: Limited Mode cannot be used with audio amplifiers.
- Page 18 SAT Auto-Tune SAT Auto-Tune programs into the remote control the correct TV channel used for viewing your paid programming. If you are experiencing fuzzy, snowy, blue, or black screens, it might be due to the TV being set to the wrong channel. Using the SAT Auto- Tune feature helps prevent these screen issues from occurring on TVs connected to the receiver’s modulated output (usually TV2).
- Page 19 Enabling and Disabling SAT Auto-Tune Note: SAT Auto-Tune is enabled by default; however, the channel must be set (see Setting SAT Auto-Tune Channel on page 16). Press and hold SAT for three seconds until all four Mode buttons are lit. Press STAR (*).
- Page 20 Setting Auto-Tune for DVD/VCR You can set Auto-Tune for your DVD and/or VCR. Auto-Tune allows you to return to the channel for your DVD/VCR output when you accidentally change the channel or video input. Make sure the remote control operates your DVD/VCR. Press and hold DVD for three seconds until all four Mode buttons are lit.
- Page 21 Removing Auto-Tune for DVD/VCR If you want to remove Auto-Tune for your DVD and/or VCR, follow the steps below. Press and hold DVD until it stays lit. Press STAR (*). Enter 00 or 000. Press POUND (#).
- Page 22 Recovering Your Picture Use the RECOVER button to get back to watching satellite programming if you accidentally change channels or inputs on your TV, DVD, and/or VCR. To use this feature, you must set up Auto-Tune for your TV (see page 16) and for your DVD/VCR (see page 18).
- Page 23 Control Amplifier Volume When the remote control is set up to operate your TV, the MUTE and VOLUME buttons adjust your TV volume when in SAT mode. To use the remote to adjust the volume of a remote-controllable audio receiver or amplifier instead of adjusting the TV’s volume setting, use the steps on this page.
- Page 24 Control TV Volume Use this procedure to change from having the remote adjust the volume of an audio receiver or amplifier to having the remote adjust the TV’s volume. When the remote control is set up to operate your TV, the MUTE and VOLUME buttons adjust your TV volume when in SAT mode.
- Page 25 You can program the remote control to operate any other DISH Network receiver except where UHF is used, such as TV2 on DISH Network receivers. Turn on the second receiver and open System Info screen.
- Page 26 Device’s Remote Use this procedure if you are unable to find a code that allows your DISH Network remote to control your device or if some of the commands are not functioning as you expect after programming your DISH Network remote to control your device (in TV, DVD, or AUX modes).
- Page 27 Learning from Another Device’s Remote, continued To have the DISH Network remote control learn specific commands for another device, complete the following steps. Ensure the DISH Network remote control is working with the receiver (see page 4 or 5). Place both the DISH Network remote and the original device’s remote control on a flat, stable...
- Page 28 Learning from Another Device’s Remote, continued On the DISH Network remote, press and release the button you want the DISH Network remote to learn from the original device’s remote. The Mode light goes off and comes back on. On the original device’s remote control, press and hold the button you want learned until the Mode light goes out and comes back on.
- Page 29 Discrete Codes Discrete On and Off IR-only remote-control commands are used by installers when programming macro commands into universal remotes. Using an On-only or Off-only command is more effective than a toggle On/Off command when trying to ensure the receiver is reliably in one state or the other.
- Page 30 Changing the Remote and Receiver Address If you notice that your receiver is changing channels or opening menus, but you’re not using the remote control, changing the address should fix the problem. Press SYSTEM INFO on the receiver’s front panel. Write down the TV2 remote address shown on the System Info screen.
- Page 31 TV Codes This table contains the manufacturer codes for programming the remote control to operate your TV. If your TV brand is not listed or if the codes do not work, the remote may not control your TV. In some cases, codes may operate some, but not all buttons, shown in this guide.
- Page 32 Diamond Vision 546 643 659 Futuretech 541 657 682 694 Dimensia 503 645 830 Gateway 507 511 535 581 609 DISH Network 742 710 721 746 753 763 801 Disney 529 559 General Electric 503 508 522 Dixi 566 761 897...
- Page 33 TV Codes, continued Gibralter 501 505 506 520 627 751 766 773 777 809 829 834 711 775 813 838 839 841 846 857 903 Go Video 696 Inteq 501 711 775 813 Goldi 566 JBL 566 621 656 674 761 792 Goldstar 505 506 520 523 564 818 897 566 627 653 654 655 658 702...
- Page 34 TV Codes, continued Magnavox 506 507 508 517 MTC 505 506 516 520 523 627 520 527 532 536 550 560 563 653 654 680 566 569 581 609 618 621 625 Multitech 541 657 682 627 646 654 656 674 679 688 Multivision 810 694 710 733 746 747 753 756 NAD 526 564 595 627 631 635...
- Page 35 TV Codes, continued Penney 503 505 506 508 516 Quasar 508 512 577 619 634 520 525 526 543 564 595 627 685 689 700 729 734 765 780 631 635 645 650 653 654 655 784 819 820 821 822 823 860 658 661 680 681 690 702 718 861 862 867 868 869 870 871 720 728 730 744 749 768 776...
- Page 36 TV Codes, continued Scotch 564 627 654 718 Sylvania 506 520 527 529 536 Scott 505 532 541 564 627 559 566 567 568 569 618 621 654 655 657 658 682 718 627 646 654 656 668 672 674 Sears 503 523 526 527 532 679 694 723 724 733 756 761 558 564 569 590 595 611 621...
- Page 37 TV Codes, continued Trutech 529 559 584 Zenith 500 501 506 520 524 TVS 533 726 834 530 533 553 555 564 615 627 Ultra 589 638 640 645 675 677 711 718 US Logic 588 720 726 727 748 749 752 756 V Inc.
- Page 38 VCR Codes This table contains the manufacturer codes for programming the remote control to operate your VCR. If your VCR brand is not listed or if the codes do not work, the remote may not control your VCR. In some cases, codes may operate some, but not all, buttons shown in this guide.
- Page 39 VCR Codes, continued Go Video 502 507 522 524 Marantz 554 556 581 585 592 529 591 675 678 779 912 594 801 Goldstar 502 507 512 522 529 Marta 512 676 678 592 594 676 678 779 Matsushita 554 614 628 799 Goodmans 585 Gradiente 544 588 594 Media Center PC 792...
- Page 40 VCR Codes, continued Panasonic 554 614 628 672 Sanyo 515 516 525 549 581 770 771 777 780 781 782 783 591 675 789 784 786 787 788 791 799 806 SBR 556 801 809 810 912 Sceptre 549 581 Penney 512 554 581 591 592 Scott 508 534 559 567 594 595 675 676 678 776...
- Page 41 VCR Codes, continued UltimateTV 649 Unitech 591 675 Urban Concepts 672 783 Vector Research 534 592 594 Victor 561 562 Video Concepts 534 568 592 Videomagic 512 676 678 Videosonic 591 675 Viewsonic 792 Villain 544 588 594 Voodoo 792 Wards 512 528 533 534 544 554 585 588 591 592 594 595 605 607 649 675 676 678 772...
- Page 42 DVD Player Codes This table contains the manufacturer codes for programming the remote control to operate your DVD or Blu-ray Player. If your DVD Player brand is not listed or if the codes do not work, the remote may not control your DVD Player. In some cases, codes may operate some, but not all, buttons shown in this guide.
- Page 43 DVD Player Codes, continued General Electric 580 589 616 Lexicon 743 LG 611 615 626 673 683 824 666 702 703 710 720 749 816 835 842 GFM 570 617 619 631 658 661 Lifetec 634 674 679 764 829 Liquid Video 564 Go Video 610 611 615 626 673 Liteon 602 610...
- Page 44 DVD Player Codes, continued Philips 565 572 574 577 601 Sherwood 751 870 Sherwood Newcastle 870 608 610 617 619 658 661 672 674 698 713 743 764 766 829 Shinco 589 848 854 873 874 Shinsonic 681 731 837 Pioneer 653 665 686 719 812 SonicBlue 626 683 877 878 879 880...
- Page 45 Tuner/Amplifier Codes This table contains the manufacturer codes for programming the remote control to operate your tuner/amplifier. If your tuner/amplifier is not listed or if the codes do not work, the remote may not control your turner/amplifier. In some cases, codes may operate some, but not all, buttons shown in this guide.
- Page 46 Tuner/Amplifier Codes, continued Goldstar 814 Motorola 737 GPX 834 NAD 648 Hafler 758 Nakamichi 649 658 Harman/Kardon 640 685 714 NEC 641 Nexxtech 711 825 Hitachi 850 Nikko 708 iLive 835 Niro 779 Initial 735 789 826 Norcent 711 731 780 811 815 Insignia 711 770 825 825 834 Integra 650 695 785 788 790...
- Page 47 Tuner/Amplifier Codes, continued Saba 741 Samsung 688 807 Sansui 685 719 725 Sanyo 824 850 Sharp 832 Sharper Image 728 Sherwood 743 770 831 833 Sherwood Newcastle 743 833 Shinsonic 735 789 826 Shure 641 Sonic Blue 661 729 742 Sonic Frontiers 750 Sony 638 654 683 730 765 766 769 771 773 778 784 793 794...
- Page 48 DVR Codes This table contains the manufacturer codes for programming the remote control to operate your DVR. If your DVR brand is not listed or if the codes do not work, the remote may not control your DVR. In some cases, codes may operate some, but not all, buttons shown in this guide.
- Page 49 Combo Codes This following tables contain the manufacturer codes for programming the remote control to operate combined devices. If your combined device brand is not listed or if the codes do not work, the remote may not control your combined device. In some cases, codes may operate some, but not all, buttons shown in this guide.
- Page 50 Combo Codes, continued TV/VCR Codes, continued Magnavox Penney TV Code 756 876 887 TV Code 888 891 892 VCR Code 591 675 676 893 894 Philips VCR Code 533 544 588 TV Code 876 887 891 892 756 797 893 894 Memorex VCR Code 801 TV Code...
- Page 51 Combo Codes, continued TV/VCR Codes, continued Symphonic TV Code VCR Code 533 544 588 756 Thomas TV Code VCR Code 533 544 588 Toshiba TV Code 617 666 755 VCR Code 538 542 543 769 Zenith TV Code 748 752 756 899 VCR Code 533 544 588...
- Page 52 Combo Codes, continued TV/DVD Codes Note: Program the remote control in TV mode using the TV code and then in DVD mode (or in AUX─press 1 before entering the DVD code) using the DVD code. Accurian Coby TV Code DVD Code 634 636 Curtis TV Code TV Code...
- Page 53 Combo Codes, continued TV/DVD Codes, continued Haier TV Code TV Code 503 522 636 637 Hitachi 639 650 671 742 TV Code 786 788 790 791 751 763 779 805 831 859 TV Code DVD Code 647 867 Initial Samsung TV Code TV Code 680 684...
- Page 54 Combo Codes, continued DVD/VCR Codes Note: Program the remote control in DVD mode using one of the listed DVD codes, and then in AUX mode, first pressing 1 and then using the listed VCR code. Go Video Accurian DVD Code 507 524 611 615 DVD Code 617 619 658 661 626 673 683 692 674 764 829...
- Page 55 Combo Codes, continued DVD/VCR Codes, continued Presidian Sony DVD Code 617 619 658 661 DVD Code 613 618 629 729 674 764 829 730 731 768 778 VCR Code 519 817 818 847 883 VCR Code 618 768 778 DVD Code 616 690 702 703 Sylvania 720 749 816 842 DVD Code 617 619 658 661...
- Page 56 Combo Codes, continued TV/DVD/VCR Codes Note: Program the remote control in TV mode using the TV code and then in DVD mode using the DVD code, and then in AUX mode (press 1 before entering the VCR code) using the VCR code. Akai Panasonic TV Code...
- Page 57 Troubleshooting Use this information if you have a problem using the remote. To solve a particular problem, do the following: • Find the information that relates to the problem you are experiencing. Try the suggested solution for that problem. • Make sure your remote control has fresh batteries.
- Page 58 Troubleshooting, continued Your remote control does not work well. What to do: Move your receiver to different locations. For best results, place the receiver as high as possible, above all other equipment in your entertainment center. There may be IR interference from objects near the receiver.
- Page 59 What to do: If your receiver isn’t in Single Mode, press the MODE button on the front panel (if available). Verify your receiver has the PIP feature. If your receiver is not PIP capable, contact DISH Network about upgrading to a receiver with the PIP feature.
- Page 60 This warranty does not cover installation of the DISH Network System; consumer instruction; physical set up or adjustment of any consumer electronic equipment; remote control batteries; signal reception problems;...
- Page 61 Accessory Warranty An accessory is any DISH Network branded equipment, displaying the DISH Network logo, excluding the receiver, Smart Card, cables and hookups, and non-mechanical components. A one- year warranty becomes effective upon the activation of the DISH system or date of purchase, if bought separately.
- Page 62 Regulatory Factors This device complies with Part 15 of FCC Rules. Operation is subject to the following two conditions: 1. This device may not cause harmful interference, 2. This device must accept any interference received, including interference that may cause undesired operation. Changes or modifications to this device may void your authority to operate this equipment.
- Page 63 Reference Table Write down your remote address, channel numbers/ inputs, TV, VCR, DVD player, and stereo equipment codes as you program them for future reference. Remote Address Channel or Input for Cable Programming If you enter a “1” as the last number of your code, your remote is in Limited Mode (see page 15 for more details).
- Page 64 For all your customer needs, go to www.dishnetwork.com/chat or call the Customer Service center at 1-800-333-DISH (3474) 180532...
Need help?
Do you have a question about the 20.1 and is the answer not in the manual?
Questions and answers
I have a 21.1 IR/UHF PRO model remote and it has suddenly stopped working DISH. The batteries are new. The remote still operates the tv just fine. But it doesn't seem to communicate with the Dish receiver at all. I can't even get "system wizard" to open on the tv by holding "0." I think I may have pushed something by mistake as it was working this morning and seemingly just suddenly stopped. How can I fix this probelm?
If your Dish Network 20.1 remote stopped working with the receiver but still operates the TV, follow these steps to fix it:
1. Check the Batteries: Replace the remote batteries if they are low.
2. Use System Wizard:
- Press and hold the 0 button until the System Wizard message appears.
- Follow the on-screen instructions to restore remote settings.
- Select Continue to return to Live TV.
3. Manually Reconnect the Remote:
- Turn on the receiver and TV.
- Press the SYSTEM INFO button on the front of the receiver.
- Confirm that the System Info screen appears.
- Press the RECORD button on the remote to re-link it with the receiver.
If the remote still does not work with the receiver, ensure there is a clear line of sight between them or, if using UHF mode, confirm the UHF/IR switch is set correctly.
This answer is automatically generated