Table of Contents
Advertisement
Advertisement
Table of Contents
Troubleshooting

Related Manuals for Gree GRS-CQ8.0Pd/NaEK


Summary of Contents for Gree GRS-CQ8.0Pd/NaEK
- Page 1 Air-to-water Heat Pump Split Versati Commercial AC R&D Department Ⅰ March , 2016...
-
Page 2: Table Of Contents
Contents Product ............................1 1. Product Data ........................... 1 1.1 Lineup ..........................1 1.1.1 Main Unit ......................1 1.1.2 Water Tank ......................2 1.2 Nomenclature ......................... 2 1.2.1 Main Unit ......................2 1.2.2 Water Tank ......................2 1.3 Product Features ......................3 1.3.1 General ........................ - Page 3 6.1 Specifications of the Water Tank .................. 34 6.2 Volume Selection of the Water Tank ................34 6.2.1 Selection Based on Water Consumption Per Capita ........... 34 6.2.2 Selection Based on Sanitary Utensils ..............35 6. 2.3 Selection of the Water Tank ................35 7 Examples for Model Selection ....................
- Page 4 3. 2.6 Key Lock ......................77 Unit Installation .......................... 79 1. Installation Guides ......................... 79 1.1 Installation Positions of the outdoor unit ............... 80 1.2 Installation Positions of the indoor unit ................. 80 1.3 Matters Need Attention ....................80 2 Filed Supplied Pipes and Valves .................... 80 3 Service Tools .........................
- Page 5 4.1 Diagnosis Flowchart of Driving of Single-phase Unit and Three-phase Unit ....116 5 Daily Maintenance and Repair....................121 5.1 Daily Maintenance ...................... 121 5.2 Troubleshooting......................122 5.3 Repair ........................122 5.3.1 Key Components ....................122 5.3.2 Charging and Discharging of Refrigerant ............124...
-
Page 6: Product
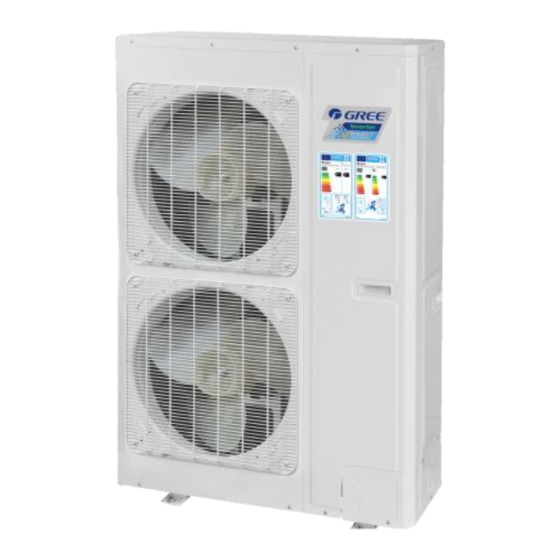
Product Product 1. Product Data 1.1 Lineup 1.1.1 Main Unit Cooling Heating Power Series Model Product Code Capacity Capacity Refrigerant Appearance Supply (kW) (kW) GRS-CQ8 .0Pd/NaE- ER01001300 220-240V ,~,50Hz GRS-CQ1 0Pd/NaE- ER01001290 GRS-CQ1 2Pd/NaE- ER01001280 12.5 GRS-CQ1 220-240V 4Pd/NaE- ER01001270 13.5 ,~,50Hz VERSATI... -
Page 7: Water Tank
SXVD300LCJ2/A-K ER20000190 SXVD300LCJ2/A-M ER20000270 1.2 Nomenclature 1.2.1 Main Unit Description Options GREE G-GREE Air to water heat pump Heat Pump Water Heater Heating Mode S= Static; C=Circulating Function Q=Multi-function; Omit=Single-function Nominal Heating Capacity 6.0=6.0kW; 8.0=8.0kW;10=10kW; 12=12kW; 14=14kW; 16=16kW Compressor Style Pd=DC Inverter;... -
Page 8: Product Features
1.3 Product Features 1.3.1 General GREE air to water heat pump is a completely flexible, energy efficient home heating system that extracts the heat from the outside air, raises this heat to a higher temperature and then distribute swarmth around the home using under-floor heating, radiators or fan convector heat emitters. -
Page 9: Operating Principle
Product 2. The dot-matrix display can show in both English and Chinese to show information in a more direct and convenient way. 3. The six-lattice display pattern will accommodate more information. 4. The 12V JACK interface can supply power to the control separately and lengthen the communication distance. -
Page 10: Technical Data
Product Name Name Name Liquid Temperature Compressor Water Tank Sensor of the PHE Discharge Temperature Gas Temperature Sensor Leaving Water Temperature Sensor of the PHE Sensor of the Solar System Flow Switch for the Solar High Pressure Switch Plate-type Exchanger System Leaving Water Water Pump for the Solar... - Page 11 Product Cooling(floor cooling) 1.95 Power Input* Heating(floor heating) 1.778 2.273 EER* (floor cooling) COP* (floor heating) Cooling(for Fan coil) Capacity* Heating(Fan coil or Radiator) Cooling(for Fan coil) 2.33 2.77 Power Input* Heating(Fan coil or Radiator) 2.24 2.88 EER* (for Fan coil) COP* (Fan coil or Radiator) Refrigerant charge volume...
- Page 12 Product heating) Cooling(floor cooling) Power Input* Heating(floor 3.75 heating) EER* (floor cooling) COP* (floor heating) Cooling(for Fan coil) Capacity* Heating(Fan coil 14.5 11.5 12.5 or Radiator) Cooling(for Fan coil) Power Input* Heating(Fan coil or Radiator) EER* (for Fan coil) COP* (Fan coil or Radiator) 3.35 Refrigerant charge volume...
- Page 13 Product ② Heating Indoor Water Temperature: 40°C/45°C; Outdoor Temperature: 7°CDB/6°CWB Model GRS-CQ12Pd/NaE-M GRS-CQ14Pd/NaE-M GRS-CQ16Pd/NaE-M Product Code ER01001250 ER01001240 ER01001230 Cooling(floor 13.5 14.5 cooling) Capacity* Heating(floor 15.5 heating) Cooling(floor 3.55 3.95 cooling) Power Input* Heating(floor 3.85 3.35 heating) EER* (floor cooling) COP* (floor heating) 4.05...
-
Page 14: Nominal Working Conditions
10~48 Heating 25~55 -22~35 Water Heating 40~80 (Water Tank Temperature) -22~45 Note: when operating conditions are out of the range listed above, please contact GREE. 1.5.4 Electric Data Minimum Sectional Minimum Sectional Power Supply Leakage Switch Area of Power Area of Earth Wire... -
Page 15: Capacity Correction
Product GRS-CQ14Pd/NaE-M(O) 4×3.3 GRS-CQ16Pd/NaE-M(O) 4×3.3 GRS-CQ12Pd/NaE-M(I) 4×3.3 GRS-CQ14Pd/NaE-M(I) 4×3.3 GRS-CQ16Pd/NaE-M(I) 4×3.3 Notes ① L eakage Switch is necessary for additional installation. If circuit breakers with leakage protection are in use, action response time must be less than 0.1 second, leakage circuit must be 30mA. -
Page 16: Outline Dimensions
Product 14(57.2) 1.442 1.402 1.350 1.302 1.252 15(59.0) 1.490 1.450 1.400 1.350 1.302 18(64.4) 1.539 1.502 1.451 1.402 1.350 Computer of actual cooling capacity: actual cooling capacity = nominal cooling capacity x cooling capacity correction coefficient. Heating Capacity Correction GRS-CQ8.0Pd/NaE-K,GRS-CQ10Pd/NaE-K,GRS-CQ12Pd/NaE-K,GRS-CQ14Pd/NaE-K, GRS-CQ16Pd/NaE-K,GRS-CQ12Pd/NaE-M,GRS-CQ14Pd/NaE-M,GRS-CQ16Pd/NaE-M. - Page 17 Product GRS-CQ12Pd/NaE-K(O), GRS-CQ14Pd/NaE-K(O) , GRS-CQ16Pd/NaE-K(O) GRS-CQ12Pd/NaE-M(O), GRS-CQ14Pd/NaE-M(O) , GRS-CQ16Pd/NaE-M(O)
-
Page 18: Outline Dimensions Of Indoor Unit
Product 2.2 Outline dimensions of indoor unit GRS-CQ8.0Pd/NaE-K(I), GRS-CQ10Pd/NaE-K(I) -
Page 19: Explosive Views And Part Lists
Product GRS-CQ12Pd/NaE-K(I), GRS-CQ14Pd/NaE-K(I) , GRS-CQ16Pd/NaE-K(I) GRS-CQ12Pd/NaE-M(I), GRS-CQ14Pd/NaE-M(I) , GRS-CQ16Pd/NaE-M(I) 3 Explosive Views and Part Lists (1) GRS-CQ8.0Pd/NaE-K(I), GRS-CQ10Pd/NaE-K(I) - Page 20 Product Parts List of GRS-CQ8.0Pd/NaE-K(I) for ER010N1300, GRS-CQ10Pd/NaE-K(I)for ER010N1290. Name of part Part Code Quantity Display Board 30292000047 Temp Sensor Sleeving 05212423 Water Pressure Gauge 49028009 Electric Box Assy 100002000198 Strainer 07412808 Plate-type Heat Exchanger 00902812 Expansion Drum 07422800004 Steam current Switch sub- Assy 45028062 Water Pump 812007000002...
- Page 21 Product Auto Air Outlet Valve 07108208 Transformer 4311027001 Terminal Board 42011051 Thermostat 4504800201 Terminal Board 42011255 Terminal Board 42010249 Terminal Board 42011254 Main Board 30223000120 Bipolar AC Contactor 44010221 Receiver Board 30261014 (2) GRS-CQ8.0Pd/NaE-K(O), GRS-CQ10Pd/NaE-K(O) Parts List of GRS-CQ8.0Pd/NaE-K(I) for ER010N1300, GRS-CQ10Pd/NaE-K(I)for ER010N1290.
- Page 22 Product Name of part Part Code Quantity Electric Box Assy 100002000095 Supporting Strip(Condenser) 01894100053 Rear Grill 01574100010 Condenser Assy 01122800082 Silencer 07245012 Temp Sensor Sleeving 05212423 Strainer 0721212101 Pressure Protect Switch 46020007 Pressure Protect Switch 46020006 Sensor (High Pressure) 322101032 Magnet Coil 4300040032 4-Way Valve...
- Page 23 Product (3) GRS-CQ12Pd/NaE-K(I), GRS-CQ14Pd/NaE-K(I) , GRS-CQ16Pd/NaE-K(I). Parts List of GRS-CQ12Pd/NaE-K(I) for ER010N1280, GRS-CQ14Pd/NaE-K(I) for ER010N1270, GRS-CQ16Pd/NaE-K(I) for ER010N1260. Name of part Part Code Quantity Display Board 30292000047 Temp Sensor Sleeving 05212423 Water Pressure Gauge 49028009 Strainer 07412808 Electric Box Assy 100002000198 Plate-type Heat Exchanger 00902800030...
- Page 24 Product Steam current Switch sub- Assy 45028062 Water Pump 812007000002 Electric heater 32102802 Auto Air Outlet Valve 07108208 Relief Valve 07382814 Temperature Sensor 3900028316G Transformer 4311027001 Terminal Board 42011051 Terminal Board 42010249 Thermostat 4504800201 Terminal Board 42011255 Terminal Board 42011254 Main Board 30223000120 Bipolar AC Contactor...
- Page 25 Product Electric Box Assy 01392800230 Rear Grill 01574100004 Condenser Sub-Assy 0115410000802 Supporting Strip(Condenser) 01894100026 Capillary tube 81020167 Silencer 07245012 Strainer 0721212101 Temp Sensor Sleeving 05212423 Pressure Protect Switch 46020006 Pressure Protect Switch 46020007 Magnet Coil 4300040032 4-Way Valve 43040000002 Sensor (High Pressure) 322101032 Strainer 07210037...
- Page 26 Product Inductance 43120122 Inductance Assy 01394100050 Radiator 49018000013 Coping 01264100008P (5) GRS-CQ12Pd/NaE-M(I),GRS-CQ14Pd/NaE-M(I) ,GRS-CQ16Pd/NaE-M(I). Parts List of GRS-CQ12Pd/NaE-M(I) for ER010N1250, GRS-CQ14Pd/NaE-M(I) for ER010N1240, GRS-CQ16Pd/NaE-M(I) for ER010N1230. Name of part Part Code Quantity Display Board 30292000047 Temp Sensor Sleeving 05212423 Water Pressure Gauge 49028009...
- Page 27 Product Strainer 07412808 Electric Box Assy 100002000197 Plate-type Heat Exchanger 00902800030 Expansion Drum 07422800004 Steam current Switch sub- Assy 45028062 Water Pump 812007000002 Temperature Sensor 3900028316G Electric Heater 32000004 Relief Valve 07382814 Auto Air Outlet Valve 07108208 Terminal Board 42011051 Terminal Board 42011135 Thermostat...
- Page 28 Product (6) GRS-CQ12Pd/NaE-M(O),GRS-CQ14Pd/NaE-M(O) ,GRS-CQ16Pd/NaE-M(O). Parts List of GRS-CQ12Pd/NaEM(O) for ER010W1250, GRS-CQ14Pd/NaE-M(O) for ER010W1240, GRS-CQ16Pd/NaE-M(O) for ER010W1230. Name of part Part Code Quantity Electric Box Assy 100002000085 Rear Grill 01574100004 Condenser Assy 000100000009 Supporting Strip(Condenser) 01894100026 Capillary tube 81020167 Silencer 07245012 Strainer 0721212101 Temp Sensor Sleeving...
-
Page 29: Supply Scope
Product Magnet Coil 4300040032 4-Way Valve 43040000002 Pressure Sensor(High Pressure) 322101038 Strainer 07210037 Temp Sensor Sleeving 05210001 Strainer 0721200102 Electric Expand Valve Fitting 4304413221 Electronic Expansion Valve 43044100172 Cut off Valve 07330000002 Right Connection Board 01344100003P Gas-liquid Separator 07424100014 Cut off Valve 07334100016 Compressor and Fittings 00204100018... - Page 30 Product √ 2-way Valve √ 3-way Valve √ Remote Temperature Sensor √ Wired Controller √ Communication Cable √ Water Tank Temperature Sensor √ Expansion Bolt √ Solar System Water Pump √ Solar System Flow Switch...
-
Page 31: Design And Selection
Design and Selection Design and Selection 1 Installation Example CASE 1: Connecting the Under-floor Coil for Heating and Cooling Note: ① The two-way valve is very important to prevent dew condensation on the floor and radiator at the cooling mode; ②... - Page 32 Design and Selection Note: ① In this case, three-way valve should be installed and should comply with installation of this manual; ② Sanitary water tank should be equipped with internal electric heater to secure enough heat energy in very cold days; CASE 3: Connecting the Solar Thermal System Note: ①...
-
Page 33: Model Selection
Design and Selection ③ When the water tank is unavailable, the solar thermal system is “reserved”. When the water tank is avaiablle and set to “ON”, the solar thermal system will be activated regardless of solar timer setting; when set to “OFF”, the solar thermal system will be deactivated; when set to “Time”, the solar thermal system will be timed to start. -
Page 34: Flowchart Of Model Selection
Design and Selection 2.3 Flowchart of Model Selection 2.4 Design Principle (1) Cooling: capacity of the unit ≥ cooling load of the air conditioning (2) Heating: capacity of the unit ≥ max{ heating load, floor heating load, water heating load} (3) Water Tank: it should be selected based on the sanitary outfit or quantity of users. -
Page 35: Selection Of Tube Spacing Of The Underfloor Coils
Design and Selection and the maximum empirical values listed above. ② The top layer whose load is generally larger than the middle or bottom layer should take the maximum empirical value. ③ The guest room whose load is generally much large should take the value between the intermediate and the maximum empirical values listed above. -
Page 36: Selection Of Loop Quantity For Each Room
Design and Selection conditions of the project and generally should not exceed 30m. 3.3.2 Selection of Loop Quantity for Each Room 1) Length of a single loop should not exceed 100m. If so, it should be divided into multiple loops. 2) Area of a single loop=tube length×tube spacing=100m×150mm=15m Length of underfloor coils is recommended to be within 100m and length of each branch should be kept the same to the most extent. - Page 37 Design and Selection 5) Distance between the unit and the water trap (collector) should be within 15m. If the distance exceeds 20m, then it is required to calculate the hydraulic power.
-
Page 38: Requirements On Installation Of The Water Trap (Collector)
Design and Selection 4.2 Requirements on Installation of the Water Trap (Collector) 1) The water trap (collector) should be installed on the wall or inside the special box. For housing constructions, it is generally installed in the kitchen. 2) The valve for the water trap (collector) should be installed horizontally and keep a distance of at least 300mm to the ground. -
Page 39: Selection Of The Water Tank
Design and Selection return. ② When load of the FCU is too large, the unit would always run under high frequency, which is unhelpful for energy conservation. Cooling Heating Static Air Volume Type Capacity Capacity Pressure Appearance (kW) (kW) (Pa) Wall ——... -
Page 40: Selection Based On Sanitary Utensils
Design and Selection Villa Per person, Per day 70~110 6.2.2 Selection Based on Sanitary Utensils Daily Water Utensil Type Water Temperature (°C) Consumption (L) Bathtub, Sprinkler system (with shower) Bathtub, Sprinkler system (without shower) Shower 70~100 37~40 Wash Basin 6. 2.3 Selection of the Water Tank Selection of the water tank should consider the flow rate of the shower head, duration of use per person and daily water consumption. -
Page 41: Arrangement Design Of The Underfloor System For A Single Floor
Design and Selection Bathroom Total Load 2296+900=3196W 7.2.2 Arrangement Design of the Underfloor System for A Single Floor Assumed conditions: the floor is cement or ceramics, the normal external diameter of the heating pipe is 20mm, thickness of the stuffer is 50mm, thickness of PS foam insulation is 20mm, supply water temperature is 45°C, return water temperature is 35°C, indoor design temperature is 20°C Average Temperature of the Heating Pipe=(45+35)/2=40°C 7.2.3 Arrangement Design of the Underfloor System for the Bath Room... -
Page 42: Model Selection
Design and Selection Long-term Dwelling Area 24~26 Short-term Dwelling Area 28~30 Nobody Area 35~40 7.3 Model Selection Heat demand for a single layer: 3196W Heat loss for a single layer: 1016W Total heat load for a single layer: 4212W Total heat load of the building: 8424W Capacity of the main unit should be larger than 8424W, so we can select: GRS-CQ10Pd/NaE-K... -
Page 43: Unit Control
Unit Control Unit Control 1 Integral Control Concept 1.1 Control Principle Diagram 1. The environment temperature is detected by the sensor installed at fins of the finned heat exchanger, which is mainly used to control the initialization steps of the fan and the electrostatic expansion valve and also limit the maximum running frequency of the compressor. - Page 44 Unit Control or water heating mode, the compressor will stop and this error will be displayed at the controller. When it fails at the cooling mode, the compressor continues to run but this error will be displayed at the controller. 3.
- Page 45 Unit Control system respectively. Theses sensors are mainly used to control the water pump of the hot water of the solar system. When the entering water temperature sensor fails, this error will be displayed at the controller and the unit continues normal operation. When other two sensors fail, this error also will be displayed at the controller and the water pump of the solar system will stop.
-
Page 46: Control Flowchart
Unit Control 1.2 Control Flowchart 2 Main Control Logics 2.1 Cooling 2.1.1 Control to the Compressor When the unit is controlled by the leaving water temperature, the operating frequency of the compressor will be adjusted by the temperature difference in the way that it increases as the temperature difference goes up and it decreases as the temperature difference goes down. -
Page 47: Freeze Protection
Unit Control 2.1.2 Freeze Protection When it is detected that the leaving water temperature of the plate heat exchanger is lower than the freeze protection temperature, the compressor will drop its operating frequency until it reaches the minimum operating frequency. Then if it is still detected that the leaving water temperature is lower than the freeze protection temperature, the main unit will stop as per the shutdown frequency but the water pump keeps normal operation. -
Page 48: Water Heating By The Solar System
Unit Control water heating range of the main unit, the auxiliary electric heater of the main unit will run depending on the temperature difference. If the actual water tank temperature is higher than the maximum value of the water heating range of the main unit, the water tank heater will start. At any time, only one between the auxiliary electric heater and the water tank heater is allowed to run. -
Page 49: Control To The 4-Way Valve
Unit Control high pressure side. Under the heating or water heating mode, the operating frequency of the fan is adjusted according to the pressure at the low pressure side. During defrosting, the fan stops and resumes operation when defrosting ends up. 2.7 Control to the 4-way Valve The 4-way valve always keeps on under the cooling mode and will off after the compressor starts up under the heating or water heating mode. -
Page 50: Controller
Unit Control three times within 60 minutes that the unit comes into water pump overload protection, this error will be displayed and is unrecoverable. The unit is allowed to restart only after the unit is shut down manually and this error is cleared. (5) Compressor Hi-pressure Protection In any case, when it is detected that the high-pressure switch acts, the unit will come into high-pressure protection three seconds later. -
Page 51: Standby Page And Homepage
Unit Control Power indicating LED ② It will light on/off when the unit is powered on/off. (yellow) ③ Error indicating LED (red) It will light on when some fault occurs. ④ Left key It is intended to move the cursor left. It is intended to modify the setting state or value of the selected ⑤... -
Page 52: Operation Instructions
Unit Control Item Functional Description Mode It is intended to access to the actual running mode. Auxiliary Func. It indicates the auxiliary function. Error state It indicates if there is any error. T-water out It indicates the actual leaving water temperature. T-outdoor It indicates the actual outdoor environment temperature. -
Page 53: Function Setting
Unit Control When the unit is ON, the green indicating LED located at the upper right of the control will light on. When the unit is OFF, the green indicating LED will light off. [Notes] ① The unit is defaulted to be OFF when energized for the first time. ②... - Page 54 Unit Control FUNCTION page 1 2. At the FUNCTION page, by the Right/Left key , the desired function option can be selected, and by the Up/Down key , the setting of the current function option can be modified. The function key no. 3 or no.
- Page 55 Unit Control unadjustable 2. When "Floor config" is set to "Without", this function is adjustable. When the water tank is unavailable, Cool+hot Cool+hot water Cool/Hot water Cool this function will be reserved, and water the LCD will display ‘Reserved’. When the water tank is unavailable, Heat+hot Heat+hot water Heat/Hot water...
- Page 56 Unit Control expired. When it set to “Air+hot water”, “hot water” can be performed even though the thermostat is off. Assistant Assis. Heater 1/2/Off heater Other heater Other heater With/Without Without Chassis Chassis heater On/Off heater When the water tank is available, this setting is adjustable;...
- Page 57 Unit Control Air removal Air removal On/Off [1~125] Address Address [127~253] Gate-Controll Gate-Ctrl. On/Off 3.2.2.1 Mode It enables the user to select the run mode of the unit. When the water tank is not prepared, then only Cool and Heat modes are available. When the water tank has been prepared and Water Tank is set to “With”...
- Page 58 Unit Control [Notes] ① It works only when “Water tank” is set to “With”. ② This setting will be memorized upon power failure. 3. 2.2.4 T-water Ctrl (Water Temperature Control for Heating) There are two options for the leaving water temperature control, high-temperature water circulation (High temp) and normal-temperature water circulation (Normal temp).
- Page 59 Unit Control [Notes] ① “Hot water” will take precedence only when “Water tank” is available, other it will tell “Reserved”. ② This setting will be memorized upon power failure. 3.2.2.7 Quiet This function can be activated when the running noise is too high. [Note] when this function is activated, frequency of both the compressor and the fan will go down and the capacity of the unit will also correspondingly decrease.
- Page 60 Unit Control [Notes] ① Once it is activated, it should be deactivated manually. ② This setting will be memorized upon power failure. ③ The saved “Start time” and “End time” will be memorized upon power failure. ④ It is configurable no matter whether the unit is in operation or not. 3.2.2.9 Weather-dependent Mode For areas with large change of diurnal temperature, in order to avoid the user to set the leaving water temperature or room temperature too often, this function will adjust automatically depending on...
- Page 61 Unit Control This function is intended to sanitize the water tank by raising the water temperature to 70°C under which the legionella will die immediately. When this function is activated, the sanitation data and start time is configurable. [Operation Instructions] 1.
- Page 62 Unit Control 3.2.2.12 Weekly Timer This function will make the unit run with certain modes in certain periods within a week based on the user’s actual demand. [Operation Instructions] 1. At the homepage, by pressing the Function key access to the FUNCTION page, and then locate where “Weekly timer”...
- Page 63 Unit Control 4. When above settings are finished, pressing the Return key and then pressing “Save”, a pop-up window will pop up to remind if you are determined to save these settings. If so, press the OK key If not, press the Return key to not save these settings.
- Page 64 Unit Control resetting “Water tank” from “With” to “Without”, then “Hot water” mode will be automatically changed to “Heat”, “Cool+hot water”/ “Heat+hot water” changed to “Cool”/ “Heat”. ⑤ Temperature Setpoint The control is able to decide the temperature type and temperature range based on the current “Clock Timer”, “FCU”, “T-water Ctrl.”, and “Ctrl.
- Page 65 Unit Control or decrease the corresponding value which will be continuously changed by pressing and holding the key. (Unless otherwise specified, all timer settings follow the similar way.) 4. When the setting is finished, save it by pressing the Function key no. 2 , or this setting without being saved is ineffective.
- Page 66 Unit Control [Notes] ① When “Weekly timer”, “Clock timer”, and “Temp. timer” settings are performed at the same time, the last one takes precedence. ② This function works only when the unit is in operation. ③ The allowed running modes include “Heat” and “Cool” When the start time of “Period 2”...
- Page 67 Unit Control “Solar timer”. [Notes] ① Once “Solar timer” is activated,it cannot be deactivated through ON/OFF operation but be done manually. ② “Start time” and “End time” will be memorized upon power failure ③ It can be set under both ON and OFF states 3.
- Page 68 Unit Control press “Cancel” to go on. [Notes] ① This function can be activated only when the unit is OFF. When it is intended to activate this function with the unit being ON, a dialog box will pop up, warning “Please turn off the system first!”.
- Page 69 Unit Control ③ At the Emergency mode, the ON/OFF key operation will be disabled; the running mode will not be allowed to be changed; the Quiet Mode and Weather-dependent Mode cannot be deactivated; “Weekly timer”, “Clock timer” and “Temp timer” also cannot be activated, or will be deactivated if being activated.
- Page 70 Unit Control from the thermostat. ③ If “Thermostat” is set to “On”, the control will automatically disable some functions concerning timer, and run in accordance with the mode set by the thermostat. In this case, the running mode is unchangeable and the ON/OFF key operation of the control is ineffective.
- Page 71 Unit Control The plate heater can be activated or deactivated by the user. Generally it is suggested to activate it when the water pump has stopped and the environment temperature is lower than 2°C so as to prevent the heat exchanger from being frozen. [Operation Instructions] Go to the FUNCTION page and locate “Plate heater”...
- Page 72 Unit Control changed freely. Under the cooling mode, when it is set to “With”, the leaving water temperature range is 18-25℃ and the default is 18℃ ; when it is set to “Without”, the range is 7-25℃ , the default is 7℃ . “Floor config”...
-
Page 73: Parameter Setting (Parameter Set)
Unit Control 3.2.3 Parameter Setting (Parameter Set) 3.2.3.1 User Parameter Setting At the parameter setting pages, each parameter is configurable, like: water out temperature for cooling, water out temperature for heating, and water tank temperature etc. [Operation Instructions] 1. At the homepage, it is able to go to the PARAMETER page by pressing the Function key no. 2 2. - Page 74 Unit Control [Without FCU] [Without FCU] Water out WOT-Heat 25~55°C[High 77~131°F[High 45°C/113°F[High temp.] temperature for temp.] temp.] 35°C/95°F[Normal.] heating 25~45°C[Normal 77~113°F[Normal temp.] temp.] Room temperature RT-Cool 18~30°C 64~86°F 24°C/75°F for cooling Room temperature RT-Heat 18~30°C 64~86°F 20°C/68°F for heating Tank temperature T-water tank 40~80°C 104~176°F...
- Page 75 Unit Control Weather-dependent temp.] [Normal temp.] the Weather-dependent Mode for heating Mode setting changes. Lower limit ambient Lower AT-Cool 8~25°C 46~77°F 25°C/77°F temperature at the Weather-dependent Mode for cooling Upper limit Upper AT-Cool 26~50°C 79~122°F 40°C/104°F temperature at the Weather-dependent Mode for cooling Upper limit room Upper...
-
Page 76: View
Unit Control 3. 2.4 View At the view pages, the user is enabled to view the unit’s running state, running parameters, errors, version of the wired controller etc. [Operation Instructions] At the homepage, by pressing the Function key no.3 , it is able to go to the VIEW page as shown in the figure below. - Page 77 Unit Control Compressor running state Compressor On/Off Fan 1 running state Fan 1 On/Off Fan 2 running state Fan 2 On/Off Heat pump-water pump HP-pump On/Off Solar water pump running state SL-pump On/Off Reserved Reserved Reserved Tank heater running state Tank heater On/Off Reserved...
- Page 78 Unit Control Full Name Displayed Name Outdoor temperature T-outdoor Suction temperature T-suction Discharge temperature T-discharge Defrost temperature T-defrost Plate heat exchanger Water in temperature T-water in PE Plate heat exchanger water-out temperature T-waterout PE Refrigerant liquid line temperature Temp-RLL Refrigerant gas line temperature Temp-RGL E-heater water-out temperature T-waterout EH...
- Page 79 Unit Control [Notes] ① The real-time error will show on the control. Taking Error 2 in the above figure for example, when it is recovered, it will disappear and be replaced by Error 3, and other errors follow the same way. ②...
- Page 80 Unit Control Water tank water temperature sensor 1 error Tank sens. 1 Water tank water temperature sensor 2 error Tank sens. 2 Solar kit-entering water temp sensor T-SL water out Solar kit-leaving water temp sensor T-SL water in Solar kit- temp sensor T-solar battery Swimming pool-entering water temp sensor T-Swimming in...
-
Page 81: General Setting
Unit Control At the version view page, the user is enabled to see the version of the program and the protocol. [Operation Instructions] 1. At the VIEW page, select Version and then press the OK key to go to the VERSION page. 2. -
Page 82: Key Lock
Unit Control Temperature unit Temp. unit Celsius/Fahrenheit Celsius 中文/English Language Language English On/off memory On/off memory On/Off Time&Date Time&Date Beeper Beeper On/Off “On”: it always lights on. “Eco”: it lights off when there is no key Back light Back light Lighted/Energy save Energy save operation for 1 minute,... - Page 83 Unit Control...
-
Page 84: Unit Installation
1. Installation Guides WARNING! ① Installation should be performed by GREE appointed servicemen, or improper installation would lead to unusual operation, water leakage, electric shock or fire hazard. ② The unit should be installed on the foundation which is capable of supporting the unit, or the unit would fall off or even lead to personal injury. -
Page 85: Installation Positions Of The Outdoor Unit
Installation ⑦ A platform should be set up when working high above the ground. 1.1 Installation Positions of the outdoor unit (1). Avoid direct sunshine. (2). Outdoor unit must be installed on a firm and solid support. (3). Ensure the hanger rod, ceiling and building structure have sufficient strength to support the weight of air conditioner unit. - Page 86 Installation It is used to switch waterways between underfloor system 2-way Valve and the FCU. It is used to switch waterways of hot water inside the 3-way Valve water tank and circulation water inside the main unit. Bypass Valve It is used to balance the water pressure. Water Trap It is used to distribute water.
-
Page 87: Service Tools
Installation Water pump It is used to circuit water in the pipe system. Water flow switch It is used to detect waterflow and protect unit. 3-way tube It is used to split water. 3 Service Tools Name Picture Spanner Screw Driver Pliers Tube Tongs... -
Page 88: Instalaltion Instructions
Installation 4 Instalaltion Instructions 4.1 Installation Examples CASE 1: Connecting the Under-floor Coil for Heating and Cooling Note: ① The two-way valve is very important to prevent dew condensation on the floor and radiator while cooling mode; ② Type of thermostat and specification should be complied with installation of this manual; ③... -
Page 89: Pre-Installation
Installation Note: ① In this case, the three-way valve should be installed and should comply with installation of this manual; ② The sanitary water tank should be equipped with internal electric heater to secure enough heat energy in very cold days. CASE 3: Connecting the solar thermal system Two-way valve is very important to prevent dew condensation on the floor and radiator while cooling mode. -
Page 90: Outline Dimension Of Outdoor Unit
Installation (2) Avoid placing the outdoor unit under window or between two constructions, hence to prevent normal operating noise from entering the room. (3) Air flow at inlet and outlet shall not be blocked. (4) Install at a well-ventilated place, so that the machine can absorb and discharge sufficient air. (5) Do not install at a place where inflammable or explosive goods exist or a place subject to severe dust, salty fog and polluted air. - Page 91 Installation Description: Unit: inch Name Remarks GRS-CQ8.0/10Pd/NaE-K, GRS-CQ12/14/16Pd/NaE-K , Liquid-side Service Valve GRS-CQ12/14/16Pd/NaE-M GRS-CQ8.0/10Pd/NaE-K, GRS-CQ12/14/16Pd/NaE-K , Gas-side Service Valve GRS-CQ12/14/16Pd/NaE-M Handle Used to cover or uncover the front case Air discharge Grill...
-
Page 92: Installation Clearance Data
Installation 4.5 Installation Clearance Data (1) When moving the outdoor unit, it is necessary to adopt 2 pieces of long enough rope to hand the unit from 4 directions. Included angle between the rope when hanging and moving must be 40° below to prevent center of the unit from moving. -
Page 93: Installation Clearance Data
Installation Name Remarks 1″Male BSP Leaving Water Pipe 1″Male BSP Returning Water Pipe GRS-CQ8.0/10Pd/NaE-K, GRS-CQ12/14/16Pd/NaE-K , Gas-side Pipe GRS-CQ12/14/16Pd/NaE-M GRS-CQ8.0/10Pd/NaE-K, GRS-CQ12/14/16Pd/NaE-K , Liquid-side Pipe GRS-CQ12/14/16Pd/NaE-M 4.7 Installation Clearance Data (1) Indoor unit shall be vertically mounted on the wall of the room with expansion bolt. (2) Keep the indoor unit away from heat sources like heat sink and so on in the room as much as possible. - Page 94 Installation Water Tank With Bolts Installed on the ground and never suspended The minimum clearance from the water tank to combustible surface must be 500mm. There should be water pipe, hot water joint and floor drain near the water tank in favor of water replenishment, hot water supply and drainage of water tank.
- Page 95 Installation Preparation of pipelines: Circulating water outlet/inlet pipe must be hot water pipe, PPR pipe with nominal out diameter of dn25 and S2.5 series (wall thickness of 4.2mm) being recommended. Cooling water inlet pipe and hot water outlet pipe of water tank should also be hot water pipe, PPR pipe with nominal out diameter of dn20 and S2.5 series (wall thickness of 3.4mm) being recommended.
-
Page 96: Electric Wiring
Installation ② Prepare the materials according to the above joints dimension. If cut-off valve is installed outside the room, PPR pipe is recommended to avoid freeze damage. ③ Waterway pipelines can’t be installed until water heater unit is fixed. Do not let dust and other sundries enter into pipeline system during installation of connection pipes. - Page 97 Installation GRS-CQ12Pd/NaE-M(I),GRS-CQ14Pd/NaE-M(I),GRS-CQ16Pd/NaE-M(I) (2) Wiring diagram: outdoor unit GRS-CQ8.0Pd/NaE-K(O),GRS-CQ10Pd/NaE-K(O)
- Page 98 Installation GRS-CQ12Pd/NaE-M(O),GRS-CQ14Pd/NaE-M(O),GRS-CQ16Pd/NaE-M(O)
-
Page 99: Wiring Of The Terminal Board
Installation GRS-CQ12Pd/NaE-K(O),GRS-CQ14Pd/NaE-K(O),GRS-CQ16Pd/NaE-K(O) 4.10 Wiring of the Terminal Board GRS-CQ8.0Pd/NaE-K,GRS-CQ10Pd/NaE-K,GRS-CQ12Pd/NaE-K,GRS-CQ14Pd/NaE-K, GRS-CQ16Pd/NaE-K... - Page 100 Installation GRS-CQ12Pd/NaE-M,GRS-CQ14Pd/NaE-M,GRS-CQ16Pd/NaE-M...
-
Page 101: Wiring Of The 2-Way Valve
Installation 4.11 Wiring of the 2-Way Valve There are two 2-way valve, the 2-way valve 1 is available and the 2-way vavle 2 is reserved. The 2-way valve 1 is required to control water flow for cooling or heating operation. The role of 2-way valve 1 is to cut off water flow into the underfloor loop when the fan coil unit is equipped for cooling operation. -
Page 102: Wiring Of The3-Way Valve
Installation Step 1. Uncover the front cover of the unit and open the control box. Step 2. Find the terminal block and connect wires as below. WARING! ① Normal Open type should be connected to wire (ON) and wire (N) for valve closing in cooling mode. -
Page 103: Wiring Of Other Auxiliary Heat Sources
Installation WARING! ① . The 3-way valve should select water tank loop when electric power is supplied to wire (OFF) and wire (N). ② . The 3-way valve should select under floor loop when electric power is supplied to wire (ON) and wire (N). -
Page 104: Wiring Of The Remote Air Temperature Sensor
Installation 4.15 Wiring of the Remote Air Temperature Sensor Note: ① Distance between the indoor unit and the remote air temperature sensor should be less than 15m due to length of the connection cable of remote air temperature sensor; ② Height from floor is approximately 1.5m;... -
Page 105: Wiring Of The Thermostat
Installation ③ Remote air temperature sensor cannot be located where the area may be hidden when door is open; ④ Remote air temperature sensor cannot be located where external thermal influence may be applied; ⑤ Remote air temperature sensor should be installed where space heating is mainly applied; ⑥... - Page 106 Installation HEATING terminal no.3 is for Verstati Heat terminal 24; COOLING terminal no.4 is for Verstati Cool terminal no.25. The thermostat terminal no. 2 is for the Verstati terminal (no. 22). CAUTION! ① Never use 230V AC and 24V AC thermostat at the same time, otherwise, it will cause short circuit and power cut-off by the circuit breaker;...
-
Page 107: Wiring Of The Control
Installation 4.17 Wiring of the Control... - Page 108 Installation...
-
Page 109: Commissioning And Trial Run
Installation Note: ① The wired controller can be connected to the terminal of AP1 CN6 through the four-wire communication line. ② AP1 (CN 5) and AP2 (CN 7) have been connected with the communication line (three-wire communication line before delivery. ③... -
Page 110: Test Run
Installation Attention: If there is any item marked with ×, please notify the contractor. Items listed above are just for reference. General Evaluation: Debugging □ Amendment □ Judge the following items (if there is not any filling, qualification will be regarded.) a: Power supply and electric control system b: Loading calculation c: Heating problems of Unit... - Page 111 Installation Check all the conditions needed to start up the unit: oil temperature, mode, required load etc. Start up the unit, and observe the operation of compressor, electric expanding valve, fan motor and water pump etc. Note: the unit will be damaged under abnormal running state. Do not operate the unit in states of high pressure and high current.
-
Page 112: Test Operation & Troubleshooting & Maintenance
Test Operation & Troubleshooting & Maintenance Test Operation & Troubleshooting & Maintenance 1 Trial Run 1.1 Check for Wiring WARNING! Do not check for the power supply unless proper checkout equipment has prepared and preventive measures have been taken, otherwise it would lead to severe injury. (1) Are sizes of connection lines and the air switch proper? (2) Does wiring comply with relative standards and electric codes? (3) Is there any incorrect wiring? -
Page 113: Trial Run
When there is any error, solve it according to the troubleshooting flowchart covered in this manual. However, if the troubleshooting flowchart is still unhelpful, please contact GREE sales agent. 2 Error Code List... - Page 114 Test Operation & Troubleshooting & Maintenance Heat pump-water flow switch HP-Water SW Solar kit-water flow switch SL-Water SW Swimming pool-water flow switch SW-Water SW Welding protection of the auxiliary heater 1 Auxi. heater 1 Welding protection of the auxiliary heater 2 Auxi.
-
Page 115: Flow Chart Of Troubleshooting
Test Operation & Troubleshooting & Maintenance 3 Flow Chart Of Troubleshooting 3.1 Comp High-pressure Protection E1... -
Page 116: Comp Low- Pressure Protection E3
Test Operation & Troubleshooting & Maintenance 3.2 Comp Low- pressure Protection E3... -
Page 117: Comp Discharge Temp Protection E4
Test Operation & Troubleshooting & Maintenance 3.3 Comp Discharge Temp Protection E4... -
Page 118: Overload Protection Of Compressor Or Driver Error
Test Operation & Troubleshooting & Maintenance 3.4 Overload Protection of Compressor or Driver Error... -
Page 119: Dc Fan Error Ef
Test Operation & Troubleshooting & Maintenance 3.5 DC Fan Error EF 3.6 Temperature Sensor Error... -
Page 120: Communication Malfunction E6
Test Operation & Troubleshooting & Maintenance 3.7 Communication Malfunction E6... -
Page 121: Capacity Switch Error (Code:"C5")
Test Operation & Troubleshooting & Maintenance 3.8 Capacity Switch Error (Code:"C5") 4 Diagnosis of Driving 4.1 Diagnosis Flowchart of Driving of Single-phase Unit and Three-phase Unit 1) Drive Module Reset(Code:"P0") ; IPM or PFC Temperature Sensor Error(Code:"P7") ; AC Current Protection (Input Side)(Code:"PA"); Current Sense Circuit Error(code:"PC"); PFC Protection(Code:"HC") - Page 122 Test Operation & Troubleshooting & Maintenance 2) IPM or PFC Over-temperature Protection(Code:"P8") 3) DC Busbar Over-voltage Protection(Code:"PH") ; DC Busbar Under-voltage Protection...
- Page 123 Test Operation & Troubleshooting & Maintenance (Code:"PL") Note: three-phase input voltage is in the range from 320VAC to 475VAC. 4) Drive-to-main-control Communication Error(Code:"P6") 5) Compressor Startup Failure(code:"LC")
- Page 124 Test Operation & Troubleshooting & Maintenance 6) Compressor Current Protection (Code:"P5"); Compressor Motor Desynchronizing (Code:"H7"); IPM Protection (Code:"H5"); Phase Loss (Code:"LD")
- Page 125 Test Operation & Troubleshooting & Maintenance 7) Charging Circuit Error(Code:"PU")
-
Page 126: Daily Maintenance And Repair
Test Operation & Troubleshooting & Maintenance 5 Daily Maintenance and Repair 5.1 Daily Maintenance In order to avoid damage of unit, all protecting devices in the unit had been set before outgoing, so the user can never adjust or remove them. For the first startup of the unit or next startup of unit after long-period stop (above 1 day) by cutting off the power, please electrify the unit in advance to preheat the unit for more than 8hr Never put sundries on the unit and accessories. -
Page 127: Troubleshooting
Test Operation & Troubleshooting & Maintenance hydraulics system pressure according to next item: ① If the pressure is less than 0.5 bar, please recharge the water immediately; ② When recharging, the hydraulics system pressure should be not more than 2.5 Bar. 5.2 Troubleshooting Malfunctions Reasons... - Page 128 Test Operation & Troubleshooting & Maintenance It is the heart of the cooling system, mainly used to turn the low-temperature, low-pressure refrigerant vapor to high-temperature high-pressure vapor and then discharge it to Compressor the evaporator. The two-stage enthalpy-adding compressor is adopted herein, which can improve the heating performance of the unit largely.
-
Page 129: Charging And Discharging Of Refrigerant
Test Operation & Troubleshooting & Maintenance It is used to keep stable pressure of the water system. The tank is charged with a certain volume of nitrogen which is separated from the water side with a gasbag. When pressure of the water side exceeds the nitrogen pressure, the gasbag will Expansion Tank expand and water enters into the tank so as to lower the... - Page 130 Test Operation & Troubleshooting & Maintenance (4) After confirming that there is no leakage from the system, when the compressor is not in operation, charge additional R410A working fluid with specified amount to the unit through the filling opening of the liquid pipe valve of the outdoor unit.
Need help?
Do you have a question about the GRS-CQ8.0Pd/NaEK and is the answer not in the manual?
Questions and answers