Table of Contents
Advertisement
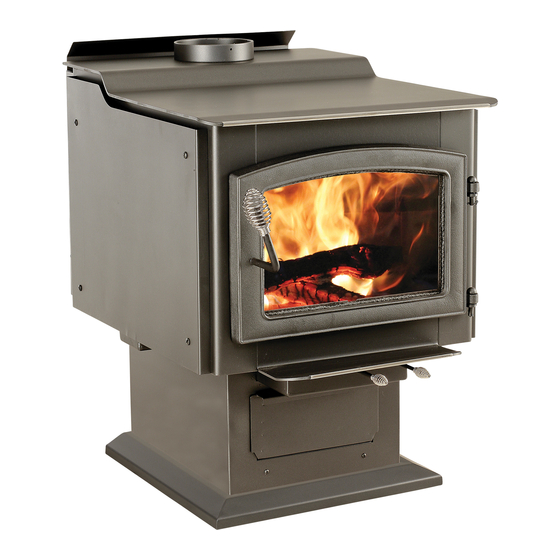
PONDEROSA HIGH-EFFICIENCY WOODSTOVE
Owner's Manual
Model TR007
EPA Certified (3.20 grams/Hr.)
(Save these Instructions)
Le Manuel de langue francais est disponible a www.
usstove.com / French language manual is available at
www.usstove.com
U.S. Environmental Protection Agency
Certified to comply with 2015 particulate emissions
standards.
This stove meets test standards:
US: Ul1482-2011 & CDN: ULC-S627-00
READ ALL INSTRUCTIONS CAREFULLY BEFORE
NOTE: IT IS RECOMMENDED INSTALLATION BE
INSTALLING OR OPERATING THIS STOVE. FAILURE TO
COMPLETED BY A QUALIFIED HEATING EQUIPMENT
FOLLOW INSTRUCTIONS MAY RESULT IN PROPERTY
INSTALLER!
DAMAGE, BODILY INJURY, OR EVEN DEATH.
ROOM HEATER, SOLID FUEL TYPE, ALSO FOR USE IN
REFER TO MARKINGS ON STOVE LABELS FOR
MOBILE (USA ONLY)
ADDITIONAL INFORMATION.
SAFETY NOTICE: IF THIS STOVE IS NOT PROPERLY INSTALLED, A HOUSE/BUILDING FIRE MAY RESULT. FOR YOUR
SAFETY, CONTACT LOCAL OR MUNICIPAL BUILDING OR FIRE OFFICIALS ABOUT PERMITS, RESTRICTIONS AND
INSTALLATION REQUIREMENTS FOR YOUR AREA.
U.S. Stove Company
227 Industrial Park Road,
South Pittsburg, TN 37380
Phone 1-800-750- 2723
www.usstove.com
852201D-2001G
Advertisement
Table of Contents

Related Manuals for Vogelzang International TR007


Summary of Contents for Vogelzang International TR007
- Page 1 PONDEROSA HIGH-EFFICIENCY WOODSTOVE Owner’s Manual Model TR007 EPA Certified (3.20 grams/Hr.) (Save these Instructions) Le Manuel de langue francais est disponible a www. usstove.com / French language manual is available at www.usstove.com U.S. Environmental Protection Agency Certified to comply with 2015 particulate emissions standards.
-
Page 2: Safety Instructions
Safety Instructions This manual describes the installation and operation of the Vogelzang, TR007 wood heater. This heater meets the 2015 U.S. Environmental Protection Agency’s crib wood emission limits for wood heaters sold after May 15, 2015. Under specific test conditions this heater has been shown to deliver heat at rates ranging from 11,913 to 34,108 Btu/hr. - Page 3 16. Do not operate stove while under the influence of drugs or alcohol. 17. DO NOT ELEVATE THE FIRE. Build fire directly on the bottom of the firebox. This stove has not been tested with the use of grates, andirons or other means of elevating the fire and must not be used. 18.
-
Page 4: Tools And Materials Required For Installation
Assembly Instructions NOTICE: No warranty is granted, stated or implied, for the installation or maintenance of your wood stove and assumes no responsibility of any incidental or consequential damages. TOOLS AND MATERIALS REQUIRED FOR INSTALLATION (NOTE: The following items are NOT included with your stove) Tools: Materials: •... - Page 5 LOCATING STOVE 1. The stove must be placed on solid concrete, solid masonry, or when installed on a combustible floor, on an Underwriters Laboratories Listed Type 2 floor protector listed to UL standard UL 1618, such as Hy-C or Imperial Model UL4056BK.
-
Page 6: Clearances - Top View
Locating Stove CLEARANCES | TOP VIEW COMBUSTIBLE CONSTRUCTION IN ACCORDANCE WITH US NFPA 211 DASHED LINES SHOW HORIZONTAL CHIMNEY CONNECTOR BACKWALL AND ADDITIONAL FLOOR PROTECTOR REQUIRED BENEATH 17"/ AND EXTENDING 2"/50.8mm BEYOND 40"/ EACH SIDE OF CONNECTOR PIPE 43.2cm 102cm 8"/21cm min. -
Page 7: Firebrick Assembly
FIREBRICK ASSEMBLY Firebrick extends the life of your stove and radiates heat more evenly. Check to see that all firebricks are in their correct positions and have not become misaligned during shipping or assembly. If removed for ease of locating stove, firebrick must be replaced before firing. -
Page 8: Connector Pipe Installation
Connector Pipe Installation NOTE: Connector pipe is not included. To purchase, visit your local hardware, home, or building center. See “locating stove” page 6 for additional specifications. Connector pipe is used to make the connection from the final positioning of your stove to an approved chimney. Connector pipe is NOT included as part of the stove. -
Page 9: Mobile Home Installation Instructions
Mobile Home Installation Instructions This stove is approved for mobile home installation in the USA only (DO NOT INSTALL IN MOBILE HOMES IN CANADA). In addition to the installation and safety instructions, the following requirements are MANDATORY for installation in a mobile home. All mobile home installations must be made in accordance to Manufactured Home and Safety Standard (HUD), CFR 3280, part 24. -
Page 10: Chimney Connections
Chimney Connections CHIMNEY THIMBLE FLUE COLLAR 6˝ ROUND The stove must be connected to either a lined masonry or manufactured metal chimney built and tested to the 24 ga. BLACK specifications listed on the previous pages. 5/8" TILE CONNECTOR Chimneys perform two functions: CHIMNEY STOVEPIPE As a means of exhausting smoke and flue gases which are the result of fuel combustion. - Page 11 MANUFACTURED CHIMNEY REFER TO CHIMNEY AND CHIMNEY CONNECTOR MAKER’S INSTRUCTIONS FOR INSTALLATION AND USE. Use only 6˝/152mm diameter manufactured chimney system listed to UL 103 HT (US) or ULC-S629 (CDN). Chimney made to this listing is High Temperature rated to 2100°F/1149°C.
-
Page 12: Fireplace Installation
CAUTION: Not all fireplace chimneys are suitable for conversion to accommodate connection to a wood stove. Check with a qualified expert. Many prefabricated fireplaces are of the “zeroclearance fireplace” category. These consist of multi layered metal construction. They are designed with enough insulation and/or air cooling on the base, back and sides so they can be safely installed in direct contact with combustible floors and walls. - Page 13 CHIMNEY CONNECTOR SYSTEMS & CLEARANCES NFPA 211 (US) NOTE: In Canada, installation must conform to CAN/CSA-B365 when passing through combustible construction. A. Brick Masonry - Minimum 3.5˝/89mm thick brick masonry all framed into combustible wall with a minimum of 12˝/305mm brick separation from clay liner to combustibles.
-
Page 14: Operating Safety Precautions
Operating Instructions Caution: House Fire Hazards • Do not store wood on floor protector, underneath stovepipe or anywhere within minimum clearances from combustible surfaces specified for this stove. • Overfiring may cause a house fire. You are overfiring if a unit or chimney connector glows red. OPERATING SAFETY PRECAUTIONS 1. -
Page 15: Optimal Fuel Consumption
Notice: Use solid wood materials only. Do not burn garbage or flammable fluids such as gasoline, naphtha or engine oil. Do not use coal. This stove is not designed to accommodate the air flow (draft) necessary to properly burn coal or coal products. Do not elevate fire or use grates or andirons. Build fire directly on bottom of firebox. -
Page 16: Starting A Fire
STARTING A FIRE DO NOT LEAVE STOVE UNATTENDED WITH DOOR OPEN! The top down method of fire building is recommended for this appliance. After making sure that the stove air intake controls are fully open (completely pull-out towards you), Place the largest pieces of wood on the bottom, laid in parallel and close together. Smaller pieces are placed in a second layer, crossways to the first. -
Page 17: Adding Fuel
ADDING FUEL If the coal bed is not hot and glowing, rake the coals to the front of the stove, close the door and adjust the primary air inlet control to the wide open position. Let the coals re-heat for 10–15 minutes. When hot and glowing, spread them out and place your next fuel load into the stove (make sure no coals or ashes block the LPAO). -
Page 18: Operational Tips
Chimney Connections OPERATIONAL TIPS • Get the appliance hot and establish a good coal bed before adjusting to a low burn rate (this may take 30 minutes or more depending on your wood) • Use smaller pieces of wood during start-up and a high burn rate to increase the stove temperature •... -
Page 19: Service Hints
Service Hints 1. Atmospheric Pressure and Air Supply Atmospheric pressure that affects the draft may occur from outside the structure, inside the structure, or both. High pressure weather (clear and cold) usually produces a better chimney draft than low pressure (overcast and damp) conditions. Negative pressure can be created inside a home by appliances that expel air from within such as bathroom vents, range hoods, clothes dryers, and forced air furnaces. -
Page 20: Preventing Creosote Buildup
PREVENTING CREOSOTE BUILDUP 1. Creosote will inevitably form in your chimney and connector pipe. Following these steps will help reduce the rate of build up. 2. BURN ONLY SEASONED WOOD that has dried for at least one year. (<20% humidity by weight) 3. -
Page 21: Door Gasket Replacement
Warning: Replace glass only with 5mm high temperature ceramic glass of the proper size. Do not use substitute materials such as tempered glass or double thickness window glass! Contact the stove manufacturer for replacement glass. GLASS REPLACEMENT PROCEDURE CAUTION: Do not operate with cracked 1. -
Page 22: Wiring Diagram
WIRING DIAGRAM - MODEL F-6 BLOWER OPTION Wiring Diagram CAUTION: MOVING PARTS CAN CAUSE DANGER: SHOCK HAZARD. DISCONNECT INJURY. DO NOT OPERATE WITH COVER POWER SOURCE BEFORE INSTALLATION REMOVED. AND WHENEVER SERVICING BLOWER ASSEMBLY. NOTICE: ANY REPLACE- MENT WIRING MUST HAVE E Q U I VA L E N T I N S U L A - TION AND TEMPERATURE RATING (105°C). -
Page 23: Ordering Parts
Ordering Parts -23-... -
Page 24: Parts List
Parts List Ref. No. Part No. Description Qty. 07-01 Stove Body 892399 Left Side Heat Shield 07-03 C-Cast, Top 07-04 Nickle Trim, Top Plate 07-05 Kao Wool Ceramic Fiber Pad 07-06 Rear Heat Shield Deflector 07-07 Kao Wool Retainer Assembly 892409 Pedestal Base 07-09... - Page 25 Ordering Parts WG-01 GK34 Caution: Never operate stove with missing or cracked fire bricks! Part No. Description Qty. Firebrick, A-size (9˝ x 4.5˝ x 1.25˝) Firebrick, M-size (9˝ x 2.25˝ x 1.25˝) Firebrick, XD-size (8˝ x 4.5˝ x 1.25˝) Firebrick, XE-size (9˝ x 1.5˝ x 1.25˝) -25-...
- Page 26 Floor Protector Material Calculations This stove has been tested for and must be installed on a floor protector with the proper Thermal Resistance or R-value as stated in step 1 of the installation instructions under “Locating Stove” section of this manual. If the floor protector materials listed in the instructions are not available, materials with an equivalent R-value may be substituted.
-
Page 27: Service Record
Service Record It is recommended that your heating system is serviced regularly and that the appropriate Service Interval Record is completed. Service Provider: Before completing the appropriate Service Record below, please ensure you have carried out the service as described in the manufacturer’s instructions. -
Page 28: Limited Warranty
Limited Warranty Plate Steel Heaters (Inserts, Freestanding, and Pedestal) Operation of this heater in a manner inconsistent with the owner’s manual will void your warranty and is against federal regulations. Vogelzang warrants to the original purchaser its products against premature failure of any component due to workmanship, quality, or materials as follows: TIME PERIOD: Firebox ............................ - Page 29 This heating appliance is safe when installed properly and will provide you with years of service. However, always exercise good judgement when you are using the stove. You are dealing with FIRE! Fire is inherently dangerous and must be treated with respect. Stay warm and in good health! THIS STOVE MAY BE INSTALLED IN A MOBILE HOME WITH SPECIFIC INSTALLATION INSTRUCTIONS FOR SUCH USE.
Need help?
Do you have a question about the TR007 and is the answer not in the manual?
Questions and answers