Vogelzang International Highlander TR003 Owner's Manual
High efficiency woodstove
Hide thumbs
Also See for Highlander TR003:
- Owner's manual (21 pages) ,
- Owner's manual (20 pages) ,
- Owner's manual (20 pages)
Table of Contents
Advertisement
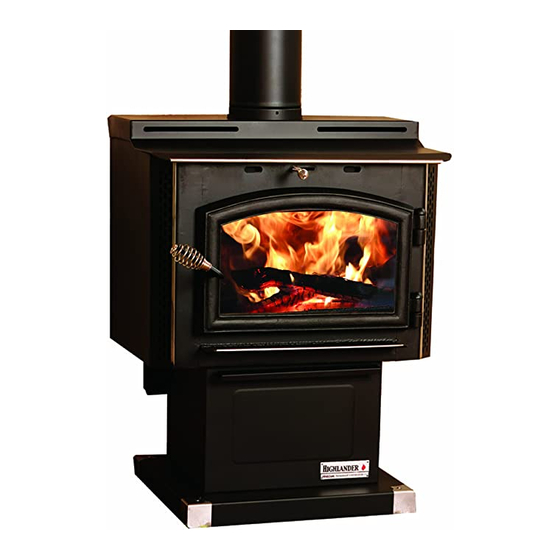
HIGHLANDER
EFFICIENCY WOODSTOVE
Model TR 003 Owners Manual
READ ALL INSTRUCTIONS CAREFULLY
BEFORE STARTING THE INSTALLATION
OR OPERATING THE STOVE. FAILURE TO
FOLLOW INSTRUCTIONS MAY RESULT
IN PROPERTY DAMAGE, BODILY INJURY,
OR EVEN DEATH.
SAFETY INSTRUCTIONS
SAFETY NOTICE: IF THIS STOVE IS NOT PROPERLY INSTALLED A HOUSE/BUILDING FIRE
MAY RESULT. FOR YOUR SAFETY, CONTACT LOCAL BUILDING OR FIRE OFFICIALS ABOUT
PERMITS, RESTRICTIONS, AND INSTALLATION REQUIREMENTS FOR YOUR AREA.
READ ALL INSTRUCTIONS CAREFULLY.
1. The installation of this stove must comply with
your local building code rulings. Please observe
the clearances to combustibles (see reference
figures 1–3). Do not place furniture or other
objects within the clearance area.
2. Verify that the stove is properly assembled &
installed as shown in these instructions before
firing the stove for the first time. After reading
these instructions, if you have any doubt about
your ability to complete your installation properly,
you must obtain the services of a professional
licensed installer familiar with all aspects of safe
and correct installation. DO NOT ALTER STOVE
or use temporary or makeshift compromises
during installation.
3. DO NOT store wood, flammable liquids or other
combustible materials too close to the unit. Refer
to certification label on back of unit and reference
figures 1 – 3 in this manual.
4. Do not install this stove in a mobile
home, manufactured home, trailer or tent
( N O E X C E P T I O N S ! p e r H U D Fe d e ra l
Standard: 24 CFR Ch.XX).
NorthlineExpress.com
VGZ-028 / 20120208.0
EPA Certified (5.76 grams/hr)
(save this manual for future reference)
www.NorthlineExpress.com
HIGH
™
DO NOT USE THIS STOVE IN A
MOBILE HOME, MANUFACTURED HOME,
TRAILER OR TENT — NO EXCEPTIONS!
This stove meets
Test Standards:
UL 1482-1996
5. DO NOT MODIFY THIS STOVE IN ANY WAY! Stove
base must set directly upon the solid-surface,
non-combustible floor as specified in this stove
instruction manual. DO NOT ELEVATE STOVE
BY ANY MEANS (i.e. bricks or blocks under ped-
estal). Stove must be installed with pedestal stand
provided and attached as shown in the instructions.
DO NOT OPERATE WITHOUT ASH DRAWER IN
PLACE – NO EXCEPTIONS. Assemble only with
original parts as supplied and shown in this manual.
DO NOT OPERATE A STOVE THAT IS MISSING
ANY PARTS! If any parts are missing or defective,
please notify the dealer or manufacturer immediately.
Replace missing, broken or worn parts with factory
original or equivalent parts only.
6. CAUTION: DO NOT ALTER COMBUSTION AIR
CONTROL RANGE TO INCREASE FIRING OR
FOR ANY REASON. Altering or tampering with air
control beyond normal capacity will create unsafe
and hazardous conditions.
7. Always connect this stove to a chimney and vent
to the outside. Never vent to another room or
inside a building. DO NOT CONNECT THIS
TR003X HIGHLANDER™ /
continued on next page
Call us at 1-866-667-8454
Page 1
Advertisement
Table of Contents

Related Manuals for Vogelzang International Highlander TR003


Summary of Contents for Vogelzang International Highlander TR003
-
Page 1: Safety Precautions
HIGHLANDER HIGH ™ EFFICIENCY WOODSTOVE EPA Certified (5.76 grams/hr) Model TR 003 Owners Manual (save this manual for future reference) READ ALL INSTRUCTIONS CAREFULLY DO NOT USE THIS STOVE IN A BEFORE STARTING THE INSTALLATION MOBILE HOME, MANUFACTURED HOME, OR OPERATING THE STOVE. FAILURE TO TRAILER OR TENT —... - Page 2 SAFETY INSTRUCTIONS continued… UNIT TO A CHIMNEY FLUE SERVING ANOTHER or abuse. When installing your stove, use care APPLIANCE. in handling. Clean with soap and warm water 8. DO NOT CONNECT A WOOD BURNING STOVE when stove is not hot. Do not use any acids TO AN ALUMINUM TYPE B GAS VENT.
-
Page 3: Table Of Contents
TABLE OF CONTENTS Safety Precautions ..................1 – 2 Tools and Materials Required for Installation ........... 4 Assembly Instructions ..................4 Locating the Stove ..................... 4 Minimum Clearances ................. 5 – 6 Installation ......................7 Firebrick Assembly .................... 7 Connector Pipe Installation ................7 Chimney Connections ................ -
Page 4: Tools And Materials Required For Installation
ASSEMBLY INSTRUCTIONS NOTICE: Vogelzang International Corp. grants no warranty, stated or implied, for the installation or maintenance of your wood stove and assumes no responsibility of any incidental or consequential damages. TOOLS AND MATERIALS REQUIRED FOR INSTALLATION 7. Place flattened carton on floor and place styrofoam tools packaging material on carton to support stove body •... - Page 5 LOCATING STOVE …continued 2. The stove must have its own flue. DO NOT 7. T h e c l e a r a n c e s p r o v i d e d a r e m i n i m u m CONNECT THIS UNIT TO A CHIMNEY FLUE dimensions determined by Omni Test Lab- SERVING OTHER APPLIANCES.
-
Page 6: Minimum Clearances
LOCATING STOVE …continued CORNER CLEARANCES 12" 12" Fig. 2 – Top View Minimum Corner Clearances from Combustible Surfaces Fig. 3b – Side View Minimum Clearance Dimensions from Combustible Surfaces FIREBRICK ASSEMBLY Firebrick extends the life of your stove and radiates heat more evenly. -
Page 7: Installation
LOCATING STOVE Fire Brick Dimensions A-Size: 9”x41/2”x11/4” B-Size: 9”x23/4”x11/4” C-Size: 9”x31/4”x11/4” Four (4) A-Size Two (2) A-Size Two (2) B-Size Two (2) C-Size Fig.4b– Step 2, Side Firebrick Installation Fig.4c– Step 3, Back Firebrick Installation CONNECTOR PIPE INSTALLATION tion. The use of more than two 90 degree bends NOTE: CONNECTOR PIPE IS NOT INCLUDED. -
Page 8: Chimney Connections
CHIMNEY CONNECTIONS The stove must be connected to either a masonry nect directly to a masonry chimney are shown in or manufactured metal chimney built and tested to the figure 6. specifications listed on the previous pages. If the connector stove pipe must go through a com- Chimneys perform two functions: bustible wall before entering the masonry chimney, 1). - Page 9 CHIMNEY CONNECTIONS continued … MANUFACTURED CHIMNEY REFER TO CHIMNEY AND CHIMNEY CONNEC- TOR MAKER’S INSTRUCTIONS FOR INSTALLATION AND USE. Use only 6” diameter listed chimney UL 103 HT Chimney made to this listing is High Temperature rated to 2100 degrees Fahrenheit. Use chimney from only one manufacturer.
- Page 10 CHIMNEY CONNECTIONS continued … or a knowledgeable inspector. Consult your insurance Positioning the center of the stove pipe entry into company if you cannot find a qualified expert. the chimney 24” below the ceiling should insure proper clearance for a 6” stovepipe. CAUTION: Not all fireplaces are suitable 2.
-
Page 11: Operating Instructions
OPERATING INSTRUCTIONS CAUTION: HOUSE FIRE HAZARDS WARNING: EXPLOSION HAZARD • DO NOT STORE WOOD ON FLOOR PROTEC- • NEVER USE CHEMICALS, GASOLINE, TOR, UNDERNEATH STOVEPIPE OR ANY- GASOLINE-TYPE LANTERN FUEL, KEROSENE, WHERE WITHIN MINIMUM CLEARANCES FROM CHARCOAL LIGHTER FLUID, OR SIMILAR COMBUSTIBLE SURFACES SPECIFIED FOR FLAMMABLE LIQUIDS TO START OR “FRESH- THIS STOVE. -
Page 12: Adding Fuel
OPERATING INSTRUCTIONS OPERATING TIPS 7. Once fuel has been loaded, close the door and fully open air inlet control until fire is well established Preventing Creosote Buildup (approximately 10 minutes) being careful not to 1. Burn with air control open for several minutes at over fire. -
Page 13: Service Hints
SERVICE HINTS CHIMNEY DRAFT on the glass can develop into cracks or breaks dur- ing operation. Draft is a function of the chimney, not the 5. Never attempt to clean the glass while the unit is hot; stove — do not expect the stove to draw. Smoke spillage allow to dry thoroughly before reuse. -
Page 14: Creosote Formation, Prevention, Removal
SERVICE HINTS…cont’d CHIMNEY MAINTENANCE Door Gasket Replacement CREOSOTE – Formation and Removal When wood is burned slowly, it produces tar and CAUTION: DO NOT OPERATE A STOVE THAT IS other organic vapors which combine with expelled mois- MISSING DOOR GASKET MATERIAL. OVER FIR- ture to form creosote. -
Page 15: Parts - Highlander
PARTS - TR003X HIGHLANDER HIGH-EFFICIENCY STOVE When ordering missing or replacement par ts, always give the Model Number of the stove, Part Number, and Part Description. Use the illustrations and part lists provided to identify parts. 11 (12) 10 (12) 9 (12) 14, 15, 16 Part No. -
Page 16: Parts - Glass Door (Glass Replacement)
PARTS - TR003X HIGHLANDER HIGH-EFFICIENCY STOVE When ordering missing or replacement parts, always give the Model Number of the stove, Part Number, and Part Description. Use the illustrations and part lists provided to identify parts. Part No. Description Qty. Door Assembly (complete) ......1 Handle Assembly (complete) .... -
Page 17: Optional F-6 Blower Wiring Diagram
WIRING DIAGRAM - HIGHLANDER BLOWER ASSEMBLY When ordering missing or replacement par ts, always give the Model Number of the stove, Part Number, and Part Description. Use the illustrations and part lists provided to identify parts. CAUTION: MOVING PARTS CAN CAUSE DANGER: SHOCK HAZARD. -
Page 18: Floor Protector Calculations
FLOOR PROTECTOR MATERIAL CALCULATIONS This stove has been tested for and must be installed on a floor protector with the proper Thermal Resistance or R-value as stated in the installation instructions on page 3, “Locating Stove” step 1, of this manual. If the floor protector materials listed in the instructions are not available, materials with an equivalent R-value may be substituted. -
Page 19: Chimney Connection Systems & Clearances
CHIMNEY CONNECTOR SYSTEMS & CLEARANCES A. Brick Masonry Minimum 3.5˝/89mm thick brick masonry all framed into combustible wall with a minimum of 12˝/305mm brick separation from clay liner to combustibles. The fireclay liner shall run from outer surface of brick wall to, but not beyond, the inner surface of chimney flue liner and shall be firmly cemented in place. - Page 20 This Vogelzang heating appliance is safe when installed properly and will provide you with years of service. However, always exercise good judgement when you are using this stove. You are dealing with FIRE! Fire is inherently dangerous and must be treated with respect. Stay warm and in good health! Respectfully yours, Steve Vogelzang Proprietor...
Need help?
Do you have a question about the Highlander TR003 and is the answer not in the manual?
Questions and answers