Advertisement
Quick Links
1.
Remove your scooter from its packaging.
Loosen the tiller adjustment knob, raise the tiller
to the desired angle and retighten the knob.
5.
Insert the armrests into the attachement points
in the seat frame so that the armrests face
forward.
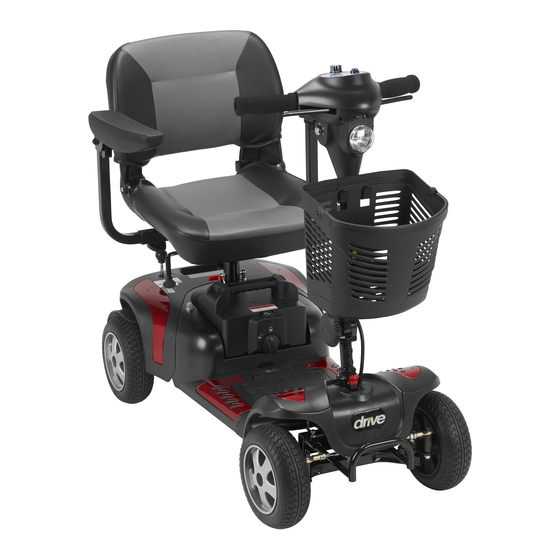
Quick Start Guide
Phoenix HD 3 & 4 Wheel
2.
Remove the clear plastic insert from the area
where the battery pack connects on the front
shroud.
6.
Secure the armrests in place with the provided
star knobs at the desired width.
Please Read Before Operating!
For technical assistance, call toll free (866) 621-4933 or (800) 544-5155.
3.
Set the battery pack onto the scooter directly in
front of the seat post. Lock the battery pack in
place by rotating the dial on the pack to the
locked position.
7.
Attach the front basket by aligning the bracket
on the tiller with the mounting holes on the
basket. Then push down to secure in place.
4.
While lifting up on the seat release lever, place
the seat onto the seat post. Release the lever
and rotate the seat until it locks into place.
8.
Fully charge the scooter's batteries by inserting
the round charger connector into either the
charging terminal on the scooter's battery pack or
the terminal located on the scooter's tiller. Then insert
the 3-pronged plug into a standard electrical outlet.
Be sure to charge the scooter for 8-10 hours before
first time use.
Advertisement

Related Manuals for Drive Phoenix HD


Summary of Contents for Drive Phoenix HD
- Page 1 Please Read Before Operating! Quick Start Guide Phoenix HD 3 & 4 Wheel For technical assistance, call toll free (866) 621-4933 or (800) 544-5155. Remove your scooter from its packaging. Remove the clear plastic insert from the area Set the battery pack onto the scooter directly in...
- Page 2 THIS FIRST! Your Phoenix HD Scooter is designed to be easily disassembled into 5 pieces for convenient transport or storage. The pieces are: • Front Section (heaviest piece, 40 lbs.) • Rear Section •...
Need help?
Do you have a question about the Phoenix HD and is the answer not in the manual?
Questions and answers