Table of Contents
Advertisement
Advertisement
Table of Contents

Related Manuals for Drive Spitfire Scout


Summary of Contents for Drive Spitfire Scout
- Page 1 SPITFIRE SCOUT OWNER’S MANUAL...
-
Page 2: Table Of Contents
SAFETY NOTICES III. SAFETY GUIDELINES EMI & RFI INFORMATION PARTS SETUP VII. COMFORT ADJUSTMENTS VIII. ASSEMBLY & DISASSEMBLY OPERATION BATTERIES & CHARGING INSPECTION & MAINTENANCE XII. BASIC TROUBLESHOOTING XIII. SPECIFICATIONS XIV. LIMITED WARRANTY XV. ACCESSORIES Spitfire Scout Owner’s Manual www.drivemedical.com REV3.9.29.14... -
Page 3: Preface
The manufacturer disclaims all responsibilities for any personal injury or property damage which may occur as a result of improper or unsafe use of this product. Spitfire Scout Owner’s Manual www.drivemedical.com REV3.9.29.14... -
Page 4: Safety Notices
Always make sure the power is turned off when getting in and out of the scooter. Always make sure freewheel levers are in the drive position before getting in or out of the scooter. Do not put the scooter in freewheel when on an incline or decline. - Page 5 Do not stand on the foot board. Keep your hands and feet away from moving parts while driving. Be aware of loose fitting clothes that can become caught in the drive wheels. Do not connect an extension cord to the battery charger. ...
-
Page 6: Safety Guidelines
MODIFICATIONS Do not modify, remove, disable, or add any parts, features, or functions on your scooter. Drive Medical offers a wide variety of accessories for your scooter to help accommodate your needs. WARNING – Do not modify your scooter in any way; doing so will void the warranty. - Page 7 WARNING – Never put the scooter in freewheel model while on an incline. WARNING – Drive your scooter straight up or down an incline, never backwards. Erratic movements, or back and forth patterns may increase the chance of tipping.
- Page 8 Disengaged, or “freewheel” mode, releases the locking mechanism on the gearbox allowing the scooter to roll freely with or without power. Engaged, or “drive” mode, secures the locking mechanism on the gearbox preventing the scooter from rolling freely. WARNING – Never attempt to personally put your scooter in freewheel mode while seated in the unit.
- Page 9 OUTDOOR OPERATION & INCLEMENT WEATHER PRECAUTIONS While your scooter is purposed for in-home use to assist you in daily living activities; Drive Medical understands there are times you need to operate the scooter outdoors, and has designed it to perform superbly on level outdoor surfaces.
- Page 10 Reduce the forward speed just before the front wheels come in contact with the obstacle, and remain at the reduced speed until scooter has cleared the obstacle, and then you may increase the forward speed. CORRECT INCORRECT APPROACH: APPROACH: Spitfire Scout Owner’s Manual www.drivemedical.com REV3.9.29.14...
-
Page 11: Transporting Your Scooter
WARNING – Do not sit in your scooter while in a moving vehicle. POSITIONING BELT (OPTIONAL) A safety belt may be included with your scooter. Your authorized Drive Medical Provider, assistive technology therapist, or healthcare professional are responsible for determining your requirement for a safety belt to operate your scooter safely. Once determined, securely fasten the safety belt. - Page 12 ATTENTION – Be aware of your own physical limitations when familiarizing yourself with the scooter. ATTENTION – Be aware of precautions, warnings, and safety issues when taking prescribed or over-the-counter drugs while operating your scooter. Spitfire Scout Owner’s Manual www.drivemedical.com REV3.9.29.14...
-
Page 13: Emi & Rfi Information
WARNING – Be aware of nearby transmitters, such as radio or television stations, and avoid close proximity. WARNING – If you experience unintended movement or brake release occurs, power off as soon as it is safe. Please report EMI incidents to Drive Medical. Spitfire Scout Owner’s Manual www.drivemedical.com... -
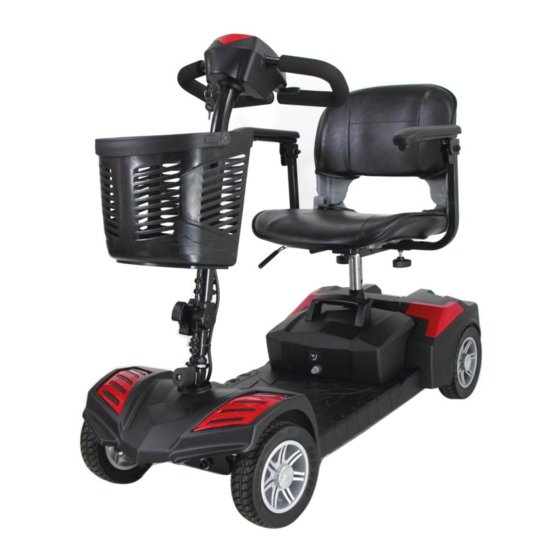
Page 14: Parts
6. Tiller Adjustment Knob 7. Front Wheel Lock 8. Seat Swivel & Release Lever 9. Seat Post 10. Battery Pack 11. Charge Port 12. Circuit Breaker 13. Footboard 14. Accessory Post 15. Freewheel Lever 16. Anti-tip Wheels Spitfire Scout Owner’s Manual www.drivemedical.com REV3.9.29.14... - Page 15 1. Battery Indicator 2. Horn Button 3. Speed Dial 4. Throttle 5. Key Switch 6. Key 7. Diagnostic Light (the red light on the battery indicator will also display flash codes when a problem exists) Spitfire Scout Owner’s Manual www.drivemedical.com REV3.9.29.14...
-
Page 16: Setup
Step 3: While lifting up on the seat release lever, place the seat onto the seat post. Release the lever and rotate the seat until it locks into place. Spitfire Scout Owner’s Manual www.drivemedical.com REV3.9.29.14... - Page 17 Step 6: Fully charge the scooter by inserting the round charger connector into the battery charging terminal on the battery pack, and then insert the 3-pronged plug into a standard electrical outlet. Spitfire Scout Owner’s Manual www.drivemedical.com REV3.9.29.14...
- Page 18 The new panel will snap into place. Front Shroud Replacement: Reach underneath the front shroud, and gently push up on the color panel until it releases from the scooter. The new panel will snap into place. Spitfire Scout Owner’s Manual www.drivemedical.com REV3.9.29.14...
- Page 19 VI. SETUP Rear Shroud Replacement: Reach underneath the rear shroud, and gently push up on the color panel until it releases from the scooter. The new panel will snap into place. Spitfire Scout Owner’s Manual www.drivemedical.com REV3.9.29.14...
-
Page 20: Comfort Adjustments
Adjust the seat post to the desired height, and reinstall the nut and bolt removed. Be sure the nut and bolt are tightened securely to reduce vibrations, and improve stability. Spitfire Scout Owner’s Manual www.drivemedical.com REV3.9.29.14... - Page 21 The angle of the tiller can be adjusted to multiple positions to suit each user. Loosen the knob on the right side of the tiller, reposition the tiller as necessary, and tighten the knob to secure the tiller in place. Spitfire Scout Owner’s Manual www.drivemedical.com REV3.9.29.14...
-
Page 22: Assembly & Disassembly
180° to allow for removal of the battery pack. Step 3: Loosen the tiller angle adjustment knob, and drop the tiller to its lowest position. Tighten the angle adjustment knob to secure the tiller in place. Spitfire Scout Owner’s Manual www.drivemedical.com REV3.9.29.14... - Page 23 Assembly: Step 1: Line up the front and rear sections of the base. Lift up on the connecting handle, and slowly lower the front and rear sections until the two lock together. Spitfire Scout Owner’s Manual www.drivemedical.com REV3.9.29.14...
- Page 24 Step 4: While lifting up on the seat release lever, place the seat onto the seat post. Release the lever and rotate the seat until it locks into place. Spitfire Scout Owner’s Manual www.drivemedical.com REV3.9.29.14...
-
Page 25: Operation
Rotate the speed knob to the lowest speed setting. Engage the throttle, and begin steering to drive forward, backward, left or right. If you want to stop the scooter, release the throttle and it will automatically return to the center position to stop the unit. -
Page 26: Batteries & Charging
SUGGESTION – If you use your scooter infrequently, charge the batteries once a week for 10 to 14 hours. Spitfire Scout Owner’s Manual www.drivemedical.com REV3.9.29.14... - Page 27 SUGGESTION – When transporting your scooter on public transportation contact your carrier’s ticket counter in advance to determine their specific requirements. Spitfire Scout Owner’s Manual www.drivemedical.com REV3.9.29.14...
-
Page 28: Inspection & Maintenance
Your scooter is an advanced mobility device, and with the correct routine maintenance you can ensure years of maximum use. While some of the maintenance can be done by yourself, you may need assistance from an authorized Drive Medical provider. If you have any doubts, contact your authorized Drive Medical provider. - Page 29 WARNING – Never hose off your scooter or expose it to direct contact with water. WARNING – Never use any chemicals on the upholstery of your seat, this may cause the seat to dry out and crack. Spitfire Scout Owner’s Manual www.drivemedical.com REV3.9.29.14...
- Page 30 Drive Medical provider for information on proper disposal. CONTACTING YOUR AUTHORIZED DRIVE MEDICAL PROVIDER The following conditions may indicate a serious problem with your scooter. Contact your authorized Drive Medical provider if one of the following conditions occurs: Motor or gearbox noise ...
- Page 31 Check the entire scooter and clean any mud, dirt, hair, food, drink, etc. on the unit SUGGESTION – Once a year take your scooter to an authorized Drive Medical provider for inspection and maintenance. Spitfire Scout Owner’s Manual www.drivemedical.com...
-
Page 32: Basic Troubleshooting
Charge the battery pack. Main Fault Contact your authorized Drive Medical provider. Brake Fault Engage the freewheel lever to “drive” mode. Make sure the throttle is in the rest or neutral Throttle Fault position when powering on. Check connections to the battery & charge the Battery Fault battery pack if necessary. -
Page 33: Specifications
Country of Origin: Vietnam * Speed and range vary with user weight, type of terrain, battery charge and condition The information contained herein is correct at the time of publication; Drive Medical reserves the right to alter specifications without prior notice. -
Page 34: Limited Warranty
ADDITIONAL COMPONENTS Items not mentioned or listed are covered at the discretion of Drive Medical. Any accessories, standard or optional, supplied by Drive Medical, are covered for a period of one year from the date of purchase with the particular unit. - Page 35 REPLACEMENT PARTS WARRANTY Some states do not allow limitations on how long an implied warranty lasts or do Parts that are supplied by Drive Medical as replacements to warranted parts will be not allow the exclusion or limitation of warranted for a period of time equal to the incidental, punitive, special and remainder of the original part’s warranty...
-
Page 36: Accessories
XV. ACCESSORIES Add functionality and convenience to your Drive scooter with these options and accessories. Contact your authorized Drive Medical provider or visit www.drivemedical.com for more information. Dust Cover Trailer Oxygen Tank Holder Crutch/Cane Holder Part#: AZ1000 Part#: AT1000 Part#: AH2000... - Page 37 Drive Medical Design & Manufacturing 99 Seaview Boulevard Port Washington, NY Tel: (516) 998-4600 Fax: (516) 566-2043 www.drivemedical.com Spitfire Scout Owner’s Manual www.drivemedical.com REV3.9.29.14...
Need help?
Do you have a question about the Spitfire Scout and is the answer not in the manual?
Questions and answers