Table of Contents

Related Manuals for Getac RX10


Summary of Contents for Getac RX10
- Page 1 RX10 USER MANUAL...
- Page 2 Rugged Mobi l e Computi ng Sol uti ons July 2015...
- Page 3 All brand and product names are trademarks or registered trademarks of their respective companies. NOTE The information in this manual is subject to change without notice. For the latest version of the manual, please visit the Getac website at www.getac.com.
-
Page 4: Table Of Contents
Tabl e of Contents Chapter 1 Getting Started ................1 Getting the Tablet PC Running ......... 2 Unpacking ..............2 Installing the Micro-SIM Card (Optional) and Battery Pack 3 Connecting to AC Power ..........5 ... - Page 5 Security Menu ............52 Boot Menu .............. 53 Exit Menu ............... 53 Chapter 6 Using Getac Software ............. 55 OSD Control Panel ............56 G-Manager ..............57 Getac Camera ............. 59 ...
- Page 6 Cleaning Guidelines ........... 62 Battery Pack Guidelines ..........62 Touchscreen Guidelines ..........64 When Traveling ............65 Chapter 8 Troubleshooting ..............66 Preliminary Checklist ............67 Solving Common Problems ..........68 Battery Problems ............
-
Page 8: Getting Started
Chapter 1 Getti ng Started Congratulations on purchasing this healthcare Tablet PC. This chapter first tells you step by step how to get the Tablet PC up and running. Then, you will find a section briefly introducing the external components of the Tablet... -
Page 9: Getting The Tablet Pc Running
Getti ng the Tabl et PC Runni ng Unpacki ng After unpacking the shipping carton, you should find these standard items: RX10 Tablet PC AC adapter AC power cord Battery pack Stylus Tether Driver disc ... -
Page 10: Installing The Micro-Sim Card (Optional) And Battery Pack
Instal l i ng the Mi cro-SIM Card (Opti onal ) and Battery Pack Sel ect model s onl y: With the micro-SIM card’s chip side facing up and the beveled corner pointing to the slot, insert the card all the way into the slot. NOTE: To remove the micro-SIM card, just push in the card to pop-out and remove the card. - Page 11 CAUTION: Make sure the latch is correctly locked, not revealing the underneath red part.
-
Page 12: Connecting To Ac Power
Connecti ng to AC Power It is suggested that you use AC power when starting up the Tablet PC for the very first time. 1. Plug the DC cord of the AC adapter to the power connector of the Tablet PC ... -
Page 13: Using The Tether
Usi ng the Tether A tether is provided for attaching the stylus to your Tablet PC. 1. Insert one of the tether’s loop ends through the hole of the stylus (as indicated below). Then, insert the other end through the first loop (as indicated ... -
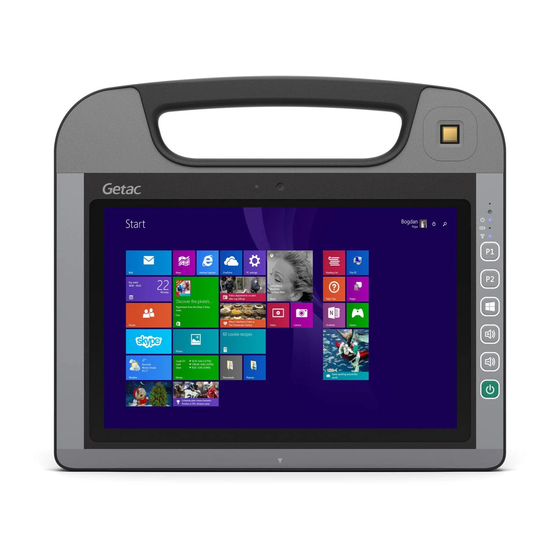
Page 15: Taking A Look At The Tablet Pc
Taki ng a Look at the Tabl et PC NOTE: Depending on the specific model you purchased, the color and look of your model may not exactly match the graphics shown in this document. CAUTION: You need to open the protective covers to access the connectors. - Page 16 Lights blue when the RF radio of any RF feature RF (Radi o (WLAN/BT/WWAN) is on. Frequency) Starts the Getac Camera program and serves as P. 59 P1 Button the shutter release button. Can be changed to another set of predefined P.
- Page 17 Component Descri pti on See Al so occasions. Opens or closes the OSD Control Panel. P. 56 P2 Button P. 68 When pressed l onger: Serves as the keyboard keys. Ctr l Al t Can be changed to another set of predefined P.
-
Page 18: Rear Components
Rear Components Component Descri pti on See Al so Stylus can be tethered to this hole. P. 6 Tether Hol e Serves as the input device by tapping on the P. 16 Styl us/ touchscreen to make selections and enter Digi tizer Pen information. -
Page 19: Left-Side Components
The bridge battery charging is in Bl i nki ng i n amber: an abnormal state. Ask for repair service in case this happens. Component Descri pti on See Al so Supplies power to your Tablet PC when external P. -
Page 20: Top Components
Component Descri pti on See Al so Connects a HDMI monitor or TV set. P. 46 Micro HDMI Connector Connects a set of headphones or external P. 46 Combo Audio speakers with amplifier Connector Supports a headset microphone with 4-pole TRRS 3.5mm jack. -
Page 22: Operating Your Tablet Pc
Chapter 2 Operati ng Your Tabl et PC This chapter provides information about the use of the Tablet PC. If you are new to computers, reading this chapter will help you learn the operating basics. If you are already a computer user, you may choose to read only the parts containing information unique to your Tablet PC. -
Page 23: Turning On And Off The Tablet Pc
Turni ng On and Off the Tabl et PC Turni ng On Press the power button ( ) for at least 2 seconds until the Power Indicator lights up. The Windows operating system should start. NOTE: By default, there is 2-second delay time for the power button. - Page 24 * “Sleep” is the default setting of the power button. You may change what the power button does in Windows settings.
-
Page 25: Navigating On The Screen
Navi gati ng on the Screen The screen of your Tablet PC is touch-sensitive. You can control the location of the cursor/pointer on the screen using the included stylus or your finger to communicate with the Tablet PC. CAUTION: Do not use a sharp object such as a ballpoint pen or pencil on the touchscreen. - Page 26 Usi ng Mul ti -touch Gestures You can interact with your Tablet PC by placing two fingers on the screen. The movement of the fingers across the screen creates “gestures,” which send commands to the Tablet PC. Here are the multi-touch gestures that you can use: Acti ons Gestur es Descri pti ons...
-
Page 27: Using The Dual Mode Display (Optional)
Acti ons Gestur es Descri pti ons = fi nger down; = fi nger up) Press and Use press and tap to access the shortcut menu. Press on target and tap using a second finger. Two- The function is defined by finger Tap applications that support the specific gesture. - Page 28 You can move the cursor by bringing the digitizer pen close to the screen, without actually touching the screen’s surface.
-
Page 29: Using The Wireless Connection Features
Use either Windows Mobility Center or Getac Quick Bar. To For Wi ndows 7: open Getac Quick Bar, tap and hold the Getac Utility icon on Windows taskbar and select . Tap the WLAN button in the Quick Bar (an Quick Bar X over the button means the radio is currently off). -
Page 30: Using The Bt Feature
If you want to quickly turn off all wireless radio, simply switch on Airplane mode. Connecti ng to a WLAN Network 1. Make sure that the WLAN function is enabled (as described above). Tap the network icon in the system tray. For Wi ndows 10: Tap the Wireless Network icon on the taskbar. - Page 31 Devi ces Bl uetooth switch to the position. Use Getac Quick Bar. To open Getac Quick Bar, tap and For Wi ndows 7: hold the Getac Utility icon on Windows taskbar and select Quick Bar Tap the BT button in the Quick Bar (an X over the button means the radio is currently off).
-
Page 32: Using The Wwan Feature (Optional)
Mobi l e Broadband Mobi l e Broadband to the On position. Use the WWAN utility software or Getac Quick Bar. To open For Wi ndows 7: Getac Quick Bar, tap and hold the Getac Utility icon on Windows taskbar and select . - Page 33 To turn off the WWAN radi o: You can turn off the WWAN radio the same way you turn it on. If you want to quickly turn off all wireless radio, simply switch on Airplane mode. Setti ng up a WWAN Connecti on 1.
-
Page 34: Managing Power
Chapter 3 Managi ng Power Your Tablet PC operates either on external AC power or on internal battery power. This chapter tells you how you can effectively manage power. To maintain optimal battery performance, it is important that you use the battery in the proper way. -
Page 35: Ac Adapter
AC Adapter CAUTION: The AC adapter is designed for use with your Tablet PC only. Connecting the AC adapter to another device can damage the adapter. The AC power cord supplied with your Tablet PC is for use in the country where you purchased your Tablet PC. -
Page 36: Battery Pack
Battery Pack The battery pack is the internal power source for the Tablet PC. It is rechargeable using the AC adapter. NOTE: Care and maintenance information for the battery is provided in the “Battery Pack Guidelines” section in Chapter Chargi ng the Battery Pack NOTE: ... -
Page 37: Initializing The Battery Pack
Ini ti al i zi ng the Battery Pack You need to initialize a new battery pack before using it for the first time or when the actual operating time of a battery pack is much less than expected. Initializing is the process of fully charging, discharging, and then charging. -
Page 38: Battery Low Signals And Actions
Push-button Battery Low Si gnal s and Acti ons The battery icon changes appearance to display the current state of the battery. Ic on Batter y Level Descri pti on Discharging The icon shows the charge remaining in 10-percent increments until the charge reaches the low-battery level. The battery charge has reached the low-battery level (10% by default). -
Page 39: Replacing The Battery Pack
Repl aci ng the Battery Pack CAUTION: There is danger of explosion if the battery is incorrectly replaced. Replace the battery only with the Tablet PC manufacturer’s battery packs. Discard used batteries according to the dealer’s instructions. Do not attempt to disassemble the battery pack. NOTE: You can hot swap the battery pack as described later in “Hot Swapping the Battery Pack.”... - Page 40 4. Fit another battery pack into place. With the battery pack correctly oriented, attach its connector side to the battery compartment at an angle ( ) and then press down the other side ( ). The battery latch should be engaged in the locked position (...
-
Page 41: Hot Swapping The Battery Pack
CAUTION: Make sure the latch is correctly locked, not revealing the underneath red part. Hot Swappi ng the Battery Pack “Hot swapping” means you can safely replace the battery pack without shutting down while your Tablet PC is running on battery power. This is possible because your Tablet PC has an internal bridge battery. - Page 42 The appropriate temperature range for hot swapping the battery pack is between -10 C (14 F) and 50 C (122 F). Check the Bridge Battery Indicator after unlocking the battery latch. Replace the battery pack only when the indicator lights in green. A red light means the bridge battery level is too low for you to safely hot swap the battery pack.
- Page 43 the charging source to only the external AC power. (For setup information, see “Advanced Menu” in Chapter 5 and the item.) Chargi ng Backup Battery...
-
Page 44: Power-Saving Tips
Power-Savi ng Ti ps Aside from enabling your Tablet PC’s power saving mode, you can do your part to maximize the battery’s operating time by following these suggestions. Do not disable Power Management. Decrease the LCD brightness to the lowest comfortable level. ... -
Page 45: Using Options And Peripherals
Chapter 4 Usi ng Opti ons and Peri pheral s This chapter describes the use of optional modules and the connection of peripherals. -
Page 46: Using The Fingerprint Scanner (Optional)
Usi ng the Fi ngerpri nt Scanner (Opti onal ) CAUTION: For optimal performance, both the scanning surface and the finger should be clean and dry. Clean the scanning surface when needed. (See “Cleaning the Fingerprint Scanner” later.) It is not recommended that you use the fingerprint scanner in a below- freezing temperature. -
Page 47: Enrolling A Fingerprint
Enrol l i ng a Fi ngerpri nt NOTE: You can enroll a fingerprint only after creating a password for the Windows user account. For Wi ndows 10 Setti ngs Accounts Si gn-i n opti ons 2. On the right side under , tap Fi ngerpri nt Set up... -
Page 48: Fingerprint Logon
5. Put any finger of your choice on the scanner surface. Keep the finger still until you’re asked to lift your finger and repeat the action again. Several scans of the fingerprint are required. NOTE: Put your finger in a natural position that matches the way you normally hold your device. -
Page 49: Cleaning The Fingerprint Scanner
Cl eani ng the Fi ngerpri nt Scanner You can use adhesive tape to remove dirt and oil from the scanner surface. To clean with cleaner: 1. Shut down the Tablet PC, disconnect the AC adapter, and remove the battery pack. -
Page 50: Using The Nfc/Rfid Reader (Optional)
(Near Field Communication) devices and RFID (Radio Frequency Identification) tags. NFC/RFID reader NOTE: For enhanced applications and customization of the module, contact your authorized Getac dealer. The NFC reader requires specialized applications. For further information, ask your system administrator. -
Page 51: Using The Barcode Scanner (Optional)
Usi ng the Barcode Scanner (Opti onal ) NOTE: For enhanced applications and customization of the module, you can use the Barcode Manager program. The maximum operating temperature for the barcode scanner is 50 C (122 F). If your model has the barcode scanner module, you can scan and decode most common 1D and 2D symbologies. -
Page 52: Connecting Peripheral Devices
Connecti ng Peri pheral Devi ces You can expand the capabilities of your Tablet PC by connecting other peripheral devices. When using a device, be sure to read the instructions accompanying the device together with the relevant section in this chapter. Slide down to open the protective cover. -
Page 53: Connecting An Audio Device
Connecti ng an Audi o Devi ce For higher audio quality, you can send sound through an external audio device. The audio combo connector is the “4-pole TRRS 3.5mm” type (Apple iPhone Recessed) so you can connect a compatible headset microphone. SAFETY WARNING: To prevent possible hearing damage, do not listen at high volume levels for long periods. -
Page 54: Using Bios Setup
Chapter 5 Usi ng BIOS Setup BIOS Setup Utility is a program for configuring the BIOS (Basic Input/ Output System) settings of the computer. BIOS is a layer of software, called firmware, that translates instructions from other layers of software into instructions that the computer hardware can understand. -
Page 55: When And How To Use
When and How to Use NOTE: The actual setting items on your model may differ from those described in this chapter. The availability of some setting items depends on the Windows version your computer is running. You need to run BIOS Setup Utility when: You see an error message on the screen requesting you to run BIOS Setup ... - Page 56 If a keyboard is connected, press the Method 2 (for Wi ndows 7 model s onl y): during system startup when the logo screen appears.
-
Page 57: Menu Descriptions
Menu Descri pti ons Informati on Menu The Information menu contains the basic configuration information of the system. There are no user-definable items in this menu. NOTE: The “Asset Tag” information appears when you have entered the asset number for this Tablet PC using the asset management program. -
Page 58: Advanced Menu
Advanced Menu The Advanced menu contains the advanced settings. Wake Up Capabi l i ty allow a USB device activity to wake up the system from USB Wake-Up From S3 S3 (Sleep) state. sets power button delay time (1 second or 2 seconds) so ... -
Page 59: Security Menu
Virtualization Technology) feature which provides hardware support for processor virtualization. When enabled, a VMM (Virtual Machine Monitor) can utilize the additional hardware virtualization capabilities provided by this technology. enables or disables VT-d (Intel® Virtualization Intel (R) VT for Di rected I/ O (VT-d) Technology for Directed I/O). -
Page 60: Boot Menu
sets the password for locking the Primary Master hard Set HDD 0 User Password disk drive. After setting a password, the hard disk drive can only be unlocked by the password no matter where it is installed. TPM Setup Menu enables or disables TPM (Trusted Platform Module) support. - Page 61 restores the previous values for all the items. Discard Changes saves the changes you have made. Saves Changes...
-
Page 62: Using Getac Software
Chapter 6 Usi ng Getac Software Getac software includes application programs for specific computer components and utility programs for overall management. This chapter briefly introduces the programs. -
Page 63: Osd Control Panel
OSD Control Panel The OSD (On Screen Display) Control Panel provides a user-friendly interface for you to quickly activate or operate certain functions on your Tablet PC with a simple tap of the screen. To open the OSD Control Panel, start the program named You can also press OSDC. -
Page 64: G-Manager
Monitor the system. View GPS information. Tap and hold the Getac Utility icon located on Windows taskbar and select to start the program. The G-Manager window appears, containing several G-Manager tabs. NOTE: Depending on your model, the actual items and information appearing on the screen may differ from those shown in this manual. - Page 65 Help For detailed information on the program, see the program’s online help.
-
Page 66: Getac Camera
Getac Camera Getac Camera is a geo-tagging camera program, which allows you to stamp geographical information on photos as watermarks and embed such information into JPEG/BMP files as EXIF 2.2 metadata. NOTE: Before starting Getac Camera, close any other program that uses the camera;... -
Page 67: Caring For The Tablet Pc
Chapter 7 Cari ng for the Tabl et PC Taking good care of your Tablet PC will ensure a trouble-free operation and reduce the risk of damage to your Tablet PC. This chapter gives you guidelines covering areas such as protecting, storing, cleaning, and traveling. -
Page 68: Taking Care Of The Tablet Pc
Taki ng Care of the Tabl et PC Locati on Gui del i nes For optimal performance, use the Tablet PC where the recommended temperature is between 0 C (32 F) and 55 C (131 F). (Actual operating temperature depends on product specifications.) Avoid placing the Tablet PC in a location subject to high humidity, extreme ... -
Page 69: Cleaning Guidelines
Do not place heavy objects on top of the Tablet PC as this may damage the display. The screen surface is easily scratched. Avoid touching it with a sharp object such as a pen or pencil. LCD image sticking occurs when a fixed pattern is displayed on the screen for ... - Page 70 – when using, charging, or storing the battery in high temperature condition To avoid hastening the deterioration of the battery pack thereby prolonging its useful life, minimize the number of times you charge it so as not to frequently increase its internal temperature.
-
Page 71: Touchscreen Guidelines
When using battery power in an extremely low temperature environment, you may experience shortened operating time and incorrect battery level reading. This phenomenon comes from the chemical characteristics of batteries. The appropriate operating temperature for the battery is -10 C ~ 50 C (14 F ~ 122 F). Do not leave the battery pack in storage for more than six months without ... -
Page 72: When Traveling
When Travel i ng Make sure that the battery pack is fully charged. Make sure that the Tablet PC is turned off. Disconnect the AC adapter from the Tablet PC and take it with you. Use the AC adapter as the power source and as a battery-charger. -
Page 73: Troubleshooting
Chapter 8 Troubl eshooti ng Computer problems can be caused by hardware, software, or both. When you encounter any problem, it might be a typical problem that can easily be solved. This chapter tells you what actions to take when solving common computer problems. -
Page 74: Preliminary Checklist
Prel i mi nary Checkl i st Here are helpful hints to follow before you take further actions when you encounter any problem: Try to isolate which part of the Tablet PC is causing the problem. Make sure that you turn on all peripheral devices before turning on the Tablet ... -
Page 75: Solving Common Problems
Sol vi ng Common Probl ems Battery Probl ems The battery does not charge (Battery Charge Indi cator does not l i ght amber). Make sure that the AC adapter is properly connected. Make sure that the battery is not too hot or cold. Allow time for the battery ... -
Page 76: Display Problems
Make sure that both devices are compatible. Di spl ay Probl ems Nothi ng appears on the screen. During operation, the screen may automatically turn off as a result of power management. Press any key to see if the screen comes back. The brightness level might be too low. -
Page 77: Power Management Problems
Make sure if the device needs any jumper or switch settings. (Refer to the documentation that came with the device.) Check the cables or power cords for correct connections. For an external device that has its own power switch, make sure that the power ... -
Page 78: Software Problems
4. Rotate the Tablet PC 360 at least three times around each axis (X, Y, and Z) as shown below. Software Probl ems An appl i cati on program does not work c orrectl y. Make sure that the software is correctly installed. ... -
Page 79: Sound Problems
Sound Probl ems No sound i s produced. Make sure that the volume control is not set too low. Increase the volume. Make sure that the sound is not muted. Make sure that the Tablet PC is not in Sleep mode. ... - Page 80 Check if there is high interference around the environment and solve the problem as described next. Radi o i nterference exi sts. Move your Tablet PC away from the device causing the radio interference such as microwave oven and large metal objects. Plug your Tablet PC into an outlet on a different branch circuit from that used ...
-
Page 81: Other Problems
Reconfigure and reset the Access Point. I cannot access the network. Make sure that the network configuration is appropriate. Make sure that the user name or password is correct. You have moved out of range of the network. ... -
Page 82: Resetting The Tablet Pc
Resetti ng the Tabl et PC You may have to reset (reboot) your Tablet PC on some occasions when an error occurs and the program you are using hangs up. If you are sure the operation has stopped and you cannot use the “restart” function of the operating system, reset the Tablet PC. -
Page 83: System Recovery
System Recovery System Recovery (a Tool for Wi ndows 7 Model s) Use System Recovery when: The Windows 7 operating system does not start at all. You want to restore the system to the factory state. WARNING: Using this feature will reinstall Windows to your system and configure it to the system’s factory default settings. - Page 84 4. The progress bar shows the percentage completed. When it reaches 100%, the system turns off. 5. Turn on the Tablet PC. The Windows setup wizard starts. Follow the onscreen prompts to continue. 6. When the system restarts, the installer screen appears. The installer will perform system hardware detection and driver installation.
-
Page 85: Using The Driver Disc
Usi ng the Dri ver Di sc The Driver disc contains drivers and utilities required for specific hardware in your Tablet PC. Since your Tablet PC comes with drivers and utilities pre-installed, you normally do not need to use the Driver disc. In case you want to manually install Windows, you will have to install the drivers and utilities one by one after installing Windows. -
Page 86: Appendix A Specifications
Appendi x A Speci fi cati ons NOTE: Specifications are subject to change without any prior notice. Parts Spec i fi cati ons Intel® Core™ M-5Y71/ M-5Y10c Processor, 4.5W, Turbo Boost Technology BIOS Insyde, 16MB flash EEPROM, supporting UEFI, ACPI, TPM, vPro (optional), AMT10, computrace (optional), and security eraser 4GB/8GB LPDDR3 1.2V 1600MHz SO-DIMM... - Page 87 Parts Spec i fi cati ons Optional Barcode scanner, Tri Pass-through Wireless LAN + BT IEEE 802.11ac, compatible with 802.11a/b/g/n, BT 4.0 + EDR Camera Front: HD, blue LED Rear: 8M pixel, autofocus, blue LED, video capture GPS (option) UART WWAN (option) 3G/4G LTE NFC/RFID Reader...
- Page 88 Button Functi on Down...
-
Page 89: Appendix B Regulatory Information
Appendi x B Regul atory Informati on This appendix provides regulatory statements and safety notices on your Tablet PC. NOTE: Marking labels located on the exterior of your Tablet PC indicate the regulations that your model complies with. Please check the marking labels and refer to the corresponding statements in this appendix. -
Page 90: On The Use Of The System
On the Use of the System Cl ass B Regul ati ons Federal Communi cati ons Commi ssi on Radi o Frequency Interference Statement NOTE: This equipment has been tested and found to comply with the limits for a Class B digital device pursuant to Part 15 of the FCC Rules. -
Page 91: Ansi Warning
Canada Canadi an Department of Communi cati ons Radi o Interference Regul ati ons Cl ass B Compl i ance Noti ce This Class B digital apparatus meets all requirements of the Canada Interference-Causing equipment regulations. Cet appareil numérique de Classe B respecte toutes les exigences du Règlement Canadien sur le matériel brouileur. -
Page 92: Safety Notices
Safety Noti ces About the Battery Cauti on Texts Concerni ng Li thi um Batteri es DANISH ADVARSEL! Lithiumbatteri – Eksplosionsfare ved fejlagtig håndtering. Udskiftning må kun ske med batteri af samme fabrikat og type. Levér det brugte batteri tilbage til leverandøren. -
Page 93: About The Ac Adapter
recommandé par le constructeur. Mettre au rebut les batteries usagées conformément aux instructions du fabricant. Attenti on (for USA Users) The product that you have purchased contains a rechargeable battery. The battery is recyclable. At the end of its useful life, under various state and local laws, it may be illegal to dispose of this battery into the municipal waste stream. -
Page 94: On The Use Of The Rf Device
On the Use of the RF Devi ce USA and Canada Safety Requi rements and Noti ces To comply with FCC RF exposure compliance requirements, the antenna MPORTANT NOTE: used for this transmitter must be installed to provide a separation distance of at least 20 cm from all persons and must not be co-located or operating in conjunction with any other antenna or transmitter. -
Page 95: European Union Ce Marking And Compliance Notices
If harmful interference with radio or television reception occurs when the device is turned on, the user must correct the situation at the user’s own expense. The user is encouraged to try one or more of the following corrective measures: Reorient or relocate the receiving antenna. - Page 96 Dutch Dit product is in navolging van de bepalingen van Europees Directief 1999/5/EC. Fi nnish Tämä tuote noudattaa EU-direktiivin 1999/5/EC määräyksiä. French Ce produit est conforme aux exigences de la Directive Européenne 1999/5/EC. German Dieses Produkt entspricht den Bestimmungen der Europäischen Richtlinie 1999/5/EC. Greek To π...
-
Page 97: User Notification Of Take-Back Service
Getac believes in providing our institutional customers with easy-to-use solutions to recycle your Getac-brand products for free. Getac understands the institutional customers will likely be recycling multiple items at once and as such. Getac wants to make the recycling process for these larger shipments as streamlined as possible. -
Page 98: Energy Star
® Please reference ENERGY STAR related information from http://www.energystar.gov. ® As an ENERGY STAR Partner, Getac Technology Corporation has determined that ® this product meets the ENERGY STAR guidelines for energy efficiency. ® An ENERGY STAR qualified computer uses 70 % less electricity than computers without enabled power management features. - Page 99 Getac Product Compl i ance ® ® All Getac products with ENERGY STAR logo comply with the ENERGY STAR standard, and the power management feature is enabled by default. The monitor and computer are automatically set to sleep after 15 and 30 minutes of user inactivity.
-
Page 100: Battery Recycling
Battery Recycl i ng For the U.S. and Canada only: To recycle the battery, please go to the RBRC Call2Recycle website or use the Call2Recycle Helpline at 800-822-8837. Call2Recycle® is a product stewardship program providing no-cost battery and cellphone recycling solutions across the U.S. and Canada. Operated by Call2Recycle, Inc., a 501(c)4 nonprofit public service organization, the program is funded by battery and product manufacturers committed to responsible recycling.
Need help?
Do you have a question about the RX10 and is the answer not in the manual?
Questions and answers