Table of Contents
Advertisement
Quick Links
Advertisement
Table of Contents

Related Manuals for Getac ZX80


Summary of Contents for Getac ZX80
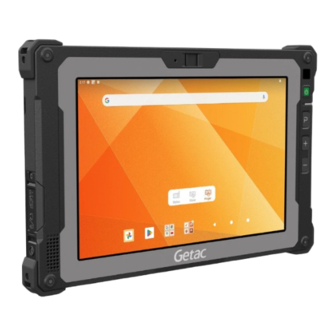
- Page 1 ZX80 USER MANUAL Rugged Mobile Computing Solution...
- Page 2 They may differ from the actual screens and presentations generated by the actual product. Your device is based on Android™ 13 operating system, with additions by Getac. For the latest version of the manual, please visit the Getac website at www.getac.com.
-
Page 3: Table Of Contents
Table of Contents Chapter 1 Getting Started ..............1 Identifying Hardware Components .......... 1 Front Components ..............1 Back Components ..............3 Left-Side Components ............4 Top Components..............5 Bottom Components ............. 5 Getting Your Device Ready for Use ........... 6 Installing the Nano-SIM Card (Select Models Only) .... - Page 4 Using the Barcode Scanner ..........35 GetacIME Settings ..............37 DisplayLink Presenter ............... 39 Log Tool ..................39 GDMS Agent ................39 Getac Driving Safety Utility ............. 40 Chapter 5 Managing Your Device ..........41 Managing Power ..............41 Battery Protection Mechanism ........... 41 Low Battery Signals and Actions ........
- Page 5 Updating Getac Apps ............53 Update Center Settings ............53 Update Center Scan ............. 54 Caring for Your Device ............55 Appendix A Specifications ..............56 Appendix B Regulatory Information ..........58 Safety Precautions ..............58 About Charging ..............58 About the Charger ..............
-
Page 6: Chapter 1 Getting Started
Chapter 1 Getting Started This chapter introduces you to the external components of your device and guides you through the process of setting up your device for use. CAUTION: Safety instructions are provided in related sections throughout the User Manual. Please read the manual and any accompanying document(s) before starting to use the product. - Page 7 The default function is Camera Shutter or Barcode Trigger depending on your model. Camera Serves as the shutter release button for Shutter Getac Camera. Barcode Serves as the trigger button for the barcode Trigger scanner if your model has the module.
-
Page 8: Back Components
NOTE: The hardware buttons (except the power button) can be re-defined using Getac Settings. The response time of LCDs can be affected by low temperatures. The display has a slower response time in low temperature environments. This does not mean the LCD is defective. -
Page 9: Left-Side Components
Component Description Camera lens Allows you to use the camera function. (optional) Flash LED Provides extra light in certain applications. Microphone Receives sound and voice. Additional battery Provides additional battery power to your device pack (optional) (as Battery 2). -
Page 10: Top Components
Component Description Supports a headset microphone with 4-pole TRRS 3.5mm jack. Top Components Component Description Barcode scanner Scans barcodes. lens (optional) Bottom Components Component Description Docking Connects to the office or vehicle dock (purchased connector separately). Tri antenna Connects to the docking station for using external passthrough WWAN/GPS/WLAN antenna. -
Page 11: Getting Your Device Ready For Use
Getting Your Device Ready for Use Installing the Nano-SIM Card (Select Models Only) The SIM card tray is located inside the device. 1. If you have the basic model, remove the battery bay cover, which is a blank filler for the empty battery bay. If your model has the additional battery pack installed, remove the battery pack. -
Page 12: Installing The Additional Battery Pack (Select Models Only)
Installing the Additional Battery Pack (Select Models Only) NOTE: If you have the high-capacity battery model, the battery pack looks different from the one shown here. The removal/installation method is the same. 1. If you purchased the additional battery pack later on for a basic model, you have to remove the battery bay cover before you can install the battery pack. -
Page 13: Using The Stylus Tether (Optional)
Then, insert the stylus through the loop ( ) and pull it tight. If the tether holder is occupied by a Getac option such as the hand strap, fasten the stylus tether to the D-ring on the option. -
Page 14: Connecting To External Power And Charging The Battery
Components” in this chapter for instructions.) 3. Connect the power adapter. (The power adapter shown here as the example is the one available from Getac.) NOTE: The look of your power plug and electrical outlet might not match the one shown in this document. -
Page 15: Performing The Initial Startup
4. The Battery Charge indicator glows in amber when charging is in progress. Do not disconnect your device from AC power until the battery is fully charged, as indicated by the amber indicator turning into green. This will take a couple of hours. Performing the Initial Startup NOTE: You must use external power when starting up the device for the very first time. -
Page 16: Chapter 2 Operating Basics
Chapter 2 Operating Basics This chapter familiarizes you with the basic operations of your device. CAUTION: Do not expose your skin to the device when operating it in a very hot or cold environment. The device can get uncomfortably warm when you use it in high temperatures. ... -
Page 17: Navigating On The Screen
Navigating on the Screen Use your finger or the stylus (purchased separately) to navigate and select objects on the screen. Here are some common terms that you should know when using the touchscreen: Touch the screen once with the finger (or stylus) to open an item or select an object. -
Page 18: Touch Mode
You can change the touch mode to suit your scenario. To quickly switch the mode, tap one of the widgets on the Home screen. Enables simultaneous use Select this mode when liquids, with Getac stylus or finger such as raindrops, are falling touch. on the screen and should be rejected as input. -
Page 19: Home Screen
Home Screen The Home screen is your starting point to access all the features on your device. You can have it display application icons, widgets, shortcuts, and other features that you want. The default Home screen already contains some app icons and widgets. To return to the Home screen at any time, tap the Home icon at the bottom of the screen. -
Page 20: Using Applications
Using Applications Swipe up from the bottom of the Home screen to open the All Apps screen. The screen holds icons for all of the apps on your device. Tap an icon to open the app. Navigation Buttons The navigation buttons at the bottom of the screen provides buttons for navigation purposes and frequently-used tasks. -
Page 21: Quick Settings And Notifications Panel
Quick Settings and Notifications Panel You can open Quick Settings and Notifications Panel by swiping down from the top of the screen. Quick Settings allow you to quickly change common settings such as screen brightness, Wi-Fi, Bluetooth, Airplane mode, and others. Notifications Panel provides timely reminders for events, tasks, and alerts. -
Page 22: Entering Information
You can change to a different input method by tapping at the bottom corner of the screen. Or, when the “Getac Input method” item has been enabled in Getac Settings, you can switch between Gboard and GetacIME using the floating buttons as shown below. -
Page 23: Quick Qr Code Scanning (Select Models Only)
Google Search bar. The scan beam will turn off after a successful scan or timeout. NOTE: You can turn off the beep sound and change the timeout duration in Getac Settings. (See “Getac Settings” in Chapter 5.) -
Page 24: Notes
Notes Pulse repetition rate: 57.67 Hz Scan angle: 360° tilt; ±60° pitch; ±60° skew CAUTION: Use of controls or adjustments or performance of procedures other than those specified herein may result in hazardous radiation exposure. About Manufacture Date and Labels See “Manufacture Date and Labels”... -
Page 25: Chapter 3 Getting Connected
To check or modify settings, go to Settings Network & internet. Tap the Settings icon next to the mobile network name. To check the specific WWAN module information, go to Getac Settings and check the items under LTE. Using Dual SIM Only one SIM can be activated at a time. -
Page 26: Using Wi-Fi Networks
If the network is open, you are prompted to confirm that you want to connect to that network by tapping Connect. Using the Bluetooth Function NOTE: Getac does not guarantee the product’s compatibilities with the Bluetooth headsets/devices from all manufacturers. Turning On/Off the Bluetooth Radio Open Quick Settings and tap the Bluetooth icon. -
Page 27: External Connections
2. Tap Pair new device. Your device scans for and displays the IDs of all available Bluetooth devices in range. 3. On the list of discovered devices, tap the ID of the device you want to pair with. 4. The devices pair with each other. If you’re prompted to enter a passcode, try entering 0000 or 1234 (the most common passcodes), or consult the documentation that came with the device to learn its passcode. -
Page 28: Connecting An Audio Device
A USB-C power adapter is available to you as an option. NOTE: With a proper adapter, you can still connect a USB peripheral that has a Type-A connector to this Type-C connector. However, Getac does not guarantee the compatibility with all USB peripherals via the adapter. -
Page 29: Using A Microsd Card (Select Models Only)
Using a MicroSD Card (Select Models Only) Inserting a microSD card Depending on the model you have, there is a card tray or card slot for the microSD card. 1. Remove the battery bay cover or the additional batter pack (if existing). (See step 1 in “Installing the Nano-SIM Card (Select Models Only)”... - Page 30 Remove a microSD card You can safely remove the microSD card from your device any time the device is shut down. If you need to remove the card while the device is on, unmount the card first to prevent corrupting or damaging the card. 1.
-
Page 31: Chapter 4 Getac Applications
For instructions on using the preinstalled apps from Google, check Google official website for online help. You can use Update Center to update Getac apps to the latest version. (See “Updating Getac Apps” in Chapter 6 for information.) Getac Camera Use the Getac Camera app to take photos and record videos. -
Page 32: Taking Photos
Taking Photos 1. Open the Getac Camera app. If you are in Video mode, tap to switch to Camera mode. Photo view Settings Video mode Shutter Control buttons Zoom control 2. To focus on a specific area: Tap the area in the preview window. A green focus frame appears. -
Page 33: Recording Videos
Recording Videos 1. Open the Getac Camera app. If you are in Camera mode, tap to switch to Video mode. Video playback Settings Camera mode Record Control buttons Zoom control 2. To focus on a specific area: Tap the area in the preview window. A green focus frame appears. -
Page 34: Control Buttons
6. An image from your most recent video is displayed as a thumbnail at the corner. You can tap the thumbnail to view the video. The video will be saved as a MP4 file in the predefined folder. Control Buttons Any setting change remains valid until you change it again. -
Page 35: Camera Settings
Flash - Off (default) (for Video mode) - On To switch between the front and back camera lens. Camera Switch Camera Settings While in Getac Camera, tap at the top left corner to open the settings menu. - Page 36 Item Description Camera Double tap to To set if you can take the photo by double tapping capture where you want to focus in the preview window. Timer To set the countdown timer for taking the photo. Angle To set if the device orientation angle is displayed in the preview window.
- Page 37 Options are: • Internal Storage • SD card Reset Settings Reset settings To reset all Getac Camera settings to the default values. to default Set Settings Via QR code Import To import Getac Camera settings from another device by settings scanning the QR code on that device.
-
Page 38: Getacime
To switch to the GetacIME keyboard, tap at the bottom corner of the screen and select GetacIME. Or, if the “Getac Input method” item has been enabled in Getac Settings, you can switch to GetacIME by tapping one of the floating buttons NOTE: When you use Text Scanner or Barcode Scanner for the very first time, you will be asked to allow permissions for the app. - Page 39 2. Switch to the GetacIME keyboard. Tap Text Scanner on the left side of the keyboard. You can also use the floating button (if enabled) to access the function. 3. The scan preview window appears. Turn on the torch if needed. While in landscape view, you can expand/reduce the preview window and move the reduced window right/left.
-
Page 40: Using The Barcode Scanner
5. Use one of the two methods to select the one you want to enter. • Method 1: Tap the unit that contains the text string you want. • Method 2: Tap the Capture button to freeze the current preview window. - Page 41 NOTE: If you are scanning postal barcodes with the device scanner, make sure you have selected the matching postal symbology for the “Postal Symbologies” item in Getac Settings. 4. Steps 4 to 7 are instructions for the camera scanner. Using Camera Scanner: Several buttons are available in the preview window.
-
Page 42: Getacime Settings
5. Aim the rear camera lens at the target. Each scanned barcode will be surrounded by a white border with the result displayed at the top left side of the white border. 6. Use one of the two methods to select the one you want to enter. •... - Page 43 Item Description Sound Keypress sound To enable or disable the typing sound whenever a key is pressed. Shutter sound To enable or disable the shutter sound played upon barcode/text capturing with the rear camera. Camera barcode To enable or disable the beep sound upon a scanned beep successful barcode scan with the camera scanner.
-
Page 44: Displaylink Presenter
Follow the onscreen instructions to mirror the Android screen to the HDMI display. Log Tool Getac Essentials Log Tool allows you to collect device logs from the Android system. Device logs contain information about the operation of software, system, OS, kernel, Bluetooth, network, etc. -
Page 45: Getac Driving Safety Utility
Getac Driving Safety Utility The Getac Driving Safety Utility app helps prevent distracted driving by putting your device into Lock mode once device movement is detected. In Lock mode, the device operation is restricted. -
Page 46: Managing Your Device
Chapter 5 Managing Your Device This chapter tells you how to manage power and customize your device. Managing Power Your device comes with an internal battery pack (Battery 1) and supports an additional battery pack (Battery 2) which is hot-swappable. If your device has two battery packs, they are charged and discharged in parallel. -
Page 47: Low Battery Signals And Actions
NOTE: This automatic battery protection is not equivalent to “Battery Charging Mode” in Getac Settings. When the battery is in an automatic protection mode as described above, the mode has priority over the Battery Charging Mode. When the battery is out of the automatic protection mode, the Battery Charging Mode takes effect. -
Page 48: Hot Swapping The Additional Battery Pack (Select Models Only)
Hot Swapping the Additional Battery Pack (Select Models Only) CAUTION: There is danger of explosion if the battery is incorrectly replaced. Replace the battery only with the device manufacturer’s battery packs. Discard used batteries according to the dealer’s instructions. Do not attempt to disassemble the battery pack. - Page 49 NOTE: During the period of the battery pack absence, the screen display will be turned off. 4. Fit another battery pack into place. With the battery pack correctly oriented, attach its connector side to the battery bay at an angle ( ...
-
Page 50: Power-Saving Tips
Power-Saving Tips You can extend your battery’s life between charges by turning off features that you don’t need. You can also monitor how apps and system resources consume battery power. Enable Battery Saver. Set a shorter screen timeout. Decrease the LCD brightness to the lowest comfortable level. ... -
Page 51: Customizing Your Device
For information on standard Android settings, check Google official website for online help. Getac Settings Use Getac Settings to configure functions specific to your device. Tap the Getac Settings app icon , which can be found in the default Home... - Page 52 The following table describes the configurable items. Item Description Physical buttons (+) Plus Button To assign a function or app to a hardware button on your device. Tap a button name and select from the (-) Minus Button available options in the popup menu. P Button Button To switch the button backlight on or off.
- Page 53 Item Description Barcode Turn off barcode To set an inactivity timeout after which the barcode scanner scanner turns off its power. The barcode scanner will turn on again when next accessed. If you want to keep the barcode scanner always on, select Never. Barcode beeper To enable or disable the beep sound upon a successful barcode scan.
- Page 54 The floating button works as a shortcut to switch between Gboard and GetacIME. Besides configuring settings for specific components, you can also view device information in Getac Settings, such as sensor status, certain hardware and firmware information, etc.
-
Page 55: Care And Maintenance
Chapter 6 Care and Maintenance This chapter provides various care and maintenance information. Restart or Hard Reboot Restart To restart the device, press and hold the power button until a menu pops up. Then tap Restart. If the device somehow cannot display the power off menu, you can force the device to power off by pressing and holding the power button for more than 8 seconds. -
Page 56: Update Center
To open the app, tap the Update Center app icon , which can be found in the Getac folder and the All Apps screen. When opening the app for the very first time, you will be asked to allow the installation. Tap the on/off switch to turn it on and then tap ... - Page 57 You will see this screen if the OS is up to date. You will see this screen if an update is found available at the server. Tap DOWNLOAD NOW. After the download is completed, a window pops up to inform you. Tap UPDATE in the popup window.
-
Page 58: Updating Getac Apps
Updating Getac Apps After opening Update Center, tap Application. The information you see depends on the current status of your device. If an update is found available after a check (either manually or automatically), you will see the UPDATE button for the app. -
Page 59: Update Center Scan
Android version only. You will not be notified of a new Android version. Update Center Scan The “Scan” feature is available for specific customers only. With a QR code provided by Getac, updates can be performed by scanning the QR code. -
Page 60: Caring For Your Device
Caring for Your Device Taking good care of your device will ensure trouble-free operation and reduce the risk of damage to your device. Keep your device away from excessive moisture and extreme temperatures. Avoid exposing your device to direct sunlight or strong ultraviolet light ... -
Page 61: Appendix A Specifications
Appendix A Specifications NOTE: Specifications are subject to change without any prior notice. Parts Specifications Qualcomm® QCS 6490, Octa-core, 1.95 GHz, maximum 2.7GHz, 2MB cache Video Controller UMA, Qualcomm® Adreno™ GPU 643 Display 8-inch (16:10) TFT LCD, WUXGA 1920 x 1200, dimmer mode, Panel blackout mode, sunlight readable, 1000 nits standard brightness, protection film... - Page 62 Parts Specifications Battery Internal Lithium-ion type, 1 cell, 15.67 Whr pack Additional Hot swappable (optional) Standard: Lithium Polymer type, 1 cell, 19 Whr High capacity: Lithium Polymer type, 2 cells, 38 Whr Dimension 234 x 149.8 x 17.6 mm (9.21 × 5.89 × 0.69 inches) Weight ≥...
-
Page 63: Appendix B Regulatory Information
Use only an appropriate charger for your device. Use of an incorrect type will result in malfunction and/or danger. You can purchase the charger (or called power adapter) from Getac. Use a specified cradle approved by the manufacturer. ... -
Page 64: About The Battery
Allow adequate ventilation around the charger when using it to operate the device or charge the battery. Do not cover the charger with paper or other objects that will reduce cooling. Do not use the charger while it is inside a carrying case. -
Page 65: Heat Related Concerns
Caution Do not use the battery where static electricity (more than 100V) exists that might damage the protection circuit of the battery. When children are using the system, parents or adults must ensure that they are using the system and battery correctly. Keep the battery away from flammable materials during charging and ... -
Page 66: North America
North America Federal Communications Commission Radio Frequency Interference Statement NOTE: This equipment has been tested and found to comply with the limits for a Class B digital device pursuant to Part 15 of the FCC Rules. These limits are designed to provide reasonable protection against harmful interference in a residential installation. - Page 67 SIM card, memory card, etc.) while the circuit is live unless the area is free of ignitable concentrations. Replace the battery with battery model BP1S1P4990B or BP1S2P4990B, manufactured by Getac Technology Corporation only. Use of another battery may present a risk of fire or explosion.
- Page 68 California Proposition 65 For California USA: Proposition 65, a California law, requires warnings to be provided to California consumers when they might be exposed to chemical(s) identified by Proposition 65 as causing cancer and birth defects or other reproductive harm. Almost all electronic products contain 1 or more of the chemicals listed under Proposition 65.
-
Page 69: Canada
Canada Canadian ICES-003 CAN ICES-3(B)/NMB-3(B) This device contains licence-exempt transmitter(s)/receiver(s) that comply with Innovation, Science and Economic Development Canada’s licence- exempt RSS(s). Operation is subject to the following two conditions: (1) This device may not cause interference. (2) This device must accept any interference, including interference that may cause undesired operation of the device. -
Page 70: User Notification Of Take-Back Service
If you have a Getac computer that needs to go to a recycling house, Getac can help you. Just contact us at (866) 394 – 3822 or by email at GUSA.RecycleProgram@getac.com to obtain a prepaid shipping label at no charge to you, pack up your equipment in a box of your choice and send it off. -
Page 71: Europe Marking And Compliance Notices
Der gesamte Text der EU Konformitätserklärung ist verfügbar unter: https://support.getac.com/Portal/Page/846 Español Por la presente, Getac declara que el producto cumple con la Directiva de la UE 2014/53/UE. El texto completo de la declaración UE de conformidad se encuentra a continuación. - Page 72 WLAN 6G: 13.98 dBm BT: 9.85dBm The device is restricted to indoor use only when operating in the 5150 to 5350 MHz frequency range. UK (NI) Restriction or Requirement in the UK: 5150 to 5350 MHz indoor-use only. Waste Electrical and Electronic Equipment (WEEE) This symbol means that according to local laws and regulations your product shall be disposed of separately from household waste.
-
Page 73: Restriction Of Hazardous Substances (Rohs) Directive
Restriction of Hazardous Substances (RoHS) Directive EU RoHS Getac products meet the requirements of Directive 2011/65/EU on the restriction of the use of certain hazardous substances in electrical and electronic equipment. For more information about RoHS, go to: https://www.getac.com/us/environment/ Company name Getac Technology GmbH. -
Page 74: Energy Star
® Getac’s ENERGY STAR qualified products are listed on the EPA website. https://www.energystar.gov/products NOTE: ZX80 complies with ENERGY STAR® only if it is used with the power adapter supplied by Getac for ZX80. -
Page 75: Manufacture Date And Labels
Manufacture Date and Labels The manufacture date is identified by the second and third digits of the product’s serial number. Example: Month Year Code Year Code Month 2021 Jan. 2022 Feb. 2023 Mar. 2024 Apr. 2025 2026 Jun. 2027 Jul. 2028 Aug. - Page 76 Manufacturer: Getac Technology Corporation 5F., Building A, No. 209, Sec.1, Nangang Road, Nangang Dist. Taipei City 115018, Taiwan, R.O.C.
Need help?
Do you have a question about the ZX80 and is the answer not in the manual?
Questions and answers