
Related Manuals for Raymarine eci-100


Summary of Contents for Raymarine eci-100
- Page 1 ECI-100 INSTALLATION INSTRUCTIONS English (EN) Date: 10-2015 Document number: 87202-3 © 2015 Raymarine UK Limited...
- Page 3 Software updates Important: Check the Raymarine website for the latest software releases for your product. www.raymarine.com/software Product handbooks The latest versions of all English and translated handbooks are available to download in PDF format from the website www.raymarine.com.
-
Page 5: Table Of Contents
Contents Chapter 1 Important information......7 Chapter 8 Technical support ......45 Water ingress ............7 8.1 Raymarine product support and servicing ....46 Disclaimer ..............7 8.2 Viewing product information ........47 EMC installation guidelines ........7 Chapter 9 Technical specification...... 49 Suppression ferrites ........... - Page 6 ECI–100...
-
Page 7: Chapter 1 Important Information
• Raymarine recommends certified Disclaimer installation by a Raymarine approved installer. A certified installation qualifies Raymarine does not warrant that this product is for enhanced product warranty benefits. error-free or that it is compatible with products Contact your Raymarine dealer for... -
Page 8: Suppression Ferrites
Suppression ferrites workboats NOT covered by International Maritime Organization (IMO) and Safety of Life at Sea • Raymarine cables may be pre-fitted or supplied (SOLAS) Carriage Regulations. with suppression ferrites. These are important for correct EMC performance. If ferrites are supplied separately to the cables (i.e. -
Page 9: Chapter 2 Document And Product Information
Chapter 2: Document and product information Chapter contents • 2.1 Document information on page 10 • 2.2 Product overview on page 11 Document and product information... -
Page 10: Document Information
• Accepted methods of payment for printed This document contains important information manuals are credit cards and PayPal. related to the installation of your Raymarine product. The document includes information to help you: • Printed manuals can be shipped worldwide. -
Page 11: Product Overview
(CAN bus). Note: For the latest engine compatibility Supported J1939 and NMEA 2000 engine and information please visit the Raymarine website transmission data and steering control messages are www.raymarine.com. converted and then transmitted on to the SeaTalk ng®... - Page 12 ECI–100...
-
Page 13: Chapter 3 Planning The Installation
Chapter 3: Planning the installation Chapter contents • 3.1 Installation checklist on page 14 • 3.2 Parts supplied on page 14 • 3.3 Required additional components on page 15 • 3.4 Compatible displays on page 15 • 3.5 Compatible autopilot systems on page 16 •... -
Page 14: Installation Checklist
3.1 Installation checklist 3.2 Parts supplied Installation includes the following activities: The following items are supplied with your product. Installation Task Item Description Quantity Plan your system. ECI–100 (Engine & Control Interface) Obtain all required equipment and tools. 400 mm (1.3 ft) SeaTalk Site all equipment. -
Page 15: Required Additional Components
3.3 Required additional components 3.4 Compatible displays This product is compatible with the following display This product forms part of a system of electronics products. and requires the following additional components for full operation. LightHouse MFDs: • Engine specific adaptor cables are required to Product Product connect your unit to the engine(s) CAN bus. -
Page 16: Compatible Autopilot Systems
3.6 Software updates For steering control this product is compatible with The software running on the product can be updated. the following Raymarine autopilots. • Raymarine periodically releases software updates • EV2 — Evolution autopilot to improve product performance and add new features. -
Page 17: Tools Required
Engine-specific adaptor cable ECI unit SeaTalk 5–way block Example: Independent engine CAN bus networks Unless instructed otherwise, generally on a multi-engine vessel that has a dedicated CAN bus network for each engine, 1 ECI-100 per network is required. Planning the installation... - Page 18 Note: The illustration above shows the various products that can be connected in a typical system. For information on how to connect the products, refer to the Chapter 4 Cables and connections section. For information on available cables and accessories, refer to the Chapter 10 Spares and accessories section.
-
Page 19: Warnings And Cautions
3.9 Warnings and cautions 3.10 General location requirements Important considerations when choosing a suitable Important: Before proceeding, ensure that you location for your product. have read and understood the warnings and cautions provided in the Chapter 1 Important This product is suitable for mounting below decks. information section of this document. -
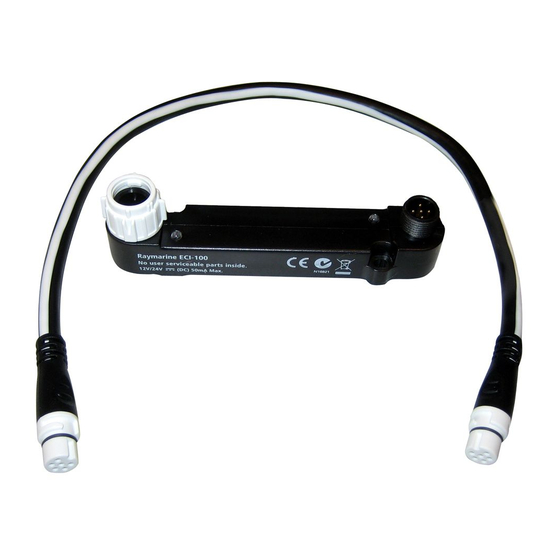
Page 20: Product Dimensions
3.11 Product dimensions 21.35 mm ( 0.84 in) 109.2 mm ( 4.3 in) D12972-1 ECI–100... -
Page 21: Chapter 4 Cables And Connections
Chapter 4: Cables and connections Chapter contents • 4.1 General cabling guidance on page 22 • 4.2 Connections overview on page 22 • 4.3 Power connection on page 23 • 4.4 Volvo engine connections on page 25 • 4.5 Yamaha engine connections on page 27 •... -
Page 22: General Cabling Guidance
SeaTalk SeaTalk spur of the correct type, supplied by Raymarine. using the cables. Refer • Ensure that any non-Raymarine cables are of the supplied spur Chapter 10 correct quality and gauge. For example, longer cable. Spares and power cable runs may require larger wire gauges accessories. -
Page 23: Power Connection
• The power cable for each unit in your system should be run as a separate, single length of 2-wire cable from the unit to the vessel's battery or distribution panel. • Raymarine recommends a minimum wire gauge of 18AWG (0.82 mm ) for any length of cable extension. - Page 24 1. Vessel power supply positive (+) More information 2. Vessel power supply negative (-) Raymarine recommends that best practice is observed in all vessel electrical installations, as 3. In-line fuse (If your products power cable does detailed in the following standards: not have a built in fuse then an in-line fuse •...
-
Page 25: Volvo Engine Connections
ECI-100. Volvo link cable (E70240) is required, This cable must be connected to the DeviceNet connector on the ECI-100 and an available connector on the Volvo Multi-link hub. If a Volvo IPS or Aquamatic steering system is fitted... - Page 26 12 V dc D1 Sail drive D4–180 Sail drive Volvo engine data and steering control With the ECI-100 connected to a compatible Volvo system the following engine data can be displayed D12976-2 on a LightHouse MFD. The ECI-100 also enables 1.
-
Page 27: Yamaha Engine Connections
The Yamaha link cable (E70242) is required, F300 Z300 This cable must be connected to the DeviceNet connector on the ECI-100 and a spare ‘DEVICE’ Yamaha engine data and steering control connector on the hub. If a Helm Master steering system is fitted then... -
Page 28: Yanmar Engine Connections
With the ECI-100 connected to a compatible Yanmar On multi-engine systems the engines’ J1939 CAN engine system the following engine data can be bus networks and the ECI-100 must all be connected displayed on a LightHouse MFD. to a separate NMEA 2000 network. This network... -
Page 29: Honda Engine Connections
BF200AKI BF100 BF225A BF115D BFP60A BF135A Honda engine data With the ECI-100 connected to a compatible Honda engine system the following engine data can be displayed on a LightHouse MFD. Engine Data Engine Fuel Flow Rate Engine Speed (RPM) Engine Hours... -
Page 30: Caterpiller (Cat) Engine Connections
With the ECI-100 connected to a compatible CAT engine system the following engine data can be Multi-engine connection displayed on a LightHouse MFD. An ECI-100 and Y-Loom cable is required for each Engine Data engine/MPD. Engine Speed (RPM) Engine Fuel Pressure... -
Page 31: Chapter 5 Mounting
Chapter 5: Mounting Chapter contents • 5.1 Mounting the unit on page 32 Mounting... -
Page 32: Mounting The Unit
5.1 Mounting the unit The ECI is designed to be surface mounted. Before mounting the unit ensure that you have: • Identified the routes that the cables will take. D12973-1 1. Switch off the vessel’s power supply. 2. Check the selected location for the unit, a clear, flat area is required, which is safe to have screws fitted to. -
Page 33: Chapter 6 System Checks And Troubleshooting
Chapter 6: System checks and troubleshooting Chapter contents • 6.1 Initial power on test on page 34 • 6.2 Engine identification and setup - LightHouse MFDs on page 35 • 6.3 Engine identification and setup — Legacy MFDs and Instrument Displays on page 37 •... -
Page 34: Initial Power On Test
6.1 Initial power on test Once your product is fully connected and installed, perform an initial power on test to verify correct operation. 1. Switch on the vessel’s power supply. 2. Switch on the vessel’s engine(s). The engine(s) has to be on and providing power to its CAN bus in order for both LEDs to function. -
Page 35: Engine Identification And Setup - Lighthouse
6.2 Engine identification and setup - LightHouse MFDs Engine identification Engine data can be displayed on your MFD using the Data application, which provides some preset Engine pages for displaying some of the most common types of engine data. Important: Before you can display Engine data on your MFD, you must: •... - Page 36 Engine setup with an ECI interface Before you can display engine data on your MFD, you may need to use the "Engine Identification wizard” on the MFD to setup the engines. Important: When setting up on a multiple engine system, engines should always be turned on in sequence from port to starboard.
-
Page 37: Engine Identification And Setup - Legacy Mfds And Instrument Displays
Important: You must: • Ensure that your MFD / Instrument Display is running the latest software version. Refer to www.raymarine.com/software/ to download the latest software. • For engines with a NMEA 2000 CAN bus, ensure that the CAN bus is outputting the relevant PGN messages that include the engine instance data. - Page 38 Engine instancing and setup — legacy MFDs and Instrument Displays Before you can display engine data on your legacy MFD or a compatible Instrument Display, your engine(s) may require "instancing" (assigned a unique ID / address) by an engine representative / dealer. Single engine installations Engine instancing is NOT required for single engine vessels.
-
Page 39: Troubleshooting
All Raymarine products are, prior to packing and shipping, subjected to comprehensive test and quality assurance programs. However, if you experience problems with the operation of your... -
Page 40: Power Up Troubleshooting
Software corruption In the unlikely event that the products software has become corrupted please try re-flashing the latest software from the Raymarine website. On display products, as a last resort, you can try to perform a ‘Power on Reset’, however this will delete all settings/presets and user data (such as waypoints and tracks) and revert the unit back to factory defaults. - Page 41 Remove 3rd party Engine Gateway and try again. present on system ECI-100 has previously been used on a • Contact Technical Support for information on how to get your ECI-100 reset. system with a different engine type. • Swap out ECI-100 for new unit.
- Page 42 Note: If any other LED sequence other than described above is seen and persists please contact Raymarine technical support. Resetting the ECI-100 A specialist tool is required to reset the ECI-100, contact Raymarine Product Support for further information. Your ECI-100 will need resetting if it has previously been used on a different engine type.
-
Page 43: Chapter 7 Maintenance
Chapter 7: Maintenance Chapter contents • 7.1 Routine checks on page 44 • 7.2 Unit cleaning instructions on page 44 Maintenance... -
Page 44: Routine Checks
7.1 Routine checks 7.2 Unit cleaning instructions The following periodic checks should be made: The unit does not require regular cleaning. However, if you find it necessary to clean the unit, please follow • Examine cables for signs of damage, such as the steps below: chafing, cuts or nicks. -
Page 45: Chapter 8 Technical Support
Chapter 8: Technical support Chapter contents • 8.1 Raymarine product support and servicing on page 46 • 8.2 Viewing product information on page 47 Technical support... -
Page 46: Raymarine Product Support And Servicing
Servicing and warranty 3614 905 Raymarine offers dedicated service departments for Sweden support.se@raymarine.com warranty, service, and repairs. (0)317 (Raymarine subsidiary) Don’t forget to visit the Raymarine website to 633 670 register your product for extended warranty benefits: Finland +358 support.fi@raymarine.com http://www.raymarine.co.uk/display/?id=788. (0)207... -
Page 47: Viewing Product Information
8.2 Viewing product information You can view information about your unit from the Diagnostics menu on a compatible multifunction display. This option displays information such as product serial number and software version. With the Homescreen displayed: 1. Select Set-up. 2. Select Maintenance. 3. - Page 48 ECI–100...
-
Page 49: Chapter 9 Technical Specification
Chapter 9: Technical specification Chapter contents • 9.1 Technical specification on page 50 Technical specification... -
Page 50: Technical Specification
9.1 Technical specification Physical specification Dimensions • Length: 109.2 mm (4.3 in) • Height: 30.2 mm (1.19 in) • Width: 21.35 mm (0.84 in) Weight 43 g (1.52 oz) Power specification Engine CAN bus SeaTalk (DeviceNet) Nominal supply 12 V dc 12 to 24 V dc voltage Operating... -
Page 51: Chapter 10 Spares And Accessories
Chapter 10: Spares and accessories Chapter contents • 10.1 Spares and accessories on page 52 • 10.2 SeaTalk ng® cables and accessories on page 52 Spares and accessories... -
Page 52: Spares And Accessories
• 1 x 3 m (9.8 ft) spur cable (A06040) Y Loom cables • 1 x Power cable Adaptor (A06049) cable / SeaTalk A25062 Includes: Engine ECI-100 Part Backbone Kit Description connectors connector number • 2 x 5 m (16.4 ft) Backbone cable Volvo Y-Loom E70241 (A06036) cable –... - Page 53 Description Part No Notes SeaTalk to bare A06044 ends 3 m (9.8 ft) spur SeaTalk Power A06049 cable SeaTalk A06031 Terminator A06028 Provides 1 x spur SeaTalk T-piece connection SeaTalk 5–way A06064 Provides 3 x spur connector connections SeaTalk A06030 backbone extender SeaTalk to E22158...
- Page 54 ECI–100...
-
Page 55: Appendix A Supported J1939 And Nmea 2000 Sentences
NMEA 2000 The tables below show standard J1939 parameters Throttle 127489 127489 and NMEA 2000 PGNs that can be sent from a Position connected engine, received by the ECI-100, bridged Sensor and transmitted onto the SeaTalk ng® bus. Engine 61443... - Page 56 ECI–100...
- Page 58 Raymarine UK Limited, Marine House, Cartwright Drive, Fareham, PO15 5RJ. United Kingdom. Tel: +44 (0)1329 246 700...
Need help?
Do you have a question about the eci-100 and is the answer not in the manual?
Questions and answers