Table of Contents
Advertisement
Quick Links
Advertisement
Table of Contents

Related Manuals for EC Line EC-VP-1100


Summary of Contents for EC Line EC-VP-1100
- Page 1 User Manual EC-VP-1100 All-in-one Touch POS Terminal...
-
Page 2: Table Of Contents
7.5 Network / LAN Failure ......................15 7.6 MSR Failure ..........................15 7.7 USB Failure ..........................15 7.8 Cash Drawer Doesn’t Function ....................16 7.9 Re-Boot Continuously ......................16 7.10 Printer Doesn’t Work ......................16 EC-VP-1100 User Manual – V1 - 1 -... - Page 3 8.3.2 MSR ..............................18 8.3.3 Customer Display ..........................18 8.3.4 SATA Interface ..........................18 8.3.5 Mainboard ............................19 8.3.6 Memory Card ..........................19 8.3.7 LCD Panel ............................19 9. MAINBOARD ....................20-21 EC-VP-1100 User Manual – V1 - 2 -...
-
Page 4: Overview
Overview Thank you for purchasing the EC-VP-1100 all in one touch POS terminal. We are committed to use up-to-date technology and provide better after-sales service continuously. Please take time to read this user manual before system installation. Note: Information in this user manual may change without prior notice 1. -
Page 5: Electromagnetic Compatibility Statement
Information Technology Equipment according to CISPR 22/European Standard EN 55022. The limits for Class A equipment were derived for commercials and industrial environments to provide reasonable protection against interference with licensed communication equipment. EC-VP-1100 User Manual – V1 - 4 -... -
Page 6: Specification
10ms 600:1 Contrast Ratio Viewing Angle (Up/ Down/ Left/ 80°/80°/70°/70° Right) Touch Panel Taiwan Capacitive Touch Luminance 350 cd/m Power Input Universal AC 100-240V Output DC+12V Environment Management VESA DPMS 35MAX Consumption EC-VP-1100 User Manual – V1 - 5 -... - Page 7 3 Tracks Magnetic Reader Support Peripherals 1-line VFD 2-line VFD Support 10 inch Monitor (with/ without Support touch) 12 inch Monitor (with/ without Support touch) 15 inch Monitor (with/ without Support touch) EC-VP-1100 User Manual – V1 - 6 -...
-
Page 8: Installation Guide
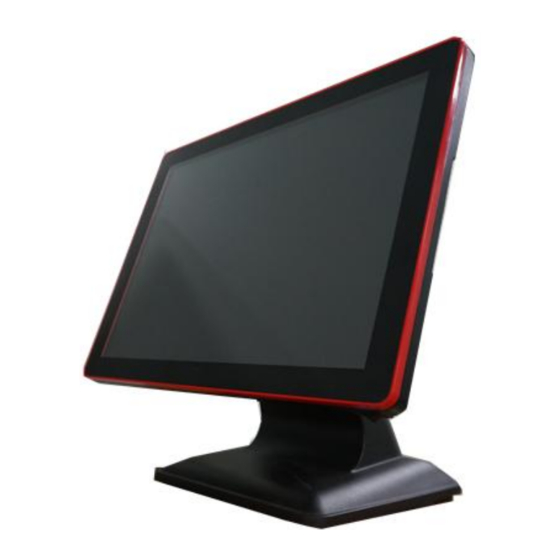
4. Installation Guide 4.1 Appearance 4.2 Power Button EC-VP-1100 User Manual – V1 - 7 -... -
Page 9: Rear Panel I/O Connectors
4.3 Rear Panel I/O Connectors At the rear panel of the EC-VP-1100 is a row of external I/O device connectors. Detail as below: Power USB*2 Output COM1 USB*2 RJ11 COM2 COM3 Power Input RJ11 - RJ11 interface (DK port) for connection of cash drawer ... -
Page 10: Getting Start
5. Getting Start: This chapter describe preparation before use the EC-VP-1100. The following topics are described. 5.1 Unpacking Below are the items should include in the carton box: EC-VP-1100 X 1 Power Supply X 1 Power cord X 1 ... -
Page 11: Install The Optional Parts
3.1 Open the installer directory in the CD, select the J1900 MB drivers 3.2 Double-click the “custom display” to proceed 3.3 Double-click “setup.exe” to start installation 3.4 When installation starts, click [NEXT] to proceed to the next step, until installation finish EC-VP-1100 User Manual – V1 - 10 -... -
Page 12: Install The Second Display
1. Turn the second display, secure the stand with four screws 2. Connect the power to “power output” and VGA cable 5.3.4 Connect the Cash Drawer 1. Connect the cash drawer cable 2. Test the cash drawer EC-VP-1100 User Manual – V1 - 11 -... -
Page 13: Installation The Drivers And Software
Open the installer directory in the CD, select J1900 MB drivers Step 2: Double-click the “eGalaxTouch_5.11.0.9126”to proceed Step 3: Double-click “setup.exe” to start installation Step 4: When installation starts, click [NEXT] to proceed to the next step EC-VP-1100 User Manual – V1 - 12 -... - Page 14 Step 6: Select “install RS232 interface driver” and click [Next] to continue Step 7: Select option ”NONE”, click [Next] to continue installation Step 8: When installing USB touch, connect the USB controller and USB cable EC-VP-1100 User Manual – V1 - 13 -...
- Page 15 Files\eGalaxtouch”. Click [Next] to continue installation Step 11: Select the Program Folder to install the utility. The default is ”eGalaxtouch”. Click [Next] to continue installation Step 12: Check the option to create a desktop shortcut icon EC-VP-1100 User Manual – V1 - 14 -...
-
Page 16: Identify The Problem
1. Check the MSR reader cables 7.7 USB Failure 1. Check the ports which detected in Windows Device Manager 2. Reseat the USB device 3. Reinstall the USB device driver 4. Replace the USB device EC-VP-1100 User Manual – V1 - 15 -... -
Page 17: Cash Drawer Doesn't Function
2. Remove all I/O device drivers and reinstall them 3. Check the IDE cable 4. Check the memory 7.10 Printer Doesn’t Work 1. Make sure the printer is power on 2. Replace paper roll 3. Check the printer cables EC-VP-1100 User Manual – V1 - 16 -... -
Page 18: Replace Field Replaceable Units(Frus)
When replacing a falling part, other parts that have to be removed before the falling part are listed at the top of the page To replace a part, reverse the removal procedure EC-VP-1100 User Manual – V1 - 17 -... -
Page 19: Rear Cover
Remove the screws Disconnect the cable Remove the MSR 8.3.3 Customer display Disconnect the cables Remove the customer display with two screws 8.3.4 SATA interface Remove the hard disk interface screws Disconnect the cables EC-VP-1100 User Manual – V1 - 18 -... -
Page 20: Mainboard
After take out the mainboard, pull from both side of the memory slot 8.3.7 The LCD panel Tear up the black lid Disconnect the cables Remove 4 screws, then take out the LCD panel EC-VP-1100 User Manual – V1 - 19 -... -
Page 21: Mainboard
9. Mainboard EC-VP-1100 User Manual – V1 - 20 -... - Page 22 EC-VP-1100 User Manual – V1 - 21 -...
- Page 23 Manufacturer: EC LINE Thank you very much for using EC Line product For service, please contact service@ecline.com.hk www.eclinepos.com EC-VP-1100 User Manual – V1 - 22 -...
Need help?
Do you have a question about the EC-VP-1100 and is the answer not in the manual?
Questions and answers