Table of Contents
Advertisement
Quick Links
Advertisement
Table of Contents

Related Manuals for Martin RUSH MH 11 Beam


Summary of Contents for Martin RUSH MH 11 Beam
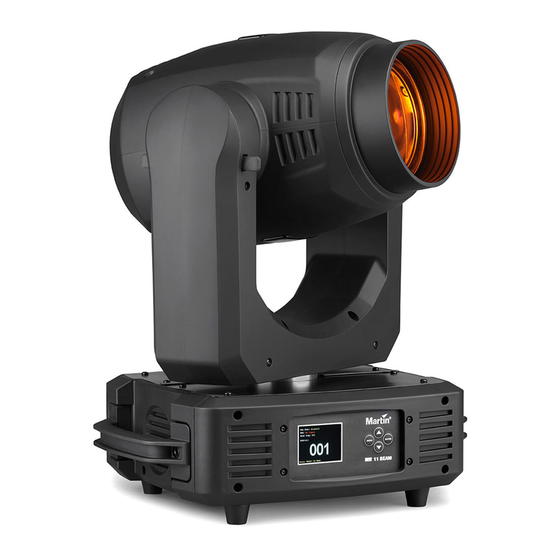
- Page 1 ® RUSH MH 11 Beam User Manual...
- Page 2 HARMAN Professional Denmark ApS registered in the United States and/or other countries. Features, specifications, and appearance are subject to change without notice. Martin Professional • Olof Palmes Allé 18 • 8200 Aarhus N • Denmark • www.martin.com RUSH® MH 11 Beam User Manual: Revision C...
-
Page 3: Table Of Contents
Table of contents Safety information..................5 Introduction ....................11 Before using the product for the first time .......... 11 Maximizing lamp life ................11 Physical installation ................. 12 Fastening the fixture to a flat surface ..........12 Mounting the fixture on a truss ............12 AC power .................... - Page 4 Updating firmware................34 Service and repairs................34 DMX protocol ................... 35 Control menus ..................39 Troubleshooting ..................41 Specifications................... 42...
-
Page 5: Safety Information
Install, operate and service Martin® products only as directed in their user manuals, or you may create a safety hazard or cause damage that is not covered by product warranties. - Page 6 If you have any questions about how to install, operate or service the fixture safely, please contact your Martin® distributor (see www.martin.com/where-to for details) or call the Martin® 24-hour service hotline on +45 8740 0000, or in the USA on 1-888-tech-180. Respect all locally applicable laws, codes and regulations when installing, operating or servicing the fixture.
- Page 7 the MAINS OUT socket, see ‘Linking fixtures to power in a chain’ on page 14. Protection from burns and fire Do not operate the fixture if the ambient temperature (T exceeds 40° C (104° F). The surface of the product casing can reach up to 100° C (212°...
- Page 8 Refer any service operation not described in this manual to a qualified technician. Lamp safety Install only a lamp that is approved by Martin® for use in the product. Prolonged exposure to an unshielded discharge lamp can cause eye and skin burns. Do not look at an exposed lamp while it is lit.
- Page 9 If you exceed the average lamp lifetime, the lamp may explode and damage the fixture. If the quartz envelope of a discharge lamp is broken, the lamp releases a small quantity of mercury and other toxic gases. If a discharge lamp explodes in a confined area, evacuate the area and ventilate it thoroughly for 30 minutes.
- Page 10 To minimize the risk of eye irritation or injury, disconnect the fixture from power at all times when the fixture is not in use and provide well-lit conditions to reduce the pupil diameter of anyone working on or near the fixture. RUSH®...
-
Page 11: Introduction
4. Ensure that the voltage and frequency of the power supply match the power requirements of the fixture. 5. Check the support pages on the Martin Professional website at www.martin.com for the most recent user documentation and technical information about the fixture. Martin® user manual revisions are identified by the revision letter at the bottom of the inside cover. -
Page 12: Physical Installation
Do not use the fixture to illuminate surfaces within 10 m (33 ft.) of the fixture. Martin® can supply safety cables and rigging clamps that are suitable for use with the fixture (see ‘Accessories’ on page 44). Fastening the fixture to a flat surface The fixture can be fastened to a hard, fixed, flat surface. - Page 13 (arrowed in illustration below) and around a secure anchoring point. If a safety cable attachment point becomes damaged or deformed, do not use the fixture. Return it to a Martin Service Centre for repair. RUSH® MH 11 Beam User Manual...
-
Page 14: Ac Power
AC power Read ‘Safety information’ on page 5 before connecting the fixture to AC mains power. Warning! The mains power input cable supplied with the fixture is rated 9 A and can safely supply only one fixture with mains power. Do not connect any device to the fixture’s MAINS OUT socket when using this input cable. - Page 15 16 A-rated power input cable and 16-A rated power relay cables available as accessories from Martin® (see ‘Accessories’ on page 44). Using these 16 A-rated cables, you can link: • Maximum two (2) RUSH® MH 11 Beam fixtures in total at 100-120 V, •...
-
Page 16: Fixture Overview
Fixture overview 3 4 5 1 – Display The display is used to configure the fixture and show status. 2 – Control buttons • MENU: Press to activate the menu. Within the menu, press to escape and return to the previous level. Press and hold to exit the menu. •... -
Page 17: Control Data Link
Control data link A DMX 512 data link is required in order to control the fixture via DMX. The fixture has 3-pin and 5-pin XLR connectors for DMX data input and output. Up to 32 devices can be linked together on a single daisy chain. The total number of fixtures in one 512-channel DMX universe is limited by the number of DMX channels required by the fixtures. -
Page 18: Connecting The Data Link
To split the link into branches, use an opto-isolated splitter such as the Martin® DMX 5.3 Splitter. Terminate the link by installing a termination plug in the output socket of the last fixture. The termination plug, which is a male XLR plug with a 120 Ohm, 0.25 watt resistor soldered between pins 2 and... -
Page 19: Fixture Setup
Fixture setup This section explains the fixture characteristics you can set that determine how it can be controlled and will behave. You choose the settings using the menus available from the control panel, and they are retained even when the fixture is powered off. Options can also be set over the DMX line using RDM from a suitable controller, see “Setting options by RDM”... -
Page 20: Lamp Control Settings
Lamp control settings The fixture’s lamp may be controlled automatically or manually using these settings. If the lamp is hot from having been previously lit, it will not restrike until the temperature falls below the MAX ON AT TEMPERATURE, which is fixed at 45°... -
Page 21: Fixture Settings
Fixture settings Hold or blackout on loss of DMX If the fixture loses the DMX signal, it can either hold the look it’s currently displaying or black out. The default is HOLD. To change the setting: To set fixture behavior when it is not receiving DMX: 1. - Page 22 Blackout during pan/tilt movements The fixture can be set to black out during pan or tilt movement. To enable this option: 1. In the FIXTURE SET menu select BI.O.P/T MOVE and press ENTER. 2. Select ON to enable automatic blackout, or OFF to disable it (default). 3.
-
Page 23: Fixture Information
2. Select YES to restore factory settings. 3. Press ENTER to confirm or MENU to exit without restoring. Fixture information Total operating hours To display the fixture’s total operating hours: 1. In the INFORMATION menu, select TIME INFORMATION and press ENTER. -
Page 24: Position Calibration
PC that is connected to the installation via a DMX data link. To use Martin® M-PC, connect a PC running the application to the data link via a USB-to-DMX interface box such as the Martin®... -
Page 25: Getting Status And Setting Options By Rdm
3. Give the controller time to identify the devices on the link and prepare for communication with the devices. Getting status and setting options by RDM The status and options listed in the table below can be read and set by RDM. - Page 26 STATUS_ID_DESCRIPTION CLEAR_STATUS_ID DEVICE_MODEL_DESCRIPTION MANUFACTURER_LABEL DEVICE_LABEL FACTORY_DEFAULTS DMX_PERSONALITY DMX_PERSONALITY_DESCRIPTION SENSOR_DEFINITION SENSOR_VALUE DEVICE_HOURS LAMP_HOURS BOOT_SOFTWARE_VERSION_ID BOOT_SOFTWARE_VERSION_LABEL LAST_STATE DIMMER_CURVE LAMP_STRIKE LAMP_STATE DEVICE_POWER_CYCLES DISPLAY_INVERT SLOT_DESCRIPTION PAN_INVERT TILT_INVERT RESET_DEVICE RUSH® MH 11 Beam User Manual...
-
Page 27: Effects
Effects This section describes the effects provided by the RUSH® MH 11 Beam. See ‘DMX protocol’ on page 35 for a full list of the DMX channels and values required to control the different effects. imming Overall intensity can be precisely adjusted from 0 to 100% using 16-bit coarse and fine control. -
Page 28: Gobos
Gobos The fixture contains one gobo wheel with gobo positions as shown below: Gobo wheel (rotating gobos) Individual gobos can be set to indexed positions, and rotated clockwise and counter-clockwise. Gobo shake is also available. When option “BI.O. Other Move” is ON, the fixture blacks out during color and gobo changes. -
Page 29: Maintenance
The user may carry out the service operations described in this manual. All other service operations must be carried out by an authorized Martin® service technician. Do not try to repair the fixture yourself, as you may create a safety risk or cause damage that is not covered by the product warranty. -
Page 30: Replacing Gobos
Use gentle pressure only when cleaning, and work in a clean, well-lit area. Do not use any product that contains solvents or abrasives, as these can cause surface damage. To clean the fixture: 1. Disconnect the fixture from power and allow it to cool for at least 10 minutes. - Page 31 3. The rotating gobos sit in goboholders that slot into clips in the rotating gobo wheel. Find the gobo you want to replace. See below. Pull its goboholder away from the gobo wheel slightly, then lift the goboholder out of its clip in the wheel. 4.
-
Page 32: Lamp Replacement
(see Lamp on page 42). Install only lamps that are approved by Martin® for this fixture (see Lamp on page 42). If a lamp breaks, ventilate the room for 30 minutes, put on nitrile gloves and remove the pieces . - Page 33 3. Squeeze and unhook the ends of the lamp retaining spring. Pivot the spring away from the lamp. 4. Carefully pull the lamp wires off the connection pins. Remove the lamp. 5. Avoid direct contact with the new lamp. Either wear clean lint-free cotton gloves or hold the lamp with the included cloth.
-
Page 34: Lamp Temperature Control
3. Replace with a fuse of the same size and rating only. 4. Screw the fuse holder cap back on before reapplying power. Updating firmware If Martin releases an updated version of firmware for this fixture, you can update it using the Martin Companion Software using M-DMX. See www.martin.com. -
Page 35: Dmx Protocol
DMX protocol Fade Default Channel Value Function type value Dimmer, coarse Fade 0-255 Intensity 0 → 100% Dimmer, fine Fade 0-255 Dimmer intensity fine Shutter 0-31 Shutter closed 32-63 Shutter open 64-95 Strobe effect slow → fast 96-127 Pulse, fast close & slow open Snap 128-159 Pulse, fast open &... - Page 36 Fade Default Channel Value Function type value Open Stepped Scroll 148-151 152-155 Blue 156-159 Green 160163 Magenta 164-167 Yellow 168-171 Light blue 172-175 Pink 176-179 Orange 180-183 Aqua 184-187 Purple 188-191 192-195 196-199 Continuous rotation 200-220 Clockwise, fast → slow 221-222 No rotation 223-243...
- Page 37 Fade Default Channel Value Function type value 102-106 Gobo 7, rotating 107-111 Gobo 8, rotating Rotating gobo shake 112-121 Gobo 1, shake 122-131 Gobo 2, shake 132-141 Gobo 3, shake 142-151 Gobo 4, shake 152-161 Gobo 5, shake 162171 Gobo 6, shake 172-181 Gobo 7, shake 182-191...
- Page 38 Fade Default Channel Value Function type value Frost (Wash Mode) *see note 1 0-127 No frost Snap 128-255 Enable frost Focus, Coarse Fade 0-255 Focus, near → far Focus, Fine Fade 0-255 Fine focus adjustment Pan, Coarse Fade 0-255 Pan, 0° → 540° Pan, Fine Fade 0-255...
-
Page 39: Control Menus
Control menus To access the control menus, press the MENU button. Use the UP and DOWN buttons to navigate the menus. Select a menu option with the ENTER button. For more information, see ‘Using the control menus’ on page 19. Default fixture settings are shown in bold. - Page 40 Menu Sub-menu Setting/Value Explanation Display inverse AUTO/ON/OFF Flip display Backlight auto 02~60m 05m Set delay time for display off Celsius/ Temperature Unit Select unit for temp. display Fahrenheit Display Setting Error Record 1 Display Warning Toggle error code display Error Record 2 ...
-
Page 41: Troubleshooting
One of the control DMX setup or DMX link See next section. channels is fault. unresponsive or Damaged step motor or Contact your Martin only responds cable connection authorized distributor or intermittently. between head and service center for body. -
Page 42: Specifications
Specifications Physical Dimensions (LxWxH)....301 x 408 x 560 mm (11.9 x 16.1 x 22.1 in.) Weight ..................19.3 kg (42.5 lbs.) Lamp Approved lamp ..........Philips MSD Platinum 11R 250 W Color temperature ................. 7800 K Average lifetime* ................2000 hours *Preliminary figure obtained under manufacturer´s test conditions Dynamic Effects Dimming ............ - Page 43 Optics Beam angle ....................2.6° Interchangeable Gobos Acceptable materials..........Stainless steel or aluminum Diameter........14 mm, +0/-0.2 mm (0.55 in., +0/-0.008 in.) Max. image diameter, metal..........9.5 mm (0.37 in.) Thickness, metal .............0.2mm (0.008 in.) nominal Control and Programming Control systems................DMX, RDM DMX channels ....................18 Integrated user interface ......
- Page 44 Thermal Cooling ............Forced air, temperature-regulated Maximum ambient temperature (T max.)........ 40° C (104° F) Minimum ambient temperature (T min)......... 0°C (32° F) Total heat dissipation* ..............1430 BTU/hr. *Calculated, +/- 10%, at full intensity, full white Approvals EU safety....... EN 60598-2-17 (EN 60598-1), EN 62471, EN 62493 EU EMC..........EN 55015;...
- Page 45 Specifications subject to change without notice. For latest product specifications, see www.martin.com Disposing of this product Martin® products are supplied in compliance with Directive 2012/19/EC of the European Parliament and of the Council of the European Union on WEEE (Waste Electrical and Electronic Equipment), where applicable.
- Page 46 Photobiological Safety Warning The label shown below is displayed on this product. If it becomes difficult or impossible to read, it must be replaced using the illustration below to reproduce a new label sized 88 x 43, in black on a yellow background. RISK GROUP 3 WARNING.
Need help?
Do you have a question about the RUSH MH 11 Beam and is the answer not in the manual?
Questions and answers