TERSUS David User Manual
Hide thumbs
Also See for David:
- User manual (103 pages) ,
- Quick start manual (2 pages) ,
- Quick start manual (13 pages)
Table of Contents
Advertisement
Quick Links
Download this manual
See also:
User Manual
Advertisement
Table of Contents

Related Manuals for TERSUS David


Summary of Contents for TERSUS David
- Page 1 User Manual Version V1.0-20180525 User Manual For David GNSS Receiver ©2018 Tersus GNSS Inc. All rights reserved. Sales & Technical Support: sales@tersus-gnss.com & support@tersus-gnss.com More details, please visit www.tersus-gnss.com...
-
Page 2: Table Of Contents
Table of Content Overview ........................8 Introduction ....................... 8 Receiver Features ....................... 8 Brief Introduction of GNSS and RTK ................9 Devices in David Package ................... 11 2.1 Rove Kit Mobile Mode ....................12 David Receiver ....................14 2.1.1 2.1.2 GNSS Antenna ....................14 The 2pin-USB Power Cable ................. - Page 3 5.5 30W Radio RS400L30 ..................... 61 Typical operating ...................... 64 David as a Rover to receive corrections from Internet ..........64 David as a Base to transmit corrections to Internet ..........67 Radios Transmit RTK Corrections between Two Davids .......... 70 Data Collection for Post Processing .................
- Page 4 Figure 36 COMM cable for 30W radio ................35 Figure 37 David GNSS receiver installation hook ............35 Figure 38 Outline of Android phone to David with Wires ..........38 Figure 39 Outline of Android phone to David with Bluetooth ......... 40 Figure 40 Outline of David connected to a Computer ............
- Page 5 Figure 44 Panel of David ..................... 54 Figure 45 Pin Definition of the COMM1/COMM2/DC ports ........... 55 Figure 46 Outline of Android phone to David with Wire ..........65 Figure 47 Outline of Android phone to David with Wire ..........67 Figure 48 Outline of Base/Rover with Radios ..............
- Page 6 Table 28 Detailed steps for rover receive corrections from Internet ......65 Table 29 Detailed steps for Base transmit corrections to Internet ........ 68 Table 30 Detailed steps for David with Radios ..............70 Table 31 Detailed Steps for Static Data Collection ............73 Table 32 List of terminology ....................
-
Page 7: Table 1 The Document / Software Used In This User Manual
A warning that actions, operation or configuration may result in regulatory noncompliance, safety issues or equipment damage. NUWA is Tersus survey app, four tabs (Project, Device, Survey and Tools) are provided in the Nuwa® main window. So, in chapter 0, all the operations in the Survey software will start from these four tabs. - Page 8 Support If you have a problem and cannot find the information you need in the product documentation, request technical support using the Tersus website at www.tersus-gnss.com, or mail to support@tersus-gnss.com 7 / 76...
-
Page 9: Overview
Android platform such as a phone or tablet via USB cable or an external Bluetooth module. The David can work as a base or a rover, it can support real-time RTK positioning as well as saving data for PPK application. -
Page 10: Brief Introduction Of Gnss And Rtk
The Lemo connectors support mis-installation avoidance. Brief Introduction of GNSS and RTK Tersus BX306 GNSS receiver is integrated in David, the board is receiving the GNSS signals from satellites and RTK corrections from the base, and is outputting cm-level position, velocity and time. Figure 2 shows David system;... -
Page 11: Figure 3 Corrections Transmitted Via Internet
The RTK corrections are transmitted from a base, which can be a CORS station or a David receiver. The RTK corrections can be transmitted to the rover via Internet or with external radios. Figure 3 Corrections transmitted via Internet Figure 4 Corrections transmitted with radios... -
Page 12: Devices In David Package
This chapter will give detailed introduction about all the devices in the package. David has seven variants, which are convenient for customers to select per their application. Different accessories are included in each variant. Table 2 gives a brief description of the seven variants. For more about them, refer to section 2.1 to section 2.7. -
Page 13: Rove Kit Mobile Mode
3. Rover Kit with 2W Radio Station must work with Base Kit with 2W Radio Station or Base Kit with 30W Radio Station. 2.1 Rove Kit Mobile Mode In this variant, the David will be connected to an Android phone with Bluetooth ® module or with cables. Tersus Survey Nuwa App will run in the Android phone to receive RTK corrections from a NTRIP caster or a TCP server. -
Page 14: Figure 7 Field Photo 1 - 2
Figure 7 Field photo 1 - 2 Table 3 Devices in rover mobile mode Devices Number Items in the field photos David GNSS receiver GNSS antenna Not in the field photo, refer GNSS antenna connector to section 2.1.6 for detail. -
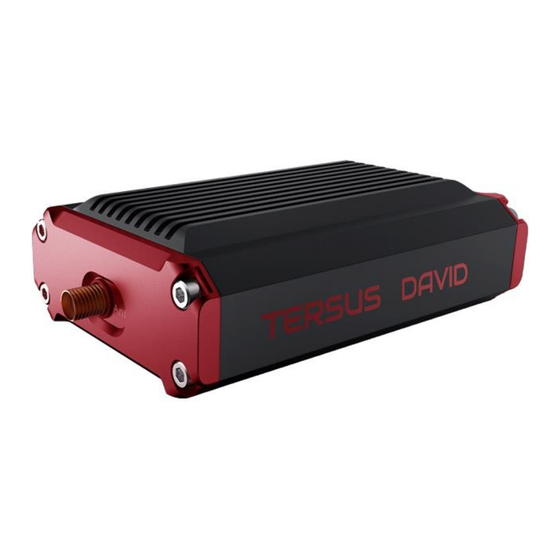
Page 15: David Receiver
COMM2 port DC port Figure 8 David Receiver David‟s DC is for power input, COMM1 port is for COM1 and CAN ports, and COMM2 port is for COM2 and USB ports, see chapter 5 for detail. Table 4 Definition of LEDs... -
Page 16: The 2Pin-Usb Power Cable
If an antenna from other companies will be used, contact Tersus to get permission, or the David may not work as it‟s expected. Figure 10 RF cable 2.1.3 The 2pin-USB Power Cable The power cable is used to connect a battery bank to the DC port of David. 15 / 76... -
Page 17: Comm1-Bluetooth Module
This Bluetooth module will use the COM1 port of David. Figure 12 Bluetooth Module The Bluetooth can only be installed to the COMM1 port of David. The SSID for this Bluetooth module is BT420A-xxxxx, where xxxxx is the last 5 digits of the Bluetooth serial number, which is printed on the Bluetooth module. -
Page 18: Gnss Antenna Connector
Figure 13 Bracket for Rover 2.1.6 GNSS Antenna Connector The GNSS antenna connector is used to install the GNSS antenna or the 30W radio station antenna to a tripod. Figure 14 GNSS Antenna Connector 2.1.7 COMM2-7pin-USB & DB9 Data Cable The COMM2-7pin-USB &... -
Page 19: Other Accessories
3. Connect to USB Type A Male to USB Type A Male cable (see Figure 17) and USB Type A Female to USB (Micro +Type C) OTG cable (see Figure 18) to connect the Android phone with David, refer to section 3.3.1. Figure 15 COMM2-7pin-USB & DB9 Data Cable The COMM2-7pin-USB cable can only be installed into the COMM2 port of David. -
Page 20: Figure 18 Usb Type A Female To Usb (Micro + Type C) Otg Cable
Figure 19 Height Measure Accessory A battery bank is used to power on the David, it‟s not included in the package, and has to be provided by the customers, see section 3.2 Power on David for 19 / 76... -
Page 21: Rover Kit With 1W Radio Station
Figure 20 Battery Bank 2.2 Rover Kit with 1W Radio Station In this variant, the David will be connected to an external 1W radio to receive RTK corrections from a base. With an external Bluetooth or with cables, the David will be connected to an Android phone, which is running Tersus Survey ®... -
Page 22: Figure 22 Field Photo 2-2
Figure 22 Field Photo 2-2 Table 6 Rover Kit with 1W Radio Station Devices Number Items in the field photos David GNSS receiver GNSS antenna Not in the field photo, refer GNSS antenna connector to section 2.1.6 for detail. GNSS antenna cable... -
Page 23: Rs900C 1W/915Mhz Radio
If data is receiving, this LED will blink GREEN. 2.3 Rover Kit with 2W Radio Station In this variant, the David will be connected to an external 2W radio to receive RTK corrections from a base. With an external Bluetooth or with cables, the David will be connected to an Android phone, which is running Tersus Survey ®... -
Page 24: Figure 24 Field Photo 3 - 1
Figure 24 Field Photo 3 - 1 Figure 25 Field Photo 3 - 2 23 / 76... -
Page 25: Rs400L2 2W/460Mhz Radio
Table 8 Rover Kit with 2W Radio Station David variants Number Items in field photos David GNSS receiver GNSS antenna Not in the field photo, GNSS antenna connector refer to section 2.1.6 for detail. GNSS antenna cable 2 Pin-USB power cable COMM1-bluetooth module 10, refer to 2.1.4... -
Page 26: Figure 26 2W /460Mhz Radio
Protocol button is pressed to switch the protocol between TP Protocol (Transparent EOT protocol) , TT (TT450S protocol) and TS Button (Tersus protocol) Two 2W radios must have the same protocol and the same channel frequency before they can communicate each other. 25 / 76... -
Page 27: Comm2-7Pin-Usb & 5Pin Cable
David. 2.4 Base Kit Mobile Mode In this variant, the David, working as a base, will transmit RTK corrections to a NTRIP caster or a TCP sever. The David will be connected to an Android phone with an external Bluetooth or ®... -
Page 28: Figure 28 Field Photo 4
The tripod, the battery bank and the tribrach are not included in the package. Table 11 Base Kit Mobile Mode Devices Number Items in field photo David GNSS receiver GNSS antenna GNSS antenna connector GNSS antenna cable 2 Pin-USB power cable COMM1-bluetooth module 8, refer to 2.1.4... -
Page 29: Bracket For Base
Bracket for Base This bracket is hooked on the tripod and all the devices in the field (an Android phone, a radio, a David and a battery bank) can be installed on it, which brings much convenience for field job. -
Page 30: Base Kit With 1W Radio Station
Figure 30 Tape Meter 2.5 Base Kit with 1W Radio Station In this variant, the David, working as a base, will transmit RTK corrections to an external 1W radio. The David will be connected to an Android phone with cables or with the ®... -
Page 31: Base Kit With 2W Radio Station
The tripod, the tribrach and the battery bank are not included in the package. Table 12 Base Kit with 1W Radio Station Devices Number Items in field photo David GNSS receiver GNSS antenna GNSS antenna connector GNSS antenna cable 2 Pin-USB power cable Not in the field photo, refer to COMM1-bluetooth module 2.1.4... -
Page 32: Base Kit With 30W Radio Station
2.7 Base Kit with 30W Radio Station In this variant, the David, working as a base, will transmit RTK corrections to an external 30W radio. The David will be connected to an Android phone with cables or with the ®... -
Page 33: Figure 33 Field Photo 7 - 2
The two tripods and the tribrach in Figure 32 and Figure 33 are not included in the package. Table 13 Base Kit with 30W Radio Station Devices Number Items in field photos David GNSS receiver GNSS antenna GNSS antenna cable GNSS antenna connector Not in the field photo, COMM1-bluetooth module refer to 2.1.4... -
Page 34: Radio
Tape meter See Figure 30 Tape Meter Not in the field photo, Height measure accessory See Figure 19. David GNSS receiver installation hook 13, see Figure 37 Not in the field photo, 2pin-USB Power Cable see Figure 11 2.7.1 30W Radio The 30W radio is used when a longer baseline is required. -
Page 35: Other Cables
Table 15 Definition of LEDs LEDs Description RED: the input voltage is normal. ON/OFF Blink RED: the input voltage is out of the limits. Blink RED: the radio is transmitting. TX/RX Blink GREEN if the radio is receiving. Channel Show the current channel BAT CAP Show the battery left. -
Page 36: Figure 36 Comm Cable For 30W Radio
Figure 36 COMM cable for 30W radio Figure 37 David GNSS receiver installation hook 35 / 76... -
Page 37: General Operation
After power on, the PV LED will be ON for 3 to 5 seconds, then it will be OFF, which means the David is booting up successfully. If the PV LED is NOT acting as the above, it means the David is NOT booting up successfully. -
Page 38: Communication Between Android Phone And David
If other power than a battery bank is used to power on David, the customer has to make a power cable themselves and take all the risks involved. The working time of David depends on the capacity of the battery bank. -
Page 39: With Wires
With Wires Figure 38 Outline of Android phone to David with Wires Three cables are used to connect the COMM2 port of David to the USB port of the Android phone. They are: COMM2-7pin-USB & DB9 Data Cable or COMM2-7pin-USB & 5pin cable. -
Page 40: Table 16 Detailed Steps
Table 16 Detailed steps 1. Connect the David‟s COMM2 port to the USB port of the Android phone with cables. 2. Connect the antenna to David with the RF cable (optional). 3. Power on the David with a battery bank. -
Page 41: With An External Bluetooth
Table 17 Detailed steps 1. Install the Bluetooth module to the David‟s COMM1 port. 2. Connect the antenna to David with the RF cable (optional). 3. Power on the David with a battery bank. 4. Run Nuwa, Device ->Device Connect... -
Page 42: Fw Upgrade & Auth Code
6. Connect Config -> Search. The SSID is BT420A-xxxxx. No password is needed to pair with it. 7. Press Connect to enable the communication with the David. You can remove a Bluetooth device from the Available Device list by pressing it for several seconds. -
Page 43: Firmware Updates
921600 temporarily during FW updates by Tersus GNSS Center, see section 3.4.1 Firmware Updates for detail. 3.4.1 Firmware Updates If a new firmware update is released, it will be available on the Tersus web site https://www.tersus-gnss.com/software, or you can get the updates from Tersus support. -
Page 44: Table 19 Detailed Steps For Fw Update
< BX306 G2SB2G2 008001174910000171 0021 20161123 3.0 Apr 24 2018 12:23:48 0021 is the FW version. See „VERSION‟ in Tersus GNSS Log & Command Reference document for more detail about this log. Table 19 Detailed Steps for FW update Hardware Installation Follow Figure 40 and the detailed steps in Table 18 to create communication between a David receiver and Tersus GNSS Center. - Page 45 Update File bar. PORT is the PC‟s serial port for the USB Type A Male to DB9 Male cable. 921600 is recommended for the baud rate. Press Next 4. The following figure shows the FW is upgrading 5. After the FW is upgraded successfully, The following show 6.
-
Page 46: Auth Code
LOG AUTHLIST //get the auth list info to the David receiver, and send all the output info to Tersus support. If the auth code application is approved by Tersus, you will get a reg.txt file, in which AUTHCODE command with the code will be given, copy all of them and input... -
Page 47: Download Files From Internal Emmc Card
Register to input the new auth code. 3.5 Download Files from Internal eMMC Card The files saved on David‟s internal eMMC card can be copied to the computer via a serial port. Figure 41 Download file from eMMC card... - Page 48 2. Communicate the receiver with Tersus GNSS Center, input: COM COM2 460800 // Configure baud rate of COM2 to 460800 3. Stop communicate with the David, re-communicate with it with 460800 4. Input LOGFILE CLOSE //close data collection 5. Input UNLOGALL...
- Page 49 8. After the file is downloaded successfully, the follow info will be given in the console window. 9. Go to Config -> Save Option tab to check where the file is saved. 48 / 76...
-
Page 50: Input Command Directly To The Gnss Board
The downloading rate is about 2M/min, the downloading time can be estimated based on it. Input command directly to the GNSS board Users can input commands to the BX306 board inside the David directly, the steps are given in Table 21. Table 21 Input commands to the BX306 directly Hardware Installation Follow section 3.3.1 and section 3.3.2 to connect the Android phone to the... - Page 51 1) Run Nuwa and go to Device -> Data Terminal 2) The page at the right will be shown; users can input all the commands in the Log & Command document in the window. 3) Then press Send button, the command will be input to the BX306 board.
-
Page 52: Introduction Of Nuwa
® Introduction of Nuwa Nuwa® is the Tersus survey app, which is running in the Android phone. All the configure commands for the David are input with Nuwa®, and all the ® operation of David are done with Nuwa . Four tabs menus are provided in the main window. -
Page 53: Figure 43 Four Main Windows Of Nuwa
Figure 43 Four Main Windows of Nuwa 52 / 76... -
Page 54: Specification
APPENDIX A Specification 5.1 David Receiver Table 22 David GNSS Performance GNSS Performance 1.5m RMS (Horizontal) Single positioning 3.0m RMC (Vertical) 10mm+1ppm (Horizontal) Position Accuracy RTK Positioning 15mm+1ppm (Vertical) 3mm+0.5ppm (Horizontal) Static post processing 5mm+0.5ppm (Vertical) Cold Start: <50s Time to First Fix Warm Start: <30s... -
Page 55: Figure 44 Panel Of David
Procedure V (75 g) Water & dust proof IP67 Power Requirement +5 – 12 VDC Input Voltage Power Consumption 3.2W without external Radio 6.2W with external 1W radio RS900C 9.8W with external 2W radio RS400L2 Figure 44 Panel of David 54 / 76... -
Page 56: Figure 45 Pin Definition Of The Comm1/Comm2/Dc Ports
Note 1: The default configure for pin6 and pin7 in COMM1 port are CAN_H and CAN_L. The two signals are multiplexed with PPS and EVENT. This feature is related to FW release, contact support@tersus-gnss.com confirmation. Figure 45 Pin Definition of the COMM1/COMM2/DC ports... -
Page 57: Antenna Ax3702 (Hg)
5.2 ANTENNA AX3702 (HG) Table 24 Antenna AX3702 (HG) Antenna Specification GPS L1/L2/L5; BDS B1/B2/B3; Tracking signals GLONASS L1/L2 Impedance 50 Ohm Polarization RHCP ≤ 3dB Axial Ratio Azimuth Coverage 360° ≤ 2.0 Output VSWR Peak Gain 5.5dBi Phase Center Error ±... -
Page 58: Radio Rs900C
5.3 1W Radio RS900C Table 25 Specification for RS900C General Specification Working Frequency 915MHz Data level RS-232 Serial port baud rate 115200 Data interface DB-9 male Size 78 * 51.5 * 26.4 mm Operating Temperature -40 - +85℃ Antenna impedance 50... - Page 59 58 / 76...
-
Page 60: Radio Rs400L2
Modulation GMSK Data rate in air 9600bps@25KHz RF sensitivity Better than 13dB@-119dBm Code sensitivity -116 dBm BER 10E-5@9600bps Protocol Transparent EOT, TT450S and Tersus RF Specification 10MHz (457MHz – 467MHz) Frequency range Channel width 25KHz Frequency ±1.5 ppm(25C) stability Channel number... - Page 61 60 / 76...
-
Page 62: Radio Rs400L30
5.5 30W Radio RS400L30 Table 27 RS400L30 Radio Specification Communication Interface DTE-DCE Interface 9.6kbps in the air Serial port: RS-232, Band rate 38400 Interaction High (about 30W) PWR LED: OFF high (about 20W) PWR LED: BLUE Power level Middle (about 10W) PWR LED: RED PWR LED: RED&BLUE Low (about 5W) - Page 63 116 (channel 00 – 15 are configurable, channel Channel number 16 – 116 are fixed) Adjacent channel 60dB selectivity Environment -30 – +60C Temperature Operating -40 – 85C Storage Dust proof and IP68 waterproof Physical Description Size 165 * 74 * 185.5 mm with plastic protector Weight About 1.75Kg...
- Page 64 Pin 1: GND Pin2: PWR input Power input port 63 / 76...
-
Page 65: Typical Operating
A tripod (optional). A tribrach (optional) It‟s highly recommended that a David base variant is installed on a tripod. David as a Rover to receive corrections from Internet From section 6.1 to section 6.4, David and Android phone are connected with cables;... -
Page 66: Figure 46 Outline Of Android Phone To David With Wire
Figure 46 Outline of Android phone to David with Wire Three cables are used to connect the COMM2 port of David to the USB port of the Android phone. They are: COMM2-7pin-USB & DB9 Data Cable or COMM2-7pin-USB & 5pin cable. - Page 67 6. Connect Type “ USB” 7. Press Connect Config update accordingly. 8. Press Connect to enable the communication with David. Go back to: Device -> Rover Station 66 / 76...
-
Page 68: David As A Base To Transmit Corrections To Internet
David as a Base to transmit corrections to Internet Figure 47 Outline of Android phone to David with Wire Three cables are used to connect the COMM2 port of David to the USB 67 / 76... -
Page 69: Table 29 Detailed Steps For Base Transmit Corrections To Internet
GNSS antenna and the antenna connector on it. 3. Connect the antenna to David with the RF cable. 4. Connect the David‟s COMM2 port to the USB port of the Android phone with cables. 5. Power on the David with a battery bank. - Page 70 Select Auto Startup+PDA Network+Default Server1+Auto, then press Detail to configure the parameters about the Networ If Auto Start is selected for Start Way, go to Step 14. If Manual Start is selected for Start Way, input the base‟s position manually. If Ntrip protocol is selected, please input: IP, Port, Username, Password and Mount Point.
-
Page 71: Radios Transmit Rtk Corrections Between Two Davids
GNSS antenna and the antenna connector on it. 5. Connect the antenna to the base David with the RF cable. 6. Connect the David‟s COMM2 port to the USB port of the Android phone with cables. 7. Install the RF cable from the telescopic pole to the 30W radio station. - Page 72 12. Connect the rover antenna to the rover David with the RF cable. 13. Install the COMM2-7pin-USB & 5pin cable to the COMM2 port of the rover David, and connect the other two connectors to the USB port of the Android phone with cables and to the 2W radio station, respectively.
-
Page 73: Data Collection For Post Processing
If the collection frequency increased, the data size will be increased proportionately. David provides up to 4GB internal eMMC card for data collection, before data collection, estimate whether the free space is enough for the data collection. Refer to Table 20 to delete the files on eMMC card to get more free space. -
Page 74: Figure 49 Outline Of Static Data Collection
David has worked 500 hours 40min, (500*3600 + 40*60)/100 = 18024, the file name will be 00018024.dat. 2) Update time: if the David hasn‟t gotten the GNSS time, the update time of the files will be19800000 0:0 (YYYYMMDD HH:MM). If the David has gotten the GNSS time, the update time will be the UTC time. - Page 75 6. Ensure the necessary parameters, including file name, data frequency and cutoff angle, etc. Press Start. 7. Follow steps 1 - 6 above to collect static data at other points interested. 74 / 76...
-
Page 76: Terminology
Terminology Table 32 List of terminology Abbreviation Definition ASCII American Standard Code for Information Interchange Compact Measurement Record Direct Current Electro Static Discharge ECEF Earth Center Earth Fixed GLONASS GLObal NAvigation Satellite System GNSS Global Navigation Satellite System Global Positioning System Intermediate Frequency Inertial Measurement Unit Input/Output...
Need help?
Do you have a question about the David and is the answer not in the manual?
Questions and answers