Table of Contents
Advertisement
Quick Links
User Manual
Oscar GNSS Receiver
User Manual
©2019-2021 Tersus GNSS Inc. All rights reserved.
Sales Enquiry: sales@tersus-gnss.com
Technical Support: support@tersus-gnss.com
More details, please visit www.tersus-gnss.com
Right to the Point
Information is subject to change without notice. © Copyright 2021 Tersus GNSS Inc.
Version 2.0 – 20210913
Advertisement
Table of Contents

Related Manuals for TERSUS Oscar GNSS


Summary of Contents for TERSUS Oscar GNSS
- Page 1 Oscar GNSS Receiver User Manual ©2019-2021 Tersus GNSS Inc. All rights reserved. Sales Enquiry: sales@tersus-gnss.com Technical Support: support@tersus-gnss.com More details, please visit www.tersus-gnss.com Right to the Point Information is subject to change without notice. © Copyright 2021 Tersus GNSS Inc.
-
Page 2: Revision History
2.2.2.3 scan code & 3.1 Technical specifications 20210809 Add section2.6 battery change mode; upgrade section2.5 Web UI 20210913 Update section2.3.3 Right to the Point Information is subject to change without notice. © Copyright 2021 Tersus GNSS Inc. -
Page 3: Notices
User Manual for Oscar GNSS Receiver v2.0 Notices CE Marking Tersus GNSS Inc. declares that Oscar GNSS receiver is in compliance with the essential requirements (radio performance, electromagnetic compatibility and electrical safety) and other relevant provisions of Radio Equipment Directive... - Page 4 User Manual for Oscar GNSS Receiver v2.0 KC Marking Tersus GNSS Inc. declares that Oscar GNSS receiver is in compliance with the essential requirements for safety certification of electrical products from Korea Agency for Technology and Standards (KATS). Therefore the equipment is labeled with the following KC-marking.
-
Page 5: Safety Information
A warning that actions, operation or configuration may result in regulatory noncompliance, safety issues or equipment damage. The following notices apply to all three versions of Oscar GNSS receivers. Operating or storing the receiver outside the specified temperature range can damage it. - Page 6 DO NOT operate the equipment near electrical blasting caps or in an explosive atmosphere. All equipment must be properly grounded. All equipment should be serviced only by a qualified technician. Right to the Point Information is subject to change without notice. © Copyright 2021 Tersus GNSS Inc.
-
Page 7: Table 0.1 Document And Software Used In This User Manual
If there is any problem and the information needed cannot be found in the product documentation, log a technical support ticket in our tracking system https://tersus.supportsystem.com/ , or mail to support@tersus-gnss.com. Right to the Point Information is subject to change without notice. © Copyright 2021 Tersus GNSS Inc. -
Page 8: Table Of Contents
2.1.3 Fix Oscar on a tripod or ranging pole............... 41 2.2 Oscar configuration.....................43 2.2.1 Configure via buttons..................43 2.2.2 Configure via TC20 controller................49 2.3 Data download......................55 2.3.1 Connection......................55 Right to the Point Information is subject to change without notice. © Copyright 2021 Tersus GNSS Inc. - Page 9 4.4 Tilt survey and stakeout..................... 97 4.4.1 Tilt initialization..................... 97 4.4.2 Tilt survey......................98 4.4.3 Tilt stakeout......................100 4.5 Issues and solutions....................101 5. Terminology........................105 Right to the Point Information is subject to change without notice. © Copyright 2021 Tersus GNSS Inc.
-
Page 10: List Of Figures
Figure 1.24 GNSS antenna connector............32 Figure 1.25 Height measure accessory............32 Figure 1.26 Tape measure................33 Figure 1.27 410-470MHz radio whip antenna ......... 33 Right to the Point Information is subject to change without notice. © Copyright 2021 Tersus GNSS Inc. - Page 11 Figure 2.13 Rover configuration..............53 Figure 2.14 Link status of Base..............54 Figure 2.15 Link status of Rover..............54 Figure 2.16 Connect Oscar to a computer..........55 Right to the Point Information is subject to change without notice. © Copyright 2021 Tersus GNSS Inc.
- Page 12 Figure 4.16 Rover configuration - PDA Network (Ntrip)......93 Figure 4.17 Link status of Rover using internal radio....... 94 Figure 4.18 Static Survey configuration............96 Right to the Point Information is subject to change without notice. © Copyright 2021 Tersus GNSS Inc.
-
Page 13: List Of Tables
Table 3.6 Detailed configuration information for internal radio....76 Table 3.7 TC20 technical specification............76 Table 3.8 External radio RS400H2 technical specification...... 78 Table 3.9 Default factory configuration for Radio RS400H2....79 Right to the Point Information is subject to change without notice. © Copyright 2021 Tersus GNSS Inc. - Page 14 Table 4.3 Devices of Oscar as a base external radio mode....82 Table 4.4 Devices of Oscar as a rover network mode......88 Table 4.5 Devices of Oscar as a rover internal radio mode.....89 Right to the Point Information is subject to change without notice. © Copyright 2021 Tersus GNSS Inc.
-
Page 15: Introduction
This chapter includes overview, receiver features, and devices in the package. Overview The Oscar GNSS receiver is a new generation GNSS RTK system. It supports calibration-free tilt compensation function which is immune to magnetic disturbances, leveling pole is not required. Easy configuration with 1.54 inch interactive screen on Ultimate and Advanced versions. -
Page 16: Receiver Features
(2) One battery lasts up to 8 hours when Oscar works in 4G/3G/2G network and Rover radio mode. Two batteries add up to total 16 hours use. Right to the Point Information is subject to change without notice. © Copyright 2021 Tersus GNSS Inc. -
Page 17: Devices In The Package
The devices in the package may vary according to the customer requirement. Here describes the major parts in the package. 1.3.1 Oscar GNSS receiver The Oscar GNSS receiver has three versions which are shown as below. Figure 1.1 Oscar GNSS receiver - Ultimate Figure 1.2 Oscar GNSS receiver - Advanced Figure 1.3 Oscar GNSS receiver - Basic... -
Page 18: Table 1.1 Usage Of Fn Button For Three Versions
GNSS module and make it re-search the satellites. Detailed LED flash status related to this operation refers to the LED flash patterns table. Right to the Point Information is subject to change without notice. © Copyright 2021 Tersus GNSS Inc. -
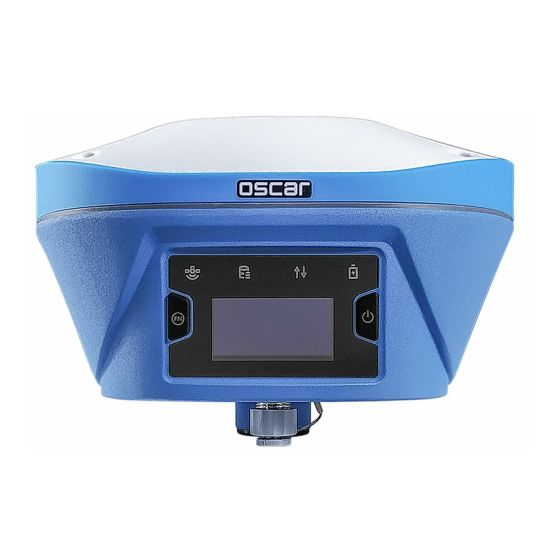
Page 19: Figure 1.4 Buttons And Display On Oscar Ultimate
Battery battery level is between 30% and 10%. Fast flash indicates the battery level is below 10% and reminds users to change battery. Right to the Point Information is subject to change without notice. © Copyright 2021 Tersus GNSS Inc. -
Page 20: Figure 1.5 Buttons And Display On Oscar Advanced
30% and 10%. Fast flash indicates the battery level is below 10% and reminds users to change battery. Right to the Point Information is subject to change without notice. © Copyright 2021 Tersus GNSS Inc. -
Page 21: Figure 1.6 Buttons And Leds On Oscar Basic
30% and 10%. Fast flash indicates the battery level is below 10% and reminds users to change battery. Right to the Point Information is subject to change without notice. © Copyright 2021 Tersus GNSS Inc. -
Page 22: Table 1.5 Possible Led Flash Patterns
Then all six LEDs light up for 1s thereafter only power LED lights up means it restarts successfully with updated firmware. Note: N/A means Not Applicable. Right to the Point Information is subject to change without notice. © Copyright 2021 Tersus GNSS Inc. -
Page 23: Figure 1.7 Bottom Of Oscar Gnss Receiver
Device, computer, USB drive SIM slot Nano SIM card TNC port 410-470MHz radio antenna 5/8’’ x 11 UNC-2B connector for Screw hole corresponding connector and pole. Right to the Point Information is subject to change without notice. © Copyright 2021 Tersus GNSS Inc. -
Page 24: Battery And Charger
1.3.2 Battery and charger Oscar equips smart lithium batteries which can detect electricity and display the power level intelligently. The Oscar GNSS receiver can also be powered by external power source via serial data port. The built-in large capacity battery is detachable, two batteries support up to 16 hours of field work in 4G/3G/2G mode and rover radio mode. -
Page 25: Figure 1.10 Cn20 Charger With Two Bn20 Batteries
Insert the DC Jack connector of the adapter to the CN20 charger, then make the adapter with cable plug in the local AC outlet (100~240V AC) to start charging. Figure 1.11 CN20 Charger Adapter Right to the Point Information is subject to change without notice. © Copyright 2021 Tersus GNSS Inc. -
Page 26: Figure 1.12 Cn20 Charger Adapter Cable (A/B/C/E/N)
3 hours per battery at room temperature. If the battery has been stored for longer than three months, charge it before use. Right to the Point Information is subject to change without notice. © Copyright 2021 Tersus GNSS Inc. -
Page 27: Tc20 Controller
User Manual for Oscar GNSS Receiver v2.0 1.3.3 TC20 controller The Tersus TC20 Controller is a rugged android smart phone with design of 4.3'' touch screen and an alphanumerical keypad. Equipped with powerful processor, it is perfect to adapt with Tersus Survey software. With professional IP68 rating, it is robust and reliable for harsh operating conditions. - Page 28 Point key: collect point manually under survey interface. FN key: shift keypad language under some input method. OK key: confirm or wrap to the next line. Right to the Point Information is subject to change without notice. © Copyright 2021 Tersus GNSS Inc.
-
Page 29: Figure 1.14 Tc20 Lithium Battery
A: American, B: British, C: Chinese, E: European, N: Australian Put the plug in in the back of the adapter to assemble the TC20 charger. Right to the Point Information is subject to change without notice. © Copyright 2021 Tersus GNSS Inc. -
Page 30: External Radio For Oscar
When using external radio for Oscar as a base, a high gain radio antenna and a telescopic pole are needed which are shown as below. Right to the Point Information is subject to change without notice. © Copyright 2021 Tersus GNSS Inc. -
Page 31: Figure 1.20 High Gain Radio Antenna
Bullet-DC to Alligator Clips are used to communicate with Oscar and connect to external power supply. Figure 1.22 Serial-5pin to External-Radio-DC-5pin & Bullet-DC Cable Right to the Point Information is subject to change without notice. © Copyright 2021 Tersus GNSS Inc. -
Page 32: Other Accessories
Figure 1.24 GNSS antenna connector The height measure accessory is used to determine the height of Oscar with higher accuracy. Figure 1.25 Height measure accessory Right to the Point Information is subject to change without notice. © Copyright 2021 Tersus GNSS Inc. -
Page 33: Figure 1.26 Tape Measure
1. Connect Oscar to the USB port of computer for data downloading; 2. Connect the mini USB port of TC20 to charge TC20 controller. Right to the Point Information is subject to change without notice. © Copyright 2021 Tersus GNSS Inc. -
Page 34: Figure 1.29 Mini-Usb Otg Cable
Figure 1.30 Extension pole 30cm This metal fixing plate is used to fixate the high gain radio antenna to the tripod. Figure 1.31 Metal fixing plate Right to the Point Information is subject to change without notice. © Copyright 2021 Tersus GNSS Inc. -
Page 35: Figure 1.33 Bracket For Tc20
A yellow carrying case is to store all the devices and accessories except ranging pole, high gain radio antenna and telescopic pole. Figure 1.34 Carrying Case Right to the Point Information is subject to change without notice. © Copyright 2021 Tersus GNSS Inc. -
Page 36: Figure 1.35 Tool Bag
BN20 battery. Figure 1.36 Serial-5pin to DC JACK & DB9 male cable Figure 1.37 DC JACK male with two wires Right to the Point Information is subject to change without notice. © Copyright 2021 Tersus GNSS Inc. -
Page 37: Figure 1.38 Db9 Female To Usb Type A Male Converter Cable
The configuration cable for 25W radio below is used to configure parameters of the 25W radio instead of the default setting. Figure 1.39 Configuration cable for 25W radio Right to the Point Information is subject to change without notice. © Copyright 2021 Tersus GNSS Inc. -
Page 38: General Operations
Push the battery in the direction of the arrow on the top, the battery is properly installed after a ‘click’, then close the cover and lock it. Figure 2.2 Put one battery in Oscar Right to the Point Information is subject to change without notice. © Copyright 2021 Tersus GNSS Inc. - Page 39 To remove the battery, slide the battery in the opposite direction of the arrow and then take out the battery from the battery compartment. Right to the Point Information is subject to change without notice. © Copyright 2021 Tersus GNSS Inc.
-
Page 40: Insert The Sim Card
2.1.2 Insert the SIM card When 4G/3G/2G network is chosen for survey operation, you need to insert a nano SIM card into Oscar GNSS receiver. Insert the nano SIM card with the contacts facing outside which is shown as below. -
Page 41: Fix Oscar On A Tripod Or Ranging Pole
2.1.3 Fix Oscar on a tripod or ranging pole Oscar GNSS receiver has a standard 5/8” x 11 UNC-2B connector and it can be fixed on a tripod or a ranging pole to be a base or rover according to customer requirement. -
Page 42: Figure 1.32 Ranging Pole
1, details refer to section 1.3.1 Ranging pole 2, details refer to section 1.3.4 Bracket for TC20 TC20 Controller 4, details refer to section 1.3.3 Right to the Point Information is subject to change without notice. © Copyright 2021 Tersus GNSS Inc. -
Page 43: Oscar Configuration
2.2.1 Configure via buttons The detailed definition of buttons on Oscar GNSS receiver refers to Figure 1.4, Table 1.1, and related context. The OLED screen is display for Ultimate and Advanced versions, and no display for Basic version. Therefore the button configurations are different which are listed below. -
Page 44: Table 2.4 Button Configuration For Oscar Basic
G means GPS, R Satellites means GLONASS, B means Beidou, E means Galileo, S means SBAS, Q means QZSS. Right to the Point Information is subject to change without notice. © Copyright 2021 Tersus GNSS Inc. - Page 45 Mode Config Base Mode Port Set Protocol: TRANSEOT/ TT450/ SOUTH/ SATEL/ TRIMMK3 Air-Baud-Rate: 9600/ Internal Radio 19200/ 4800 Format: RTCMv2.3/ RTCMv3 / RTCMv3.2/ RTD/ Right to the Point Information is subject to change without notice. © Copyright 2021 Tersus GNSS Inc.
- Page 46 19200/ 4800 Set Channel: 0--9 Set Customize Freq. Single Mode Confirm/ Cancel Tilt.: ON/OFF ON/OFF (Oscar Ultimate Pole Height Input Pole Height only) Right to the Point Information is subject to change without notice. © Copyright 2021 Tersus GNSS Inc.
- Page 47 Select AP/ OFF/ STA WIFI SSID/ IP/ MAC Check Address SIM card Inserted/ Not Inserted Cellular IMEI/Network/Signal Check Freq.& Int.Radio Power& Protocol& Air Baud& Channel Right to the Point Information is subject to change without notice. © Copyright 2021 Tersus GNSS Inc.
- Page 48 Debug Info Select Int. Radio ON/OFF NTRIP ON/ OFF Switch among 中文/繁體中文/日本語/ Language Switch Language rançais / Español / ürkçe / English Registered Registration Unregistered Right to the Point Information is subject to change without notice. © Copyright 2021 Tersus GNSS Inc.
-
Page 49: Configure Via Tc20 Controller
Tersus official website. Figure 2.6 Device functional group When Oscar GNSS receiver is powered on, to connect Oscar, put TC20 controller near the NFC logo on Oscar, the TC20 controller pair Bluetooth with Oscar automatically; or click [Device] -> [Connect] under an opened project, and select [Oscar] for the Device Type which is shown as below. -
Page 50: Figure 2.7 Connect Oscar Via Bluetooth
On the screenshot below, the eBubble is not in the black circle and its color is red for warning purpose. Right to the Point Information is subject to change without notice. © Copyright 2021 Tersus GNSS Inc. -
Page 51: Figure 2.9 Ebubble Before Adjusting
"Use USB for Transfer files" on the TC20 screen. 2) Click TC20 -> Internal storage -> TersusSurvey on the computer, then copy Right to the Point Information is subject to change without notice. © Copyright 2021 Tersus GNSS Inc. -
Page 52: Figure 2.11 Example Of Oscar's Registration File
Figure 2.6 Device functional group, click [Base] or [Rover], then create a work mode of detailed configurations for base or rover which are shown as below. Right to the Point Information is subject to change without notice. © Copyright 2021 Tersus GNSS Inc. -
Page 53: Figure 2.12 Base Configuration
[OK] and back to the work mode list, select this configuration to start data transmission for base or rover which are shown as below. Right to the Point Information is subject to change without notice. © Copyright 2021 Tersus GNSS Inc. -
Page 54: Figure 2.14 Link Status Of Base
User Manual for Oscar GNSS Receiver v2.0 Figure 2.14 Link status of Base Figure 2.15 Link status of Rover Right to the Point Information is subject to change without notice. © Copyright 2021 Tersus GNSS Inc. -
Page 55: Data Download
If you want to download the recorded static data for post processing, find F:\record folder in the USB drive shown as below, and then copy the specific file you need to your computer. Right to the Point Information is subject to change without notice. © Copyright 2021 Tersus GNSS Inc. -
Page 56: Download Debug Data
User Manual for Oscar GNSS Receiver v2.0 Figure 2.17 Static record folder Each folder named after the date contains rinex format and tersus binary data, which can be downloaded and processed as you need. Figure 2.18 Static data for one day 2.3.3 Download debug data... -
Page 57: Figure 2.20 Debug Info Folders
PC via a Mini USB cable,download inner data of the GNSS board in the F:\debug\INNER folder on your computer for issue debugging. Figure 2.20 Debug info folders Send these debug info to Tersus technical support team to help solve the problems you encountered. Right to the Point... -
Page 58: Firmware Upgrade
User Manual for Oscar GNSS Receiver v2.0 Firmware upgrade You have two methods to upgrade firmware for Oscar GNSS receiver: wired upgrade and wireless upgrade. 2.4.1 Wired upgrade The detailed steps of Oscar wired upgrade are as follows. 1) View Oscar firmware version. - Page 59 PDF document and the firmware file of .GZ format, DO NOT unzip the firmware file further. Figure 2.23 V1.3.1 firmware upgrade package download Right to the Point Information is subject to change without notice. © Copyright 2021 Tersus GNSS Inc.
- Page 60 Figure 2.25 Copy the .BIN firmware file to a USB flash drive 4) Ensure Oscar is powered off, and use the Mini-USB OTG cable to connect Oscar to the USB flash drive. Right to the Point Information is subject to change without notice. © Copyright 2021 Tersus GNSS Inc.
- Page 61 Press and hold the power button and the FN button at the same time. When the TERSUS icon appears on the LED panel, release the power button. Only hold down the FN button and keep pressing the FN button until the LED panel displays "SYSTEM UPGRADE".
- Page 62 At this time, refer to step 1 to check the Oscar firmware version. If it is consistent with the latest firmware version in the USB flash drive, the firmware upgrade is successful. Right to the Point Information is subject to change without notice. © Copyright 2021 Tersus GNSS Inc.
-
Page 63: Wireless Upgrade
Wi-Fi, the other is using Nuwa app via PDA network. The details are to be updated. Stay tuned for the new version of this user manual. Right to the Point Information is subject to change without notice. © Copyright 2021 Tersus GNSS Inc. -
Page 64: Web Ui
User Manual for Oscar GNSS Receiver v2.0 Web UI Oscar GNSS receiver supports being a Wi-Fi hotspot and connect with a computer or a smart terminal within five meters. You can read coordinate information, configure the receiver and upgrade the firmware through the web UI (user interface) on the browser of the computer or the smart terminal. -
Page 65: Figure 2.28 Make Wi-Fi Connection
[Sign in] to enter the web UI. Figure 2.31 Sign in the web UI d. When you entered the web UI of Oscar GNSS receiver, you can see five tabs on the left and make corresponding operations such as view positioning info, view satellites info, make device settings, make connectivity settings, and upgrade firmware. - Page 66 [Firmware] - [Firmware Info] - [Firmware Upgrade] - click 【选择文件】- click [upgrade]. you can use this function to upgrade after the next official version is released. Right to the Point Information is subject to change without notice. © Copyright 2021 Tersus GNSS Inc.
- Page 67 [Security Info] - [Account Info] - [Add User] - [Add User Dialog] - input Login Name&Alias Name&Password. figure 2.35 add user login Right to the Point Information is subject to change without notice. © Copyright 2021 Tersus GNSS Inc.
-
Page 68: Battery Change Mode
Right to the Point Information is subject to change without notice. © Copyright 2021 Tersus GNSS Inc. -
Page 69: Operations Of Tc20 Controller
2. Take off the back cover: Remove the back cover by lifting it up from the bottom part shown as below. Figure 2.37 Take off the back cover Right to the Point Information is subject to change without notice. © Copyright 2021 Tersus GNSS Inc. -
Page 70: Figure 2.34 Insert Micro Sd Card
4. Insert Micro SD card: Open Micro SD card holder and insert Micro SD card into the slot, then close Micro SD card holder shown as below. Figure 2.39 Insert Micro SD card Right to the Point Information is subject to change without notice. © Copyright 2021 Tersus GNSS Inc. -
Page 71: Micro Sd Card
It automatically pops up USB connected interface after connecting USB, and then click “Turn on USB storage” to use the Micro SD as USB storage. Right to the Point Information is subject to change without notice. © Copyright 2021 Tersus GNSS Inc. -
Page 72: Using Of Touch Screen
Stylus pen: you can use stylus pen for the touch screen after turning on the function via Settings -> Accessibility -> Handwriting Pen. Right to the Point Information is subject to change without notice. © Copyright 2021 Tersus GNSS Inc. -
Page 73: Technical Specifications
>99.99% for Ultimate, >99.9% for Advanced and Basic System & Data Operating system Linux Storage built-in 16GB/8GB Data format CMR, CMR+ (GPS only), RTCM 2.X/3.X Right to the Point Information is subject to change without notice. © Copyright 2021 Tersus GNSS Inc. - Page 74 Vibration MIL-STD-810G,FIG.514.6C-1 Environmental Operating temperature -40C to +70C Storage temperature -55C to +85C Relative humidity 100% not condensed Water & dust proof IP68 Right to the Point Information is subject to change without notice. © Copyright 2021 Tersus GNSS Inc.
-
Page 75: Figure 3.1 Serial Data Port Of Oscar
Connector Pin No. Pin Definition + Positive Data Clock - Negative Table 3.5 Default factory configuration for internal radio Channel Frequency 457.550MHz 458.050MHz 458.550MHz 459.050MHz Right to the Point Information is subject to change without notice. © Copyright 2021 Tersus GNSS Inc. -
Page 76: Tc20 Controller
Android 6.0 MTK MT6735 Quad-Core 1.3GHz Memory 2GB RAM + 16GB ROM External flash Micro SD , up to 64GB Keypad backlight White Right to the Point Information is subject to change without notice. © Copyright 2021 Tersus GNSS Inc. - Page 77 0.8m drop onto concrete Dimension 210mmx87mmx31mm Weight 495g (include battery) Operating temperature -20 C ~ +55 C Storage temperature -30 C ~ +65 C Right to the Point Information is subject to change without notice. © Copyright 2021 Tersus GNSS Inc.
-
Page 78: External Radio For Oscar
IP67 Physical Description Dimension 186 x 140 x 73 mm Weight < 1.5kg Data & Power interface LEMO 5pin Installation Hook Mechanical Drawing Right to the Point Information is subject to change without notice. © Copyright 2021 Tersus GNSS Inc. -
Page 79: Table 3.9 Default Factory Configuration For Radio Rs400H2
View from outside to radio Table 3.9 Default factory configuration for Radio RS400H2 Channel Frequency 458.050MHz 458.550MHz 459.050MHz 459.550MHz 460.550MHz 461.550MHz 462.550MHz 463.550MHz Right to the Point Information is subject to change without notice. © Copyright 2021 Tersus GNSS Inc. -
Page 80: Typical Applications
Table 4.1 Devices of Oscar as a base network mode Device Name Oscar GNSS receiver Height measure accessory GNSS antenna connector Tribrach Tripod Right to the Point Information is subject to change without notice. © Copyright 2021 Tersus GNSS Inc. -
Page 81: Figure 4.2 Oscar As A Base - Internal Radio
Table 4.2 Devices of Oscar as a base internal radio mode Device Name Oscar GNSS receiver Height measure accessory 410-470MHz radio whip antenna Extension pole 30cm Tribrach Tripod Right to the Point Information is subject to change without notice. © Copyright 2021 Tersus GNSS Inc. -
Page 82: Figure 4.3 Oscar As A Base - External Radio
Metal plate for radio antenna Note: Bullet-DC connects to ‘Bullet-DC to Alligator Clips’, and then clip to the external power supply with 12V output. Right to the Point Information is subject to change without notice. © Copyright 2021 Tersus GNSS Inc. - Page 83 4. Select [Base Mode] and press the power button; 5. If using Tersus Caster Service, select [TCS] and press the power button to enter TCS network settings; Set the format, server and press the power button to confirm.
-
Page 84: Figure 4.4 Base Setting Interface
Figure 4.4 Base setting interface 8. Edit the base configuration for Oscar GNSS receiver. The startup mode can be chosen from auto start and manual start. If you choose manual start the base, you can manually type the base coordinate, or click the Right to the Point Information is subject to change without notice. -
Page 85: Figure 4.5 Base Configuration - Receiver Network (Tcs)
Network and PDA Network have three protocol options: Tersus Caster Service (TCS), Ntrip and TCP. Figure 4.5 Base configuration - Receiver Network (TCS) Figure 4.6 Base configuration – PDA Network (Ntrip) Right to the Point Information is subject to change without notice. © Copyright 2021 Tersus GNSS Inc. -
Page 86: Figure 4.7 Base Configuration - Internal Radio
9. After filling the information for the above configuration, click [OK]. Select this configuration in the work mode list and click [Start] to start data transmission for base which is shown as below. Right to the Point Information is subject to change without notice. © Copyright 2021 Tersus GNSS Inc. -
Page 87: Figure 4.9 Link Status Of Base Using Internal Radio
User Manual for Oscar GNSS Receiver v2.0 Figure 4.9 Link status of base using internal radio Right to the Point Information is subject to change without notice. © Copyright 2021 Tersus GNSS Inc. -
Page 88: Rover Operation
Figure 4.10 Oscar as a Rover - Network Mode Table 4.4 Devices of Oscar as a rover network mode Device Name Oscar GNSS receiver Ranging pole Bracket for TC20 TC20 Controller Right to the Point Information is subject to change without notice. © Copyright 2021 Tersus GNSS Inc. -
Page 89: Figure 4.11 Oscar As A Rover - Internal Radio
1. Set up Oscar according section 2.1 Setting up Oscar after all the components above are ready, ensure one battery and one SIM card are Right to the Point Information is subject to change without notice. © Copyright 2021 Tersus GNSS Inc. - Page 90 4. Select [Rover Mode] and press power button; 5. If using Tersus Caster Service, select [TCS] and press the power button to enter TCS network settings; Set the Base ID, server and press the power button to confirm.
-
Page 91: Figure 4.12 Rover Setting Interface
7. Back to [Device] - > [Rover], click [New] to create a new configuration for base. Figure 4.12 Rover setting interface 8. Edit rover configuration for Oscar GNSS receiver under different data link selections. The Receiver Network and PDA Network have three protocol options respectively: Ntrip, TCP and Tersus Caster Service (TCS). -
Page 92: Figure 4.13 Rover Configuration - Internal Radio
User Manual for Oscar GNSS Receiver v2.0 Figure 4.13 Rover configuration - Internal Radio Figure 4.14 Rover configuration - Receiver Network (TCS) Right to the Point Information is subject to change without notice. © Copyright 2021 Tersus GNSS Inc. -
Page 93: Figure 4.15 Rover Configuration - Receiver Network (Ntrip)
9. After filling the information for the above configuration, click [OK]. Select this configuration in the work mode list and click [Start] to start data transmission for rover which is shown as below. Right to the Point Information is subject to change without notice. © Copyright 2021 Tersus GNSS Inc. -
Page 94: Static Survey
User Manual for Oscar GNSS Receiver v2.0 Figure 4.17 Link status of Rover using internal radio Static survey Before performing static survey, ensure one battery is installed in Oscar GNSS receiver. Detailed steps of button operation: 1. Long press the power button to power on Oscar;... - Page 95 6. Click [Survey] -> [Static Survey], fill in the parameters of interval, cutoff angle, and etc. Then click [Start] to start static survey. Right to the Point Information is subject to change without notice. © Copyright 2021 Tersus GNSS Inc.
-
Page 96: Figure 4.18 Static Survey Configuration
7. If the DataAutoSave function is turned on, the static data is recorded automatically in the internal storage when power up Oscar next time. You can download data file refer to section 2.3. Right to the Point Information is subject to change without notice. © Copyright 2021 Tersus GNSS Inc. -
Page 97: Tilt Survey And Stakeout
User Manual for Oscar GNSS Receiver v2.0 Tilt survey and stakeout Tilt function is only applicable for Oscar GNSS receiver Ultimate version under rover mode. 4.4.1 Tilt initialization The tilt compensation of Oscar GNSS receiver Ultimate version is free of complex calibration. -
Page 98: Tilt Survey
You can start survey using the tilted ranging pole. Please ensure that the antenna height setting is correct which will affect the tilt measurement results. Right to the Point Information is subject to change without notice. © Copyright 2021 Tersus GNSS Inc. -
Page 99: Figure 4.20 Tilt Status Is On
It is not allowed to continue to complete the survey in the case where the tilt initialization accuracy is low. Right to the Point Information is subject to change without notice. © Copyright 2021 Tersus GNSS Inc. -
Page 100: Tilt Stakeout
Figure 4.21 Point stakeout when tilt compensation is on Right to the Point Information is subject to change without notice. © Copyright 2021 Tersus GNSS Inc. -
Page 101: Issues And Solutions
4. The communication between Nuwa and Oscar fails. Solution: (1) Check whether the Oscar is powered on; (2) Re-search and pair the Bluetooth; (3) Upgrade Nuwa to the latest version. Right to the Point Information is subject to change without notice. © Copyright 2021 Tersus GNSS Inc. - Page 102 (2) Next step, select <Adjust> in the Nuwa under Device Info -> E-Bubble to complete the calibration. Right to the Point Information is subject to change without notice. © Copyright 2021 Tersus GNSS Inc.
- Page 103 (3) Switchover the radio frequency to avoid the possible interference from nearby devices. 11. The Oscar rover works at a short distance (not normal distance) at the Right to the Point Information is subject to change without notice. © Copyright 2021 Tersus GNSS Inc.
- Page 104 (2) Adjust the radio of base at the high power gear. (3) Check the environment if there exists radio interference along the propagation line. Right to the Point Information is subject to change without notice. © Copyright 2021 Tersus GNSS Inc.
-
Page 105: Terminology
Radio Technical Commission for Maritime Services Subscriber Identification Module Transmission Control Protocol Unmanned Aerial Vehicle, drone UMTS Universal Mobile Telecommunications System Universal Serial BUS Universal Time Coordinated Right to the Point Information is subject to change without notice. © Copyright 2021 Tersus GNSS Inc. - Page 106 Proprietary Notice All Information in this document is subject to change without notice and does not reflect the commitment on Tersus GNSS Inc. No part of this manual may be reproduced or transmitted by all means without authorization of Tersus GNSS Inc.
Need help?
Do you have a question about the Oscar GNSS and is the answer not in the manual?
Questions and answers