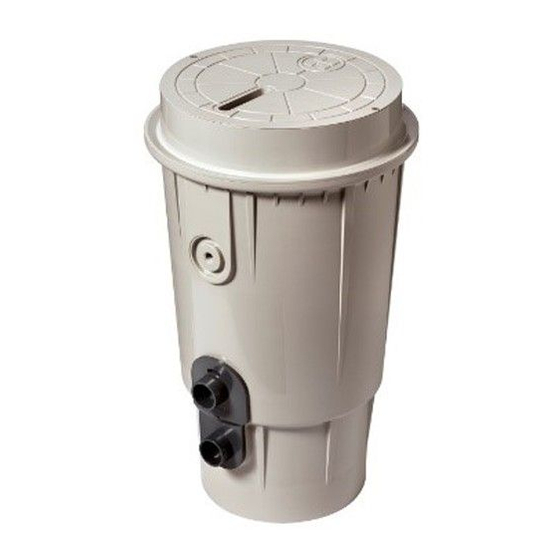
Table of Contents
Advertisement
092644 RevB
ColorLogic Laminar
®
Owner's Manual
\
Contents
Before You Begin......................................2
Installation..............................................4
Performance...........................................9
Winterization.........................................10
Maintenance..........................................11
Replacement Parts.................................11
Warranty................................................14
Hayward Pool Products
620 Division Street, Elizabeth NJ 07207
Phone (908)-355-7995
www.hayward.com
USE ONLY HAYWARD GENUINE REPLACEMENT PARTS
Advertisement
Table of Contents

Summary of Contents for Hayward WFL100 ColorLogic
-
Page 1: Table Of Contents
092644 RevB ColorLogic Laminar ® Owner’s Manual Contents Before You Begin........2 Installation..........4 Performance...........9 Winterization.........10 Maintenance..........11 Replacement Parts.........11 Warranty..........14 WFL100 Hayward Pool Products 620 Division Street, Elizabeth NJ 07207 Phone (908)-355-7995 www.hayward.com USE ONLY HAYWARD GENUINE REPLACEMENT PARTS... -
Page 2: Important Safety Instructions
WARNING – Electrical shock hazard. Damage to wiring can cause severe injury or death. To reduce the risk of electric shock replace damaged wiring immediately. Locate conduit to prevent abuse from lawn mowers, hedge trimmers and other equipment. SAVE THESE INSTRUCTIONS USE ONLY HAYWARD GENUINE REPLACEMENT PARTS... -
Page 3: Before You Begin
It is recommended to keep the unit in its original packaging until the site is prepared for installation. Compatibility The Hayward WFL100 ColorLogic Laminar is compatible with the following Hayward Accent Light models: Hayward ColorLogic 320... - Page 4 USE ONLY HAYWARD GENUINE REPLACEMENT PARTS...
-
Page 5: Installation
Installation Installation Overview USE ONLY HAYWARD GENUINE REPLACEMENT PARTS... - Page 6 1” Water Inlet Gravel Pit Drain 4”-6” length NOTE: A gravel pit must be available to allow for drainage. The lack of a gravel pit may disturb permanently installed niche and cause cracks in pool deck. USE ONLY HAYWARD GENUINE REPLACEMENT PARTS...
- Page 7 NOTE: In the event the deck niche is not installed level, use the deck collar to achieve leveled finish surface. Example Only: housing installed at a 2° angle. This step is similar to the installation of a skimmer basket collar. USE ONLY HAYWARD GENUINE REPLACEMENT PARTS...
- Page 8 Hayward ColorLogic 160 Hayward ColorLogic 320 Network Hayward ColorLogic 160 Network Hayward CrystaLogic 320 Hayward CrystaLogic 160 Step 4: Unscrew the retainer clip from the light by twisting in a counter-clockwise direction as shown below. USE ONLY HAYWARD GENUINE REPLACEMENT PARTS...
- Page 9 Hand tighten hose to valve body only. Do not use any tool to tighten further as damage may occur. Install hose to valve body. Ensure excessive stress is not applied to the valve adaptor during hose installation. USE ONLY HAYWARD GENUINE REPLACEMENT PARTS...
-
Page 10: Performance
Refer to the image below. For best performance, 6-7 GPM should be ideal. NOTE: When dry, pressurize the Laminar Jet slowly. Abrupt pressure when dry can dislodge screens. Flow Control Valve USE ONLY HAYWARD GENUINE REPLACEMENT PARTS... -
Page 11: Winterization
Step 3: Unscrew the hose from the flow control valve and install the cap that was removed dur- ing installation. Step 4: The Laminar Jet bottom union may be removed to further remove residual water. USE ONLY HAYWARD GENUINE REPLACEMENT PARTS... -
Page 12: Maintenance
WATER INLET ASSEMBLY GLXWFLOPTC OPTIC BOTTOM SEAL PLATE GLXWFLTUBE TUBING ASSEMBLY GLXWFLDISRPT DISRUPTOR ASSEMBLY GLXWFLLDSCRWPK10 DECK NICHE LID SCREW, 10PK GLXWFLSCRNPK5 SCREEN, 5PK GLXWFLGASKET LAMINAR GASKET KIT GLXWFLVLVADPT VALVE ADAPTER KIT GLXWFLTSPLT TOP SEAL PLATE USE ONLY HAYWARD GENUINE REPLACEMENT PARTS... - Page 13 Before starting system pump, fully open filter manual air relief valve. Do not close filter manual air relief valve until a steady stream of water (not air or air and water) is discharged. USE ONLY HAYWARD GENUINE REPLACEMENT PARTS...
- Page 14 A storable pool is constructed so that it is capable of being readily disassembled for storage and reassembled to its original integrity. SAVE THESE INSTRUCTIONS USE ONLY HAYWARD GENUINE REPLACEMENT PARTS...
-
Page 15: Warranty
To obtain warranty service, please contact the place of purchase or the nearest Hayward Autho- rized Service Center. For assistance on your nearest Hayward Authorized Service Center please visit us at www.hayward.com. -
Page 16: Wfl100
® trademark of Hayward Industries, Inc. © 2017 Hayward Industries, Inc. All other trademarks not owned by Hayward are the property of their respective owners. Hayward is not in any way affiliated with or endorsed by those third parties. USE ONLY HAYWARD GENUINE REPLACEMENT PARTS...


Need help?
Do you have a question about the WFL100 ColorLogic and is the answer not in the manual?
Questions and answers