Table of Contents

Related Manuals for Uniden 4KTPD-MVF


Summary of Contents for Uniden 4KTPD-MVF
-
Page 1: Installation Guide
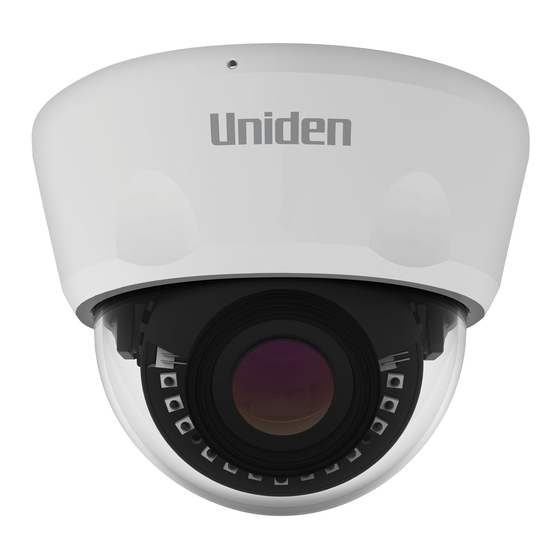
ProSeries IP CAMERA INSTALLATION GUIDE 4KTPD-MVF 2MTD-2.8 4MTPD-MVF 4MTPD-2.8 4KB-MVF 2MTPD-VF 4MB-MVF 2MB-VF 4MMD-2.8 2MMD-2.8 4MB-3.6 2MB-3.6 4MED-3.6 2MED-3.6 © 2018 Uniden America Corporation Issue 1, April 2018 Irving, Texas... - Page 2 Uniden surveillance products are not manufactured and/or sold with the intent to be used for illegal purposes. Uniden expects consumer’s use of these products to be in compliance with all local, state, and federal law. For further information on video surveillance and audio recording legal requirements, please consult your local, state and federal officials.
-
Page 3: Table Of Contents
Set Security Levels ......... . .15 UNIDEN PROSERIES MOBILEPHONE CLIENT . . . . . . . . . . . . . . . . 16 SOFTWARE OPERATING . - Page 4 TURRET DOME AND LARGE BULLET CAMERAS . . . . . . . . . . . . . . . 20 SMALL BULLET CAMERAS . . . . . . . . . . . . . . . . . . . . . . . . . . . . . . . . . 21 COMPLIANCE .
-
Page 5: Overview
INSTALLATION OVERVIEW Uniden’s IP cameras can be installed in either Uniden’s NVR or XVR surveillance systems. TAMPER- MINI DOME EYEBALL TURRET LARGE SMALL PROOF DOME DOME DOME BULLET BULLET 4KTPD-MVF 4MMD-2.8 4MED-3.6 2MTD-2.8 4KB-MVF 4MB-3.6 4MTPD-MVF 2MMD-2.8 2MED-3.6 4MB-MVF 2MB-3.6 4MTPD-2.8... -
Page 6: Tamper-Proof Domed Cameras
• Cabling Distance From NVR to Camera . The video signal sent from the camera to the DVR is reduced over distance. The maximum distance allowed is 330 feet (100 meters). A 60 foot cable is included. If you need a cable longer than 60 feet, then use an RG59 cable (with suitable connectors). - Page 7 5. If you have a 4K TPD camera, connect the plugs from the network cable tail to their appropriate cables. When using an optional external power supply, the AC 2.1mm Barrel Adapter Red - Audio In NOTE: 12VDC power supply socket outlet shall be installed near the equipment and be White - Audio Out not included...
-
Page 8: Install Mini Dome Camera
12. Remove the dessicant packet from the sealed plastic envelope and position it inside the camera. 13. Screw the housing back onto the camera base. INSTALL MINI DOME CAMERA What’s Included • IP camera • Mounting template sticker • Star-tipped Allen wrench •... -
Page 9: Install Eyeball Dome Camera
Adjustable collar 7. Adjust the collar to swivel the camera up to 175˚ on a horizontal axis (orients the camera for top/bottom of frame). As you adjust the camera position, check it through the NVR Preview screen. Thumb Control 8. Insert an SD card if needed. Reset Button SD Card Slot 9. -
Page 10: Install Turret Dome Camera
5. Connect the network cable tail to the house cabling through the 1” hole. When using an optional external power supply, the AC socket outlet shall be installed near the equipment and be easily accessible. If installed outdoors, the cable and all cable connections Red - 12VDC (optional) must be routed inside the wall. -
Page 11: Install Large Bullet Cameras
Base 2. Hold the camera and sleeve steady and unscrew the ring from Ring the base. Sleeve Camera 3. Position the installation template sticker on the location (wall, ceiling, etc). Drill a 1” hole as indicated on the sticker. Install the anchors. 4. -
Page 12: Install Camera
• Rubber plug (grommet) to seal network cable hole Install Camera 1. Remove the camera and installation items from the box. Verify that all parts are there. 2. Position the installation template at the location (wall, ceiling, etc). Drill a 1” hole as indicated on the sticker and install the anchors provided. -
Page 13: Install Small Bullet Cameras
6. Unscrew the access cover and swing it open. Unscrew the adjustment levers just enough to move them and adjust the image. Check the camera view through the NVR Preview screen. Cover • Zoom - Move lever to the left for Telephoto (zoom in) and to the right for Fish-Eye (zoom out). -
Page 14: Connecting Through Pc
Subnet Masks, and Gateways. Use this information to view and configure cameras through the browser. From Internet Explorer, go to support.uniden.com/pro-support and select VMS & CMS. From the Video Management System screen, select Download VMS to download the plugin. USING DEVICEMANAGER TOOL 1. -
Page 15: Web Access
WEB ACCESS 1. Input the network camera IP address in the browser address bar to log in. A pop-up browser control installation message automatically displays. Click to download and install. The following description uses Internet Explorer as example. Network camera factory initial information is: . -
Page 16: Set Security Levels
Progra Iles (x86) \ webactivex - rtsp) the related controls information in the folder, run unins000. Exe files, the system will automatically delete. UNIDEN PROSERIES MOBILEPHONE CLIENT SOFTWARE OPERATING 1. After install successfully, click software icon on the mobile phone, then the software will be... - Page 17 FUNCTIONS DESCRIPTION Remove Login Account login, device information can store in the cloud storage. Remember Password The app remembers the current account password. Password modification Modifies the registered user password. Local Login Can directly login without account; device stores the information in the phone.
-
Page 18: Add Device
ICON FUNCTION INTRODUCTION Return to main menu. Add device. Device; click to play all channels. Add device 1. Click Add icon in the upper right corner to display the Add Device interface. 2. Manually add a device’s connection parameters; select the Search button to search and add devices in the LAN. -
Page 19: Specifications
QR code in the Web client display. The device directly scans Query Device ID QR code when using Uniden’s mobile phone client. • User name: The user name of front-end device; default = admin. -
Page 20: Mini And Eyeball Dome Cameras
4KTPD-MVF 4MTPD-MVF 4MTPD-2 .8 2MTPD-VF R/N Ratio ----- ≥35db (AGC OFF) ≥50db (AGC OFF) Analog Video 1CH 1.0Vp-p Output complex video output Output Model PAL/NTSC adjustable MINI AND EYEBALL DOME CAMERAS 4MMD-2 .8 2MMD-2 .8 4MED-3 .6 2MED-3 .6 (MINI DOME) -
Page 21: Turret Dome And Large Bullet Cameras
TURRET DOME AND LARGE BULLET CAMERAS 2MTD-2 .8 4KB-MVF 4MB-MVF 2MB-VF (TURRET DOME) (LARGE BULLET) (LARGE (LARGE BULLET) BULLET) GENERAL IR Distance 30-50’ Night Vision 131-165’ Night 130-165’ Night 130-165’ Night (1x Array IR LEDs) Vision Vision Vision (3xArray IR LEDs) (IR Array LEDs) 3xIR-III LEDs) Protection Grade... -
Page 22: Small Bullet Cameras
SMALL BULLET CAMERAS 4MB-3 .6 2MB-3 .6 (SMALL BULLET) SMALL BULLET GENERAL IR Distance 100’ Night Vision (30 x Φ5 IR LEDs) Protection Grade IP66 Power PoE for optional 12VDC Power Jack 2.1mm Power Jack for optional 12VDC input Power <6W Consumption Operating Temp... -
Page 23: Three-Year Limited Warranty
Important: SAVE YOUR RECEIPT! Evidence of original purchase is required for warranty service . WARRANTOR: Uniden America Corporation (“Uniden”) ELEMENTS OF WARRANTY: Uniden warrants, for three years, to the original retail owner, this Uniden Product to be free from defects in materials & craftsmanship with only the limitations or exclusions set out below. - Page 24 Uniden service center for a defect or malfunction covered by this warranty, (E) used in any conjunction with equipment or parts or as part of any system not manufactured by Uniden, or (F) installed or programmed by anyone other than as detailed by the owner’s manual for this product.
Need help?
Do you have a question about the 4KTPD-MVF and is the answer not in the manual?
Questions and answers