Table of Contents
Advertisement
Advertisement
Table of Contents

Subscribe to Our Youtube Channel
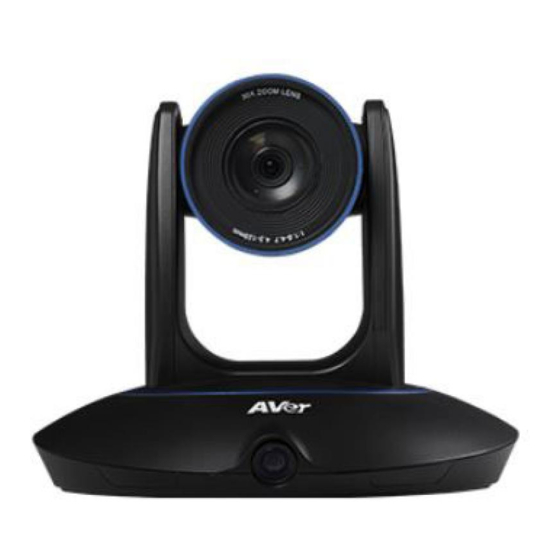
Related Manuals for AVer PTC500


Summary of Contents for AVer PTC500
- Page 1 PTC500 User Manual...
- Page 2 IMPORTANT NOTICE PLEASE READ THE INSTRUCTIONS IN THIS MANUAL BEFORE INSTALLING THE PTC500 TRACKING CAMERA. DO NOT DISASSEMBLE OR MODIFY THE ITEMS BY YOURSELF. CONTACT THE DEALER FOR HELP WHEN THE ITEMS IS FAILED TO WORK. CONNECT THE DEVICES WITH PROPER CABLES.
- Page 3 © 2017 AVer Information Inc. All rights reserved. All rights of this object belong to AVer Information Inc. Reproduced or transmitted in any form or by any means without the prior written permission of AVer Information Inc. is prohibited. All information or specifications are subject to change without prior notice.
-
Page 4: Table Of Contents
CONTENTS INTRODUCTION ........................1 Package Contents ......................1 Product Overview ......................2 Dimension ........................2 Remote Controller ......................3 INSTALLATION ........................4 Device Connections ....................... 4 Installation ........................5 Teacher Mode ......................5 Student Mode ......................6 RS232 Pin Definition ....................7 OSD TREE MAP ........................ - Page 5 For the First Time Use ....................19 Setup IP Address ....................19 Make a Connection with iPad .................. 21 USING IPAD TO SETUP PTC500 ..................24 Teacher Mode ......................24 Setup Preset Setting ....................25 Setup Tracking Zone ....................27 Setup Shield Zone ....................
-
Page 6: Introduction
INTRODUCTION AVer PTC500 is a professional tracking camera which can be teacher mode or student mode depended on user’s subject target. The PTC500 use body motion and image analysis algorithm to tracking target; the target subject no need to wear any signal transmit device. The PTC500 can communicate with recording system through RS232, RS485 or network interface. -
Page 7: Product Overview
Product Overview 8 9 10 1. PTZ camera 6. 3G-SDI 1 port(PTZ view) 2. Panoramic camera 7. HDMI port(PTZ view) 3. Power indicator 8. Video in port 4. RJ-45 port 9. RS-232 port 5. 3G-SDI 2 port(Panoramic view) 10. Power jack Dimension... -
Page 8: Remote Controller
Remote Controller 1. Camera select [Note] Only channel No.1 is available. Before you use remote, please press channel 1 first. 2. Enter 3. Camera direction control 4. White balance 5. OSD menu 6. Back light control 7. Zoom in/out 8. Exposure compensation 9. -
Page 9: Installation
INSTALLATION Device Connections... -
Page 10: Installation
Installation Please refer to following suggestion to install the PTC500 in a proper position. Teacher Mode Install height range (from floor): 2 ~ 3m; 2.4m is suggested. Distance range to podium: 4~15m; 8m is suggested. Position: Center of class room. -
Page 11: Student Mode
Student Mode [Note] Student mode is only available on AcuControl app. Install height range (from floor): 2 ~ 3m; 2.4m is suggested. Position: Upper left or right of blackboard. Make sure the view range includes all students. ... -
Page 12: Rs232 Pin Definition
RS232 Pin Definition Definition RS232_DTR RS232_DSR N.C. RS232_TXD RS232_RXD... -
Page 13: Osd Tree Map
OSD TREE MAP Trigger OSD Menu button on remote controller to call out OSD menu. Use to enter sub-menu, use ▲ Press to confirm the selection. Press button can back to and ▼ to move to the selection and use previous level of menu. -
Page 14: Tracking
Tracking User can enable or disable auto-tracking. PTC-500 will not track on object automatically when the feature is disabled. To enable auto-tracking, please select “On”. To disable auto-tracking, select “Off”. Tracking Camera > Video Format > Advanced Setting >... -
Page 15: Camera Id
Camera ID To change camera ID, please select Camera > Camera ID. Tracking Camera > Camera ID > PTC 500 Video Format > DHCP > Advanced Setting > Static IP > Preset > PTZ Camera > Language > Profile > Factory Default >... -
Page 16: Ptz Camera
PTZ Camera To adjust the parameters of PTZ camera, select Camera >PTZ Camera. Tracking Camera > Camera ID > Video Format > DHCP > Advanced Setting > Static IP > Preset > PTZ Camera > Language > Camera Mode Full Auto >... -
Page 17: Camera Mode
Camera Mode There are 4 modes of camera mode, you can select one from Camera > PTZ Camera > Camera Mode. Camera Mode Full Auto > Full Auto > Slow Shutter Full Auto > Shutter Priority > Maximum Gain 24dB Shutter Priority >... -
Page 18: White Balance
White Balance To adjust white balance value, select Camera > PTZ Camera > White Balance. Camera Mode Full Auto > Full Auto > Shutter Priority > Iris Priority > Manual > White Balance > Mode Auto Shading Correction > Auto Pan/Tile Speed One Push Zoom Speed... -
Page 19: Video Format
Shading Correction To adjust shading correction, select Camera > PTZ Camera > Shading Correction (The option is for the screen corner shadow fixing.) Camera Mode Full Auto > Full Auto > Shutter Priority > Iris Priority > Manual > White Balance >... -
Page 20: Advanced Setting
Advanced Setting To adjust RS232 protocol, address and baud rate, select Advance Setting from OSD menu. Tracking Camera > Video Format > Advanced Setting > RS232 Protocol VISCA Preset > Address(ADDRD) Language > Baud Rate 9600 Profile > Factory Default >... - Page 21 The photo shows the minimum request. If target proportion is smaller than the photo, it may cause the tracking failure. 2. 2. When PTC500 starts to track, the target proportion in the screen will be defined by preset1 setting. [Student Mode] 1.
-
Page 22: Language
Espanol Profile PTC500 allows you to save 5 profiles. To set the profile, go to OSD menu > Set and use arrow key to assign a number and press enter button. To call the profile, go to OSD menu > Apply and use arrow key to call an assigned number and press enter button. -
Page 23: Factory Default
Factory Default To reset the PTC500 to default setting, go to OSD menu > Factory Default > Yes and press enter button. Tracking Camera > Video Format > Advanced Setting > Preset > Language > Profile > Factory Default >... -
Page 24: Using Ptc500 Via Acucontrol
For the First Time Use Setup IP Address Setup IP address of PTC500 for a connection with iPad. There are two ways to setup IP address of PTC500. Please follow the steps below to setup the IP address. Dynamic IP Address(DHCP) Get IP address from your local DHCP server. - Page 25 3. Use ▲ and ▼ buttons go to “Information” to check the IP address information. Static IP Address Assign a fix IP address for PTC500. 1. After starting-up, press button on remote control to call out OSD menu. 2. Turn the DHCP off first. Go to Camera > DHCP > DHCP > Off then press or enter button to confirm the selection.
-
Page 26: Make A Connection With Ipad
Client Name: Give a name of the camera for user to recognize on camera list. Camera ID: The camera ID is shown on information section of PTC500 setup menu. IP: Enter the IP address of PTC500. The IP address can be found on Information section of PTC500 setup menu. - Page 27 4. After entering all information, select “OK” to add a camera. User should see the camera is shown on camera list. 5. Select the camera from the camera list and select “Connect” to make a connection with the camera.
- Page 28 6. When connection is successful, user should see the image view of PTC500 on screen. In view screen, user can use on-screen control panel to move camera view, zoom in/out, and switch camera view between PTZ camera and panoramic camera view.
-
Page 29: Using Ipad To Setup Ptc500
Setup can be divided to two modes – teacher and student mode and details will be described in following. Teacher Mode Before setting, please make sure your iPad and PTC500 are connected (Refer to “Make a Connection with iPad” section). 1. Connecting to PTC500 through AcuControl app (Refer to Make a Connection with iPad section). -
Page 30: Setup Preset Setting
The photo shows the minimum request. If target proportion is smaller than the photo, it may cause the tracking failure. 2. When PTC500 starts to track, the target proportion in the screen will be defined by preset1 setting. 1. Select (settings) >... - Page 31 3. In Save preset screen, use panel control to adjust the camera view to desire position and select “Save”. Enter the number (1~255) of preset position and select “OK” to save. Total are 255 preset positions can be set. 4. After setting preset, back to Preset Settings screen and select “Call preset” to check preset position.
-
Page 32: Setup Tracking Zone
Setup Tracking Zone If PTC500 detects motions in the defined zone and PTC500 will be triggered to track. If tracking zone doesn’t setup, then, all the panoramic view will be the default active zone. [Note] The screen of tracking zone setting is based on panoramic camera view. - Page 33 2. In Select tracking zone screen, select the area that wants to be tracking (a blue frame will show on screen). User can select “Preview” to see the view of the camera. 3. Select “Save” to save the setting.
-
Page 34: Setup Shield Zone
Setup Shield Zone Define the area that user doesn’t want camera to track. The shield zone should be within the active zone. 8 shield zones can be set. [Note] The screen of shield zone setting is based on panoramic camera view. 1. - Page 35 2. In Shield tracking zone screen, select the area that don’t want to be tracking (a gray block will show on screen). User can select “Preview” to see the view of the camera. To delete the shield zone area, select “-“and select the gray block area. 3.
-
Page 36: Student Mode
Student Mode Before setting, please make sure your iPad and PTC500 are connected (Refer to “Make a Connection with iPad” section). 1. Connecting to PTC500 through AcuControl App (Refer to Make a Connection with iPad section). 2. Before starting to setup PTC500, please turn off the tracking function. Select (settings) >... -
Page 37: Setup Preset Setting
Setup Preset Setting Setup preset position. [Note] When setup preset position, the camera view is based on PTZ camera view. Please adjust view of preset1 as panoramic view. Please adjust optical zoom to the minimum level (panoramic view). 1. - Page 38 2. Select “Save preset” to setup preset position. 3. In Save preset screen, use panel control to adjust the camera view to desire position and select “Save”. Enter the number (1~255) of preset position and select “OK” to save. Total are 255 preset positions can be set.
- Page 39 4. After setting preset, back to Preset Settings screen and select “Call preset” to check preset position. Select preset number (ex: preset 1, preset 25...etc.) to view preset positon view.
-
Page 40: Setup Tracking Zone
Setup Tracking Zone User needs to define the active zone for PTC500 to detect. If PTC500 detects motions in the setup zone and PTC500 will be triggered to track. If tracking zone doesn’t setup, then, all the panoramic view will be the default active zone. - Page 41 2. In Select tracking zone screen, select the area that wants to be tracking (a blue frame will show on screen). User can select “Preview” to see the view of the camera. 3. Select “Save” to save the setting.
-
Page 42: Setup Shield Zone
Setup Shield Zone Define the area that user doesn’t want camera to track. The shield zone should be within the active zone. 8 shield zones can be set. [Note] The screen of shield zone setting is based on panoramic camera view. 1. - Page 43 2. In Shield tracking zone screen, select the area that you don’t want to be tracking (a gray block will show on screen). User can select “Preview” to see the view of the camera. To delete the shield zone area, select “-“and select the gray block area. 3.
-
Page 44: Setup Front Side Student Height
Setup Front Side Student Height User needs to stand at the front side and define the whole height on screen. 1. Select (settings) > Tracking setting > Front side student height (0px). 2. Using “ ” on screen to measure and set the student height. The number of height is displayed when measure and set height. -
Page 45: Change Camera Password
Change Camera Password Change PTC500’s password. Select (settings) > System setting > Change camera password. Enter the old password and new password, then select “OK” to confirm the changes. -
Page 46: Function Table
Function Table Home Menu Sub menu sub menu Note Client name Camera ID Add camera Add Tracking Camera Port Default is 80. Password Default is admin. Cancel/OK Connect Delete Client name Camera Camera ID (Select camera to setup) Edit Port Default is 80. - Page 47 Setting menu Sub menu 2nd sub menu Note Exposure Compensation Maximum Gain Full Auto Slow Shutter On 2 (only workable under Full Auto) Exposure Compensation Maximum Gain Shutter Priority Shutter Speed Exposure Compensation Maximum Gain Iris Priority Slow Shutter Iris PTZ Camera Setting Gain Manual...
- Page 48 Auto focus when camera PTZ Zoom Focus is doing zoom in/out Preset 1,Preset 2,Preset Define the default 3,Preset 4,Preset 5,Preset Power up ACT location after PTC500 6,Preset 7,Preset 8,Preset power on. 9,HOME Auto is for HDMI. If there is no HDMI connection, Auto...
- Page 49 Setting menu Sub menu 2nd sub menu Note Auto 1080P/60 Video Output 3G-SDI 2: Panoramic 1080P/30 720P/60 Audio Input Audio line in format: Video & Audio Setting G.711 PTZ Camera IP Streaming Mode Mode 1 Panoramic Camera PTZ Camera 1080P/30 IP Streaming Mode Mode 2 Panoramic Camera...
- Page 50 Setting menu Sub menu 2nd sub menu Note The option enables to Tracking zoom in/out the target Tracking motion: Auto depends on the distance zoom on/off from camera. If set the option as off, the Tracking tracking camera will only Tracking motion: do the horizontal Vertical tracking on/off...
- Page 51 Setting menu Sub menu 2nd sub menu Note Define the shield zone. Preview Shield zone is area that you don’t want to detect Tracking motion. Save Select shielded zone (8 grid) set Press + to add the new area Press - to eliminate the existed area.
- Page 52 Profile 3 Profile Setting Profile setting location Profile 4 Profile 5 Load other setting Change Camera password Camera ID: PTC500 Camera serial number Software version: Software version 1.XX.XX.XX System Setting Download firmware When user would like to upgrade the firmware, Upgrade firmware please press "Download...
-
Page 53: Faq
6. What about Preset 2 ~9 are used for anything related to tracking? If you turn off tracking, PTC500 is a regular PTZ. User can manipulate it to assign position via center control system command. The other presets are these usages.
Need help?
Do you have a question about the PTC500 and is the answer not in the manual?
Questions and answers